
In this tutorial, I explain to you how to add a simple teleporter to your level.
1) Adding the Teleport
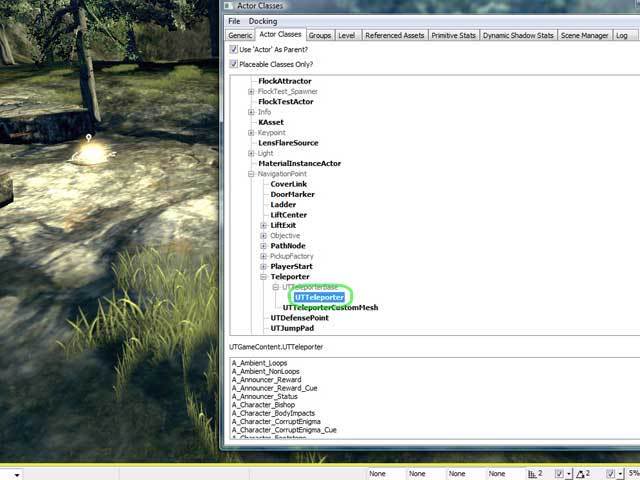
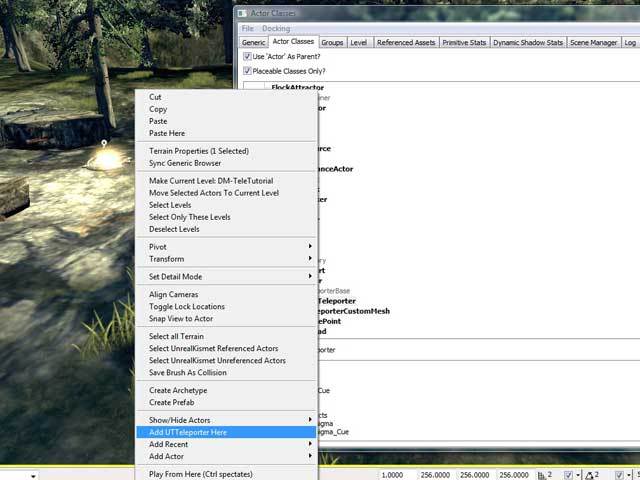
Go to The Generic Browser and access the Actor Classes tab. Expand Navigation Point>Teleporter>UTTeleporterBase>UTTeleporter. Click to highlight the UTTeleporter selection (it is in bold), and right click anywhere on the level and add UTTeleporter here.
2) Positioning the Teleporter
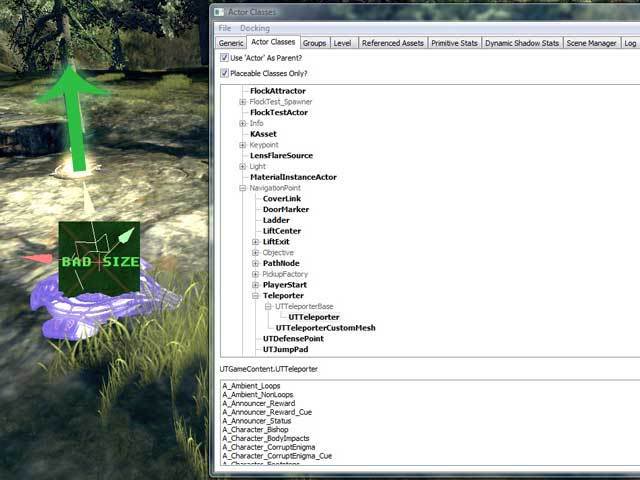
As you may already know, when actors have their collision through the ground they give an icon stating "bad size." A lot of times if the ground is not level enough the teleporter will give this warning. The simple fix is to raise the teleporter above ground level -- just slightly -- until it shows up in the editor.
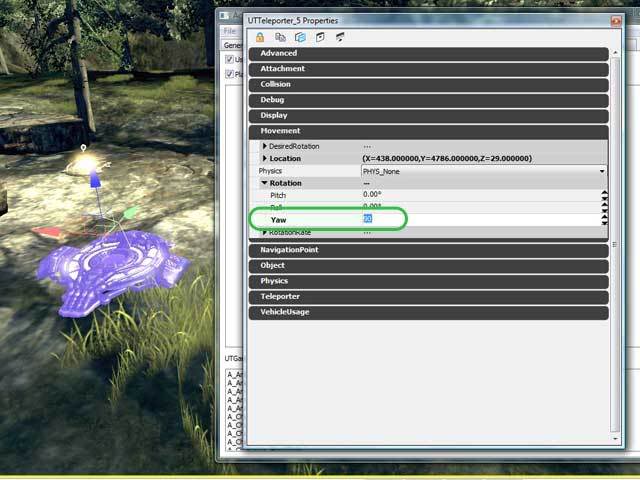
The direction the teleporter is facing is also important (although not absolutely necessary). Open the properties of the teleporter -- either by pressing F4 or double clicking the mesh -- and expand the movement section. The Yaw should be set accordingly to rotate the teleporter. The arrow icon is the direction that the player will come OUT of -- when entering the connecting teleporter. Although teleports can be entered from any angle, they work best when flush against a wall; that way, player movement is restricted to uni-direction.
3) Setting the teleporter's parameters
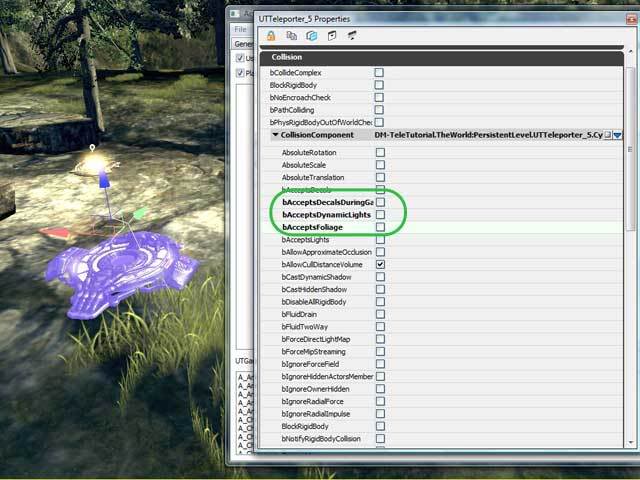
I'm not sure if this is important, but I like unchecking bAcceptsDecalsDuringGameplay, bAcceptsDynamicLights, and bAcceptsFoliage -- found under the Collision subset -- for optimization purposes.
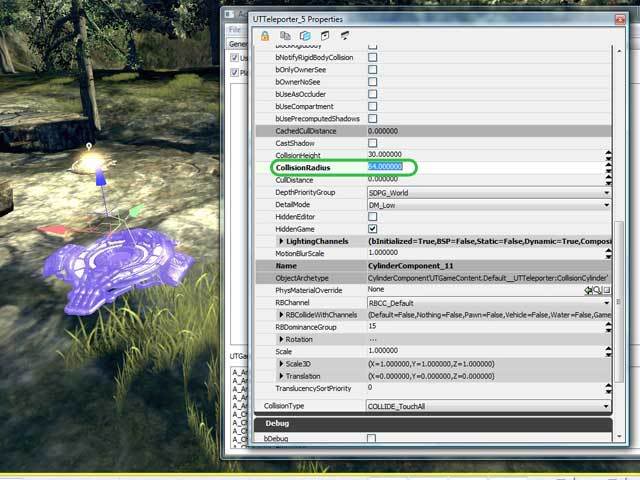
Next, it is a good gameplay choice to increase the collision radius of the Teleporter -- That way a player can enter it from a larger area. I set mine to 64 UU (unreal units) because that is the standard width of a character.
4) Directing the Teleporter
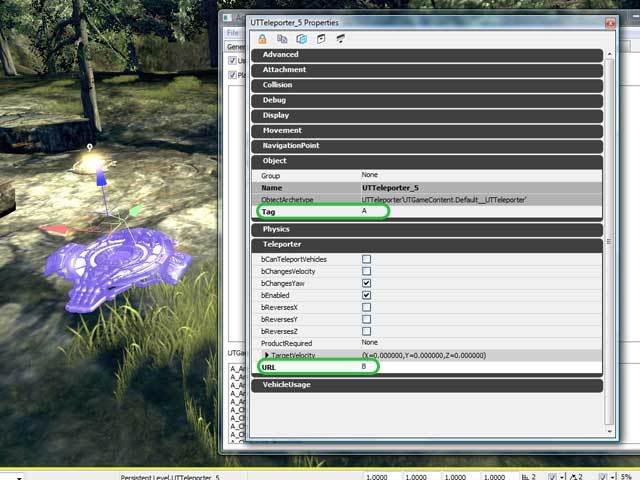
Perhaps the most important part of teleporting is knowing where to go ;). Without these parameters, a teleport is virtually useless. Under Object and Teleporter Enter a Tag for the selected teleport to be referenced as (any name you choose), and a URL for the destination teleporter (remember what you typed -- as it will be the basis for the next teleporter). In this example I used Tag = A and URL = B, but if it were a real game I would name each teleport based on location (ex: base_hill, cave_R, cave_L etc.).
The first teleport has been set up, now on to the next!
5) Creating a Second Teleporter
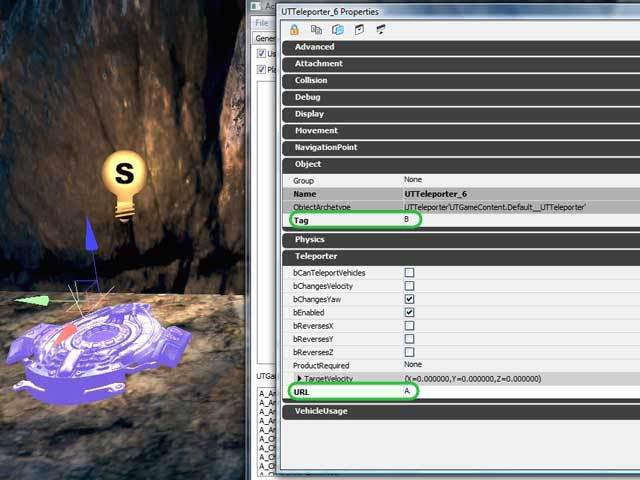
Repeat the same steps as before for the first teleporter. The main difference for the second teleporter is that the Tag (self-referencer) and URL (desitnation) will be different. A teleporter doesn't have to teleport back to itself (e.g. A->B, B->C, C->A) -- but in order for the mesh to show up it must lead to another physical teleport. In this example my second teleport references the first teleport as it's destination (Tag = B, URL = A).
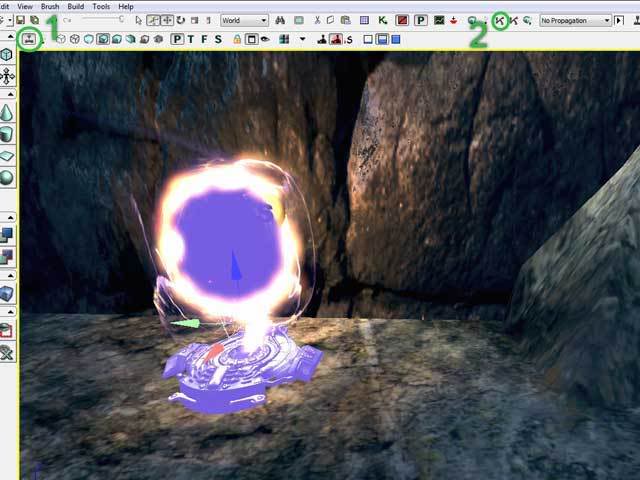
6) Building Paths for Teleportation
In order for a teleporter to show up in-game, paths (2) must be built before running the level (otherwise, the teleports will work but are invisible). Also, by clicking the hotkey "D" -- or the icon shown in the picture (1) -- a real-time preview reveals the teleporter as working. Don't be fooled though -- this preview will work EVEN if the teleports are not set up correctly.
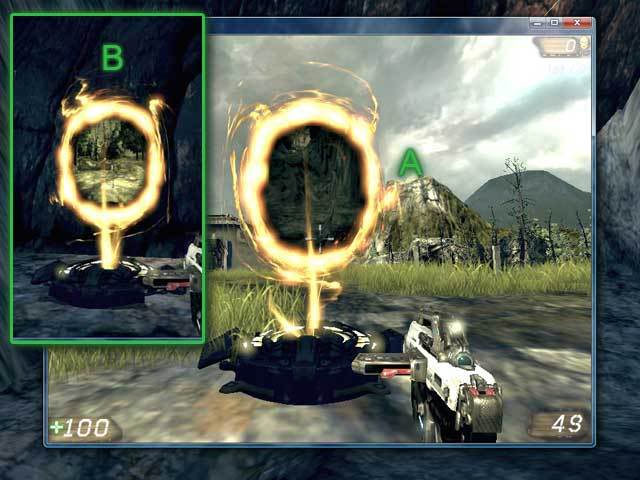
7) Testing
That's it! if everything is in order the teleport should work just fine. A preview of the next area is automatically generated at 15 fps -- slowing down framerates -- but a cool feature indeed. As you walk through you should spawn in the next area. Depending on the direction you entered the teleporter is the direction you will exit (again, why it is better to place in front of a wall).
I hope this tutorial helps you as I am glad to share what I've learned with the rest of you. Thanks for looking!
Jonathan


yey:3 portals are coming to ut3 xD
Errrhmm portals have been in UT3 for quite some time.....try playing the Official maps...they r there.
Good tutorial never the less.
I'm fairly certain he means portals from Portal in the Orange Box
I was adding some teleporters to my level following your tutorial, but unfortunately when I add the UTTeleporter actor, the base and portal do not show up in the viewport. Only the teleport symbol and a cylinder wireframe where the teleport should be. When I build and test the level, the teleports are fully functional, but invisible. Any advice on how to make it so I can see them?
Asking here and on epic's official forum, hopefully one of the two places will be able to help
jqraptor459,
I am thinking that you either have bHidden under "Display" checked, or, you are adding a "Teleporter" and not a "UTTeleporter" (confusing, right?). Under NavigationPoint, there is Teleporter -- click on the "+" to expand the section, and then you get two options: "UTTeleporterBase" and "UTTeleporterCustomMesh." Now, expand "UTTeleporterBase" to get "UTTeleporter" (it should be in bold). So that's:
NavigationPoint>Teleporter(bold)>UTTeleporterBase(unbold)>UTTeleporter(bold)
If you are adding a straight-up teleporter instead of a UTTeleporter, then you will probably be getting a simple stick figure icon with an arrow, instead of the usual teleporter mesh. You should be seeing the teleporter mesh, in the viewport, like in the pictures.
Hope that helps,
Jonathan
Hi,
I'm new to the community,
and I'm trying to modify the effect of the UTTeleporter.
I tried to change the parameters of the "effects" under Base_Teleporter but I cant save the changes.
If someone could give me some help to figure it out I'll be very very appreciated!
Awesome
Lovely tut!
Is it possible to only allow a flag carrier in CTF to go through the teleporter?