Table of Contents
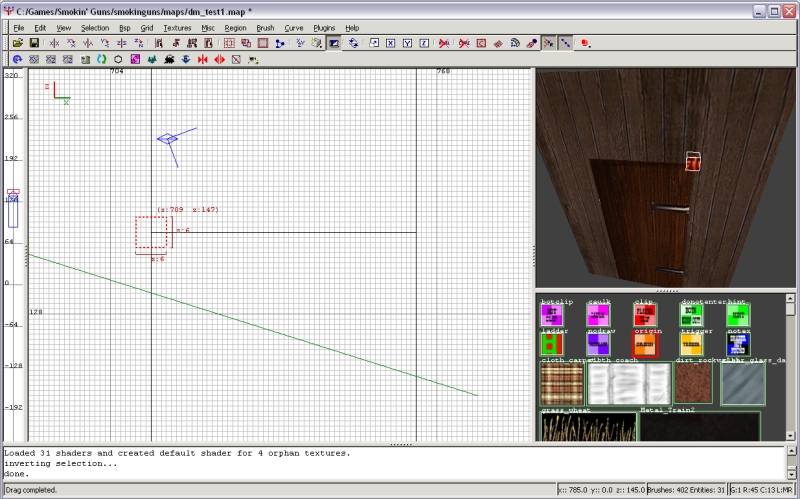
In the 2D window, right click and select pickup/pickup_money. This entity gives the player money to buy weapons and items.
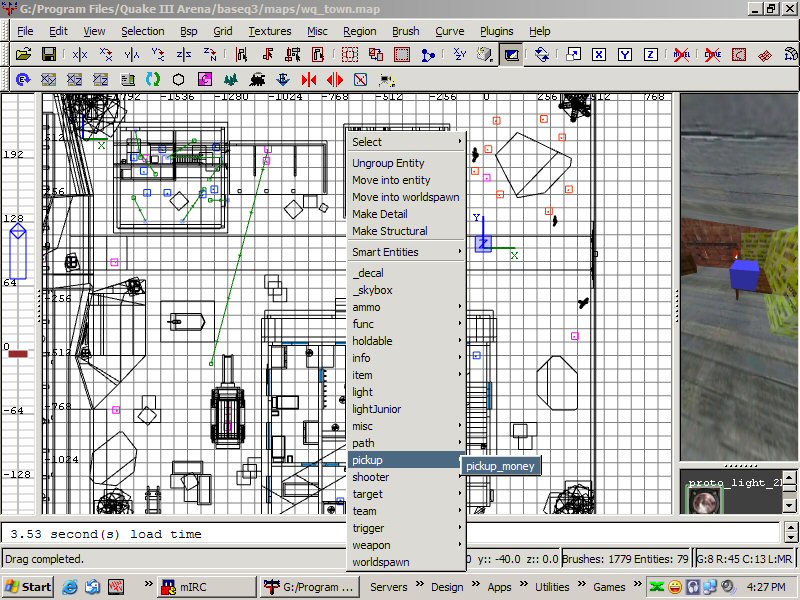
A new brush will appear. Move it into the position you desire and hit the "N" key on your keyboard to bring up the entities window.
In the "key" field type in the word "count" and then put the dollar amount you want in the "value" field. Hit enter.
To keep the gameplay reasonable I suggest you do not make pickups that are worth more than 15 dollars.
After compiling the map, the money will look different based on the amount you assign to it. Play with it and see.
Now you can decide how soon the money will reappear once it's picked up.
For large dollar pickups, you will want the cash to take a long time to reappear. This will discourage players from camping on the loot.
I have set this particular money pickup to wait 60 seconds before it reappears by assigning the key "wait" to a value of "60".
To make the reappearance of the cash unpredictable, you can assign a key "random" to a value of whatever you want.
In this example the money will not reappear for at least 60 seconds and will then show up somewhere between 0 and 40 seconds after that.
So, it could come back as soon as 60 seconds or as long as 100 seconds.
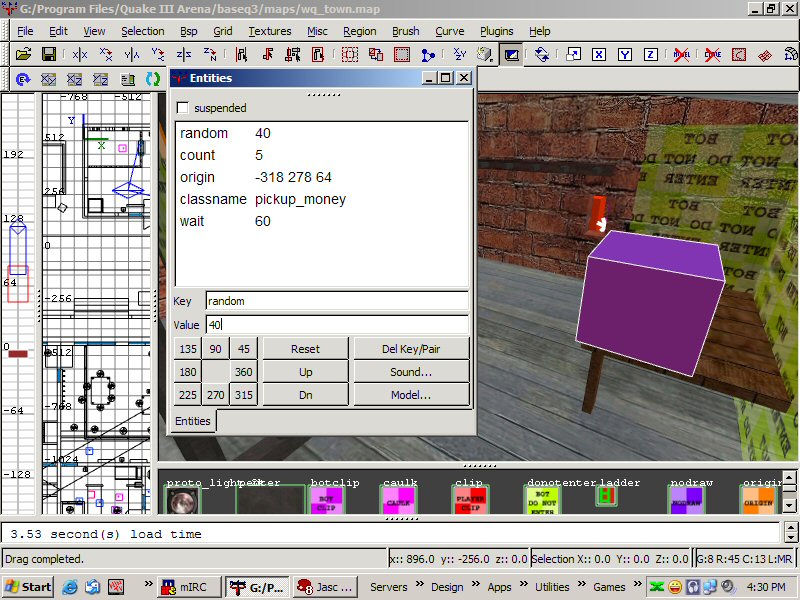
Want to place a knife or a box of dynamite that players can get without having to buy it?
In the 2D window, right click and select weapon/weapon_whatever.
(Don't bother selecting Q3 weapons like the BFG. They won't work in SG so you will be wasting your time.)
Just like when we created the money, a new brush will appear.
Move it into the position you desire and hit the "N" key on your keyboard to bring up the entities window.
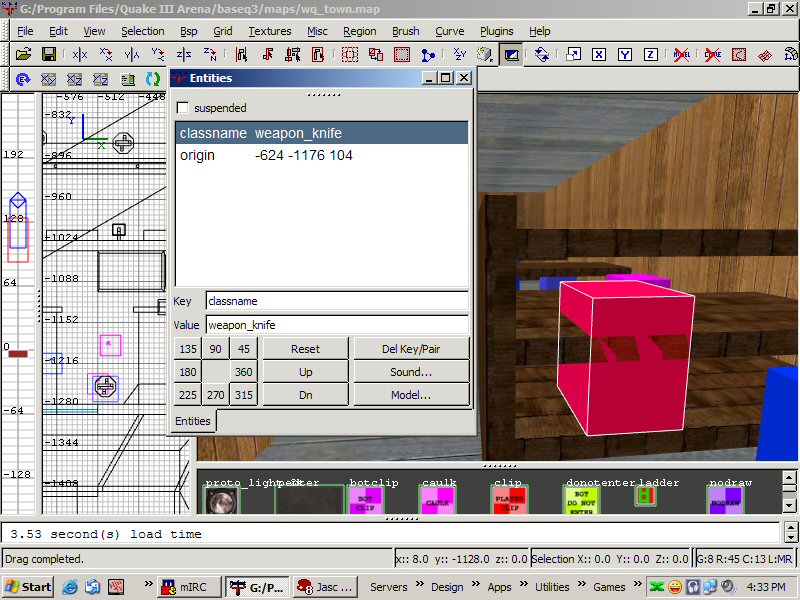
If you wish, you can assign wait and random times to the weapon in the exact same manner you did for the money.
In this example we will make a breakable window made of glass.
Make a brush that you will use for your breakable item and position it where you want. Go ahead and give it the texture you wish.
With the brush still selected, right click on the brush in the 2D window and select func/func_breakable. Hit the "N" key on your keyboard to bring up the entities window.
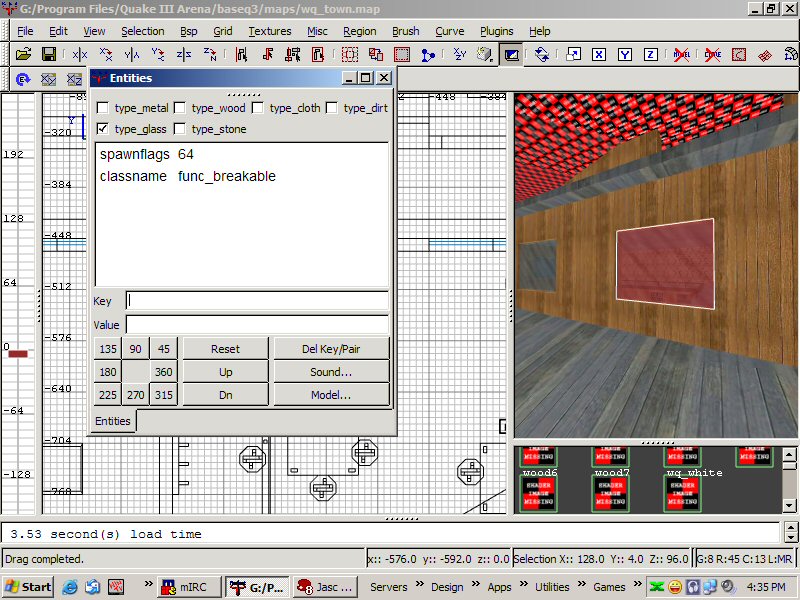
Click the appropriate box for the material. In this case we would choose glass. Easy, huh?
NOTE: I have found that some glass textures will look like rocks when you break the window.
If this happens, simply choose another glass texture and try again.
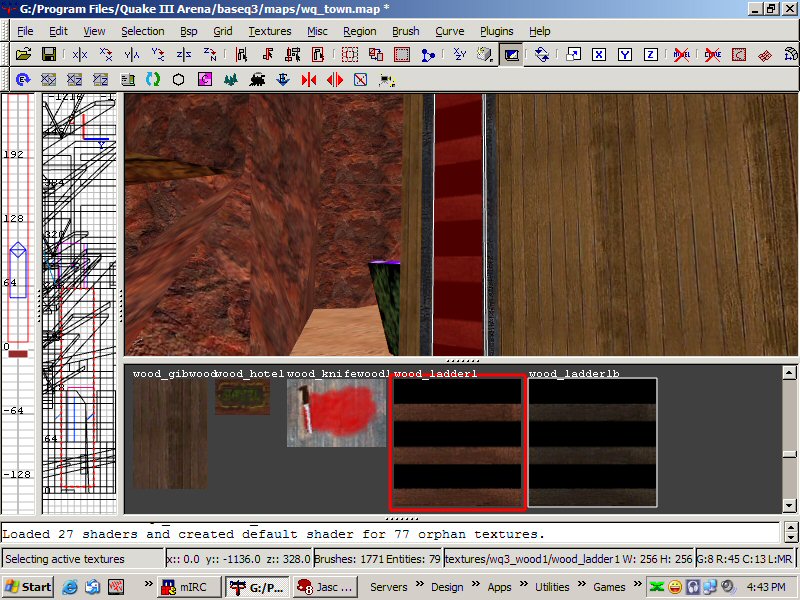
Make 2 long brushes that will be the rails for your ladder and texture it however you wish.
Then place a solid brush between them as shown in this screenshot.
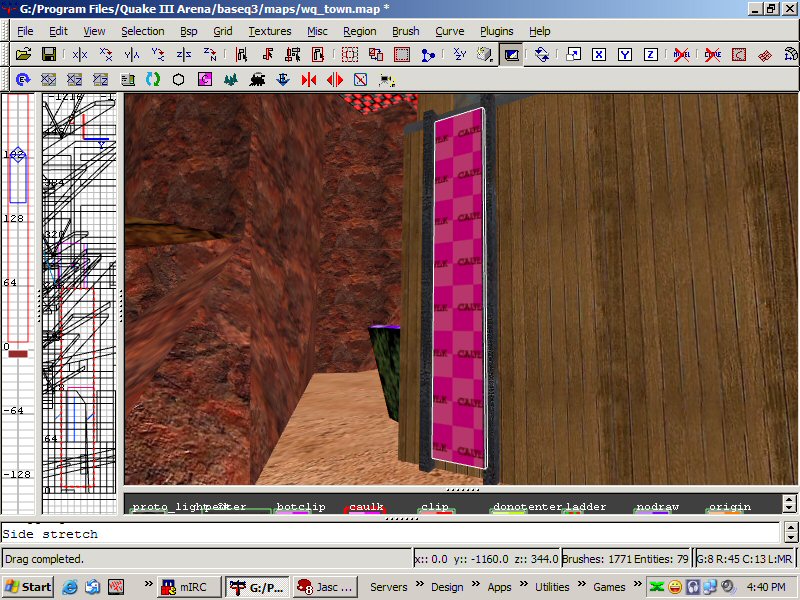
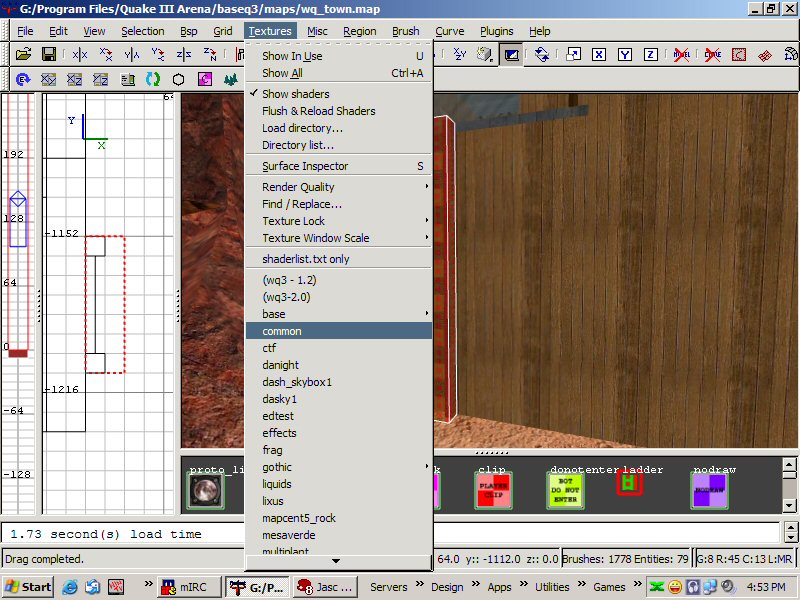
Load the "common" texture set and make the entire brush the "nodraw" texture.
Load the SG_wood1 texture set and select one of the ladder textures. Hit the escape key to deselect the brush.
Select only the front face of the brush by holding the Ctrl-Shift keys and left clicking the face you want.
This will apply the texture to just the front face of the brush.
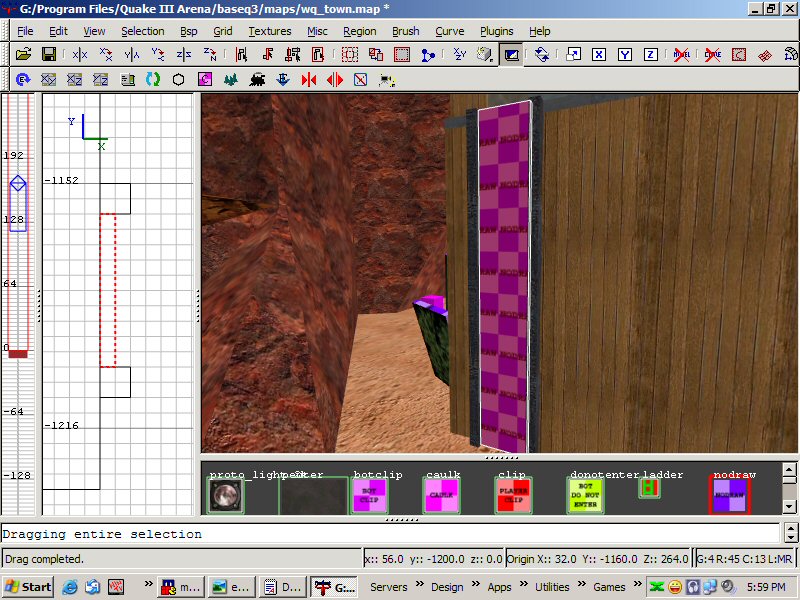
Notice that the steps are large and spaced far apart.
To make it look more natural hit the "S" key on your keyboard to bring up the surface inspector.
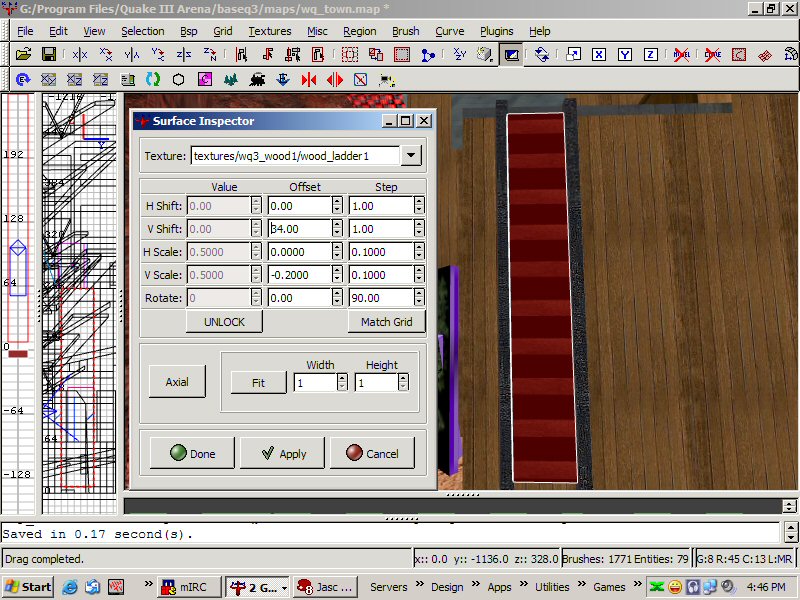
Use V Scale to adjust the vertical scale of the texture. Adjust the step field to work in smaller increments if you need to.
Then adjust V Shift to move the texture up or down until it looks right. Keep in mind the black areas of the texture will be
invisible in the game. (That's one reason we needed to make the rest of the brush a "nodraw" texture.) Once the texture is looking good hit "done".
Now make a new brush that not only covers the entire ladder but actually extends out from the front just a bit as shown in this next shot.
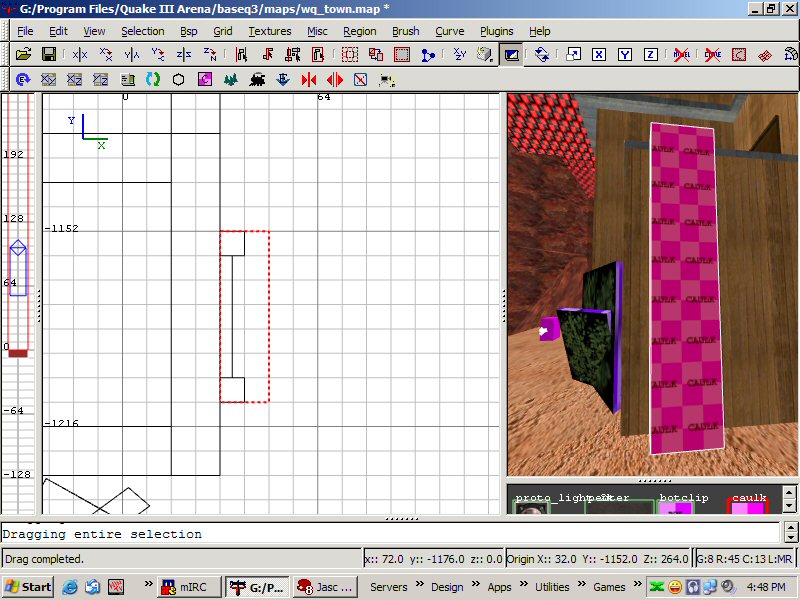
With the brush still selected, load the common texture set and select the ladder texture.
You should have something that looks like this when you are done.

In the 2D window, right click and select target/target_speaker.
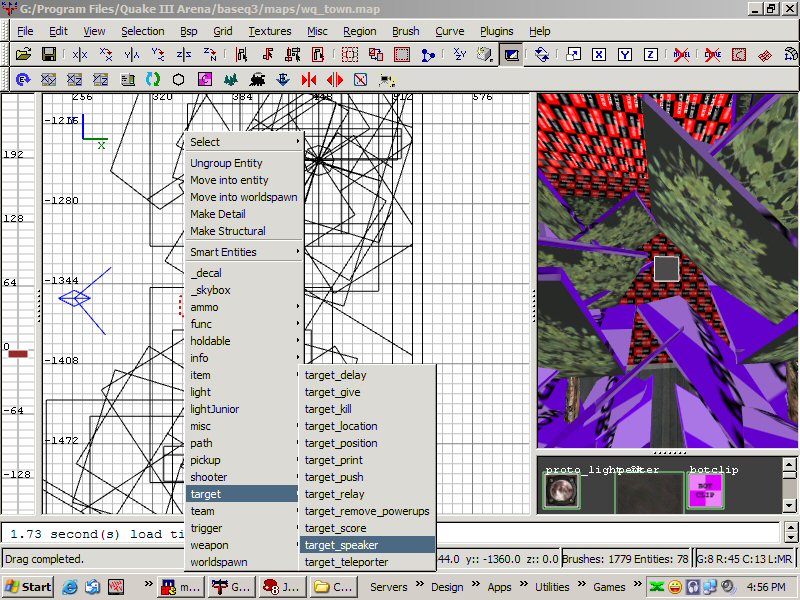
Move the new brush to the desired postion and hit "N".
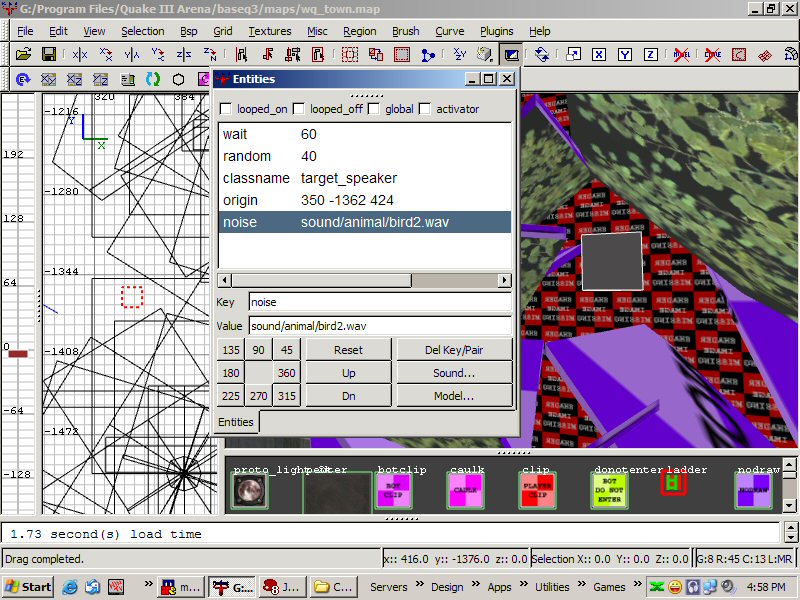
Click on the sound button at the lower right of the entity window.
A window will open for you to browse to your X:\Program Files\Quake III Arena\baseq3\sound directory.
Select the sound you want and assign any values you want. Checking the "looped_on" box will make the sound play repeatedly with no pauses.
Checking "global" will make the sound audible throughout the whole map. Otherwise, it will only be heard by players close enough to hear it.
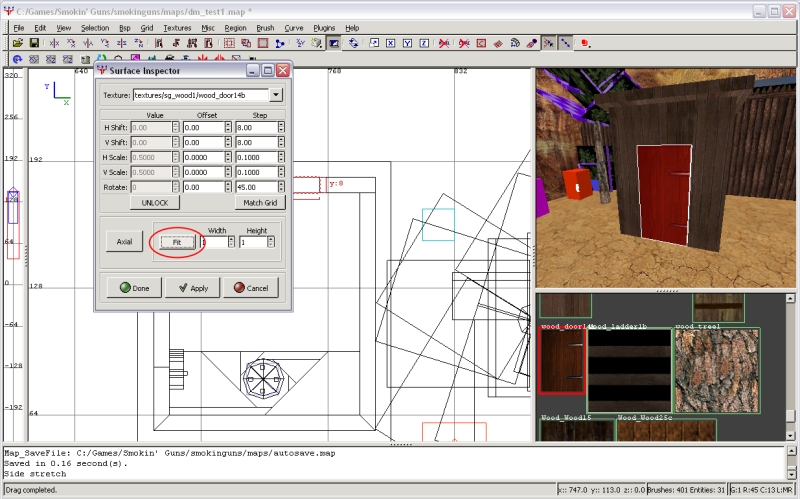
Create a doorway that you wish to put a rotating door into. I am goign to add the rotating door to the outhouse on dm_test1.map
First create a door brush that fits inside the doorway
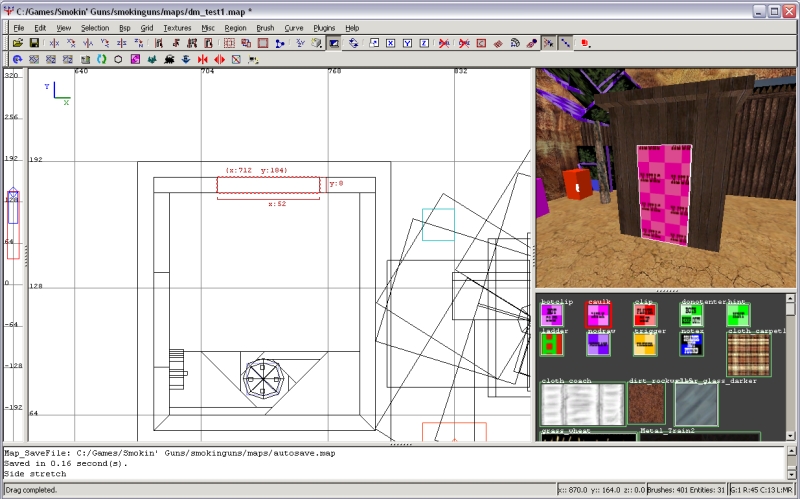
Select textures/sg_wood1/wood_door14b, press "S" to bring up the texture editos, and click "Fit"
Next, creat a small at the top-corner of the of the door brush. select textures/common/origin. This is the origin or "hinge" of the door. You may wish to adjust the placement of this orign brush to correct the rotating action of the door, but for now, center it on the upper-corner of the door.
Select both the door brush and the origin brush, and then right-click in the 2D window and select func/func_door_rotating:
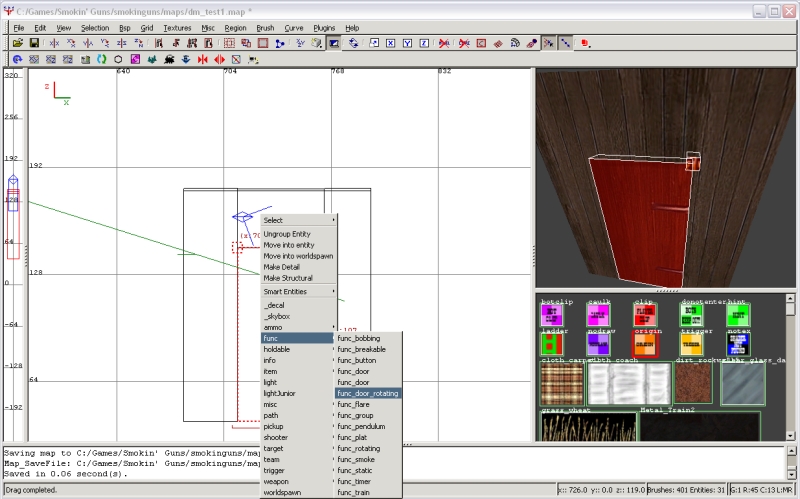
You should have a working rotating door. By default, the door rotates about the z-axis, but if you you press "N" to open the entity window, you can select x-axis or y-axis to make trap-door styledoors. Also in the entity window you can make it oneway, triigered (triggered by another entity), crusher, or normally open.
Create soemthing that you wish to add smoke to. I am gogin to add smoke to the fireplace in dm_test1.map
First you will need to create a brush that is textured with textures/common/nodraw, and then right click in the 2D window and select func/func_smoke:
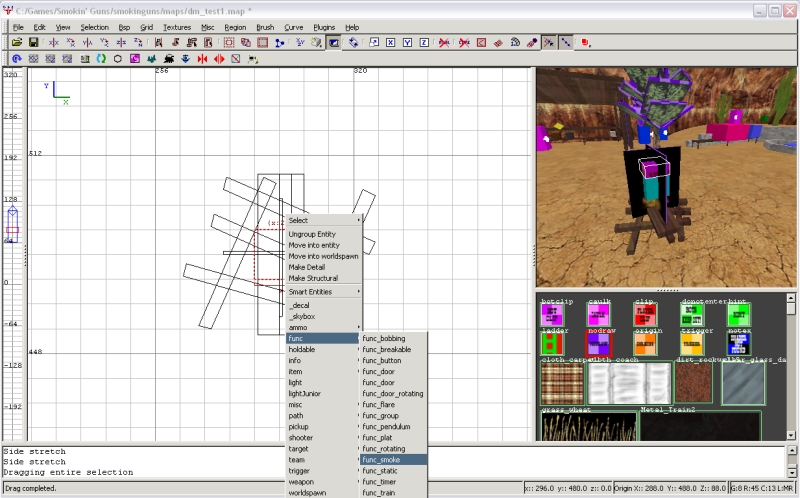
Next deselect everything (ESC). Now right click in the 2D window and select target/target_position. This will be the direction in which the smoke travels, so make it off to the side and above the func_smoke entitey:

Again, deselect everything (ESC). First select the func_smoke entity, then select the target_position entity, and finally press Ctrl+K.
Fianlly, select the func_smoke and press "N" to bring up the entity window. Enter these key&value to make the smoke look more like fire smoke:
color 123 123 123
boost 3
life 30
trans .8
wind 25
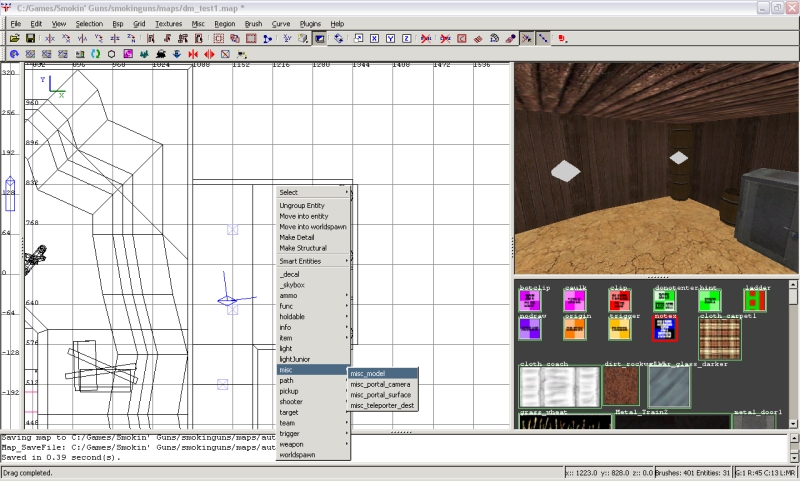
I am goign to add a torch by the safe in the dm_test1.map the was included in the sg_mapping_toolz_v2.zip:

Right click in the 2D window and select misc/mics_model:
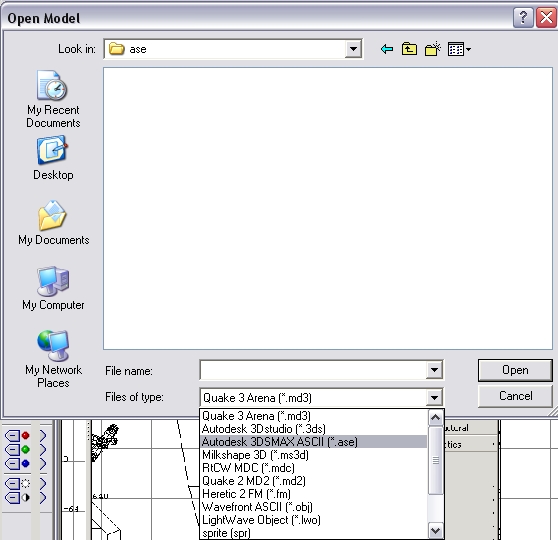
Double click on the "ase" folder and then select "Autodesk 3DSMAX ASCII (*.ase)" from the drop down menu:
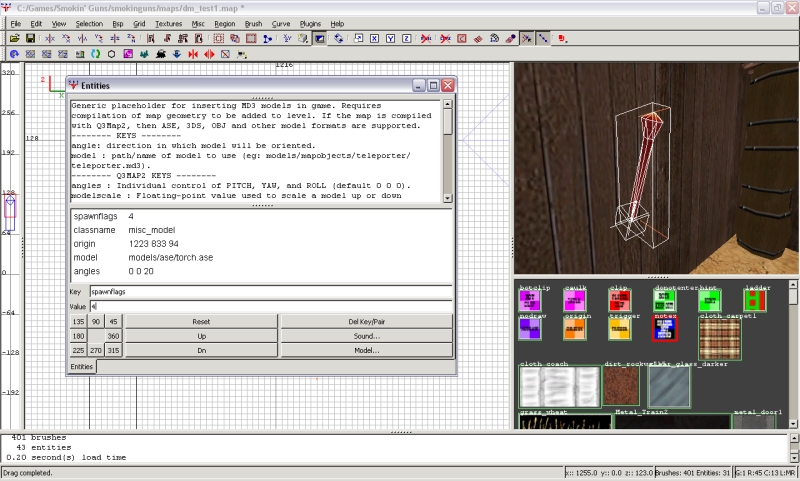
You should see a long list of ASE models in the menu. I am goign to instert "torch.ase" into the test map. Once the model is in the map you can treat it like any other model. I am going to angle it at 20 degrees and set spawnflags to 4 so that the model casts shadows. (Note: models do not have clipping, therefore you must hadd weapon clip around them after they have been added to your map):
You should now have some knowledge of how to insert Smokin' Guns entities into your map. There are some entities not listed here; I will try to get a tutorial for them. Remember, if you have any trouble with entities you can always look at the two test maps included in the sg_map_tools pack. Also, don't be afraid to post questions in the Level Editing section of the forums.