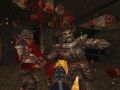
Rage through 32 single player levels and 6 deathmatch levels of sheer terror and fully immersive sound and lighting. Arm yourself against the cannibalistic Ogre, fiendish Vore and indestructible Schambler using lethal nails, fierce Thunderbolts and abominable Rocket and Grenade Launchers.
Filename
ad_sepulcher.7zCategory
Singleplayer MapLicence
ProprietaryUploader
medveAdded
Size
20.57mb (21,567,561 bytes)Downloads
226 (2 today)MD5 Hash
be8c7d653907960eaa95bc509ddab0c1Embed Button
Embed Widget
Description
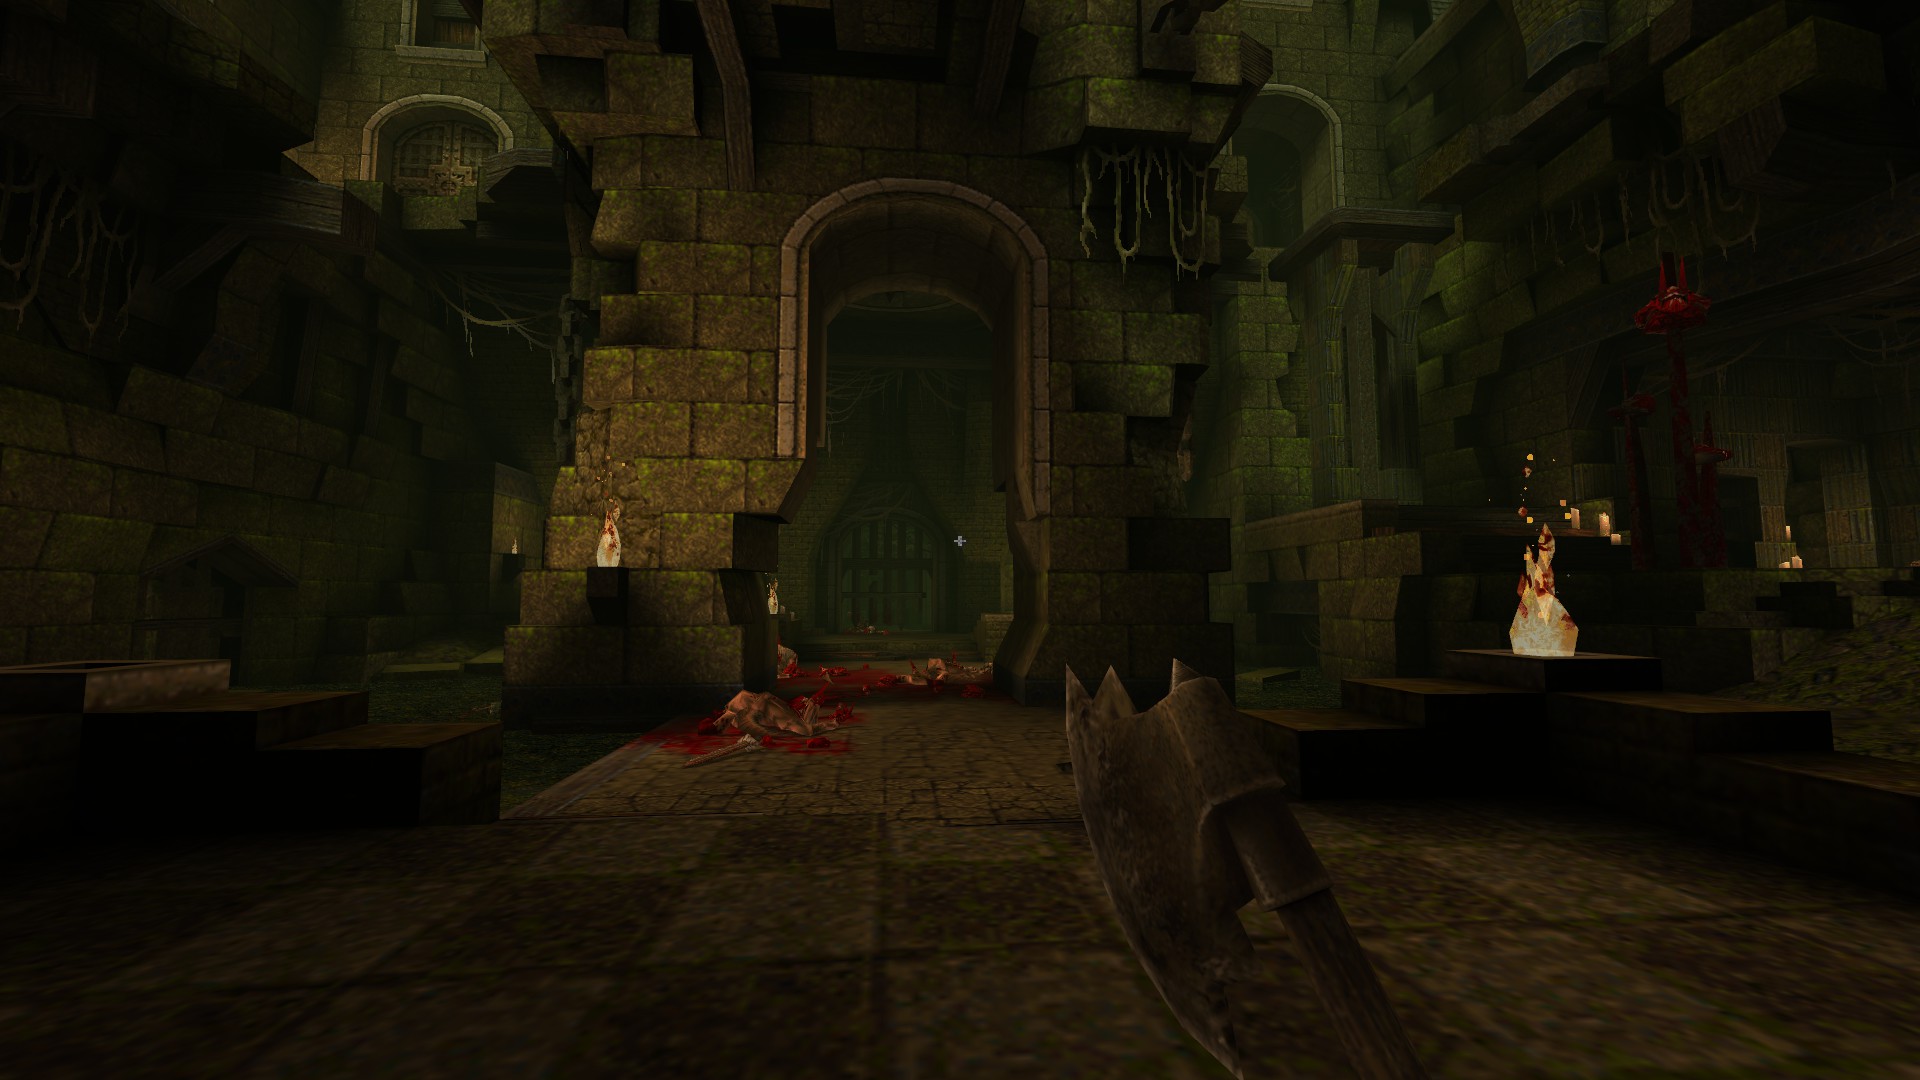
The map started as a standalone user map for the mod Arcane Dimensions, it was later picked up by the AD mod team to be developed and incorporated into the next big release of the mod. The map was originally planned to be a remix of the quake map e1m3, however as the map was so heavily rebuilt and restructured we simply passed a point where the 'e1m3 feel of the map' faded away.
==============================================================================
Title : The Forgotten Sepulcher
Date : 16th June 2017
File : ad_sepulcher.zip
Authors : Henrik "G1ftmacher" Oresten / Simon "sock" OCallaghan
Description : Crazy complex map breaking AD adventure
**** IMPORTANT INFORMATION ****
Darkplaces/MarkV DO NOT WORK (crash) with this map!?!
This map REQUIRES Arcane Dimensions to be installed properly
ONLY the Quakespasm Quake engine is supported at this time
------------------------------------------------------------------------------
Additional Credits
* Eric Wasylishen for the constant dedication updating the compiler tools
and QuakeSpasm engine with new features and more limits to break!
* Sean Campbell for the endless hours of testing and amazing gameplay
and secret suggestions (The Kraken has awaken!)
* Henrik Oresten for support and encouragement with this map project
and letting me finally finish this map! (Its been a long journey)
==============================================================================
Installation
* Download Arcane Dimensions 1.5
(http://www.simonoc.com/pages/design/sp/ad.htm)
- Create a new folder in your Quake folder called 'AD'
- Copy AD 1.5 zip file into 'AD' folder
- Extract contents of zip file into 'AD' folder
* Download AD_Sepulcher
(http://www.simonoc.com/files/ad/ad_sepulcher.zip)
* Copy this zip file into the Arcane Dimensions folder
* Extract the contents of the zip file (overwrite all files)
This zip file contains the latest AD Quake Code (v1.6)
* Download the new Quake engine - QuakeSpasm (QS) and QuakeSpasm-Spike (QSS)
QS/QSS (Win32) - Simonoc.com
QS/QSS (MacOS) - Simonoc.com
* Install/unzip the Quake engine in your 'quake' folder
* Add the following to the command line or use the mod menu
-game ad +map ad_chapters
* Run the shortcut (click icon) and make sure the engine loads
* Select the skill level you want to play via the skill pillars
* Find the new ad_sepulcher entrance in the right hand corner
* Jump in and see where the portal takes you and remember ...
* Record a demo once you start the map!
==============================================================================
Map Waffle
The map started as a standalone user map for the mod Arcane Dimensions,
it was later picked up by the AD mod team to be developed and incorporated
into the next big release of the mod. The map was originally planned to be
a remix of the quake map e1m3, however as the map was so heavily rebuilt
and restructured we simply passed a point where the 'e1m3 feel of the map'
faded away. Still, there are key elements and remnants of e1m3 to be found
and I would like to highlight a few of these:
1. The great arch in the beginning is an extension of the original grand
arch found in the starting room of e1m3.
2. The first left turn of e1m3 remain, it is now located further in from
the starting point, look up and you'll see grand wooden ceilings,
an extension of the original wooden ceilings.
3. The early grenade launcher of e1m3 is now pushed slightly forward into
the next room, past the left turn.
4. As in the original map there is a great divide of paths to the gold key,
one to the left and one to the right. If you're familiar with e1m3
you'll recognize the grand door to the left, the bars in the middle
with an ogre behind and the small staircase leading down to the right.
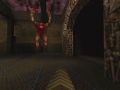
5. The gold key is located in a large open and watery space where the two
paths collide, although similar in some sense the area is greatly enhanced,
featuring an open sky, a broken down church, an old sacrifical temple
and more. All beautifully realized by Simon.
Simon has since added additional nods to e1m3, I would recommend playing or
at least visiting the classic e1m3 map before playing sepulcher. I would
also like to thank Simon for taking the time to finish this map while also
staying true to the original shapes and layout I provided to him almost
a year ago. The time, effort and hardship which he has gone through to
realize this map is commendable to say the least.
/Henrik
When I first saw the original map by Henrik I loved the organic style of the
brushwork. The map architecture felt ruined and rundown, but with plenty of
artist flair that each room felt different. The original map also featured
ropes, which I always thought was a cool feature of the mod!
My initial imput to the map was to help with the layout and flow, because it
had too many straight sight lines that were hurting performance and encounters.
The next issue was the lighting, because none of the torches were 'hot' or
glowing. The secret to good lighting is to have contrast and the giant torches
needed to burst with light and dispell the gloom of the map.
As the map grew in size and complexity (plus prefabs from me) it was
obvious the map was not going to be finished on time for the mod deadline.
So instead of rushing the map, we decided to put it on hold until after
the release of the 1.5 update.
It is always interesting to come back to a map after a long pause and see
the map with fresh eyes again. It is so easy to get too involved in a map
and wrapped up in your 'own vision' to realize that not all map design is
good map design. So with less attachment to existing brushwork and layout,
I decided to reiterated the map by converting it to GTKradiant.
As each room was rebuilt on grid, this meant the compile times were really
low (<5mins) and I could rapidly compile and test things without much of a
creative pause. The turnaround time from idea to being compiled was
drastic reduced and iteration become easy and rewarding to experiment with.
The map is very much focused around the introduction of unique monsters
like the boil, swampling and boglords. Often the hardest part of desiging
new monsters is finding good ways to use them without making everything
so scripted and rigid. Luckily the new monsters grew with the map and
it felt like a journey of design for how they were used.
As the map was inspired by E1M3 I decided to include a couple of moments
that I thought summed up what E1M3 meant to me.
* In the water caves area where there is a giant button operated portcullis,
there are large free standing curved archways which can be jumped all over.
These are designed to look like the arches found in the original map
where the GK is located in the water.
* After the catacombs and before the final arena is a room with a ledge
and two ogres. There are two doors on either side like the original map
design which are button operated. I always liked this room in the original
and felt it needed to be included as hommage to the original.
* In the arena around the final giant lift are platforms high up the walls
which have ogres on them. This is similar to the ogres found in the corridor
leading to the final elevator up. There is even a secret teleporter which
can be used to telefrag one of the ogres like the original!
I have always loved creating secrets for maps and this map is no exception
to the rule and to be honest, it went a bit bonkers! Generally speaking,
anything of interest is marked as a secret, but this map is so densely packed
that it would be the secret sound going off non stop! So there is some
'unmarked' secrets which are (mostly) listed in the readme file.
I often create secrets I would generally like to find myself and this
map has all the types I can think of (including running/timed secrets)
During the course of development of this map I got a massive amount of
help from Eric, so I thought it would be cool to do a thank you secret
and it is located in the Sanctum (after GK door).
Being a fan of non linear map design I have included plenty of shortcuts,
interconnectivity loops and ways to bypass huge parts of the map. I know
this can upset some players because they feel they must see everything
first time, but this is not what the map is about. All paths lead to the
end of the map and that is the point of the map, its a journey, not a
guided tour. Just re-play the map again and enjoy discovering new stuff!
/Simonoc
==============================================================================
Secrets / Special Items / Weapons / Keys (-- = Unmarked)
01. W Start Room, Button on back of central arch. Reward=SSG
02. - Start Room, Upper balcony where ogre comes out. Reward=Rockets
03. - Start Room, Altar room next to upper GA. Reward=L Cells
04. W Start Room, Top broken part of upper church. Reward=NG
--. - Start Room, Inside swampling cells to the right. Reward=Y Backpack
--. W Start Room, Upper area middle tower. Reward=Axe Upgrade
05. - Water tunnel after start room, Broken wall. Reward=G Backpack
06. - Upper area above spike pit, through glass window. Reward=Y Backpack
07. - Tall Pillar Room, large double glass library. Reward=Y Backpack
08. - Tall Pillar Room, button on upper balcony. Reward=Y Backpack
09. - Tall Pillar Room, drop down from upper side room. Reward=S Cells
--. - Tall Pillar Room, lower broken wall in corner. Reward=Y Backpack
--. - Tall Pillar Room, exploding boil wall by lift. Reward=Y Backpack
--. K Tall Pillar Room, large double window library. Reward=Rooftop Key
--. - Tall Pillar Room, top of lift, through glass window. Reward=Y Backpack
--. - Tall Pillar Room, fallen tower knight story. Reward=Y Backpack
10. W Spike Canyon, Wooden platform high up via ladder. Reward=Triple Shotgun
11. - Spike Canyon, Upper Fury Knight Library, Reward=Y Backpack
12. - Spike Canyon, Button by Altar in Rooftop area. Reward=MegaHealth
13. - Spike Canyon, Last room of Rooftop area. Reward=Y Backpack
--. - Spike Canyon, Corridor shortcut to knight tower. Reward=S Cells
14. - GL Room, Broken cupboard by small lift up to GL area. Reward=L Cells
15. - GL Room, Classic under lift secret, next to Crypt door. Reward=Y Backpack
--. - GL Room, Crack brick in wall next to Green Armour. Reward=Rockets
--. W GL Room, Lower area, behind bars with ogre. Reward=NG + Env Suit
--. W GL Room, Upper corner room above GL, behind broken door. Reward=NG
16. W Water Bridge, Lighting quick run above fishing ogre. Reward=LG
--. - Water Bridge, High above area with fishing ogre. Reward=Y Backpack
--. K Water Bridge, Above fishing ogre, broken wall. Reward=Crypt Key (1of2)
17. - Water Bridge, Below breakable bridge in alcove. Reward=Wetsuit
--. - Water Bridge, next to ladder with boil on wall. Reward=S Rockets
--. - Water Bridge, Small room with ogre before dungeon. Reward=Y Backpack
18. - Crypt, Upper area, jumping boil room. Reward=Y Backpack
19. - Crypt, Upper area, wall of coffins has one different. Reward=L Cells
--. - Crypt, Upper area, small room next to ogre. Reward=Crypt Key (2of2)
--. W Crypt, Lower area, in corner of poison demon traps. Reward=LG
20. - Dungeon, Climbing into corner zombie cage. Reward=Y Backpack
21. - Dungeon, Upper area via several zombie cages. Reward=Y Backpack
22. - Dungeon, Lower area with swamplings, corner ledge. Reward=S Cells
23. - Dungeon, Half way up tall liftshaft, behind arches. Reward=Y Backpack
24. - Dungeon, Ledge above Purple key door with red window. Reward=MH
25. - Dungeon, Large red window in Purple key room. Reward=R Backpack
--. - Dungeon, Breakable window in Purple key room. Reward=Y Backpack
--. K Dungeon, Ledge above doorway leading to lift altar. Reward=Purple Key
26. W Boglord Area, behind giant Boglord door on altar. Reward=SNG
27. - Boglord Area, Top corner area unlocked via button. Reward=G Backpack
28. - Boglord Area, Top library/study area, corner door. Reward=Y Backpack
29. W Boglord Area, zombie cage above book, broken wall. Reward=Triple SG
30. - Boglord Area, zombie cage above book, ladder up. Reward=Y Backpack
--. - Boglord Area, top part with Shalrath, behind boil wall. Reward=Y Backpack
--. K Boglord Area, Locked room opposite demon body. Reward=Boglord Key
31. - Dungeon Bridge, Teleporter through upper archway. Reward=L Cells
32. - Dungeon Bridge, Drop down off edge to room below. Reward=Inv Ring
--. - Dungeon Bridge, next to boglord entrance, broken wall. Reward=G Backpack
33. - Water Cave, Water below giant gate with ledge. Reward=Y Backpack
34. - Water Cave, Underneath giant bridge, broken wood. Reward=G Backpack
35. - Water Cave, Large altar in corner. Reward=Y Backpack
--. - Water Cave, Small room underwater in corner. Reward=Y Backpack
--. - Water Cave, Water area below giant door area. Reward=L Cells
36. - GK Rampart Abbey, double blue window. Reward=Y Backpack
37. - GK Rampart Abbey, small tower with lift. Reward=YA
38. - GK Rampart Abbey, small door by gate. Reward=G Backpack
--. W GK Rampart Abbey, Golden illusionary window next to blue. Reward=LG
39. - GK Zone, Platform above GK Door via steps. Reward=MH
40. - GK Zone, Platform above main Church via ladder. Reward=Pentagram
41. - GK Zone, Corner room above GK altar. Reward=L Rockets
42. - GK Zone, Small room below stairs up to GK door. Reward=R Backpack
43. - GK Church, The well below main church via water. Reward=Inv Ring
44. - GK Church, Small closet above altar, broken wall. Reward=Y Backpack
45. - GK Church, Button in small closet above altar. Reward=Quad+MH
46. - GK Church, Broken cupboard next to windows. Reward=L Cells
--. - GK Church, Small altar room via wall button. Reward=Y Backpack
--. W GK Church, Room below main church via water. Reward=Triple SG+Y Backpack
47. - Inner Sanctum, Coffin room, has one different. Reward=L Cells
48. - Inner Sanctum, Top floor via giant lift shaft. Reward=Quad+RA
49. - Inner Sanctum, Orrery at top of tower, find 3 buttons. Reward=Y Backpack
--. - After GK Door, First breakable dragon window. Reward=Y Backpack
--. - Inner Sanctum, Lower breakable dragon window. Reward=Y Backpack
--. - Inner Sanctum, Upper breakable dragon window. Reward=G+Y Backpack
--. - Inner Sanctum, The boiler room opp coffin room. Reward=Y Backpack
--. - Inner Sanctum, Blocked lift up to upper floor. Reward=Y Backpack
--. - Inner Sanctum, Room next to small lift up. Reward=L Cells
50. - Catacombs, Ledge next to large yellow window. Reward=Y Backpack
--. - Catacombs, Lift out of zombie knight corridor. Reward=Y Backpack
--. - Catacombs, E1m3 ogre ledge room, left side room. Reward=Green Armour
--. W Lower lift, Large door next to rune plinth. Reward=LG+PG(Need demons)
--. - Lower lift, Upper ledge accessed via teleporter. Reward=Y Backpack
==============================================================================
Super Secret - Demon bodies (E = Easier to find)
01. (E) Start Room, lower area, behind boil wall
02. (E) Start Room, upper area, church altar
03. (-) Start Room, upper area, altar room next to GA
04. (E) After Start Room, spike pit, altar at the bottom
05. (E) Spike Canyon, lower area, behind broken wall, opp dogs
06. (E) Spike Canyon, lower area, behind boil wall, next ogre
07. (E) Spike Canyon, upper area, altar next to fury knight
08. (-) Spike Canyon, Rooftop Key area, church altar
09. (-) Spike Canyon, Rooftop Key area, final dropdown room
10. (E) Water Bridge, lower area, besides fishing ogre
11. (E) Dungeon, first room, altar lift guarded by ogre
12. (-) Dungeon, first room, upper area with swamplings
13. (-) Dungeon, first room, lower reverse liftshaft
14. (-) Boglord room, upper area with shalraths
15. (E) Boglord room, area infront of boglord key room
16. (-) Dungeon Bridge, next to boglord entrance, broken wall
17, (-) Water Cave, below large gate in the water, broken wall
18. (E) Water Cave, large altar in corner, altar lift
19, (-) Crypt, upper area, jumping boil room
20, (-) GK Zone, upper area, rampart abbey altar
21, (-) GK Zone, upper area, corner room next to GK
22, (E) GK Zone, church area, central alter before crypt
23. (-) GK Zone, church area, window next to RoS exit
24, (-) GK Zone, lower area, top of liftshaft after RoS
==============================================================================
Books .. to find and maybe read!
01. Start Room, upper area next to Shadow Axe. "From the Shadows"
02. Start Room, upper area in broken church. "Blood and Bones"
03. Start Room, upper area next to GA secret. "The Prologue"
04. Tall Pillar Room, the knights tower. "Fallen from Grace"
05. Spike Canyon, upper area with Fury Knight. "Fury Nights"
06. Water Bridge, area above fishing ogre. "Lost and Found"
07. Water Bridge, next to ladder behind boil wall. "Skull and Bones"
08. Crypt, upper area with jumping Boil. "Boiling Point"
09. Dungeon Room, upper area besides demon altar. "In Da Walls"
10. Dungeon Room, reverse route behind boil wall. "In Between"
11. Boglord Room, upper area opposite boglord door. "The Bog Lord"
12. Boglord Room, upper area past Shalraths. "Days of Quake"
13. Water Cave, inside demon alcove. "Scampie Tales"
14. Water Cave, Upper area behind glass window. "Dreams of Light"
15. GK Church, beside windows to tree garden. "Don't Touch"
16. GK Church, small alcove with broken floor. "Where to Now?"
17. GK Church, main altar before crypt. "The Closet"
18. GK Church, corner room by GK Altar. "Nostalgic Ways"
19. GK Church, below in the water tunnels. "Put a Ring on it!"
20. Inner Sanctum, climb the broken tower. "Code Warriors"
==============================================================================
Changes to Arcane Dimensions 1.60 Codebase
* Restored monster_boil and monster_boglord assets and code
* Added monster_swampling (poisonous voreling, small+large)
* Added monster_boglord evil twin (red skin/projectiles and +HP)
* Added no_sgprojectile to worldspawn to override MOD default
* Added no_surfacecheck to worldspawn to override DP extension
* Changed all blood particles in effectinfo.txt to produce less
* Removed skycontent check for gibs, really bad slowdowns for QSS
* Changed monster_ogre_fishing to be 100% resistant to rockets
* Added lighttarget key for light entities to be mdl switchable
* Fixed misc_bob spawn delay (=-1) to be an actual random value
* Added aflag to zombies/knight zombies for onspawn fall direction
* Fixed bounding box error for zombie/knights getting up off floor
* Added infighting multiplier to monster_boil to damage other monsters
* Renamed trigger_nomonjump to trigger_monsternojump to be consistent
* Added trigger_monsterdrop to naturally drop monsters from height
* Allowed entity key idletimer to be set for first time after spawn
* Added item_backpack_armour entity, a backpack armour shard (def=15)
* Matched particle effect colour of backpack to exactskin value
* Allowed item_backpack to have types of armor (grn, yel, red)
* Updated particle effects for backpacks to match colour of skin
* Added devmode only functionality to trigger_once & trigger_multiple
* Added shambler infighting attack style to use smash on enemy low HP
* Fixed bug with gibondeath monster not being less zero when dying
* Fixed bug with many of the gibs being spawned below monster bbox
* Added switchoverride to all monsters to adjust infighting switch timer
* Fixed trigger function on client cameras not detecting empty string
* Added trigger_engine entity to cope with unique engine features
* Added static option to func_illusionary, light_candle & misc_model
* Added tetherpause to tether system, % to stop attacking when no sight
* Added brkdelaydamage to func_breakable, delay to damage functions
* Fixed monster_jim and turret mode to not use velocity movement
* Fixed monster_jim projectile sightchecks to use correct enemy target
* Added support for changing particle system setup if quickloading
* Added special ambient sounds (chime, rain, rumble, water, wind, wood)
* Updated trigger_count spawnflag to allow for displaying exact count no.
* Added trigger_count to start disabled, requires trigger_entity state
* Removed player autoaim server flag (check/set console variable)
* Merged server flag for AI path arrows into a dev helpers instead
* Added impulse 160 (Toggle Weather) works for enhanced engines only
* Added server flag for Advanced Engine Weather Systems (DP/FTE/QSS)
* Updated func_door to allow for custom silver/gold lock messages
* Fixed bug with func_door and custom keys overriding silver/gold options
* Added jump_flag to any monster to block the ability to use jump attack
* Updated trigger_hurt falling option to affect monsters and players
* Added attack_instant entity key for monsters to instantly wake+attack
* Added attack_sniper entity key for monsters to wakeup at any distance
* Added sniper mode (no attack long range check) for crossbow knights
* Added spawnnotelefrag for all monsters to prevent telefrags on spawn
* Added spawnnosight for all monsters to spawn out of sight of players
* Added custom pickup sound to item_backpack and item_backpack_armour
* Fixed v_offset problem with onceiling spiders, swampling and vorelings
* Fixed nomonstercount to update monster totals if they die or are killed
* Fixed defender, army_grenade & ogres to detect grenadebounce flag on enemy
* Added wakeup range to misc_drip as they always draw regardless of portals
* Fixed rounding error in lftos function for creating long floats
* Fixed trigger_fog speed/wait defaults not being setup correctly
==============================================================================
copyright: The source map file is in the zip file for viewing pleasure.
Please do not use any of these assets in ANY COMMERCIAL PROJECT.
Remember to give credit if you use any of the assets.
additional The majority of the textures are based on existing Quake assets
compilers and BSP/VIS Compilers - by Kevin Shanahan/Eric Wasylishen
Dev tools: Coloured light and LIT support by Bengt Jardrup & MH
TexMex 3.4 by Mike Jackman (organize textures)
engine: Designed to ONLY work with the following engines:
QuakeSpasm (http://celephais.net/board/view_thread.php?id=60452)
Darkplaces : Not supported (will crash on load of map)
==============================================================================
Map Information:
Game : Quake SP only
Coop/DM : Spawn points exist, not tested.
Difficulty : Easy 196, Normal 296, Hard 496 - Monsters
Editor : SDRadiant 1.3.8
Build Time : 1 year (Rebuilt from Quark file)
==============================================================================
Distribution / Copyright / Permissions
Copyright (c) 2017, All rights reserved.
Quake I is a registered trademark of id Software, Inc.
This MOD/MAP may be electronically distributed only at
NO CHARGE to the recipient in its current state, MUST
include this .txt file, and may NOT be modified IN
ANY WAY. UNDER NO CIRCUMSTANCES IS THIS MOD/MAP TO BE
DISTRIBUTED ON CD-ROM WITHOUT PRIOR WRITTEN PERMISSION.
==============================================================================
Preview
Post a comment
768.5KDownload
DEMOQuake with Half-Life SFX (Xash3D)
5064.51mbDEMOQuakeHL
5846mbDEMOQUAKE - Revenge of the Episode Gates
15120.84mbDEMOOBJ-2-MAP v1.3
14130.5kbDEMO2hell
12251.83mbDEMOHalf-Life 0.52 weapons for Quake
9117.69mbDEMOQuake Wrapper v0.7, revision 1 (with sources)
2.3K1.07mbPATCHQuake V1.09 (Official Update) Revision 6 & QWSL
2.7K1.93gbPATCH(NEW FIXES!) Vanilla Restoration Patch for Win/GL/QWCL
1K212.35mbPATCHQuake V1.09 (Official Update) Revision 6 & QWSL [No Music]
23036.49mb
Icon
Developer & Publisher
id SoftwareEngine
Quake EngineContact
Send MessageHomepage
Idsoftware.comRelease date
Game watch
Follow
RTX Remix
RTX Remix is a modding platform by NVIDIA, which allows modders to create stunning HD remasters of classic games (see all supported), with ray tracing and DLSS.
Learn more about this games compatiblity with RTX Remix and ModDB's collaboration with the Remix community to organize all compatible games. Hide this dialog.


Community Rating
Average
-0 votes submitted.
Related Games
Quake
First Person Shooter
Related Engines
Quake Engine
GPL
Related Groups
id Software
Developer & Publisher
Tags
This map is so ******* amazing!