Requirements:
Character Animation Model - Updated 9-7-2019 - Mega
Character Animation Model - Updated 9-7-2019 - Media
Character Animation Model - Updated 9-7-2019 - Drop
Character Animation Model - Updated 9-7-2019 - Google
Gerrys Mod to 3D Max - Google Drive
Gerrys Mod to 3D Max - Dropbox
Garry's Mod to 3D Max - Media Fire
Combine Pack Updated on 23-8-2019 Media Fire
Combine Pack Updated on 23-8-2019 Mega
Combine Pack Updated on 23-8-2019 Google Drive
Combine Pack Updated on 23-8-2019 Drop Box
Previous Tutorial to "GO" Before:
Updated Character Model Porting Tutorial
- Default files used for tutorial:
- Skeleton For Additional Bones Final 1
- Skeleton For Additional Bones Final 2
-These two files have slightest difference in bone placement, so chose which ever give you best results.
- Well first you have to understand that there is a difference between SKINS, ANIMATION and BONES placement, BONES structure aka SKELETON is only define and change by the following file:
- SteamLibrary\steamapps\common\Men of War Assault Squad 2resource\entity\humanskin\human\human.MDL
- It had the whole bone structure and its the master file which effects on SKIN and ANIMATIONS, now it had MATRIX and PLACEMENT of BONES, but to place a virtual bone in it you have to GENERATE the bone MATRIX aka SIZE of BONE and its PLACEMENT on X , Y and Z axis.
- For that open provided bone files of 3d max, for starter, go with basic POINTER approach, add pointer and give it any name, and add that pointer to the current bone structure, like in example below I use bone as LINK BONE for PISTOL, so I named it as PISTOL_HOLSTER to have pistol placed upon it, now just attach that bone with right leg in schematic, export it as by provided options, go to the extracted directory, and open your newly GENERATED human.MDL file and find that bone(s) of your and copy its Matrix , Placement and other parameters if their any to the original human.MDL in game or mod directory, where make sure that placement must be on same LINE as per bone STRUCTURE as from your generated file to original file of game, please review following picture for it:
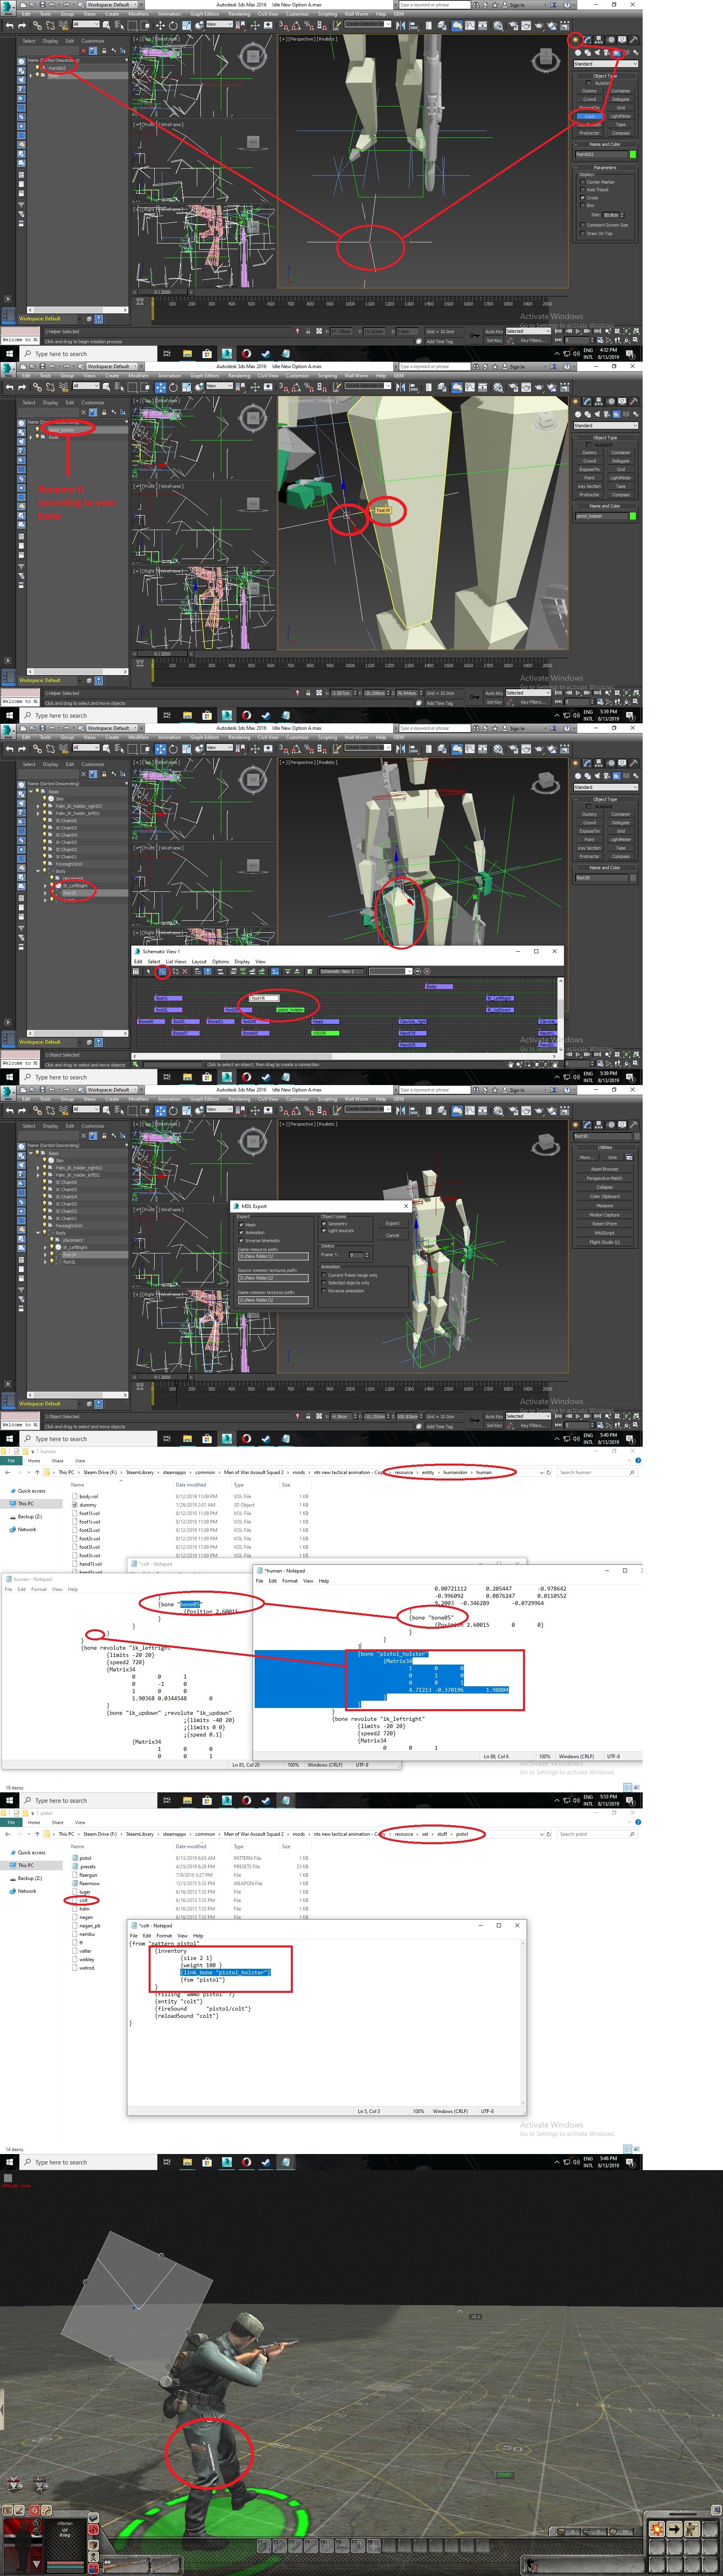
- To place armors and weapons upon bones, review this tutorial.
- To use these new bones in animation use same method as of animation tutorial, use POINTERS for animation and RESTRICT those new bone movements by Position Constraint and Orientation Constraint and place that newly created bone same as in animation skeleton, to make things simple use same skeleton for animation, skinning and adding new bone I recommend to use Skeleton For Additional Bones 1 and Skeleton For Additional Bones 2 as it also include "SKIN" in it, well new bone is linked to same bone and the pointer you restrict that bone movement, place that pointer either to the same bone or to base, depend on your animation style as if you want to play animation with hand and want that hand movement sync with new bone place that restricted pointer to hand and let the animation played in that way, now add that bone (not the helping pointer to which that bone restricted to) Name Selection Set and export it, the animation will played as normal as it is, review pictures for details:

- Where for rigging you need solid bones, you cant rig skins over POINTERS, so use existing bones to CLONE them and rename them to your desired bone while review following pictures for examples .
- Also note that some bones depend on AIMING, so restrict there movement and speed, follow following command and add and modify them according to your need in that PARTICULAR bone PROPERTIES:
Voxels=0
IKMin=-20
IKMax=20
IKSpeed=0.1
IKMin and IKMax restrict the movement of that bone is and around that range, where IKSpeed define that bone movement speed, that data also generated with bone matrix and placement, so copy as it generated, noted not all bones are needed but only those bone which involved aiming of weapon, review original, human.MDL file for that.
- Example of adding fingers for character skinning and animation:
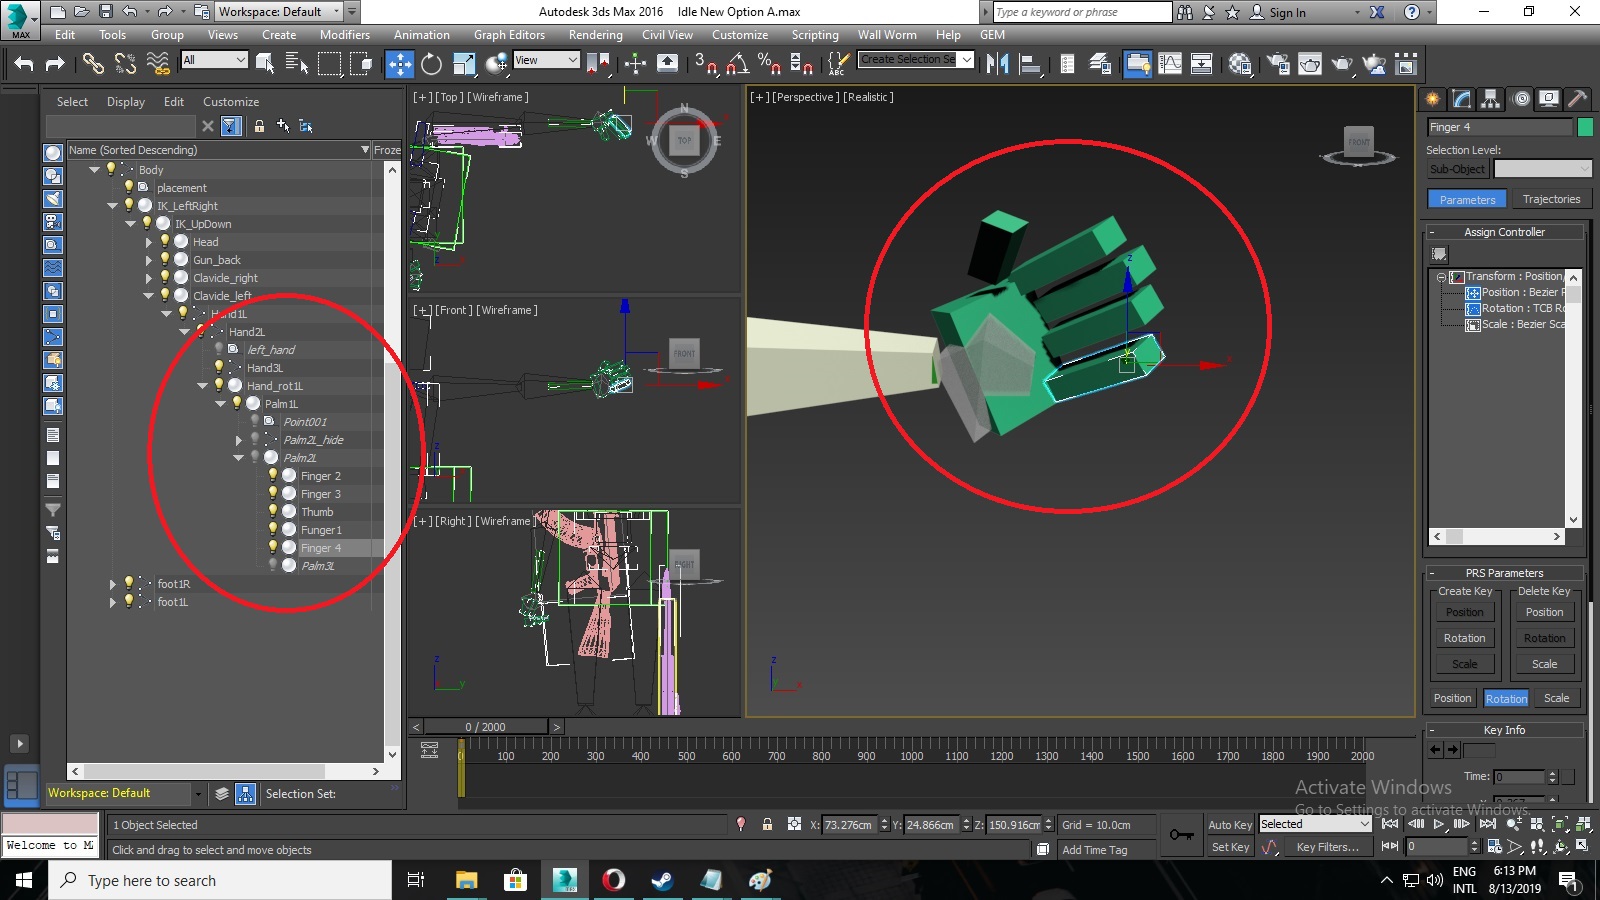
- In case if you dont want to create whole animation base then just rigged them in skin, if they are not included in animation they will remain still while rest of animation will played upon your skin except those whom you didnt rigged, beside now with it you can create other creatures, by creating whole new bone structure and skin a creature upon it, while the skin you rigged as creature will played upon creature bones and human skins will only played on bones designated for human, review following for example:
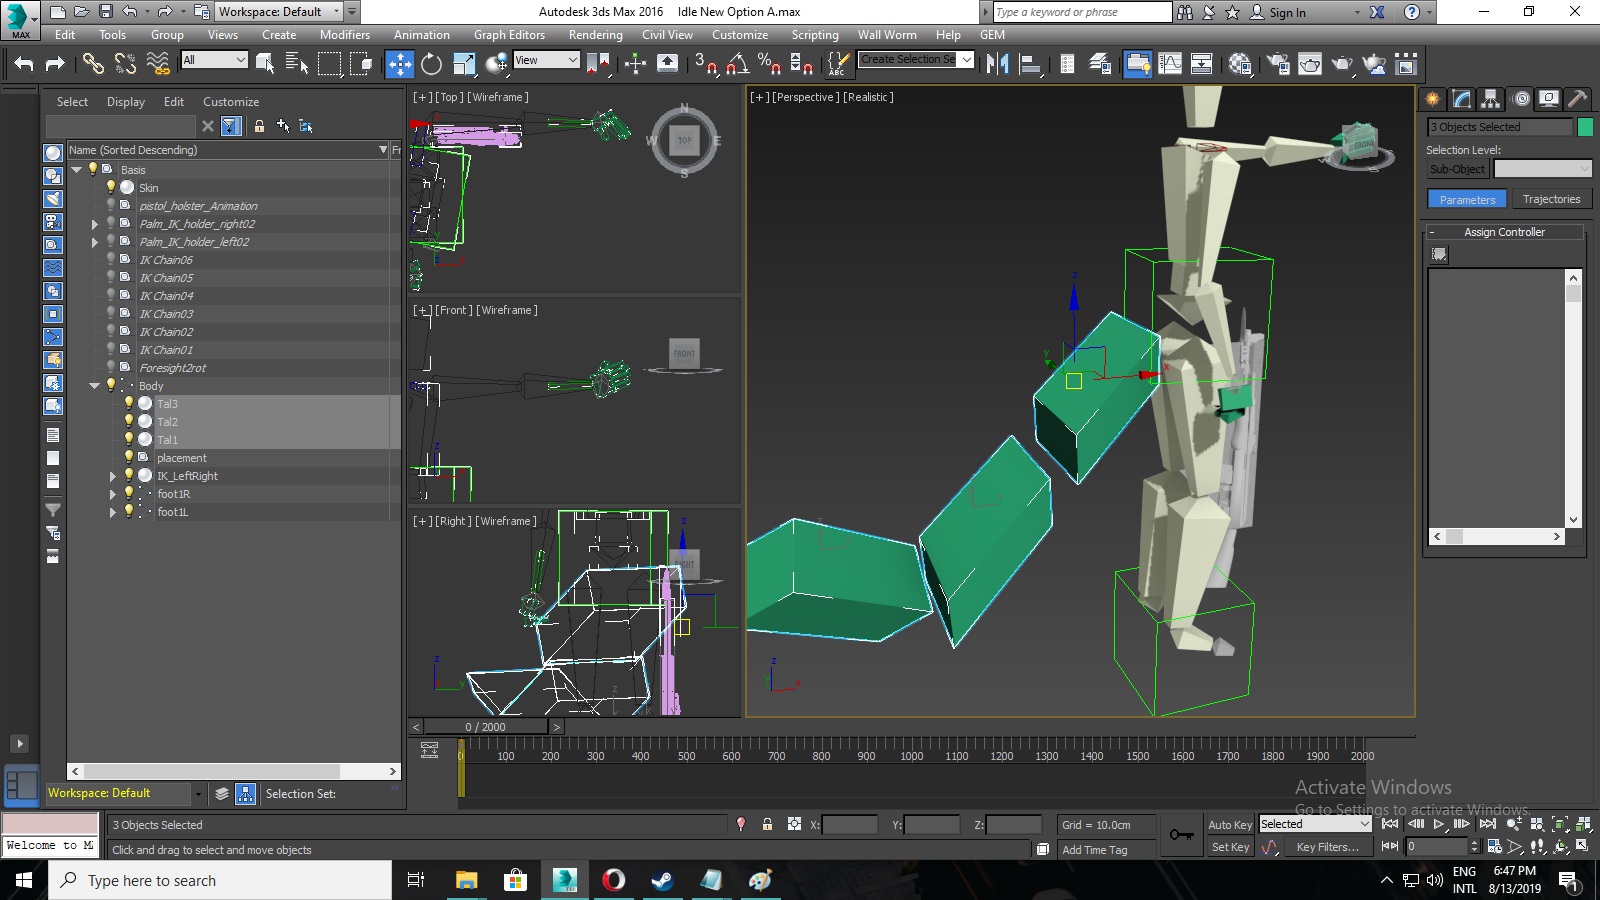
- As I created a tail structure and attach it with body, while if I rigged it as human I can left human skin to not to rigged upon it and only rigged creatures like XENOMORPH with it, and the animation which played upon it, it only effect on alien skin not on human, so now we can have other races as well, so I say lets have Alien VS Predator Mod in Motion :).
- Review following video for how to test animation in editor:


I love what you do jojo but you wouldn't happen to have a tutorial for helicopters would you. Either pointing me to them or otherwise.
Hello guys
how to download Gem 2 Editor for call to arms.please?