First of all, this is article in progress, I'll add more information to it in time. Some findings I'm only doing, being in progress of upscaling Blood 2 game and stumbling upon a lot of underwater rocks.
For the full experience I insist on reading first article, which is for LithTech 2.0 mostly (specifically for NOLF game).
Introduction
Lithtech 1.0 uses DAT v56 files for maps, DTX v1 format for textures and REZ format for game archives. While DAT files not so much differ from later versions of the game, DTX v1 format is very different. There were only two games I know of based on this version of the engine: Shogo: Mobile Armor Division and Blood II: The Chosen.
In terms of generic upscaling it's all the same: extract DTX textures from game REZ archives, convert DTX to PNG, upscale PNG, convert back to DTX, transfer DTX meta information from original textures to upscaled, modify DAT files to upscale UV vectors and pack back to REZ archive. All the same. But the devil is in the details.
Dealing with DTX v1
DTX v1 is a palette based 8-bit format, all the files have their own 256 colors palette and 4 mipmaps with image contained in them. If DTX_ALPHA_MASK flag is set within the files - additional 4 mipmaps of alpha channel are added. If you change number of mipmaps in editor, all the 4 mipmaps will still be present in file, it's just a flag within the texture of how many mipmaps to use from hardcoded four.
Alpha channel is 4-bit 16 colors image additionally stored in DTX. Alpha layers are used for transparency, for setting the amount of metal shining and so on. Unlike LithTech 2.0 not all the textures have alpha channel, just the ones with DTX_ALPHA_MASK.
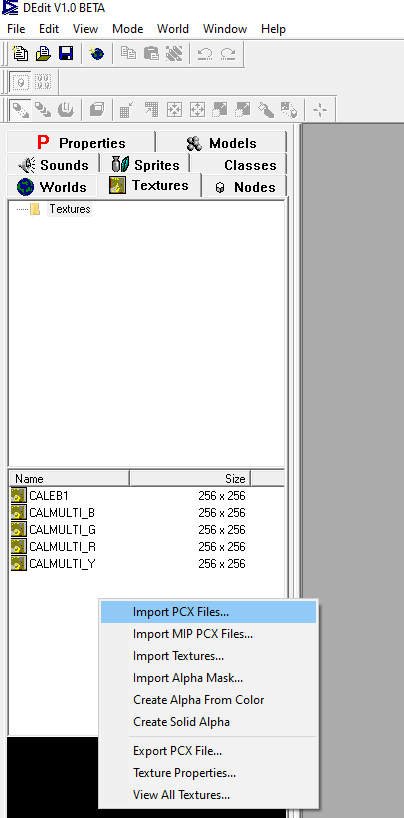
First of all we need to convert them all textures to PNG for upscaling. There is no batch utility this time, dtxutil won't work with DTX v1. You need DEdit v1.0 BETA (part of the Shogo or Blood 2 SDK, they are the same). Also you'll need DEdit Larger Texture Support, it's just a ddraw.dll file you need to place into DEdit directory. Non-patched DEdit supports maximum texture size of 256x256, so you'll definitely will need that patch later for upscaled textures (1024x1024 and less).
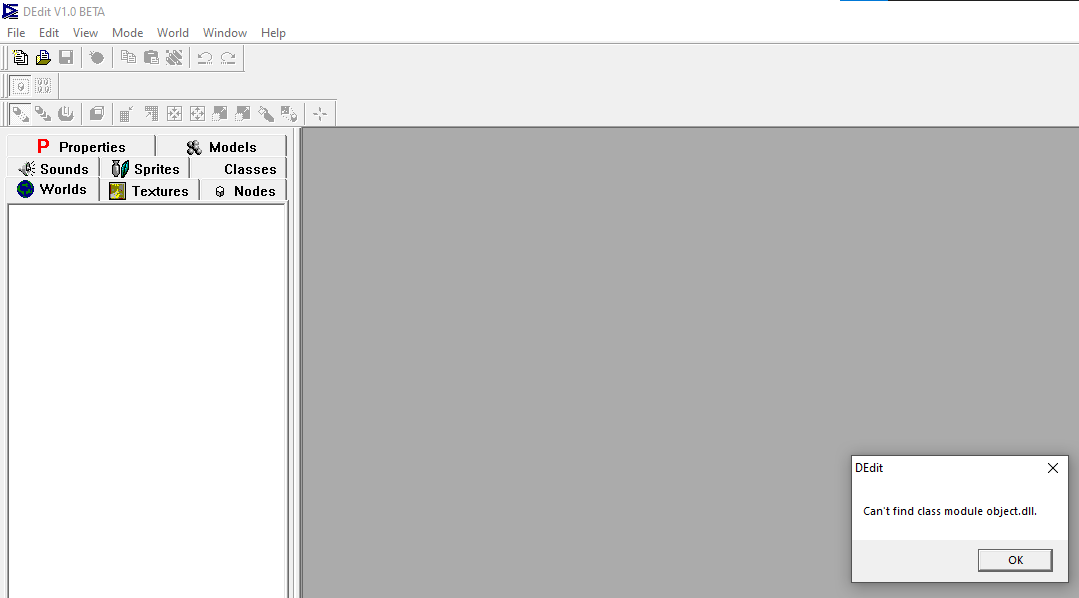
- Lauch DEdit.exe
- Create new project with default directory
- It will say something about error. Just click OK
- It will ask if you want to create world. Create one with any name you like
-Copy all the DTX you want to convert to DEDit\Project0\Textures\
-Reopen DEdit or reopen your created world in it
-Now click on Textures tab, click on folder icon called Textures
-You'll see a list of your textures. Select them all and click Export PCX file
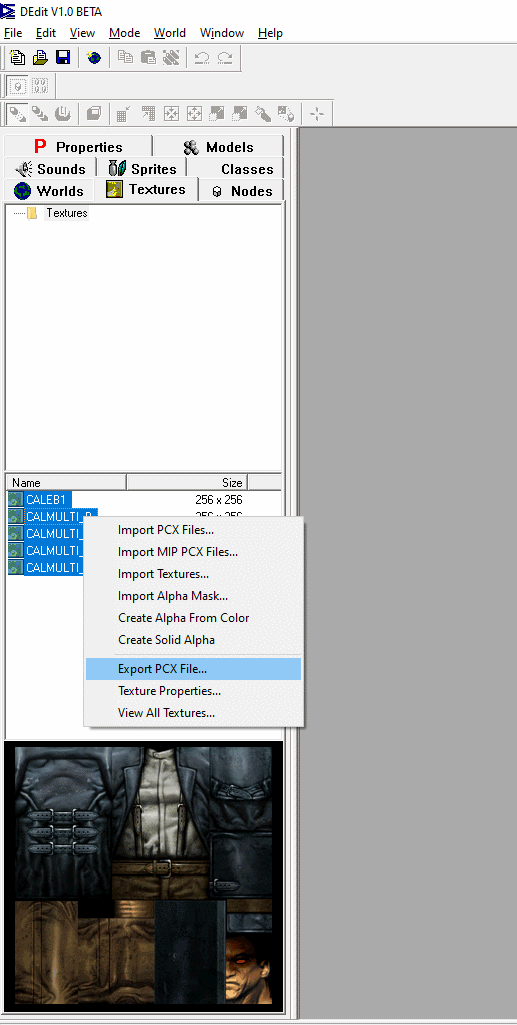
-DEdit will ask you if you want to convert each texture to PCX. Of course yes
You'll get all your DTX files converted to PCX in the same folder (DEDit\Project0\Textures\). The problem is - you can't use them yet. Most of the programs I tried can't open them for some reason. You can't batch convert them in XnView or ImageMagick will break the colors etc. This is due to some rare PCX specification used.
But they are opened without problems in GIMP. So let's teach GIMP to batch convert them.
You'll need:
1. GIMP graphics editor
2. BIMP batch plugin for GIMP
Launch GIMP, from File tab choose Batch Image Manipulation. Add format changing transformation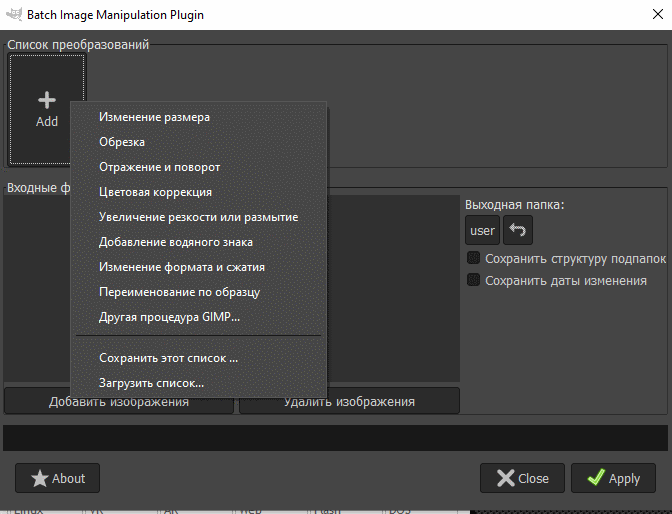
Choose PNG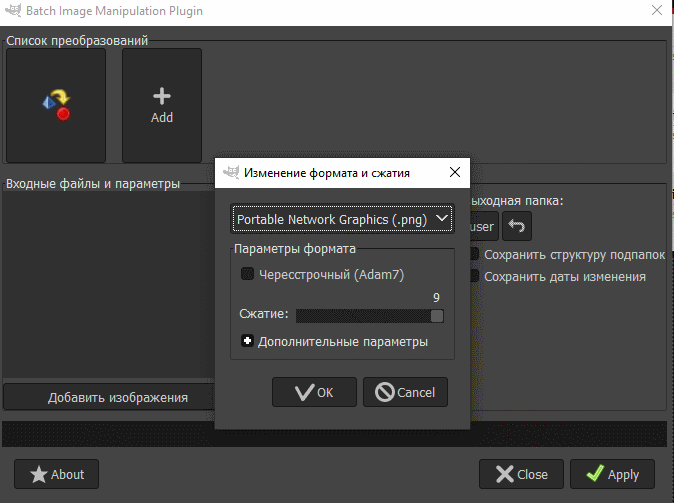
Add files you want to convert and choose output folder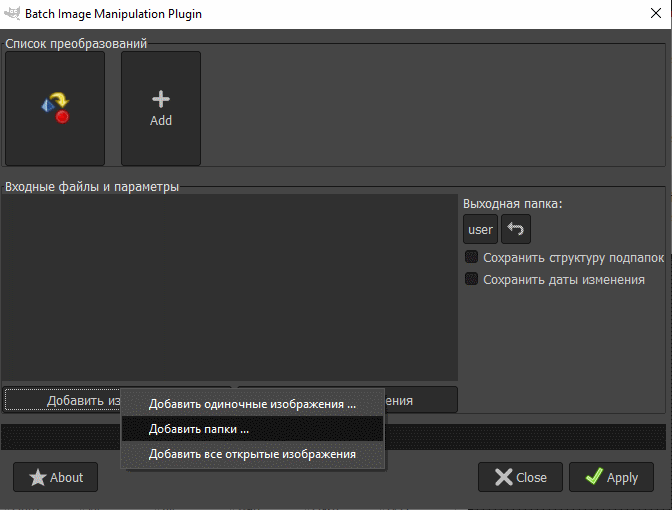
And it's done. You have a lot of proper PNG files you can upscale or edit any way you want.
Alpha Layer extraction
But what about alpha layer. The thing is, none of the existing tools I've seen can show you it. Even DEdit can't show it or export it. It's just some unknown grayscale image you can't even look at. And if you are upscaling a game - you need to deal with alpha. I don't think you want to redraw 1500+ alpha masks for images by hand not even knowing how they should look like.
So I wrote a python script to extract alpha layer from DTX if it had DTX_ALPHA_MASK flag. There were some tricky things with the way this layer is stored in file, but I managed. More info on github. Let's use it
python.exe dtx1-alpha.py --input CALEB1.dtx --output CALEB1.rawThis way you will get raw pixel data without any headers or anything. To be able to view it or use it you'll need to convert it to PNG. I was using ImageMagick for this
convert.exe -size 256x256 -depth 4 gray:CALEB1.raw CALEB1.pngYou'll need to know the exact size of the image you're converting, so I suggest you use 010 Editor template for this to look into DTX file or use DTX-Meta-Transfer script with read or table arguments. With the help of community there are templates for 010 Editor for all versions of DTX files.
Example of extracted alpha for Beretta weapon:
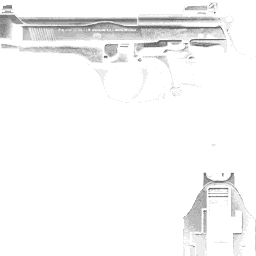
As you can see, it doesn't used for transparency but is crucial for shining chrome effect for this texture/model.
DTX v1 with Master Palette format
In Blood 2 there were 5 textures in really old format, I suppose they even not used by the engine itself (CRATE1.DTX, GRYCRET1.DTX, METAL1.DTX, ORGBRIKB.DTX, DULL1_TRANS.DTX). In this format there is no actual palette information and image is stored just as 8-bit indexes to be used with external master palette. DEdit or any viewers do not understands this format, so there was no way to open them and look whats inside. They even don't have any specific DTX meta in them.
But, once again, there was a research template for 010 Editor for them (thanks to Amphos from LithFAQ discord) and I wrote similar to alpha extraction script to retrieve raw image
python.exe dtx1-mpalette.py --input CRATE1.dtx --output CRATE1.rawExample of such file in 010 Editor with template active. Nothing interesting in header (I even do not check if it right, so you must be sure you're trying to extract image from file in such format). And very important width and height values: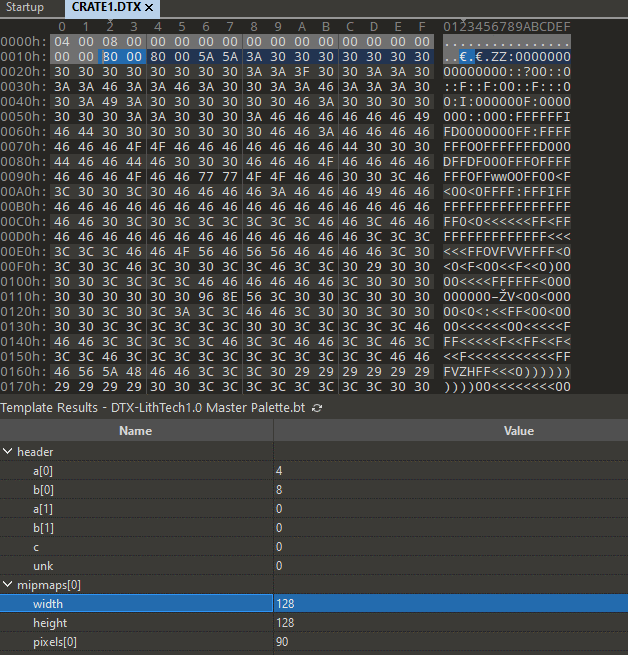
Alpha images were 4-bit, but this format is 8-bit, so the raw conversion is different. Don't forget to look for image width and height in 010 Editor template. Conversion using ImageMagick:
convert.exe -size 128x128 -depth 8 gray:CRATE1.raw CRATE1.pngAnd never-seen before there is proper CRATE1 texture in grayscale
But there was supposed to be an external master palette to be used on this texture. In Blood 2 expansion REZ archive there was interesting file: TEXTURES_AO/MASTERPAL.DTX. I converted it to PNG, extracted palette in graphics editor and applied it
I'm 99% sure this particular textures doesn't used ingame so it's just an interesting research, nothing more.
Putting everything back together
Upon upscaling images and alpha layers we need to convert them back to DTX. For images it's easy.
First of all, you need to use any graphics editor to batch convert upscaled PNGs (usually 24-bit files) to 8-bit paletted PCX, with or without dithering. DEdit only understands 8-bit PCX files so you must do it.
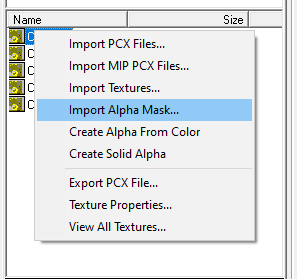
Open DEdit, go to Textures tab, select Textures folder. Right click on empty space in textures list and Import PCX Files.
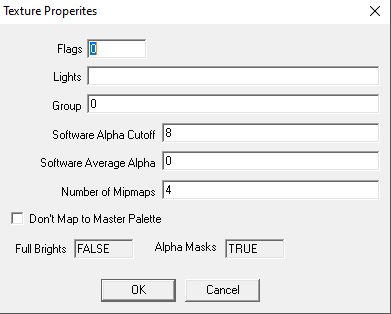
And it's done. You can view Texture Properties if you want for upscaled or original files (we won't need them for LithTech 1.0 upscale, but just in case).
Putting back alpha layer
But what about alpha layer. That's tricky. Upon upscaling we will get 24-bit PNGs, but DEdit is awaiting 8-bit PCX with specific palette to be imported. You can't even use your original extracted alpha layer cause it was 4-bit, but DEdit won't accept them even if you will create proper 4-bit PCX file.
I created a specific CLUT image we will use to remap our alpha layers.
![]()
It's on github for alpha extraction script. Don't forget to download it along with the script itself (from github, not from this article).
convert.exe -type Grayscale -colorspace gray +dither -remap 4bit.png PALMTREEM-alpha.png PALMTREEM-alpha.pcxWhy it was so specific? Here is an example of proper palette that DEdit will import info from. As we can see DEdit only understands 256 colors (8-bit) files, but for alpha only last 16 palette indexes are used like it was 4-bit image.
Now we can import our converted alpha layers
There is another veeeeery tricky thing about alpha/transparency in LithTech 1.0, and I will tell about it after DTX_FULLBRITE section of the tutorial. Just don't deal with this textures yet.
Transferring DTX meta
You already know that from previous article. Use the same script, it now has transferring support for both DTX v1 and DTX v2 formats.
You can read file info
python.exe main.py --input "C:\Textures\Example.DTX" --readNot much yeah (size, flags, surface, group and two alpha specific parameters)
Create a csv file with all the files properties
python.exe main.py --input "C:\Textures\Example1.DTX" --table "C:\Blood2\out.csv"
python.exe main.py --input "C:\Textures\Example2.DTX" --table "C:\Blood2\out.csv"
python.exe main.py --input "C:\Textures\Example3.DTX" --table "C:\Blood2\out.csv"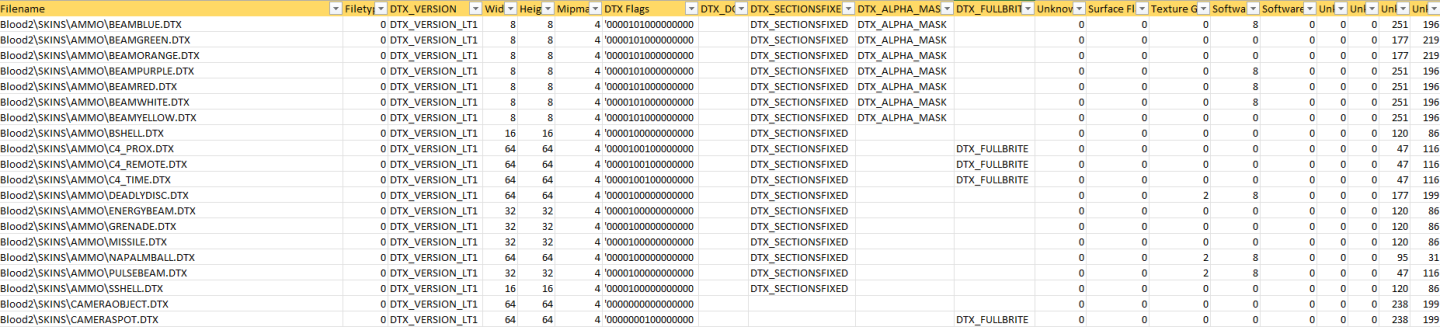
Or transfer information from original DTX to upscaled
python.exe main.py --input "C:\Textures\Example1.DTX" --output "C:\Textures-Upscaled\Example1.DTX"
python.exe main.py --input "C:\Textures\Example2.DTX" --output "C:\Textures-Upscaled\Example2.DTX"
DTX_FULLBRITE
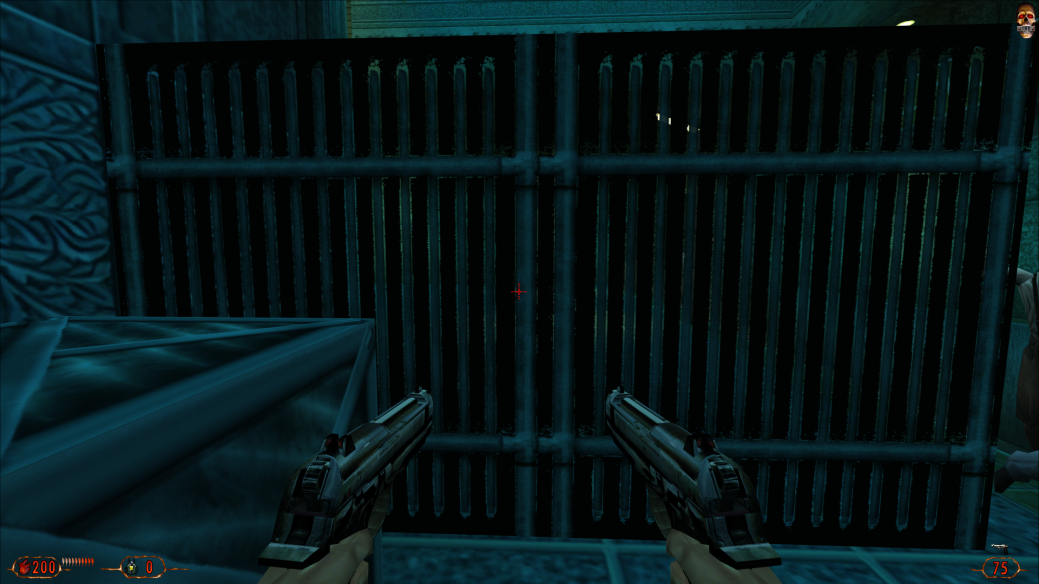
Or research pain for another 3 hours. Let's imagine we completed our upscaling, packed everything back to game and launching it
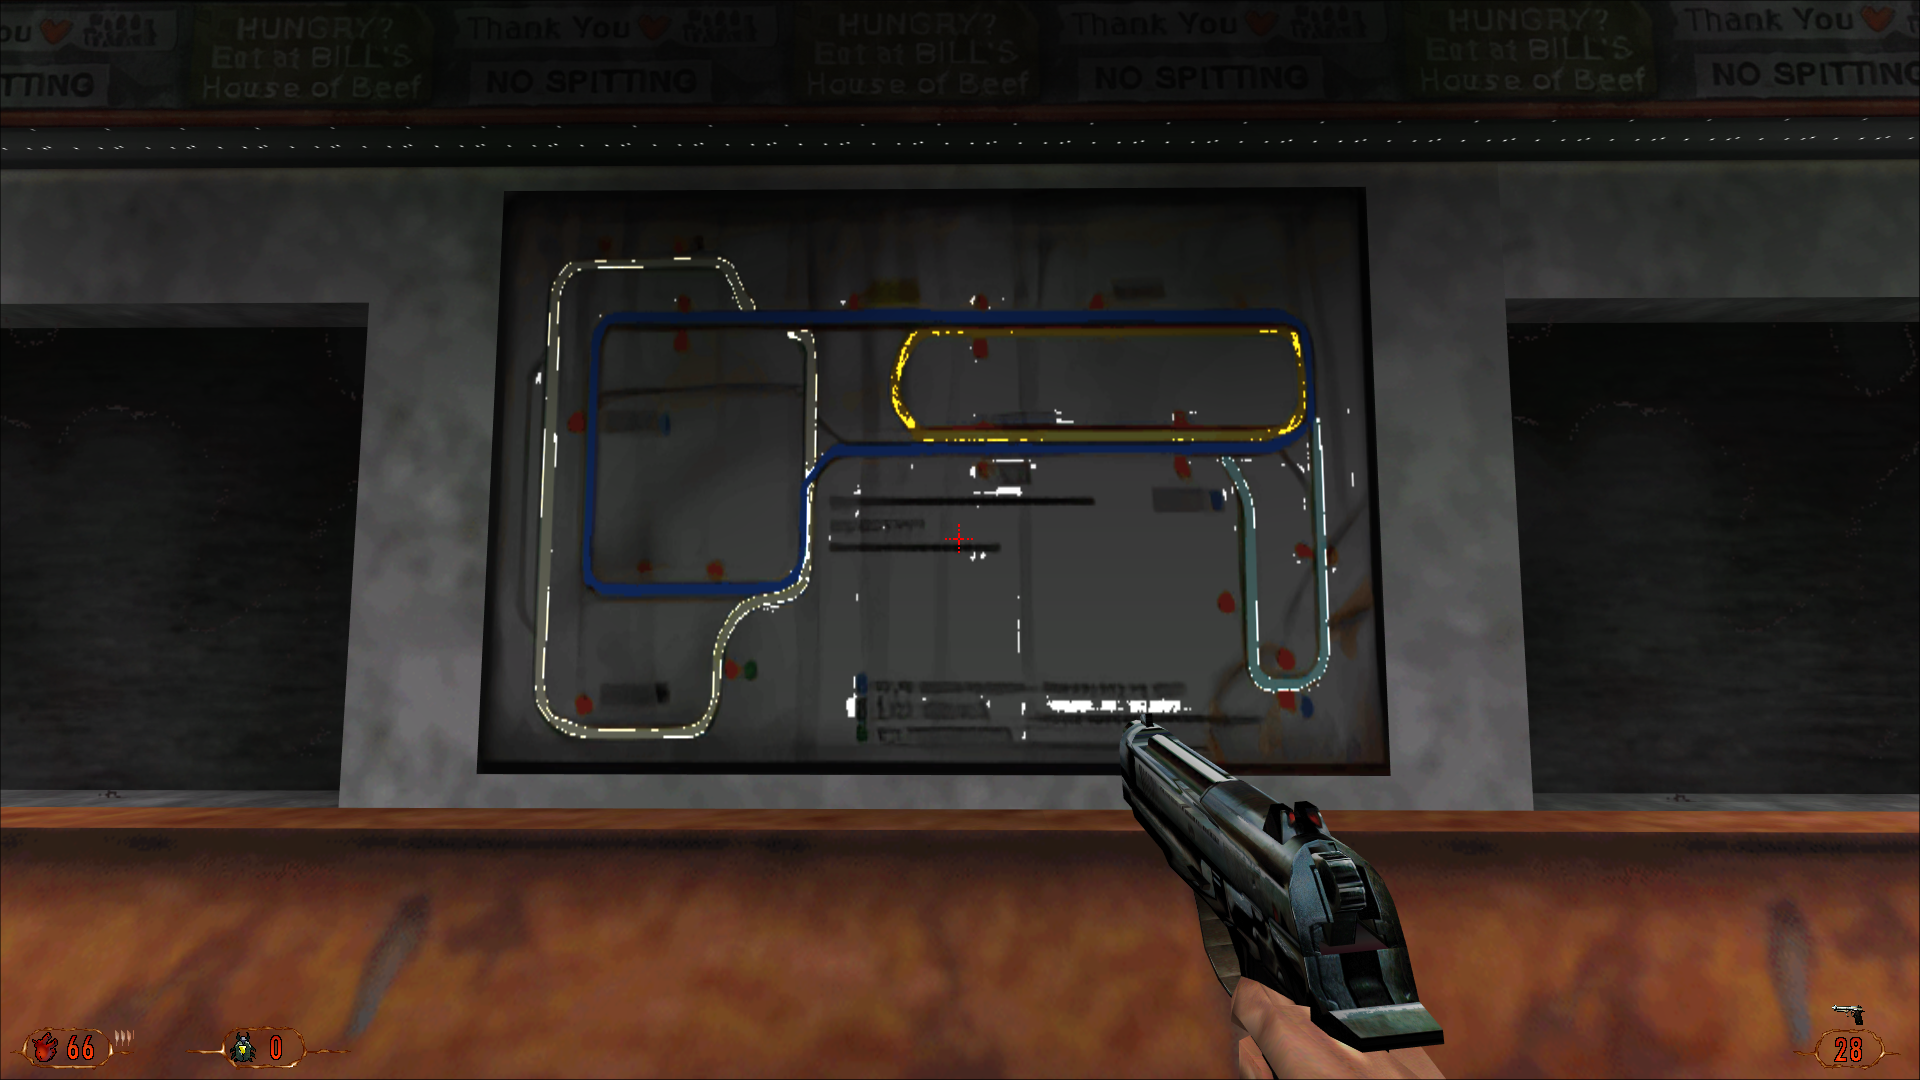
Everything looks great except for textures with lightning. That's because of DTX_FULLBRITE flag and the way it treats texture. If the flag is present - the game will not apply level light on it based on texture palette. I'm not 100% sure, but I suggest it is regulated by Software Alpha Cutoff DTX setting. The number in this parameter represent number of palette indexes that will be unlit upon rendering.
Before we do not bothered with original palettes, usual textures render properly anyway regarding of either original palette was used or not.
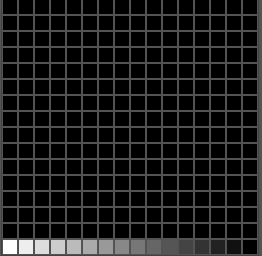
But If we open this original PNG file with DTX_FULLBRITE flag we well see that is uses this palette (I represented it as CLUT file)
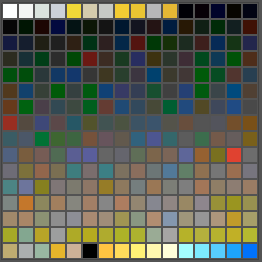
You apply this palette to your image, redraw areas that need to be unlit, load it ingame - and everything is broken again. That's because you need to use not this palette, but this

Looking familiar? Yes, because it's the same palette but with color indexes reversed. Those 8 pixels in the beginning (this texture has Software Alpha Cutoff = 8) represent the colors that will be unlit.
I don't know why and when it happens (I suggest upon importing in DEdit), but the palette you use become flipped in actual texture format. And if you once again export this texture - you'll found it not the way you imported it.
So all we need is to batch export correct palette from original textures to further use. And here comes the PAIN. ImageMagick, being veeeery useful tool, totally screw palette index order. There is some sort of internal reordering and there is no way you can turn it off. I found topics of people crying about it back from 2016 or sooner, but they didn't fixed it. So if you apply palette in ImageMagick - color order will be distorted and the game won't correctly render such texture with palette based effects being used.
So we need just to export the palette itself to be used in GIMP or Photoshop in compatible format (anyway you need to fix that textures by hand redrawing unlit ares, batch tools aren't helpful here).
By the way, if you want to export palette with fixed order from file using ImageMagick - it well reorder indexes (sic!). So we need to use this useful script which uses ImageMagick verbose mode and parse output to CLUT image. Like:
getColormap.bat FTRAINMAP3.PNG FTRAINMAP3temp.pngYou'll get CLUT in the form of 256x1 pixels![]()
IMPORTANT NOTE
On Windows 10 for some unknown reason if you try to batch process files, only the first line will be executed. So instead of
getcolor.bat test1.png test1-clut.png
getcolor.bat test2.png test2-clut.png
use
call getcolor.bat test1.png test1-clut.png
call getcolor.bat test2.png test2-clut.png
You can always convert such CLUT to 16x16 square just to be nice looking, but you don't need it anywhere in the process. Just in case
magick.exe FTRAINMAP3temp.png -crop 16x1@ -reverse +append FTRAINMAP3_16x16.pngNow we need to flip the pixels order and save it to ACT palette format which GIMP and Photoshop understands (actually it's just raw pixel data of 256 pixels)
magick.exe FTRAINMAP3temp.png -alpha off -flop rgb:FTRAINMAP3_palette.actThat's all, use this palette and repaint every texture with DTX_FULLBRITE flag (just 300 of them in Blood 2, heh).
In case you were wandering how the CLUT for this reversed palette is looking, you can see for yourself (once again, you don't need that, it's just an example)
magick.exe FTRAINMAP3temp.png -flop FTRAINMAP3inversed.png![]()
Upscaling DAT files
For your upscaled DTX textures to render properly ingame, you must upscale UV vectors inside levels. Structure of the DAT v56 file is slightly different than DAT v66.
struct WorldHeader header
struct WorldInfo info
struct WorldTree tree
struct DEBUG_BYTE
struct WorldModelHeader modelHeader
  struct WorldModel rootModel
    struct WorldBSP BSPData
      struct LTString WorldName
      struct WorldTexture WorldTextures
      struct Surface Surfaces[Y]
        struct LTVector UV1
          float x
          float y
          float z
        struct LTVector UV2
          float x
          float y
          float z
        struct LTVector UV3
          float x
          float y
          float z
        ushort Texture
  struct WorldModel model[X]
    struct WorldBSP BSPData
      struct LTString WorldName
      struct WorldTexture WorldTextures
      struct Surface Surfaces[Y]
        struct LTVector UV1
          float x
          float y
          float z
        struct LTVector UV2
          float x
          float y
          float z
        struct LTVector UV3
          float x
          float y
          float z
        ushort Texture
Most of the level is defined inside rootModel structure instead of just model[X] array. UV vectors and other parameters are the same. So I slightly modified upscaling script for 010 Editor for this particular version. Usage is similar
- Open script in 010 Editor
- Press F7
- Choose upscaling factor (4.0 for x4 textures)
- Choose files to upscale and folder to put upscaled files into
And it's done.
Transparent textures additional info
This part took me two months to solve. Lets' imagine we upscaled everything, exported and upscaled alphas, combined everything to REZ file and launching the game
It seems totaly broken. But why? We used proper alpha layer like this
And still it's not working. That's because the game uses two techniques for alpha/masked/transparent textures. I couldn't find the sign of the method used in texture properties so I guess it's somehow hardcoded in game engine. This methods are:
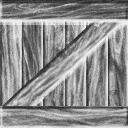
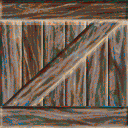
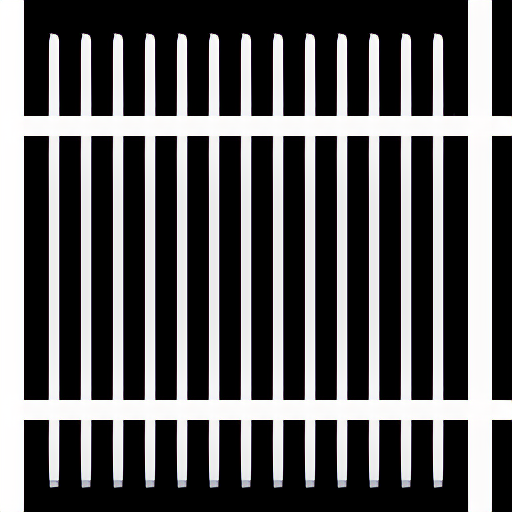
1. Using real alpha layer like the one on the last b/w picture with fence.
2. Using palette information with some color of the palette being the transparent mask. With this method alpha layer is also created and stored in texture, but it is not used by the game. Color used is usually black (000000), but it's not necessary the first color of the palette. Index could be anywhere be just have to manually check every texture. If there are several black colors, the first of them is used usually.
Example. Black color of the palette is the real mask
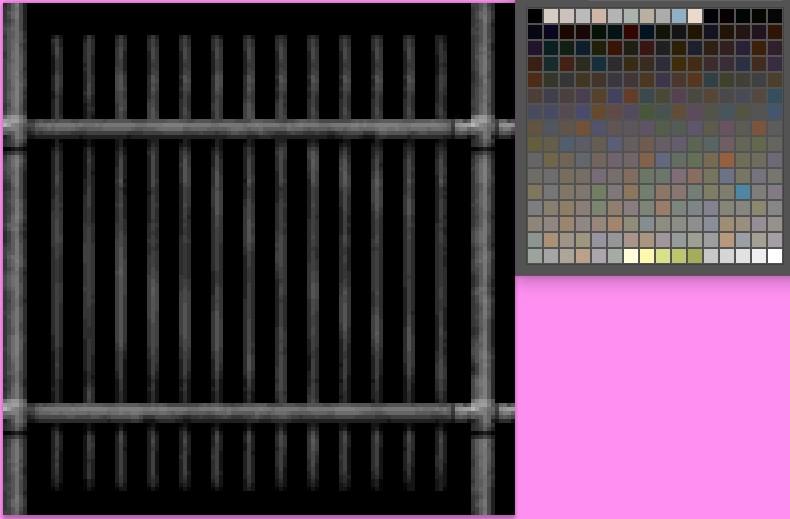
Yes, this black color (first index) represents transparency

So basically we use palette extraction and applying like in DTX_FULLBRITE section of the tutorial. Since it is not possible to say if texture will use this type of transparency - you need to open each original texture with DTX_ALPHA_MASK flag and check if some color of the palette will show anything. If it is - apply original palette and repaint pixels to match the mask. A lot of hand work, yes.
And not only that, I suggest you need to upscale and apply alpha layer as well even if texture uses palette-based transparency. Just to be sure.
There are not so much such textures, so its easier. But overall structure is very frustrating. It is very bad habit to not follow generally accepted palette transparency rules like using pink color for mask and making it the first color of the palette. Good example is Rune game - veeeeery strict, very organized in terms of textures structure.
PAN effect animation additional info
The game has PAN effect animation on almost every level. It's the effect of moving clouds, water, conveyors and so on. And the speed of this effect depends on texture size. So if we have 4x upscaled textures for clouds - they will be 4x faster. To fix this we need to divide effect parameters on level DAT files using hex editor.


Vietnam special ops was a fused software product that was based off the Shogo MAD engine, i.e. lithtech 1.0. It did have a dx7 renderer though, so it may have been capable of 32bit textures.
Sanity, akin's artifact was a monolith game using the lithtech 2 engine, probably the first title to do so. Despite this, SAA uses the same texture format as blood2, and you can view the games textures in dedit for b2 without any conversion.
They don't have so many formats so basically every game is just a combination of 3 types of DTX formats (1.0 for Shogo and Blood 2, 1.5 for Kiss and 2.0 for everything else) and several similar types of DAT with not so much changes.