Ok, for this tutorial I am only using a small document to save time on uploading images. The tutorial is only going to demonstrate a technique. First off open a document in photo shop, cs2 or any version above, 1024X800 pixels with a white background. Now create a layer (alt+shift+n). Now, before we start with the painting, I am going to select a custom brush I made. Brushes are made once you make a shape in another document, and press edit>define brush preset.
Now, select the brush and select the following settings.
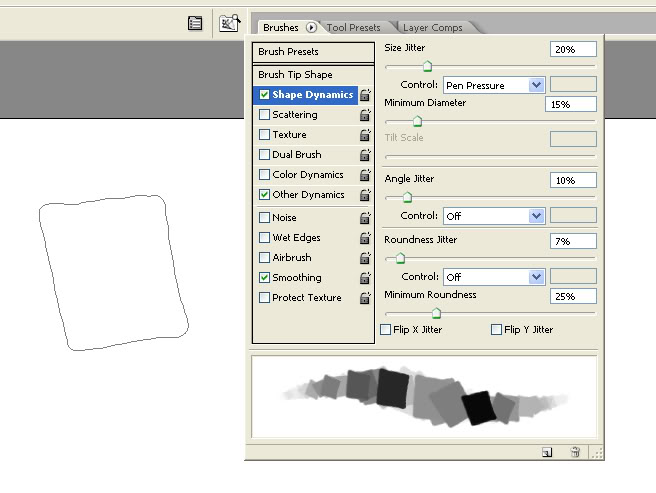
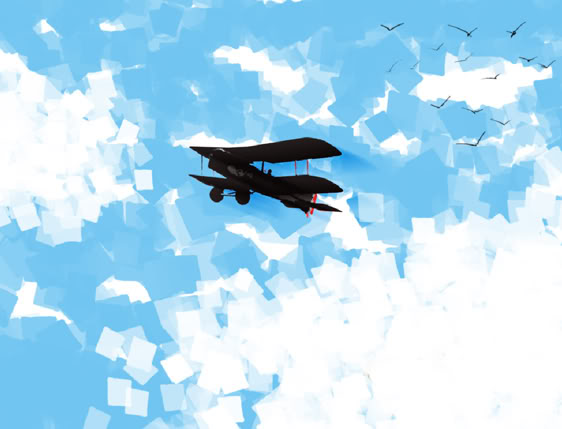
After setting the brush options, adjust your brush to a size you want. I choose a small size, around 70 pixels. The first step for this technique is to set your sky. I choose a blue brush, or any color that I want to show the mood I am trying to illustrate, and simply dot the brush around the screen...making sure to leave white spots as cloud areas. Remember the painting is only emotive, not realism based.
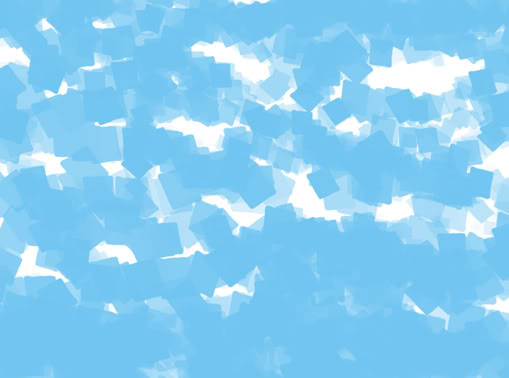
Now, click on the scatter setting in the brush options, and lower the count a bit whilst mainting a large scatter count of around 750%. With this, I paint in some large clouds.

Now, i have chosen a 2 pixel sized brush, with shape dynamics selected in the brushes options, with pen pressure being the control. Just flick your wrist side to side to get the appearance of birds floating on a draft of air.

The next part alot of people call cheating. But as picasso said, great artists cheat. And again, this painting is only to show a dramatic scene or composition. If you do enough of these speed paintings, they can become stills for a storyboard. So, here goes (and I will probably be flamed for doing this but its only to show scale and compostion) take this image, and take off the white around it using the magic wand tool, or for more precise ways, use the marquee selection tool and zoom into the image to get all the pixels you want.
Now, align and scale the image by using transform (cntrl+t). To match the rest of the painting, give the plane a cutout filter.
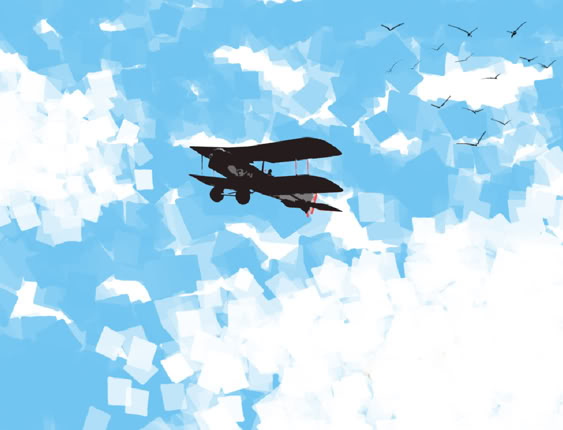
now duplicate that layer, and add a motion blur filter. Adjust the angle of the motion blur to suit the planes angle. now, move that layer back a bit behind the plane and set the layer blending mode to overlay.


Now, compress image by pressing cntrl+shift+e, and play with the image colors. I do this by playing around with image>adjustments>brightness and contrast or hue and saturation. Also, trying adding a photo filter in the same option list. Here is what I came up with.
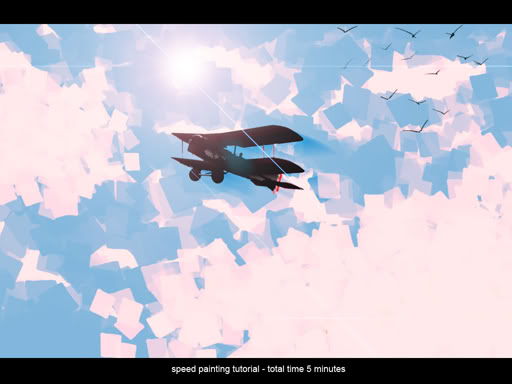
After playing with the colors, I put a border over the top and bottom, added some text to define the image and gave it a render filter>lens flare to simulate the sun kinda. Hope you learned something. Enjoy and please show me anything you come up with. Again, its a tutorial for a block brush technique to be used in speed paintings. This one took me 5 minutes..image what you could do in 10.