This tutorial was written to accompany this blog post: 3 Steps to Developing iPhone-Friendly Websites.
Bookmark icons are by far the easiest way to make your site appear to support mobile devices. They'll only waste a few minutes of your time and produce reasonably professional results. The bookmark icon is the image that appears when a user tries to set your website as a bookmark on their home screen from Safari, as seen below:
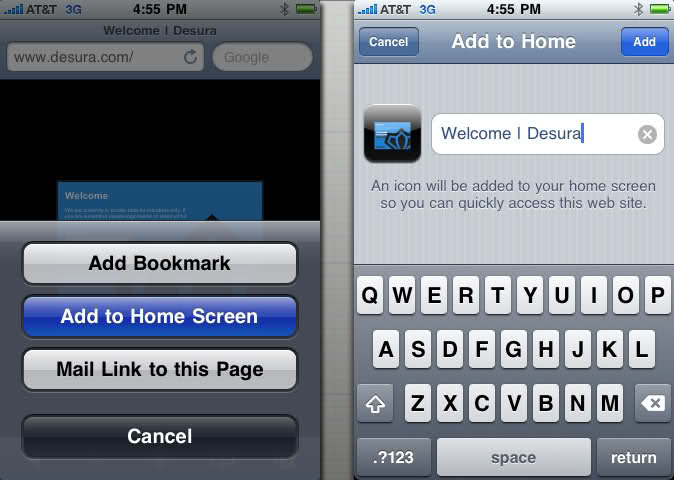
You'll notice that at first, the user will be given an icon with a preview of the site they're visiting. The visitor is able to "customize" this icon by zooming in and out of certain portions of the page. Since we're all about the user experience, we're going to void them of this creative effort by replacing it with a bookmark icon:

Actual size!
The first rule of this icon is that it must be 57x57 pixels with 90º angles. If you decide you're too good for the size parameter, the iProduct OS will resi your image. So essentially, any square will do, but if you want to optimize your pixel use and not rely on sketchy image resizing scripts, I suggest you stick to the parameters.
The second rule is that you avoid using any alpha transparency. Apple doesn't like it when it can't see what you're doing, so just play by the rules on this one.
As BuildInternet! describes in this article, there are two kinds of bookmark icons: glossy icons and precomposed icons. I prefer the latter, as I obsess over fine tuning the details. Here's the difference, in a nut shell:
Glossy
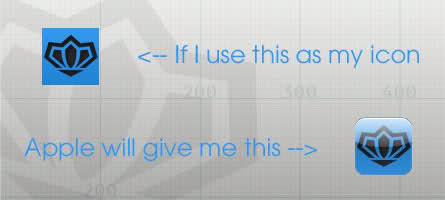
You may have been under the impression that all of those little icons on your home screen got their shine from the developers behind the application. In reality, Apple has implemented a simple processing system for these icons that renders that glare over the top of the icon:
To implement a static icon into your website, simply insert your image to one of the many tubes of the internet and enter this code in the head section of your site with all the other meta tags:
On the other hand, if you're too lazy or for whatever reason unable to edit the source code of the site, you can simply upload your image under the name 'apple-touch-icon.png' in the root directory and the iBrick will do the rest.
Precomposed
When you set your icon to be precomposed (also referred to as "freedom mode"), you're essentially telling the iObject that you don't want it to process your icon. This is especially useful if you either have dark elements in your icon that would be washed out by the glare, or if you're just a control freak. Using this option instead enables you to use glare, alpha transparency and all those other fun things that you were starting to miss at the beginning of this step.To specify that your icon is precomposed, the code to use is only slightly different:
Once again, if you are unable or humbled by the difficulties of pasting code into an HTML document, you can remedy your unreasonable fears by uploading your image under the name 'apple-touch-icon-precomposed.png' in the root directory.
That's it! If you'd like to learn more about iPhone website development, check out the blog post in its entirety here: 3 Steps to Developing iPhone-Friendly Websites.