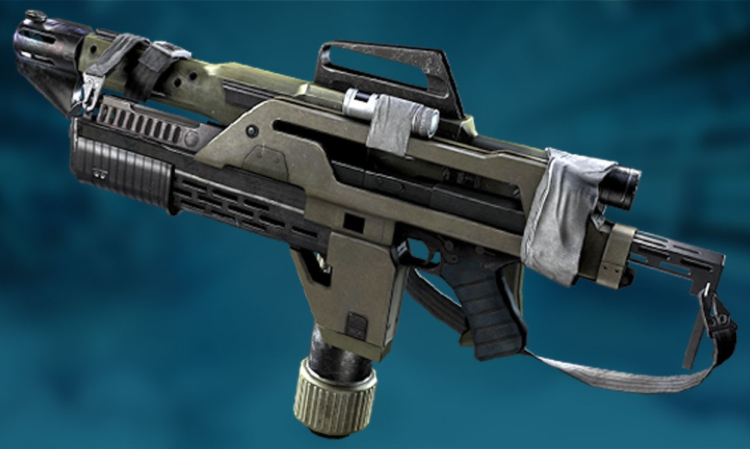
Duct tape is one of the most brilliant inventions of humanity.
Let's use it in DooM^3.
First, let us take a quick glimpse at entityDef weapon_machinegun in def/weapon_machinegun.def file:
// -------------------------------------------------------------

"weapon_light" "flashlight" // Prefix

// -------------------------------------------------------------

"flashlight_joint" "bod" // weapon joint to which this light will be attached to

"flashlight_shader" "lights/gunlight.tga"

"flashlight_color" "1 1 1"

"flashlight_radius" "640"

"flashlight_alwaysOn" "1"

"flashlight_target" "960 0 0"

"flashlight_up" "0 640 0" //8 8

"flashlight_right" "0 0 640"

"flashlight_pointLight" "0"

"flashlight_noShadows" "0"

// -------------------------------------------------------------


// -------------------------------------------------------------

"weapon_particle" "flashworld" // This name will be used in the script, by Clone-JCD

// -------------------------------------------------------------

"flashworld_joint" "barrel" // weapon bone to which the particle is to be attached.

//"flashworld_weaponDepthHack" "1" // if set, particle never clips thro' walls

"flashworld_onWorldModel" "1" // Means, this is a third person only effect.

"flashworld_offset" "6.7 0 0.2" //6.7 0 0.2 // Correction to be added to the weapon bone

"flashworld_dir" "1 0 0.03"// 1 0 0.03 // direction of weapon bone is modified by this amount

"flashworld_particle" "flashmodworld.prt"

// -------------------------------------------------------------


// -------------------------------------------------------------

"weapon_particle2" "flash"

// -------------------------------------------------------------

"flash_joint" "barrel" //"bod"

"flash_weaponDepthHack" "0"

"flash_offset" "0 0 0" //5 0 0

"flash_particle" "flashmod.prt"

// -------------------------------------------------------------
There you have:
- A flashlight .tga file. Author if it is Glen Murphy, known for his Duct-Tape mod.
- A model of a light cone and particle effect taken directly from shotgun-hack by Vikram Jadhav.
As you can see, for each component we need to define:
- Weapon bone/joint from where we'll take our attachment position. If you're not sure about it, open up a game, load map test/test_box, give yourself desired weapon and then set r_showSkel to 1.
- Color and radius ( for example, if we'd like to have a red laser-sight, we'd set color to 1 0 0. )
- It's target, where we also set it's range ( for example 960 units ).
- Up and Right sets our .tga stretch. For example, if we'd like to have small laser-sight dot it'll be smaller values as well.
- For 3D models, like the flashlight cone, we also need to define it's offset ( in. e. so it won't stay inside a weapon ) and angle.
- For more info, check out Iddevnet.com
We also need to have muzzle-flashes. You know, for shooting.
Good Ol' Duct-Tape mod used such a hack, that it replaced muzzleflash with flashlight .tga file and set it to be on for all times, so there were no flashes when shooting. Here we have more options, but also more responsibility, as everything is manual.
// -------------------------------------------------------------

"weapon_particle3" "flashfx_left" // This the effect name and must be used as prefix for keys below

// -------------------------------------------------------------

"flashfx_left_joint" "barrel"

"flashfx_left_weaponDepthHack" "1"

"flashfx_left_continuous" "0"


"flashfx_left_offset" "0 .5 -.9"

"flashfx_left_particle" "machinegun_flash_half.prt"

// -------------------------------------------------------------


// -------------------------------------------------------------

"weapon_particle4" "flashfx_right"

// -------------------------------------------------------------

"flashfx_right_joint" "barrel"

"flashfx_right_weaponDepthHack" "1"

"flashfx_right_continuous" "0"

"flashfx_right_offset" "0 0.5 .9"

"flashfx_right_particle" "machinegun_flash_half.prt"

// -------------------------------------------------------------


// -------------------------------------------------------------

"weapon_particle5" "flashfx_left_world"

// -------------------------------------------------------------

"flashfx_left_world_joint" "barrel"

"flashfx_left_world_onWorldModel" "1"

"flashfx_left_world_offset" "0 0 -1.1"

"flashfx_left_world_particle" "machinegun_flash_half_world.prt"

// -------------------------------------------------------------


// -------------------------------------------------------------

"weapon_particle6" "flashfx_right_world"

// -------------------------------------------------------------

"flashfx_right_world_joint" "barrel"

"flashfx_right_world_onWorldModel" "1"

"flashfx_right_world_offset" "0 0 .7"

"flashfx_right_world_particle" "machinegun_flash_half_world.prt"

// -------------------------------------------------------------
Having those defined, lets proceed to script/weapon_machinegun.script
1'st, let's add
void ToggleOnOff(); function declaration to object weapon_machinegun : weapon_base and then define it below:
void weapon_machinegun::ToggleOnOff() {

playAnim( ANIMCHANNEL_ALL, "switch" );

waitUntil( animDone( ANIMCHANNEL_ALL, 0 ) );

//If your model don't have special "switch" animation, you may use following:

//sys.wait( 0.1 ); // Wait some time, so that ToggleOnOff executes only once as changing the state requires time. By Clone-JCD


if($player1.getKey("mgunlight") == "0")

//I'll explain it in a moment.

{

//startSoundShader( "player_flashlight_on", SND_CHANNEL_ITEM );


//It's used when you don't have a special animation with sound bound to it.

//Remember that those sounds need to be defined in sound/weapons.sndshd

startWeaponLight( "flashlight" );

startWeaponParticle( "flash" );

startWeaponParticle( "flashworld" );

$player1.setKey("mgunlight","1");

}else {

// startSoundShader( "player_flashlight_off", SND_CHANNEL_ITEM );

//Same thing

stopWeaponLight( "flashlight" );

stopWeaponParticle( "flash" );

stopWeaponParticle( "flashworld" );

$player1.setKey("mgunlight","0");

}

weaponState( "Idle", 2 );

//That tinkers with animation cycles and look's like the Marine switched something, even without dedicated animation

}
As you can see, we refer to the Player class here. It's used for the weapon to remember which light was on or off, and we don't need to turn it on again after weapon change.
Actually making it work is very easy. We need to add boolean mgunlight to object player : player_base in script/ai_player.script and, best, initialize it with zero when player::init.
Let's take a look @ void weapon_machinegun::Raise()
if($player1.getKey("mgunlight") == "1")

{

startWeaponLight( "flashlight" );

startWeaponParticle( "light" );

startWeaponParticle( "lightworld" );

}
Adding it will fix the weapon "forgetting" about it's light.
Lastly, to execute our function, we'll add
if ( WEAPON_SPECIAL && !sys.isMultiplayer() ) {
weaponState( "ToggleOnOff", MACHINEGUN_IDLE_TO_RELOAD );
}
to the while(1) loop in void weapon_machinegun::Idle()
WEAPON_SPECIAL is a default alt-fire button in DentonMod, usually bind to middle mouse button.
More info on the subject: Iddevnet.com
All right... almost everything done. Let's add those muzzle flashes and call it a day:
- find launchProjectiles( MACHINEGUN_NUMPROJECTILES, currentSpread, 0, 1.0, 1.0 ); line in void weapon_machinegun::Fire()
- and put some stuff before and after it, so it looks kinda like this:
startWeaponParticle("flashfx_right");

startWeaponParticle("flashfx_left");

startWeaponParticle("flashfx_left_world");

startWeaponParticle("flashfx_right_world");

launchProjectiles( MACHINEGUN_NUMPROJECTILES, currentSpread, 0, 1.0, 1.0 );


owner.startSoundShader( "player_machinegun_fire" , SND_CHANNEL_WEAPON );

playAnim( ANIMCHANNEL_ALL, "fire" );

while( !animDone( ANIMCHANNEL_ALL, MACHINEGUN_FIRE_TO_IDLE ) ) {

/*

here's

some

stuff

and calculations

*/

}

stopWeaponParticle("flashfx_right");

stopWeaponParticle("flashfx_left");

stopWeaponParticle("flashfx_left_world");

stopWeaponParticle("flashfx_right_world");
As you can see, we need to start muzzle-flashes manually.
And that's it. You've got yourself MG with a flashlight.
Have a good one!
_________________________________________________________
Special thanks goes to:
Vikram Jadhav, for creating this system and for the well commented code.
Glen Murphy, for the original Duct-Tape mod idea.
Cheers!
Hmm. Very interesting stuff here. Gives me ideas to apply similiar coding definition methods for other Doom 3 assets. iDTech4 is a glorious engine.