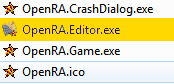
First of all, go into your OpenRA directory and run the Editor.
Since I am the author of the "crossfire" mod, I will select the crossfire mod from top right of the window that just opened up. You can feel free to select any mod. I believe that the way OpenRA has been coded, this will work with any mod, provided it has been installed, so if you are going to make a map for my mod, install that mod first.

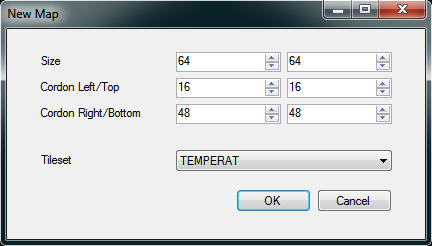
Now select any map with dimensions divisible by 8. Since this is a practice map, I will keep the dimensions very small. I recommend going for 128 x 128 at least so that you have more to do. The bigger it is, the more fun the game is.
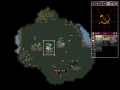
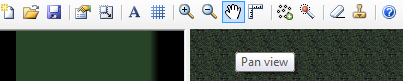
Now pan the view to come to the center of the map using the pan tool. There are other icons there on the toolbar which are self explanatory.
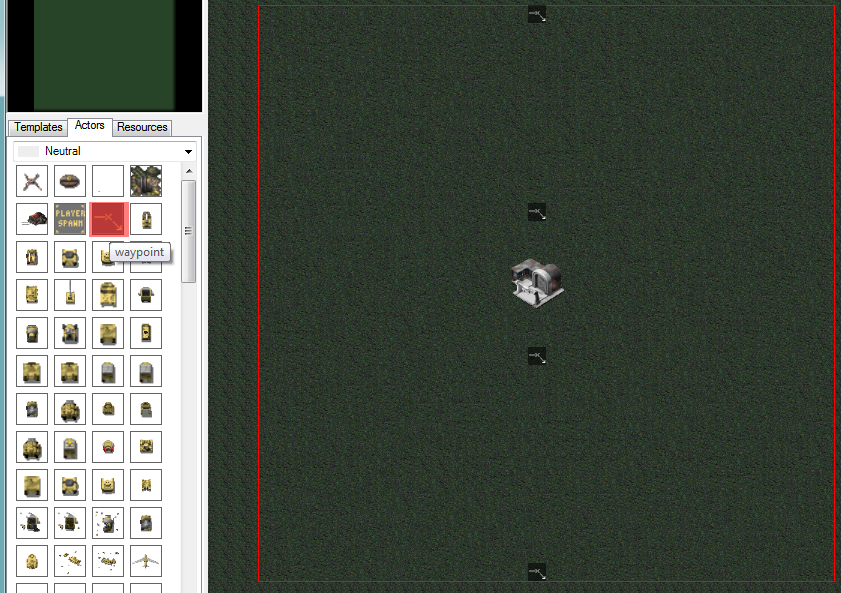
Now select the construction yard (fact) from the Actors tab towards left and place it roughly in the center of the map. If you are unable to place it, be sure to deselect the pan tool first. Once placed, you can right click to deselect the construction yard.

Now we will insert 4 waypoints. The order is not that important, just place the points and save the map. You can give it any name and right now I am giving it the name of tutorialmap. Make sure that you note down the place it is being saved.
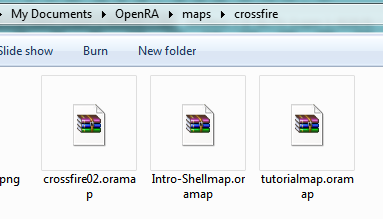
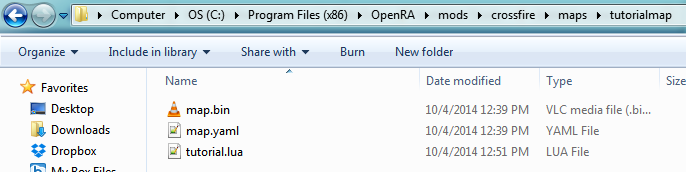
Now open the crossfire mod folder (or any other mod for which you are making the map) in another window then open the maps folder and create a new folder. Name it tutorialmap and open it. Your map file is basically an archive containing two files: map.bin and map.yaml. You can open the files with any archiving software like winrar and extract the contents to the tutorialmap folder.
The map.bin contains the map resources while the map.yaml contains the definition of these resources. Now create a text file and rename it as "tutorial.lua". This will be our code file and will contain all the scripts required to make the map work.
map.yaml
Now open map.yaml in any text editor (I personally prefer notepad++) and make the following changes:
MapFormat: 6

RequiresMod: crossfire

Title: Tutorialmap

Description: This map was created as a tutorial for map making. See the OpenRA Wiki for tutorial.

Author: Umair Azfar Khan

Tileset: TEMPERAT

MapSize: 64,64

Bounds: 16,16,32,32

UseAsShellmap: False

Type: Campaign
The important points to note are, Selectable: False, which means that it cannot be selected in multiplayer games and UseAsShellmap: False, which means that it will not be loaded when the mod starts. Setting Type: Campaign, means that it will only be shown among the list of singleplayer maps. The rest of the changes are self explanatory. You can change them as you see fit. Now to add some Options:
Options:
    Crates: False
    Fog: True
    Shroud: True
    AllyBuildRadius: False
    FragileAlliances: False
    StartingCash: 5000
    ConfigurableStartingUnits: False
These details are also self explanatory so we move on. Just change the players as this:Players:
    PlayerReference@INDIA:
        Name: INDIA
        Race: soviet
        ColorRamp: 135,255,100
        Enemies: PAKISTAN
    PlayerReference@Neutral:
        Name: Neutral
        OwnsWorld: True
        NonCombatant: True
        Race: allies
    PlayerReference@PAKISTAN:
        Name: PAKISTAN
        Playable: True
        AllowBots: False
        Required: True
        LockRace: True
        Race: allies
        LockColor: True
        ColorRamp: 100,255,100
        LockSpawn: True
        LockTeam: True
        Enemies: INDIA
We just defined the neutral player and Pakistan and India as the two factions. If you open any RA mod single player map, you will see that I have replaced soviet with INDIA and allies with Pakistan. You can change them back to soviet and allies if you wish for the RA mod.
Actors
My actors are defined like this:
Actors:
    Actor0: fact
        Location: 30,30
        Owner: Neutral
    Actor1: waypoint
        Location: 31,16
        Owner: Neutral
    Actor2: waypoint
        Location: 23,27
        Owner: Neutral
    Actor3: waypoint
        Location: 23,47
        Owner: Neutral
    Actor4: waypoint
        Location: 23,35
        Owner: Neutral
I now rename them for my convenience so that I have their names like this:Actors:
    Outpost: fact
        Location: 30,30
        Owner: PAKISTAN
    IndiaEntry: waypoint
        Location: 31,16
        Owner: Neutral
    IndiaRally: waypoint
        Location: 31,27
        Owner: Neutral
    PakEntry: waypoint
        Location: 31,47
        Owner: Neutral
    PakRally: waypoint
        Location: 31,35
        Owner: Neutral
Outpost specifies that this is the base that we have set up. See that its Owner has been changed to Pakistan. Since the user will be playing as Pakistan in this map, so he will have direct control of this Actor. India Entry tells from where the Indian forces will enter the map or spawn on the map and IndiaRally is the point to which they will run and stand. Same goes for PakEntry and PakRally. The Location attribute signifies the x and y location.If you remember, we had placed the waypoints at the same location horizontally, but vertically they were at different y values. The higher the y value, the lower we will be on the map. So here the Indian forces will enter from top, while Pakistani forces will enter from bottom. This ends what we need to do in map.yaml. Similarly, you can add more actors and waypoints, something you will learn as you make the map.Now finally we define the rules as to how this map will play out:
Rules:
    Player:
        -ConquestVictoryConditions:
    World:
        -CrateSpawner:
        -SpawnMPUnits:
        -MPStartLocations:
        LuaScriptInterface:
            LuaScripts: tutorialmap.lua
The only thing of any significance here is that we define the lua script that we will use. So now, we move on to the lua file itself.
tutorialmap.lua
Keep the name of the file exactly like the name of the map itself or the folder that we defined. I ran into problems while making this tutorial and changing the name solved my problem. In short, keep the map name, folder name and the lua name, the same. You can open this file in any text editor of your choosing and start coding.
Setting up the world
We first define what the world will contain and the mission ending situations
WorldLoaded = function()
    player = OpenRA.GetPlayer("PAKISTAN")
    india = OpenRA.GetPlayer("INDIA")

    Actor.OnKilled(Outpost, MissionFailed)
end
This code is pretty simple. You acquire the two teams which will be taking part in this map. Player is Pakistan while india is... INDIA or the opponent.Actor.OnKilled(Outpost, MissionFailed) means that if the Outpost is killed, the MissionFailed function will be called, thus terminating the mission. But we have not defined the MissionFailed function so lets do that on top of the WorldLoaded Function like this:
MissionFailed = function()
        Mission.MissionOver(nil, { player }, false)
end

WorldLoaded = function()
    player = OpenRA.GetPlayer("PAKISTAN")
    india = OpenRA.GetPlayer("INDIA")

    Actor.OnKilled(Outpost, MissionFailed)
end
But what can be the condition for making the mission successful? There can be any condition. Lets make it so that if the user survives for 1 minute, the mission is a success! So define Missi * 60 on the top of the file:
MissionSuccessDelay = 25 * 60

MissionFailed = function()
        Mission.MissionOver(nil, { player }, false)
end

WorldLoaded = function()
    player = OpenRA.GetPlayer("PAKISTAN")
    india = OpenRA.GetPlayer("INDIA")

    Actor.OnKilled(Outpost, MissionFailed)
end
The game runs at 25 frames per second, so 25 * 60 means 60 seconds. now finally do define MissionAccomplished function:
MissionSuccessDelay = 25 * 60

MissionAccomplished = function()
    Mission.MissionOver({ player }, nil, false)
end

MissionFailed = function()
        Mission.MissionOver(nil, { player }, false)
end

WorldLoaded = function()
    player = OpenRA.GetPlayer("PAKISTAN")
    india = OpenRA.GetPlayer("INDIA")

    Actor.OnKilled(Outpost, MissionFailed)
        OpenRA.RunAfterDelay(MissionSuccessDelay, MissionAccomplished)
end
We have added another line within WorldLoaded functionOpenRA.RunAfterDelay(MissionSuccessDelay, MissionAccomplished)
This lines tell the game that it should run the MissionAccomplished function after the delay defined in MissionSuccessDelay variable.So now, if the outpost is destroyed, the mission will fail and if we manage to survive for 1 minute, the mission will be a success. now we will define the forces that will take part in this mission.
Defining forces
First of all, we define the variables for Pakistani reinforcements:
JeepReinforcements = {"jeep", "jeep", "jeep"}
JeepDelay = 25 * 12
JeepInterval = 25 * 2
So we will get 3 jeeps after a delay of 12 seconds and the jeeps will arrive 2 second apart. We now define the function that will be used to send jeeps.
SendJeeps = function()
    Media.PlaySpeechNotification("ReinforcementsArrived")
    Reinforcements.Reinforce(player, JeepReinforcements, PakEntry.Location, PakRally.Location, JeepInterval)
end
The first line will play the notification that the reinforcements have arrived. The second like tells that the reinforcements will arrive for player, they will compose of what has been defined in JeepReinforcements. If you remember, PakEntry and PakRally were the waypoints we defined on the map. So the reinforcements will arrive from the Entry point and move to the Rally point one by one with the interval defined in JeepInterval.Now we define the Indian forces. Add the following code on top:
ForceDelay = 25 * 15
Force = { "e1", "e1", "e1", "e1", "e2"}
ForceInterval = 25 * 2
now define the Indian reinforcement function:
SendIndianInfantry = function()
    Reinforcements.Reinforce(india, Force, IndiaEntry.Location, IndiaRally.Location, ForceInterval)
    OpenRA.RunAfterDelay(ForceDelay, SendIndianInfantry)
end
The first line is same as before. The second line tells the game to call this function again. The delay we defined was for 15 seconds, so new reinforcements will arrive every 15 seconds. Finally call this function within the WorldLoaded function to complete this code. Hence the complete code for this map will come out to be:
MissionSuccessDelay = 25 * 60
JeepReinforcements = {"jeep", "jeep", "jeep"}
JeepDelay = 25 * 12
JeepInterval = 25 * 2

ForceDelay = 25 * 15
Force = { "e1", "e1", "e1", "e1", "e2"}
ForceInterval = 25 * 2

SendJeeps = function()
    Media.PlaySpeechNotification("ReinforcementsArrived")
    Reinforcements.Reinforce(player, JeepReinforcements, PakEntry.Location, PakRally.Location, JeepInterval)
end

SendIndianInfantry = function()
    Reinforcements.Reinforce(india, Force, IndiaEntry.Location, IndiaRally.Location, ForceInterval)
    OpenRA.RunAfterDelay(ForceDelay, SendIndianInfantry)
end

MissionAccomplished = function()
    Mission.MissionOver({ player }, nil, false)
end

MissionFailed = function()
        Mission.MissionOver(nil, { player }, false)
end

WorldLoaded = function()
    player = OpenRA.GetPlayer("PAKISTAN")
    india = OpenRA.GetPlayer("INDIA")

    Actor.OnKilled(Outpost, MissionFailed)
    OpenRA.RunAfterDelay(JeepDelay, SendJeeps) --Sending Allied reinforcements
    OpenRA.RunAfterDelay(ForceDelay, SendIndianInfantry) --Sending Indian ground troops every 15 seconds
    OpenRA.RunAfterDelay(MissionSuccessDelay, MissionAccomplished)
end
Phew! That was a bit long don't you think? Well, you do not need to make the map in one sitting so work on it for a few minutes then come back to it later to add more stuff. This is the bare minimum code to get you started and you can learn more by opening the many single player maps that come with OpenRA and reading their code. BUT! the final step is still remaining, so we go to the crossover mod folder and open the missions.yaml file.
missions.yaml
This file contains the name of the maps that can be played as singleplayer missions. We add the name of our map here:
Missions:
    mods/crossfire/maps/crossfire01
    mods/crossfire/maps/crossfire02
    mods/crossfire/maps/tutorialmap
Running the mission
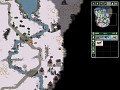
Now we come to running the mission. Start OpenRA and fire the mod for which you made this map. Since I made it for my crossfire mod, I fire it up to get this green interface. Select Single Player -> Missions and then you will see the Tutorial map in the list of missions.
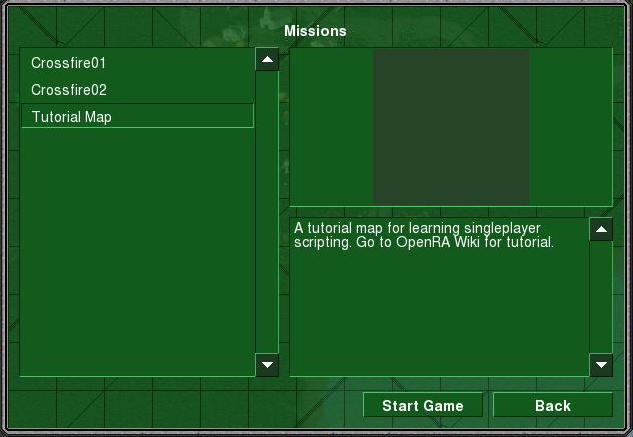
Select it and press Star Game to play your map. As we have programmed, the reinforcements will arrive at the 12 second mark and the Indian infantry will start arrive every 15 seconds. If they manage to destroy your construction yard, the mission will end in failure, but if you hold them off for 1 min, the mission will be a success! I do hope that this will get you started in making great maps and provide a lot of interesting single player maps.
- made by Umair Azfar Khan