Tutorial originally posted on Massassi.net. Mirrored here for archival purposes.
Water Tutorial
Along the way of creating water, this tutorial covers:
- Creating joined rooms
- Adding a translucent polygon between sectors
- Adding Fog
- Creating A Water Flagged Sector
So you want to make some water? Well, before you start this tutorial, you should be familiar with adding and using entities And creating conus primitives, as well as being familiar with the editor.
To start out, make a simple conus primitive that is 40x40x40. Rather large, perhaps, but its just a tutorial. Texture it if you wish. Make sure to turn off shadows for now.
Here is what mine looks like:
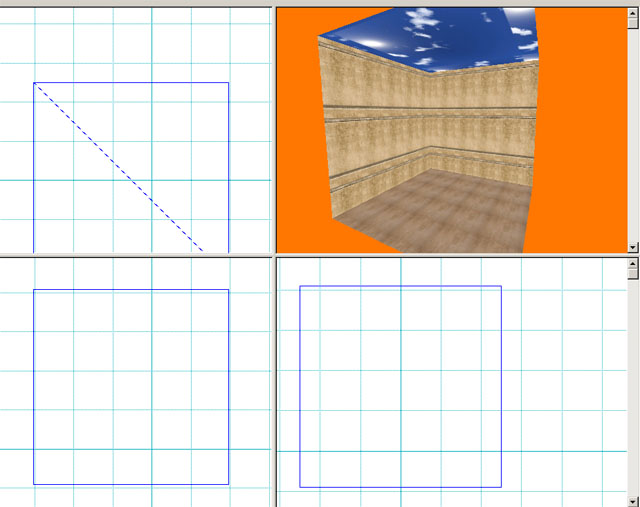
Now create another conus primitive right below it. Make its size be 20w x 20h x 40L, and put it right below the main room. DO NOT ADD IT YET. First line up the bottom of our first room with the top of this room. It may become necessary to zoom in a bit using CRTL+RMB on one of the 2d windows. Now that its lined up, MAKE SURE that you have the same layer selected as the original first room is on. This is important when applying this technique in other instances, but right now we only have one layer anyhow. Now go ahead and add the second room to the worldbase. You should now have this:
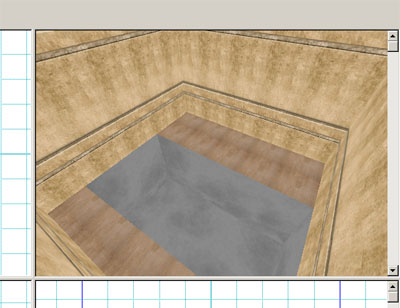
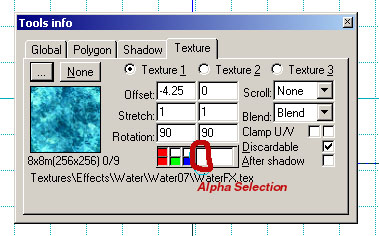
Now we are pretty much done with architecture. All thats left is actually MAKING the water! Navigate Your 3d view down to just above where the water surface should be. Hold down the shift key and right click on where the surface should be. Then go underneath the surface and use SHIFT + RMB for the opposite side of the surface. Now that they are both selected, open up the Valley of Kings texture set, and select the one that looks like water( WaterFX.tex ). Don't deselect your surfaces yet. Now open up the info/properties/tools panel by either pressing [Q] or by click View > Info Window. On the "polygon" tab, check the box marked Translucent, then select water from the surface tab. On the Shadows Tab, select Blend from the Blending Drop-down box. On The Textures Tab, change the alpha value. 90-125 seems to work for me.
Our water now has a surface! Now to make the engine actually see the water, as well as add some good effects. Go down underneath the water in 3d view, and select all of the surfaces except the water surface. In the tools info box, click on the textures tab and then click on the radio marked "Texture2". Then double click on underwater04/texture.tex from the Valley of the Kings set. Now your walls will appear to shine with the reflections of the surface. THE NEXT STEP IS THE MOST IMPORTANT.
To make the engine actually consider your water room as water, it needs to be flagged. Use the [S]key to go into sector mode, then select your water room. In the Tools/Info Dialog, go to the "Sector" tab. Under the "Content" Drop down box, select "water". In the "environment" drop down box, select "underwater". Tada! If you were to start your level right now, you would have water. But everyone knows water has a certain haze to it... so we must now apply FOG to recreate it.
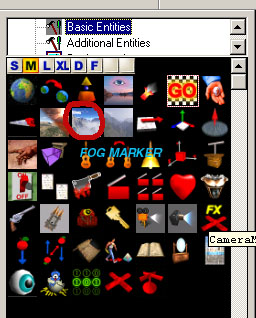
In your resources box, select "Basic Entities", and drag a fog marker into your world. Place it just above the water, and right in the middle, as shown in the picture.
NOTE: If you can not see the fog marker or the fog, right click on a pane and click on View Properties, then check the checkboxes that say "render editor models" and the one that says "render fog".
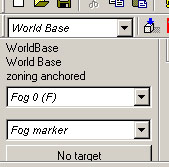
Go into entities mode using [E], then select your worldbase entity. Go to the properties section and select Fog(0) from the drop down box. From the dropdown box below that, select "fog marker".
Now go into sector mode with [S]. Select the top sector (the one where we DON'T want fog), and in the tools/info Dialog ([Q]) under the "sector" tab select "marker not set" under the fog dropdown box.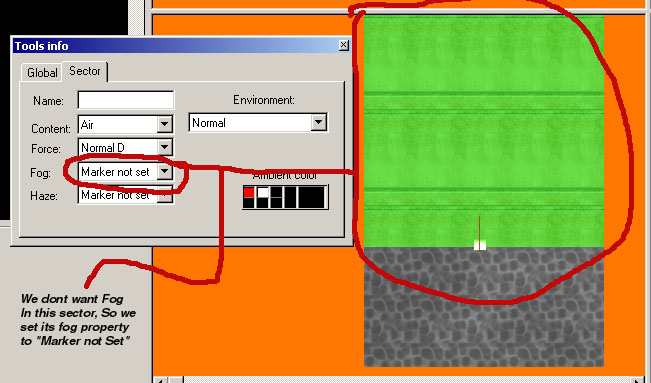
Now go back to entity mode and select the fog marker. Under the properties section (same one as the picture two pictures above, except now the marker entity is selected) select color and change it to a healthy light blue. Then select density and change it to 0.06 or 0.05. Since our water room was 20 units deep, select depth from the properties section and change it to 20.
NOTE: When dealing with fog in general, its important to understand that the fog will appear below the marker. Therefore, if you rotate the marker upside down, the fog will begin on top of the marker. Also remember that the fog will only display in sectors where it is enabled, and that it can only be enabled in sectors where the parental entity has the marker selected in the properties section under fog(0)-fog(10) or whatever. This may seem hard to understand now, but will become easy to understand as you become more experienced with the editor.
If all went right, you now have this:

Congratulations on making water! If you want to test your level, simply drag a player marker from the basic entities section onto your map, and press [T].
- oSiRiS