Tutorial originally posted to Massassi.net. Mirrored here for archival purposes. I've backed up the example file made for this tutorial here Moddb.com
Understanding and Using Triggers and Switches
This tutorial will cover:
- Triggers
- Switches
- Moving Brushes
- TouchFields
Before you start with this tutorial, you should first have read and understood the basic mapping and doors tutorials, because this will build on those two. You should also be pretty familiar with the editor by now, and I'm not going to be kind and gentle about already established things. :)
This tutorial will cover a lot of explaining, but we need a goal, so the goal is to create a moving brush object with two controller buttons, and the buttons will move in an out as you move it.
THE IDEAS IN THIS TUTORIAL CAN BE APPLIED TO OTHER THINGS!
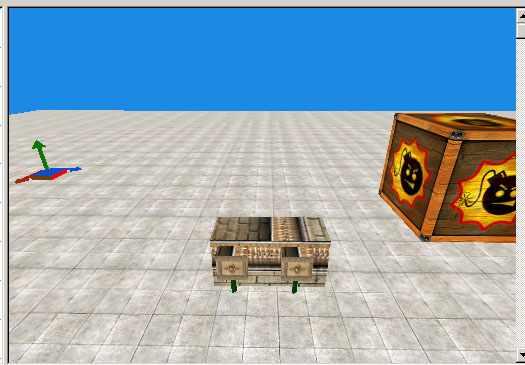
To start out, lets create a conus primitive, dimensions 100 x 100 x 100, turn off shadows, texture the floor, and set the walls and ceiling to invisible in the properties dialog ( [q] ). I recommend you go into world settings and change the World Background to light blue. This will help for visibility.
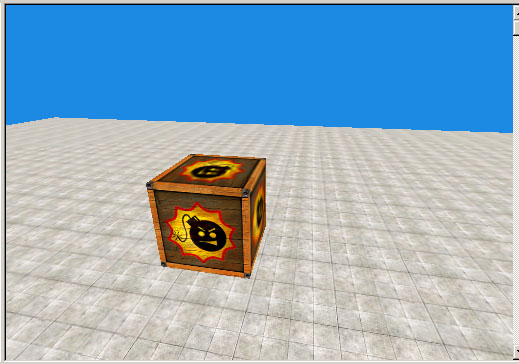
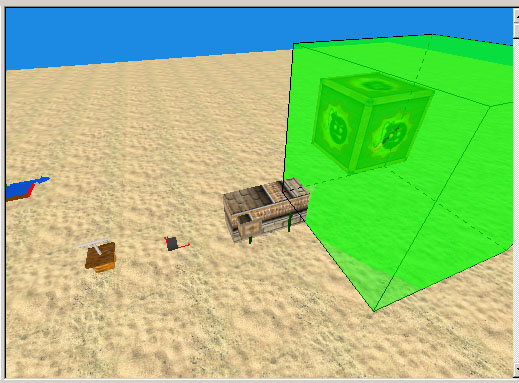
Now we have a basic platform, very large. Drag a player start onto the grid near the ground in the middle. Now drag a movingbrush entity onto the grid from the basic entities in the browser. With the movingbrush entity still selected, create a solid ( room flag NOT checked ) conus primitive 5 x 5 x 5 ( do not add it yet ). Move the primitive so that the little world icon is in the center of the conus ( if you cant see the world, press 0, or change the view properties and check off "render editor models" ), and once it is centered properly, add it to the movingbrush entity ( [+] ). Here's what I have so far:
With the movingbrush selected in entity mode ( [e] ) press [d] to drop a marker. Now move the movingbrush a ways and drop another marker with [d]. Now press ALT+[d] to check the marker links, or you can also press the check links button. Your brush should move back and forth. Go into the properties section and name it "crate" under the name parameter ( You will want to name it, because you will become confused later ). Now select the markers and go into properties section and check off the "Stop Moving" property. Now we've got our thing we're going to activate. Don't understand? A movingbrush can be activated like many things in Serious Sam, and when we trigger our moving brush with something else, it will move. This is basically what a door controller does when you enter its space. I think.. :-) This whole tutorial is based on my understanding from experimenting with triggers and switches, so its not guaranteed to be correct. :-)
Now lets create some pedestals for our switches. Select the worldbase again and create a new conus. Make the dimensions 4w x 1.5l x 2h. Place it on the ground in the middle of the path of the crate, off to the side. Like this:
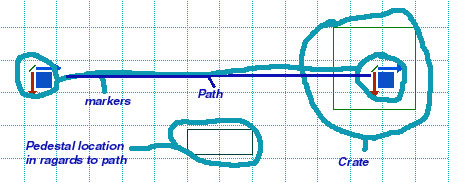
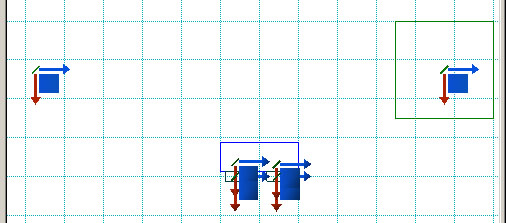
Now add it to the worldbase ( [+] ). Now we need switches, which are movingbrushes. Drag a movingbrush blank entity from the basic entities ( same as we did for the crate ). Create a new conus and give it dimensions 1w x 0.5l x 1h. Add it with [+]. Move it to the front of the pedestal ( the front being the side not facing the crate ( this way we can activate the button and see the results ) ), then to the top from there, then one notch down. This is an ideal spot, since Sam will be able to activate it without looking up. Copy the entity and place the new one next to the first on the pedestal. Select the first and move it inside the pedestal, then press [d]. Now move it outside of the pedestal, so it appears to be sticking outside of the pedestal. Press [d] again. Repeat process for the other button. Now, using the properties section, change the first button's name to "button1", and the second to "button2". This will help keep order ( we don't want a bunch of movingbrushes with no clue which is which, especially when we target the entities ). Now set the "Stop Moving" Property on both markers for both switches. You may check the links with ALT+[d] or the linkcheck icon. We now have all of the stuff, but nothing to control it! It should look like this:
Now lets make our movingbrush buttons into switches. Drag a switch entity from the basic entities browser onto the grid. It does not matter where you place it, since it will be invisible. Now drag a trigger entity onto the grid. It does not matter where you place this, either. Name them both appropriate names ( switch1, trigger for switch1 ). Now select your first button, and go to the properties section. Select the switch parameter, and from the dropdown below you should be able to select "Switch1". Now our movingbrush will use switch1 when it is activated. Now select the switch, and go to the properties section. Check off the invisible property, change "ON event type" to "Trigger Event", and change "ON\OFF Target" to "Trigger for switch1" ( If that's what you named it ). Now select the trigger, and go to the properties section. Change Target01 to Crate, Target02 to Button1, and Target03 to Button2. Now make the second button target switch1 for the switch property. Finally, while button2 is still selected and outside of the pedestal, press ALT+[d].
You should be able to test, and when you press button1, the crate will move to one side and stop, and button1 will move into the pedestal, and button2 will move out. Then you can press button2 and it switches back.
So what exactly did we do? Well, we made our movingbrush target switch1 as a switch. Having this target makes the game regard the movingbrush as a switch, so it will allow you to USE the button. The button sends a message to Switch1, which in turn sends a message to the trigger, which sends messages to both switches and the crate. This example could be easily adapted to work as an elevator, if one were to add TouchFields.
Let's experiment. Drag a touchfield onto the grid from the basic entities, and place it next to the pedestal. Create a new conus ( while the touch field is still selected ) and give it dimensions 8 x 8 x 8. Place it so the world icon is in the middle. Add it to the touchfield, and realign the field if necessary. Select the touchfeild in entities mode and goto properties section. Change its target to "Trigger for switch1".
Now when you test and walk into the touchfield, the crate will move.
Go into properties again for the touchfield, and uncheck the Active property, then change the parent property to "Crate". Now select the trigger and change Event for target4 to "activate event". Then change target4 to "Touch Field".
Now when you test, the touchfield will not initially work. Hit the switch, the crate will move and now the touchfield will work. You will notice the touchfield "locked" to the crate if you are in "render editor models" mode. This is due to the parent flag that we set on the touchfield This is indeed a handy flag.
The point of this tutorial is to help you get the hang of using triggers and switches, and hopefully you are starting to understand now. Triggers can be used in a multitude of handy and creative ways, and I can't wait to see what you can do with them.
The level used in this tutorial is available here.
-oSiRiS