Hello and welcome to another week of Lemma development progress updates!
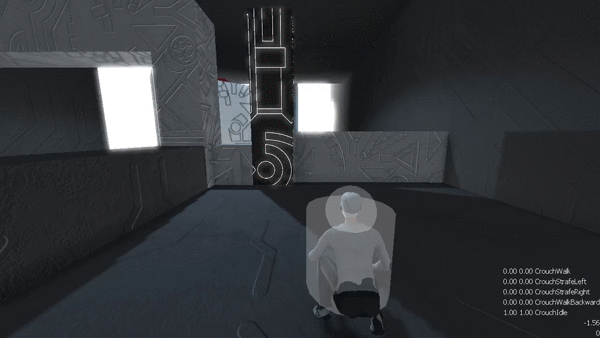
This time I did a lot more work on the player character. I spent a ton of time in GIMP working on the texture map. I didn’t skimp on memory space, it’s a full 4096×4096. The GIMP file is over 150MB.
I also split the model into three distinct materials: a shiny one for the chest, neck, and pants, a less shiny one for the hands, and a completely dull one for the hoodie. I stored the mappings for these materials in the texture’s alpha channel.
Finally I cut the triangle count from almost 60,000 down to about 26,000 without noticeably decreasing the visual quality. I did this by removing an extraneous subsurf layer from the hands and baking the high-res data into the normal map. Here’s the final result:

(Ignore the shadow hole near the shoes… it’s a geometry issue)
I also did a ton of work on the animation system. I was using linear matrix interpolation, which can result in a lot of weird squashing when blending between animations:

Now I decompose each bone matrix into its scale, rotation, and translation components and blend them individually. The result is much more natural:
I also now use quadratic easing to blend between animations. Before, the model would move to the target pose at a constant speed and then instantly stop, like this:
Now the model accelerates and decelerates much more naturally:
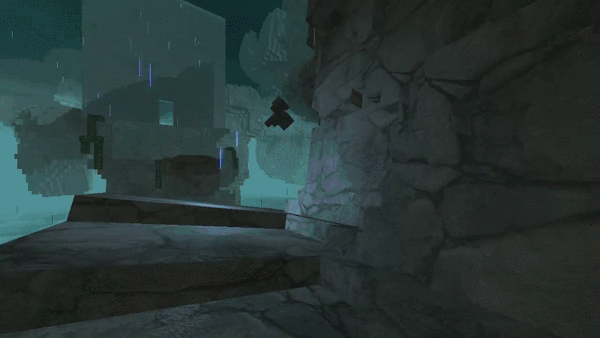
Finally, I implemented a nifty technique to improve the shadows even more. Normally you bias your shadow map samples by a constant amount, or perhaps you scale it by the “depth slope”, so that more problematic triangles facing perpendicular to the camera get more bias.
Shadow map bias is a necessary evil because it causes Peter Pan artifacts, where the shadow becomes detached from the shadow caster:

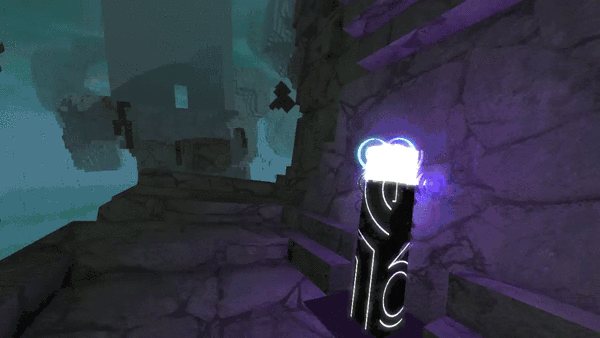
I was researching all this when I stumbled on normal offset shadows. It’s simple: offset your shadow map sample in the direction of the normal. It works beautifully:

It also has the added benefit of simulating a bit of depth in your texture if you use a normal map.
That’s it for this week. Thanks for reading!