[page=Introduction]
Making a Freedom Force mod
[page=The guide to modding]
MOD fans rejoice, Freedom Force’s ffedit program is fun and flexible. Once you know what to do, making a MOD’s is a snap.
This is what I like to think of as a Quick and Dirty MOD Tutorial. By following these steps, you should be editing an existing MOD or making your own MOD in no time flat. I have included a few screen captures of the ffedit menu that I hope will help, and a few tips at the end, along with an even briefer set of instructions that simply tell you which order I use in editing a MOD. This is basically a straight forward approach to MOD editing, with out any scripting. For more advanced tips, tricks and scripting consult the modforce.com web site.
Please note: The required computer skills needed for this tutorial are; Basic File maintenance, Creating folders, Copying files, Renaming files, Unzipping files, and Downloading Character skins.
I’ll assume you have Freedom Force and the FF Editor installed, and a program like WinZip for unzipping files on your computer.
PLEASE NOTE: I have Freedom Force installed in the following directory. E:\fforce
(I have kept the installed directory short to make it easier to see the path in the screen captures.) And the MOD folder is called, MYMOD. So the path to the sample MOD is, E:\fforce\MYMOD
If you did not do a custom install of the game, your path should be:
C:\Program Files\Irrantional Games\Freedom Force
Make sure you adjust the path so that it points to the location of your MYMOD folder.
For Example:
C:\Program Files\Irrantional Games\Freedom Force\MYMOD
Lets get started. First, inside the folder where Freedom Force is installed, create a folder called MYMOD, and inside that folder, create another folder called, missions, and inside that folder make a folder called, mission001
Your Freedom Force Directory\MYMOD\missions\mission001
In your Freedom Force Data directory, look for a file called, data.ff.
Copy and Paste this file into your MYMOD folder.
Rename data.ff to data.zip
Unzip, data.zip into the MYMOD folder.
Now you can start the ffedit program.
The program opens to the Options menu, and your first task is to rename the Primary Data Path so that it points to where your MYMOD folder is. The Secondary Data Path will stay the same, pointing to the games main data base.

Next, click on the Mission Tab.
Then, click on NEW.

The program will open up your Missions folder, and you will have to open the mission001 folder to get at the mission.dat file. (Note: This step generates the mission.dat file.)
Click on Open.
Next you need the layout file. Click on Browse.
FFedit should open in the games Level Layout folder. If it doesn’t, you will find it inside your Freedom Force’s \data\art\level layout directory.
Scroll over until you find blank_terrains.

Open that folder, and then Open blank_desert.
Click on level.txt and then Open

(You can of course select any of the terrain’s listed in the level layout folder.)

Give your MOD a name, like- My First Test Mod.
Now at the bottom of the Ffedit screen, click on Edit In-Game button.
Once the Level Edit screen opens, Press the C key.
Now using the mouse, double click on one of the menu selections.
Pick area_specfic, then
CITY, then FLORA, FLOWERS, then FLOWERS_01, and finally FLOWERS_01.NIF.
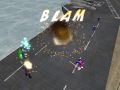
Move your flowers around by clicking on it and dragging it around. Then try adding more things from any of the menus. Add some trees, and small buildings, etc. Press the Space Bar to add more of the same item, or Backspace to delete an item. Click on the Go Back tag to access more options.
Use, ALT TAB together to toggle back and forth between the FFedit and Level Edit if you want to delete items in the Missions Marker menu.
Add some Freedom Force characters, and some villains.
Here is a list of commands that the editor uses.
Left click + drag objects to move them around
Shift left click + drag objects to move them up and down
Hold Z, left click + drag objects to rotate on Z axis (yaw)
Hold X, left click + drag objects to rotate on X axis (pitch)
Right click + drag positional markers to define radius
T - Snap object to terrain
F - Move object one level towards floor
U - Move object one level upwards
R - Toggle positional marker radius display
E - Switch edit mode
G - Toggle snap-to-grid
H - Toggle snap-to-terrain
C - Open Create Object Browser
Shift + F1 to F10 - Assign current object browser directory to a shortcut key
F1 to F10 - Jump to object browser directory
Space - Quick create last selected object
Save your work. If you’ve done something you like, open the MYMOD folder, then the Missions folder and move or rename the folder called mission001, which contains your mission.dat and mission.mg files so that you don’t over-write them while experimenting with the Editor.
When you do try a new terrain, clicking on NEW will destroy the mission.dat file that you just made.
If you get this error when you try to Run your mission from the Editor.
alert:CApp::run(): Could not locate mission, missions
Then most likely you forgot to have a secondary folder inside the missions folder. Create a folder called, mission001 inside the mission folder, then move the mission.dat and mission.mg files into the mission001 folder.
Adding A Custom Character.
Now that you know how to edit a Mission, it’s time to add your Custom Characters.
Again, I have Freedom Force installed in the following directory. E:\fforce
(I have kept the installed directory short to make it easier to see the path in the screen captures.) The path to my MOD is, E:\fforce\MYMOD
If you did not do a custom install of the game, your path should be:
C:\Program Files\Irrantional Games\Freedom Force
And the Path to your MOD would look like this:
C:\Program Files\Irrantional Games\Freedom Force\MYMOD
For this example, we are going to add The Hulk to your MOD. You can use the skin found in the custom_characters folder if you don’t wish to download the Hulk skin. You will need the skin based on the following mesh, male_hulking. Meshes can be found in the Freedom Force Data\Art\custom_characters folder and skins can be located at sites such as:
First the setup. Create the following directories in your MYMOD folder. You will need one called, Art, one called library and one called characters. And the tree looks like this:
Art\library\characters.
Then go into the Freedom Force Data\Art\custom_characters directory and Copy and Paste the male_hulking folder, with all of its contents, into your
MYMOD\ Art\library\characters folder.
Now copy your custom skin into the standard folders, which will overwrite the male_hulking.tga files.
So your custom skin male_hulking.tga and portrait.tga will be inside the Standard folder.
\Mymod\Art\characters\ male_hulking\skins\standard
Next, rename the folder, male_hulking to hulk, so the completed path will now read:
\Mymod\Art\characters\hulk\skins\standard
This way you can have more then one character in your MOD based on the male_hulking mesh, and it is easier to find and identify your custom skins.
Now load your mission.dat file, but don’t run the Edit-in-Game part of the program yet.
Next in the Options menu, make sure the Primary Data Path is pointing to where your MYMOD folder is.

Now go to the Character Tab

Click on New and give your character a name, in this case, Hulk.
If you plan to use a custom voice pack for the Hulk, change the ?? in Speech ID.
For example, make it HU.
Then in the Cutscene Base, change it to blank for now.
The AI is: CGenericHero
Save.
(Note: If you switch to any other screen menu before saving, your hero will be lost and you will have to start again.) You can come back and edit the Hulk’s Strength, Speed, Endurance, etc. Later.
Next go to Templates Tab and click New.

Name again is: Hulk
Class: GAME_OBJ_HERO
Material: Flesh
Then select the character NIF file, click on the three periods on the right side of
Example NIF.
Open to your MYMOD folder and make it point to: library\characters\hulk\character.nif

Double check the line of text, the editor sometimes drops one letter from the beginning of the line or adds a \ in front of library.
In the Attributes Overrides give the Hulk some mass and health

Then Save. Remember you can come back and edit the Hulk’s attributes later.
Now click back on the Mission Tab, then the Edit-in Game tab.
When the window pops up, press the C key.

Click on: Add a Character.
From the list, find your new hero then double click to Add him

And that’s it, you should now have your custom skins installed. Now go back and tweak the Hulk to your liking. Just make sure you save before leaving the characters or templates screens.
[page=Common Problems.]
Your Character is all white:

1: You have the right Mesh, but the wrong skin name. The directory for male_hulking can be called anything, and in this case is called Hulk, but the skin must still be called, male_hulking. And still be inside the hulk\skins\standard folder.
Your Character shows up as a simple White Block.

You might have the folder where the Hulk mesh and skin installed named incorrectly.
Check the Path for the Template, Example NIF: library\characters\hulk\character.nif
Make sure it’s still not called, male_hulking, if you in fact did rename it to Hulk.
For Example, library\characters\male_hulking\character.nif
The Hulk is just a little Blue Arrow.

Make sure the name you used in the Character menu is the same as in the Template menu. Check for typo’s. You might have, Hukl, instead of Hulk. Check to make sure you have the character added in both the Character menu and the Template menu. Remember, if you switched screens before saving, your character is lost.
Also, if you have the Level Edit (Edit-in-Game editor) running and then create a character, it will not show up in the Add a Character menu, you will have to close the Level Edit program, then open it again in order to access your newly created character.
If you still have problems: Check the Options Tab, then in the Primary Data Path, make sure it points to where your Freedom Force MOD is installed.
Also, check the Templates Tab to be sure the character.inf file has the correct path.
The editor is a bit quirky, and sometimes drops a character or adds a \ before library.
This is a correct Path: library\characters\hulk\character.nif
These are not: \library\characters\hulk\character.nif
ibrary\characters\hulk\character.nif
library\characters\hulk
[page=A Few Tips.]
Custom Text for your Character.
Inside your Freedom Force’s \Data\lang\english folder you will find the Speech, Captions and Strings text files. Open your MYMOD folder, and create the directory tree, Lang\English. Copy the Speech, Captions, and Strings.txt files over to your \MYMOD\lang\english folder.
Open the String.txt file with Note Pad or any plain text editor, but not a program like MS Word.
Add a string for the Hulk.
Hulk_01, The Incredible Hulk
Hulk_DESC_01, Gamma Ray Monster of Mayhem
Hulk_DESC2_01, Blasted by gamma rays in a nuclear accident, Bruce Banner becomes the Incredible Hulk whenever he is enraged.
Save the text file. Next Generate the Language Files. Run FFedit, In the Options Menu, Click on the Generate Language Files. Browse to your \MYMOD\Lang\English folder and Select the three files that it asks for in order, speech.txt, captions.txt, strings.txt.
Now when you run the game, the Hulk will be identified as a character just like the rest of the Freedom Force Heroes.
Custom Powers
Note: This is not Custom FX.
Click on the Powers Menu Tab.
Click on a power, like manowar Punch. Record what it does, then click on New.
In the Name field, type, Hulk Punch or Hulk Smash… etc.
Now Beef up the damage, speed, etc.
Save
Go to the Character Menu, select the Hulk. Under Powers, find your new Hulk Punch power and using the down arrow which is in the shape of a V, add the Hulk Punch to the list. Note, if you have too many powers added, you will have to remove one.
Tier A and Tier B lists the number of powers available, up to 5.
Save
VOICES
The game's speech files are in the mp3 format. It’s best to convert them to a mono channel that is the same format as in the game. Stereo well work, but the game uses mono, at 64kps/44kHz.
When generating language files, the correct order of file selection is:
1) speech.txt
2) captions.txt
3) strings.txt
Items of Note:
MAKE SURE there is one blank space before every line in the speech.txt file.
SPEECH CONTEXT alert The character has spotted an enemy.
ATTACK1 The character initiates an attack
CANTINTEROGATE The character cannot interrogate a target because enemies are still near (heroes only).
DEFEND1 The character activates an active defense.
DODGE The character dodges an attack.
FRUSTRATION The character cannot do whatever he’s just been ordered to do.
HYPNOSIS The character has been effected by a hypnosis attack.
INACTIVE The character has been standing idly, and has just gotten bored (heroes only).
INTERROGATEME The character surrenders and is ready to be interrogated.
KNOCKED OUT The character is knocked out.
MAJOR PAIN The character has just suffered a strong hit.
MENTALBLANK The character has been mental blanked.
PANIC The character has just entered the panic state.
RAGE The character has just entered the enraged state.
SELECT The character has just been selected as the active character (heroes only)
For more on Speech Files go to: Modforce.com And click on Sounds.
Here is an example of where the voice MP3 files must be.
C:\freedom force\mymod\Sounds\Speech\English
Here is an example of where the speech.txt, captions.txt, strings.txt (along with the .dat files of the same name.) must be.
C:\freedom force\mymod\Lang\English
(Again, make sure you have those folders in your MOD.)
Next, with the Editor, making sure your Primary Data Path (In the Options Menu) is,
C:\freedom force\mymod
And your Speech, Text, Languages. Output Directory is,
C:\freedom force\mymod\Lang\English

If you get an error when trying to generate the language files, check to make sure the path is correct.
And that’s it. I hope this text was of some help. Below is a step by step list without all the explanations, so you can copy and paste the text to note pad and print it out.
Quick Step by Step.
Create these directories in your Freedom Force directory.
MYMOD\missions\mission001
\Art\characters\hulk\skins\standard
\Lang\English
\Sounds\Speech\English
Copy data.ff into the MYMOD folder. Rename data.ff to data.zip and unzip.
Run FFedit.
Options menu
Primary Data Path: (Your Freedom Force DIR)\MYMOD
Mission Tab
New
Open - MYMOD\missions\mission001 mission.dat
Browse – Freedom Force’s \data\art\level layout
Open blank_terrains\ blank_desert\level.txt
Name your MOD
Run - Edit In-Game
Press C. (Open Create Object Browser- More commands listed above.)
Add Stuff
Adding A Custom Character.
Copy the male_hulking folder from \freedom force\Data\Art\custom_characters to MYMOD\Art\characters\
Rename male_hulking to Hulk
Download and install Hulk skin or just use the male_hulking skin
Character Menu
Name: Hulk
Speech ID: HU
Cutscene Base: library\cut_scenes\blank
AI: CGenericHero
Save
Tweak the Hulk’s powers etc.
Save
Template Menu
Name: Hulk
Class: GAME_OBJ_HERO
Material: Flesh
Example NIF: library\characters\hulk\character.nif
Save
Tweak the Hulk’s health, mass etc.
Save
Mission Menu
Edit-in Game
Press C
Add the Hulk
Add some villains
Run your MOD
Have FUN!