Tutorial written by Herman Toothdecay. Mirrored here for archival purposes.
1. What a texture is
Okay, if you are a beginner and not very computer literate, you might be thinking "What the $#%& is a texture anyway?!". Well, you need not worry. Motoboss is here to tell all he knows about what is and how to create a texture. To the most basic extent, a texture is an image that is placed over your terrain, sort of like taking a thin rubber sheet with colors on it and stretching it on to a bumpy surface. This gives the terrain colors that can look much better than just your grey terrain :-) .
2. Texture specifications
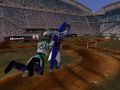
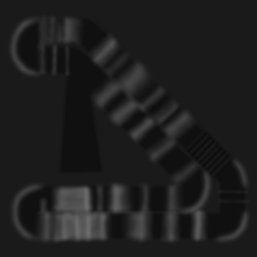
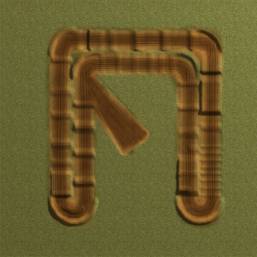
For a National or SX track, your texture needs to be a 960x960 24bit Uncompressed Targa image (.TGA). For a Stunt Quarry, Baja, or Enduro track it needs to be a 1920x1920 24bit Uncompressed Targa image. To demonstrate how a texture is created, here is the displacement map and the texture side by side of my SX track Motoboss Series Rnd1 - Lambeau:
3. Creating a texture
Okay, for this tutorial I have made a simple little SX track for demonstration purposes. Click here to download the .TGA displacement map I will be creating a texture for in this tutorial. Once you have the displacement map opened up, resize it to 1920x1920. Now, you might be thinking that this is the wrong size for a texture, but what I like to do is create a detailed image at a high resolution and when I am finished creating the texture I resize it down to 960x960, the texture size for a SX track.
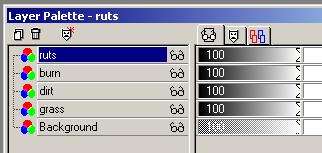
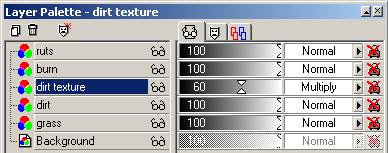
Alright, now that you have the image open and resized to 1920x1920, create a new layer called "grass" (If you do not know how to create a new layer, go to my displacement map tutorial here). Create 3 new layers named "dirt", "burn", and "ruts". Your Layer Palette should look like this when you are finished:
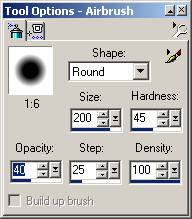
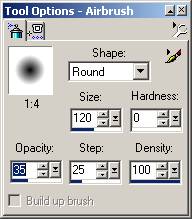
Click on the dirt layer and select the airbrush ![]() tool and change the settings to these:
tool and change the settings to these:
Now, select a color such as a light sandy dirt color by clicking on the foreground color on the color toolbar. I used a color like this: ![]()
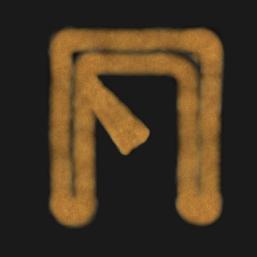
Now paint along the track path (make sure you are on the dirt layer). It should look something like this when you are done:
This dirt is kind of plain looking, and I want it to have a little bit more texture to it. To do this, first open up an OnTrack texure in the Armadillo TextureMaps folder, or open a custom 480x480 texture by either creating it from scratch or by mixing two of the ones that come with Armadillo together (I'll explain how to create good looking OnTrack and OffTrack textures in a later tutorial). In PSP7 there is a cool option for the Airbrush, Paintbrush, and Fill tools; you can choose to paint with a custom texture! I love this option, it is VERY useful for creating textures. To choose to paint with our OnTrack texture, first you'll need to select the airbrush, and change the foreground paint settings to these:
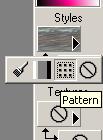
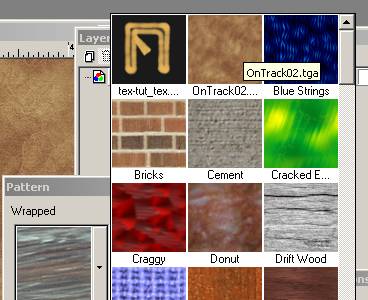
To choose your custom pattern, click on the foreground color button, scroll all the way up the list of textures, and select your OffTrack texture like this:
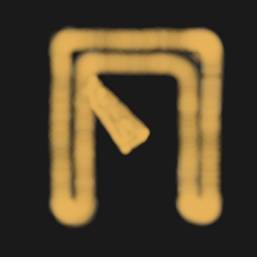
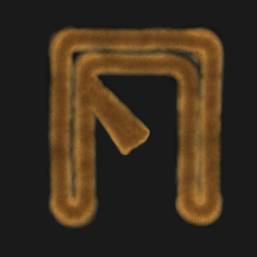
Now that we have all of the right settings, go back to your 1920x1920 texture. Create a new layer above the dirt layer called "dirt texture". Now paint over your original dirt path with the textured airbrush. Now set the layer opacity for "dirt texture" to 60% and the layer blend mode to "Multiply". Now your texture and Layer Palette should look somewhat like this
Now that the dirt is done, click on the burn layer, and change the airbrush settings to these
Now change the foreground style back to solid color and change the color to a ver dark brown, like this one: ![]()
Now paint around the center of your track path, change the layer opacity for "burn" to 60, and set the layer blend mode to "Multiply". When you are finished it should look like this
Now does that look sweet or what :-) ? Now in the game a black OffTrack would look really dumb :-), so i will show you how to make it look nice. First open a tileable OffTrack texture. I use the grass textures that jan-pieter from the MXM Board has on his site, click here to download them. Click on your grass layer, select the fill tool, and change the fill style for the foreground color to pattern. Select your tileable OffTrack image as the pattern, and just click on your image to fill in the grass layer with a nice grass texture.
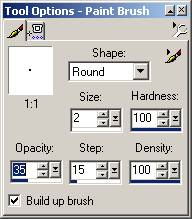
Now to add the ruts; for Nationals I like to freehand the ruts, but with a SX I draw straight lines since you usually aren't roaming all over the place on a SX track :-) . Click on the "ruts" layer, select the paintbrush tool, and change the settings to these:
Now click at the start of a section somewhere, then hold down shift and click at the end of that same section. This will create a straight line from the beginning of the section to the end. Do this with all of the sections until all of the track has ruts on it except for the corners. To finish off the corners, just freehand draw a curved line from the end of one point to the other. Finish off the ruts by gaussian blurring them with a .50 to 1.00 radius, and by setting the layer opacity to 60% and the layer blend mode to "Multiply" or "Burn".
Now to add shadows; First, open POV-Ray (Download it at archive.org). Now download the MCM.POV file (Download it here) and unzip it into C:\Temp (or whichever folder you have your displacement map in). Now, in Paint Shop Pro, create a 64x64 TGA file that is just filled with white, and save it into your C:\Temp folder as "white.tga". Open up the MCM.POV file from within POV-Ray and change the line here
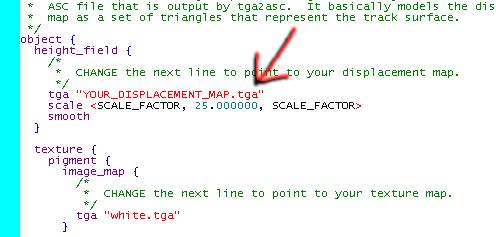
to point to your displacement map. Click on the menu item Tools>Edit Secondary INI File, and add this entry to it
[1920x1920, AA 2.0]
Width=1920
Height=1920
Antialias=On
Antialias_Threshold=2.0
Save it, and then quit POV-Ray. Open it back up again and click the menu item Render>Edit Settings. Add this entry to the "Command line options" text box
+AM2
It should look like this 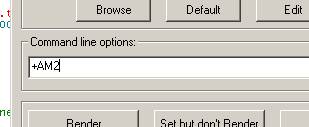
Now select your custom render size from the dropdown list on the toolbar 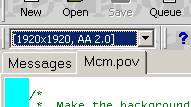
and click the "Render" button. This will take a while, it takes about 1 min 50 sec on my 900 MHz 256 MB RAM PC. When it has finished, click the menu item Toold>View last rendered file. This will open up your shadows in PSP. When in there, gaussian blur them with a radius of 2 to 4. Then go into Colors>Adjust>Hue/Saturation/Lightness. Adjust it like this:
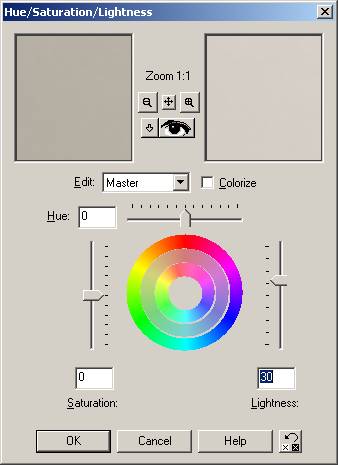
Now that we have finished touching it up, press Ctrl-C to copy it. Go back to your texture, click on the top layer, and press Ctrl-L to paste your shadows as a new layer. Rename it to "shadows" and set the layer blend mode to "Multiply". The texture is now finished and should look something like this

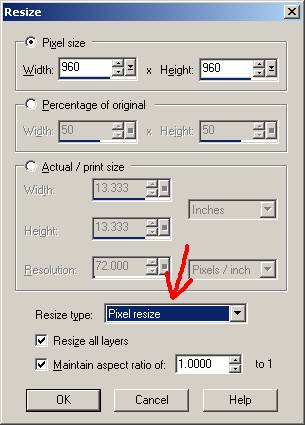
Save it as a PSP file now with LZ77 compression enabled in the compression options. Now resize it to 960x960 using pixel resize
Now save it as a 24bit uncompressed TGA file. That's it!