Tutorial created by Javokis. Mirrored here for archival purposes.
This is a step by step tutorial about building a simple sphere and popping it into the game. This tutorial will use both Milkshape 3d and NOT Editor tools so be sure to download both before reading on. This tutorial is under the assumption that you have read BOTH How to Make a Sword in Redemption and Creating a Battle-Hardened Milkmaid in Redemption tutorials.
-First start up Milkshape 3d. The version displayed in this tutorial is verison 1.8.0
-Now select the Sphere button shown in the image.
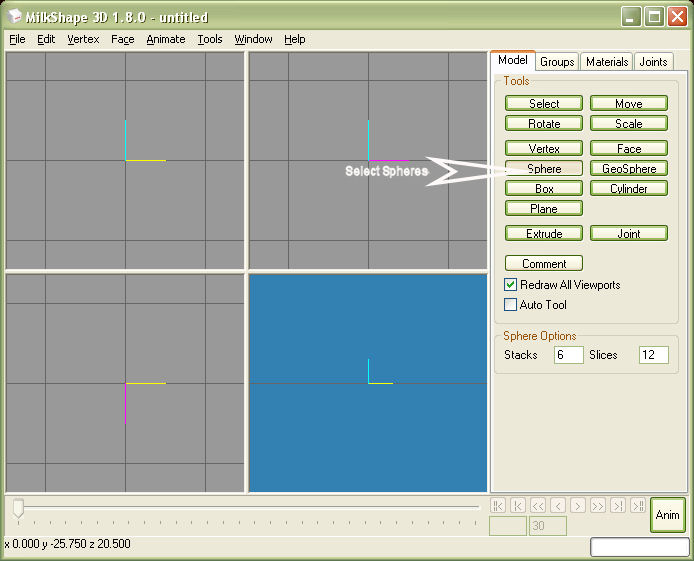
-In the lower left hand build window, we're going to left-click and drag with our mouse to build the sphere on the Z (Top) axis.
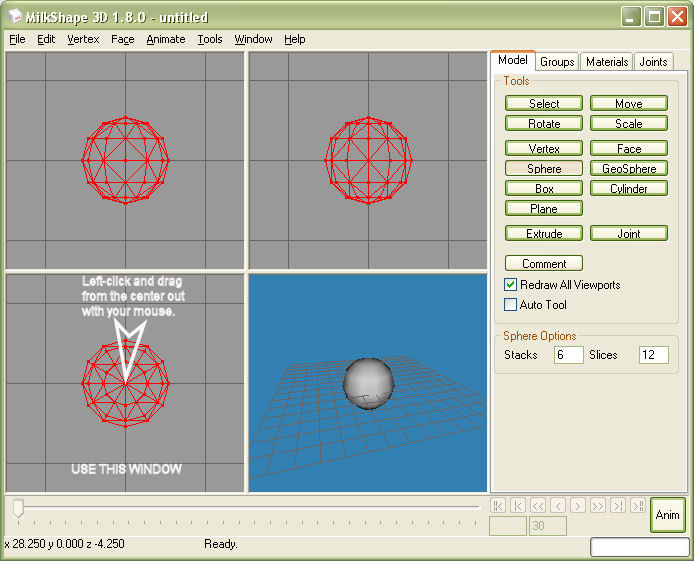
-Move the sphere so it's above ground.
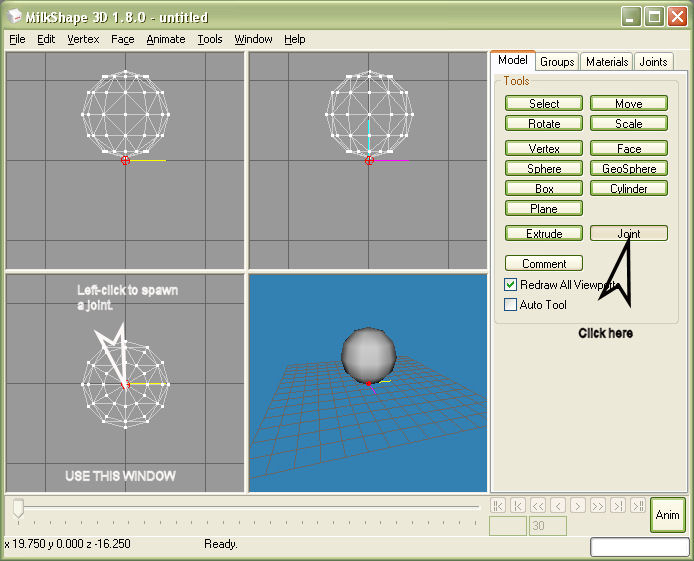
-Create a joint. All meshes in Redemption need a joint.
-Deselect everything by going into Edit then choose Select None.
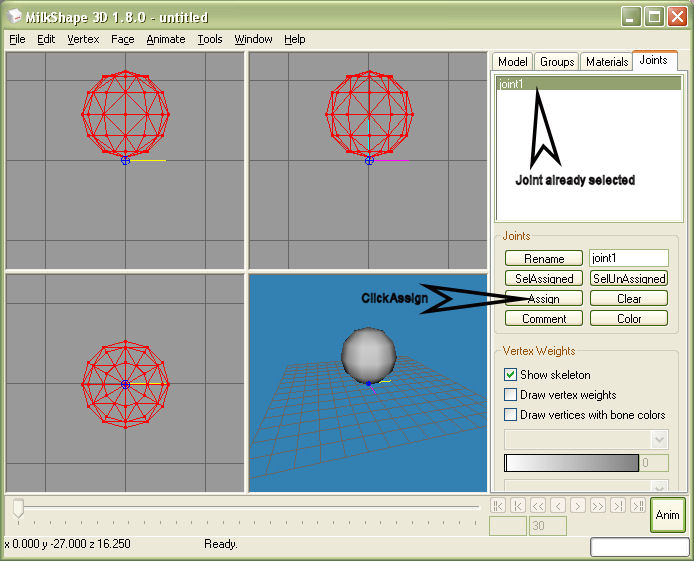
-Go to the Groups tab and select the Sphere again.

-Go to the Joints tab while the Sphere is selected and press the Assign button for Joint1.
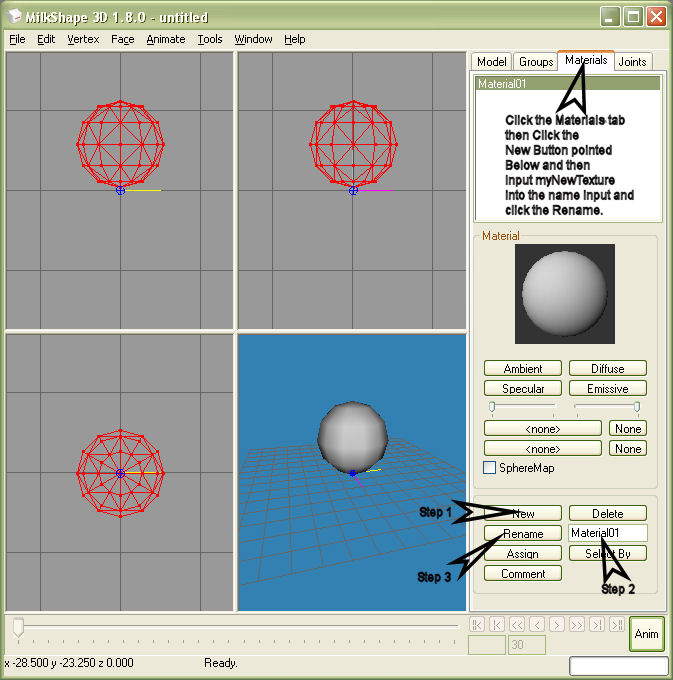
-Now let's add a material by going to the Materials tab.
-Press the New button and rename the Material as shown below.
-Then click the Assign button while the Sphere is selected and the new Material will be assigned to our sphere.
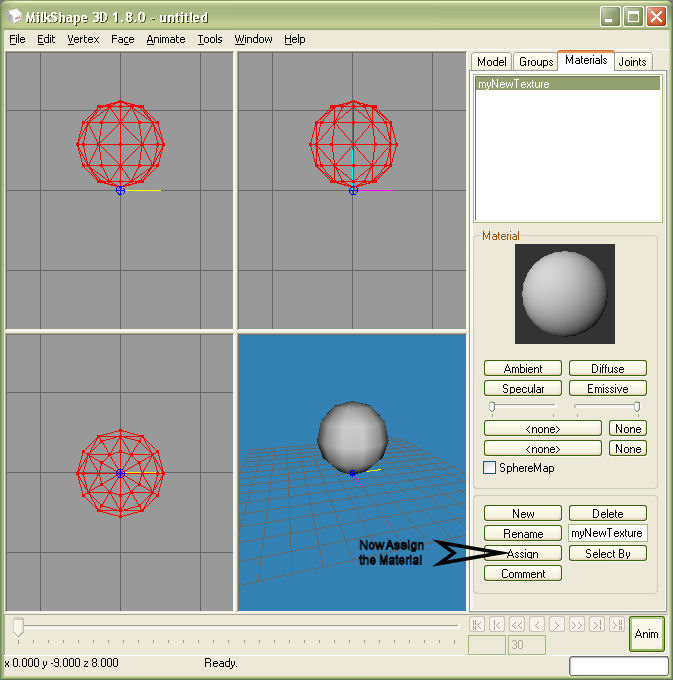
-You can verify that the Material is assigned by going to the Groups tab and looking at our Sphere group on the list.
-We're ready to export.
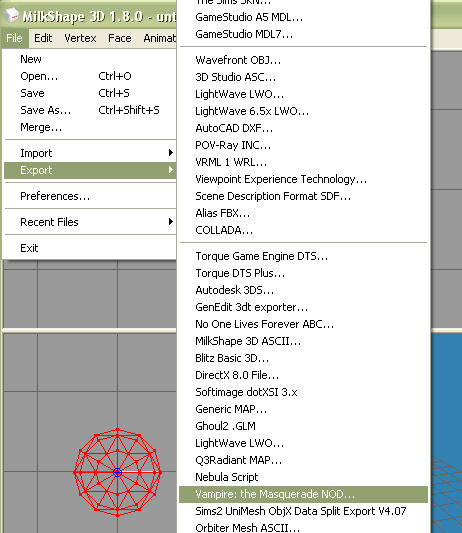
-Go to File menu and Choose export on the list.
-Choose the Vampire the Masquerade - Redemption NOD from the exporter list.
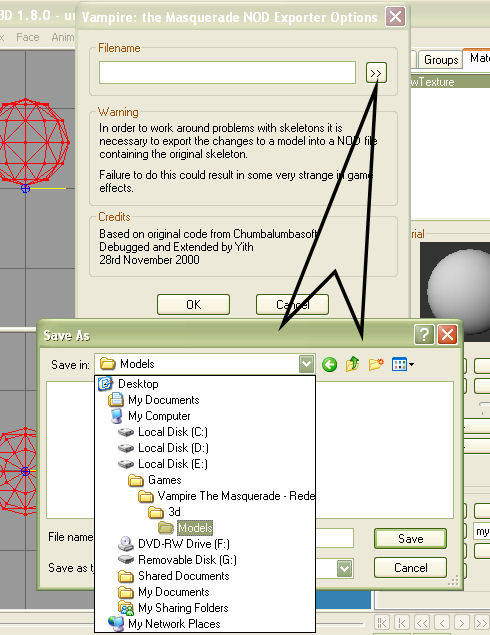
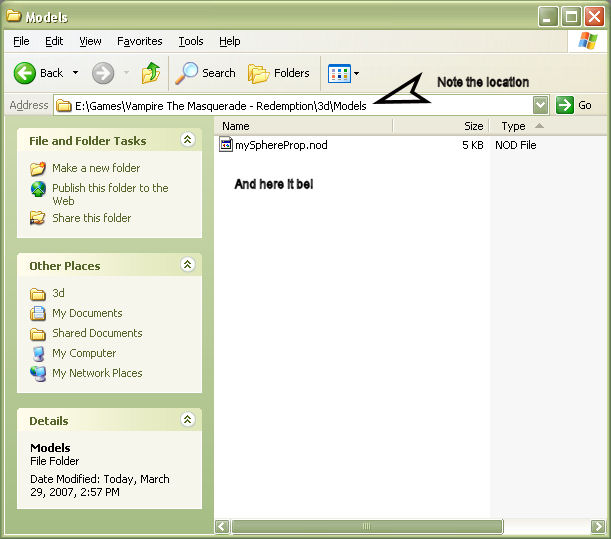
-Press the >> button to choose a location. That location should be Vampire - Redemption\3d\Models
-If you don't have a 3d\Models folder then create it.
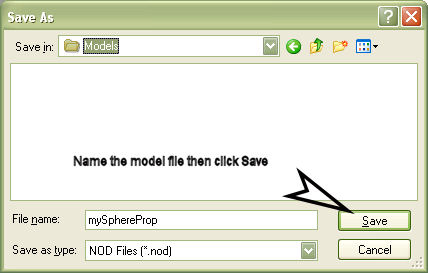
-Now name your file and click Save.
-Then click the OK button.
-When a message pops up telling you that file doesn't exist then asks whether you want to cancel, click NO.
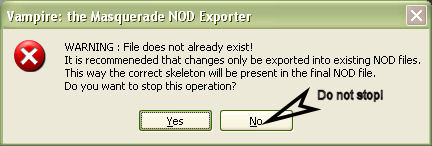
-NOTE: You're only allowed to do this if you are only making a prop with a single joint like we just did.
Otherwise, you have to save over an existing nod file that has the same joints as the model you made.
-Go into your Vampire - Redemption\3d\Models folder and check to make sure our new model (.nod) file is there.
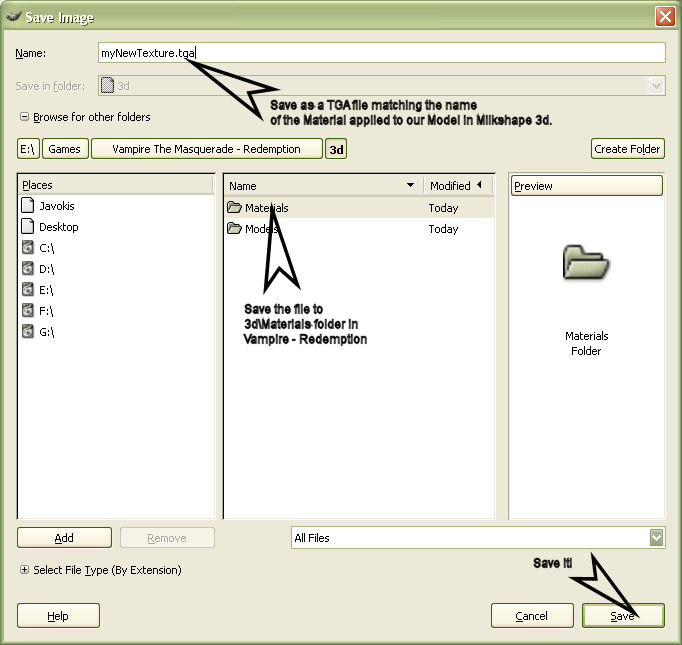
-Now we need to make a TGA file that matches our material name of our model.
-If you need help in making TGA files then check the Texturing Redemption Using The GIMP tutorial.
-As shown in the Texturing the tutorial we need to save our file, but it has to match the name of the material we assigned to our model.
-Be sure to save the TGA file to the Vampire - Redemption\3d\Materials folder.
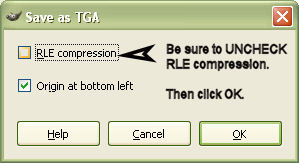
-As in the Texturing tutorial be absolutely sure you UNCHECK the RLE Compression then click OK.
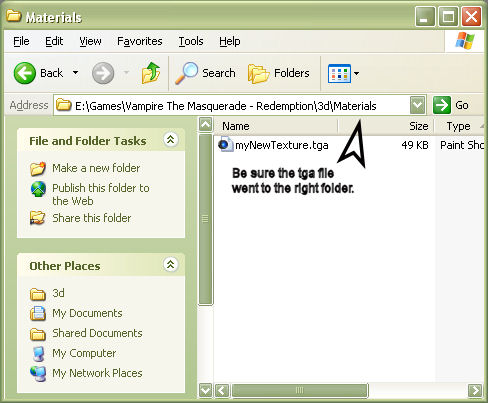
-Now check your Vampire - Redemption\3d\Materials folder to be sure our TGA went inside ok.
-It's time to start using the NOT Editor if we want our new model to show in the game.
-Load up NOT Editor.
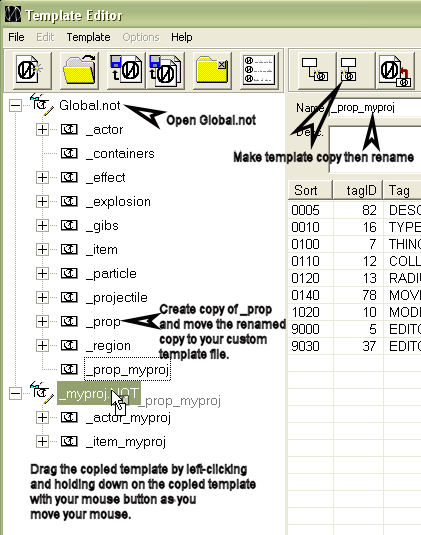
-Open the Global.not file then open your custom template file you created the prior tutorials on NOT Editing.
-Now make a copy of Global's _prop parent template, rename it, and drag it to your custom template file.
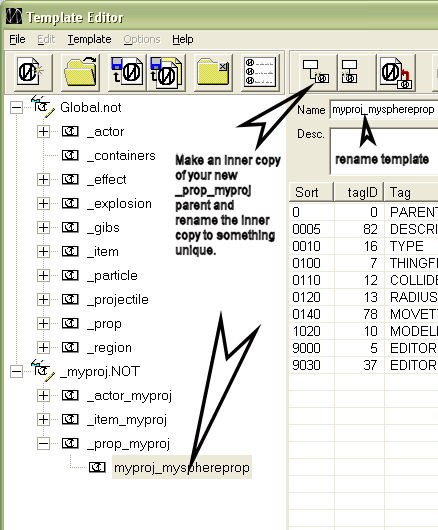
-Make an inner copy (child) of your new _prop_myproj parent and name it something.
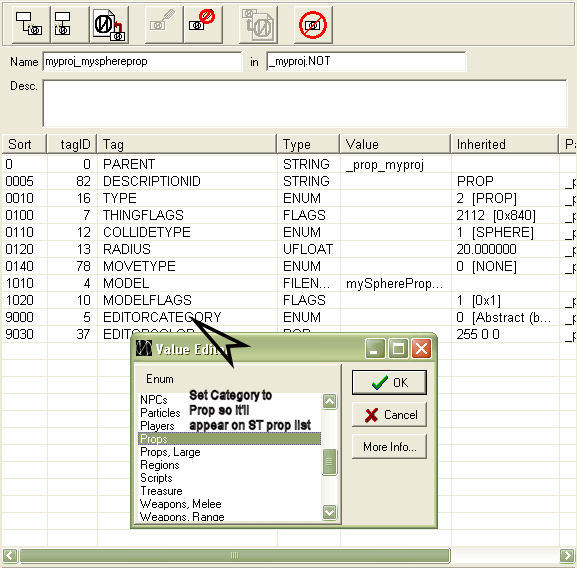
-Props are pretty simple things. We don't need to do much.
-Just add the MODEL tag and give it the name of our custom model.

-All we have left is to edit the EDITORCATEGORY tag and we're ready to save it and load the game.
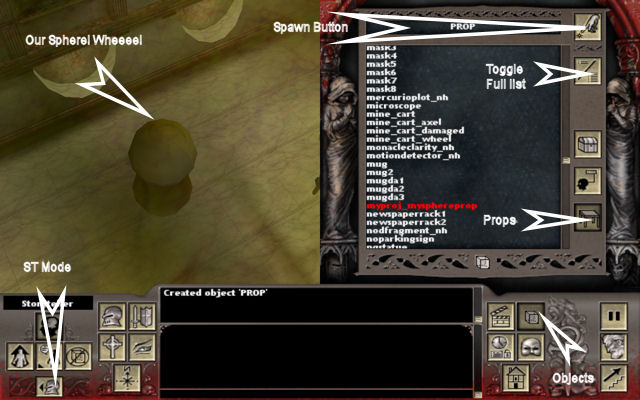
-In multiplayer, use the ST mode to spawn the item. In singleplayer, use console addthing [templatename] command.
ENJOY!