Tutorial created by SamJ the creator of M1. It was originally posted to his website. It is mirrored here for archival purposes. The editor is located here.

Tutorial 1 - A Simple Building
This tutorial should get you started using M1.
After you have downloaded and unzipped M1, run it by double clicking on M1Win.EXE. You will start up with no map loaded.
M1 after startup
You can't do anything without loading up a map, so use the Open command on the file menu. Go to your GTA\GTADATA directory and load NYC.CMP. After a couple of seconds you will see the park from the first city in GTA!
You can use the cursor keys to scroll about, or the scrolling buttons on the toolbar. The last two buttons (they look like two arrows pointing up and down) zoom you in and out.
![]()
Scrolling buttons
We're going to start a new map for this tutorial, so click New on the File menu. The new map dialogue box appears. The new map settings default to a map covered in pavement - instead we want to use grass. Click the "..." button and choose the grass tile. Leave the floor level at 3, but change the blocks setting to "Field" instead of Pavement.
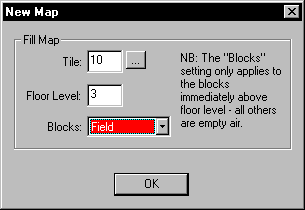
The New Map Dialogue Box
After you hit OK, you will be able to see nothing but grass. Try clicking and dragging on the map to select a rectangular area. Because the cubes you drag on are all on one level, you will only select one cube deep. Try clicking the selection-moving-buttons (snappy name, huh?) to modify your selection.
![]()
The Selection Moving Buttons
These buttons only move your selection about. To modify your selection, you can either click an drag a new selection, or you can use the selector dialog. This is a dialogue that can stay open whilst you work. Display it by clicking the selector button.
![]()
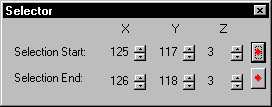
The selector button and the selector dialogue.
For example, if you want to make your selection two cubes high, click the down arrow on the selection- start-Z.
Now we will create a building!
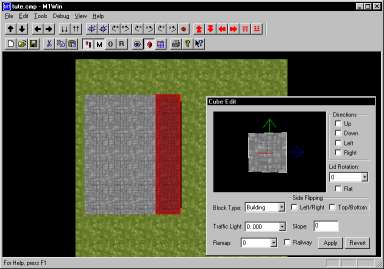
Click and drag out a selection in the middle of the grass, about 4 cubes square. Click the cube editor button on the toolbar to display the cube editor.
![]()
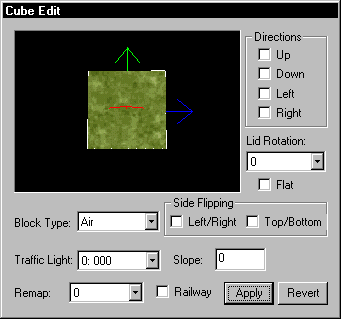
The cube edit button and the Cube Editor
This dialogue box shows you the attributes of ALL your selected cubes. Because all the cubes you have selected have grass as their top texture, the cube preview is showing a cube with grass on it. Click and drag anywhere on the cube preview to rotate the cube.
We don't want grass underneath our building, so right click on the grassy bit of the cube preview to display the select texture dialogue
(NB! If nothing happens, try left clicking and dragging the mouse a bit to wiggle the cube preview then try again. I think this is a bug ;) - you will have to do it almost every time you want to right click in the cube preview).
The select texture dialogue
Note you can resize the tetxure dialog (and it should remember where it was). To get rid of the grass, click the very first texture in the box (although you can see it in the select dialogue box, texture 0 is never drawn in the game).
In the cube editor, the cube should now just be a white outline. Click the Apply button to apply it to your selection, and all the grass should disappear.
Now move your selection up twice, using the Raise Selection button (it's got two red arrows pointing up on it). The selection is now where the roof of your building will be. In the cube editor, right click the top of the cube again (that's the side with the red arrow pointing through it) and choose a groovy roof texture. Before you apply your changes, change the Block Type to Building, then click Apply.
Now lower your selection once (use the "Lower Selection" button, not the "Selection Down" button), and again change the Block Type to Building and press apply. Then move it up twice (so it is in the cubes over the roof) and change the Block Type to Field (Don't forget to press Apply).
Ok, now we need the sides of the building on (you might want to scroll slightly so you can see the sides; but it doesn't really matter). Click and drag down the roof on the right hand side of the building, so you select all the cubes on the right of the roof like this:
The right hand cubes of the roof selected.
Now you should rotate the cube in the cube editor so you can see the right of the cube (the side with the blue arrow pointing through it). Right click on that side and choose a texture for the right hand side of your building, then hit Apply. Lower your selection once and do it again - now the whole right hand side of the building is textured.
Now select the cubes along the top edge of your building. Look at the cube preview and see that the right hand cube says "Multiple Textures" on it. This means that the right hand sides of some of your selection have different textures - this is because only the rightmost cube has a right hand side texture. Right click on the top of the cube in the cube editor (the side with the green arrow pointing through it) and choose a side texture again, then Apply it.
Lower your selection and do it again (getting the hang yet?). Finish off the other two sides.
That's all for this one.
-- SamJ.