Tutorial written by Herman Toothdecay. Mirrored here for archival purposes.
1. Basic displacement map overview
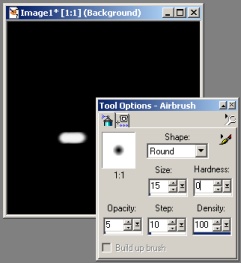
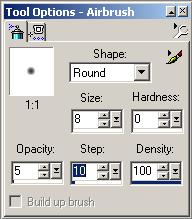
To begin with, a displacement map is an image in which a grayscale color defines how tall an individual point on your terrain is going to be. For example, in the next image created in Paint Shop Pro 7, the program I will be using to make these tutorials, I used the airbrush tool ![]() on a black background with the foreground color set to pure white(255-255-255 RGB):
on a black background with the foreground color set to pure white(255-255-255 RGB):
If you have Armadillo and would like to test it out, simply create a picture like the example, save it somewhere (save it in "C:\temp" for the purposes of this tutorial) as a 257x257 24bit uncompressed .TGA (Targa) file). Then load Armadillo, create a new National track TWO times (this is dumb, but Armadillo doesn't work unless you do that in some systems). Select "Import Targa Height Map", browse to "C:\temp\" , and select your .TGA file. Click on any of the other tabs and then click "Race Track" on the top toolbar.
The airbrush tool is my standard for creating jumps, berms, ramps, and other terrain deformations. You can use any tool you want including the paintbrush and gradient tools as long as the finished copy is an image only containing colors that are dark and light shades of gray.
2. Displacement map creation
If you tested out the test displacement exactly like I showed you, you should have seen that the jump is incredibly steep, and would make for an awful jump in the game. In order to do this, you must blur the image. There are many blurring techniques, but I prefer to use the following as it maintains control over all sides of the jump and does not round of the jump at the edges.
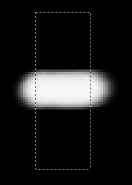
Firstly, create a new square selection of the middle of the jump, like this:
Now select Effects>Blur>Gaussian Blur from the menu bar. Set the radius to 8.00 and click "Ok". There you go, you're first blurred jump! But wait, you're saying, what about the edges of the jump? Here's what you do: Press Ctrl-Shift-I, which inverses the selection, then press delete to erase all of the sides. Now finish by Gaussian blurring it at a 1.00 radius, and voila, your first complete jump! You can test it out again, just make sure that when you save it out for Armadillo to open it has to be a 257x257 24bit uncompressed Targa file.
Now that you (hopefully) understand the basics of creating a displacement map, I am going to demonstrate how to create a simple nationals track. First, you will need to create a new image at 514x514.

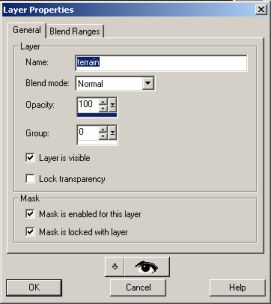
Be sure to set the Background color to black and the image type to "16.7 Million Colors (24 Bit)". Even though you will be creating a grayscale image, Armadillo can only read 24bit Targa files. Now, to create the terrain, I like to use layers, so for our purposes create a new layer by clicking on the menu item
Layers>New Raster Layer, naming it "terrain".
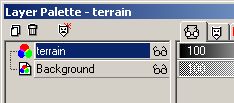
Now you will be able to see two layers in the Layer Palette dialog: "Background" and above it "terrain".
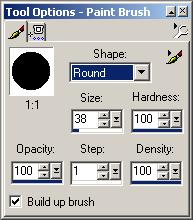
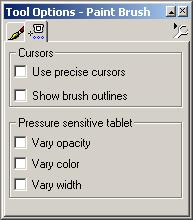
Select the paint brush tool ![]() and set the tool settings to these
and set the tool settings to these
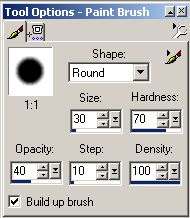
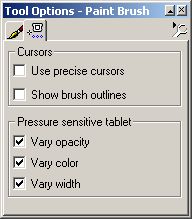 :
:
Fill in the terrain layer with a RGB value of 32-32-32.
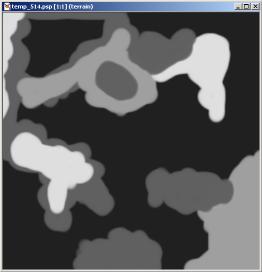
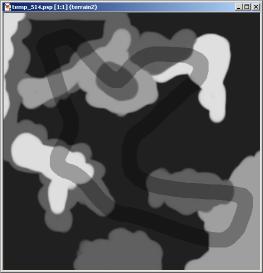
Then paint your terrain using various grayscale values until it looks similar to this:
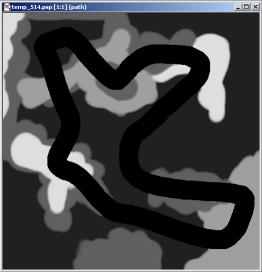
Create a new layer and name it "path". Set your paint brush settings to these
And draw a track path like this:
As you might be able to tell, the path is rather large and will be wide in MCM2. Here's how to take care of that;
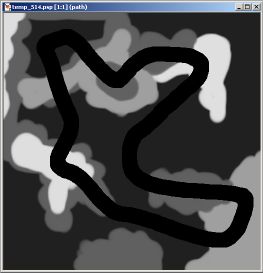
Select magic wand tool ![]() and click on your track path. Now click Selections>Modify>Contract. Set the number of pixels to contract by to 4 and click "Ok". Now inverse the selection by pressing Ctrl-Shift-I, and press delete to remove the excess on the outside of your path. When you're done the path should be thinner and look something like this
and click on your track path. Now click Selections>Modify>Contract. Set the number of pixels to contract by to 4 and click "Ok". Now inverse the selection by pressing Ctrl-Shift-I, and press delete to remove the excess on the outside of your path. When you're done the path should be thinner and look something like this
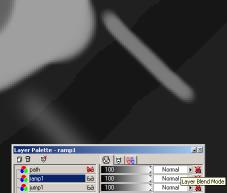
Alright, now that we have the path done, we have to make it so we can make our track path ditch-like, so you can see the path while you are creating jumps and also for your track to race better in the game. Do this by selecting your track path with the magic wand again and inversing the selection, then go to the terrain layer. Press Ctrl-C to copy, and Ctrl-L to paste it as a new layer. You should now have 4 layers that look like this:
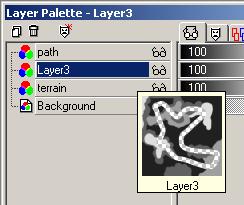
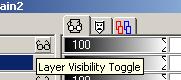
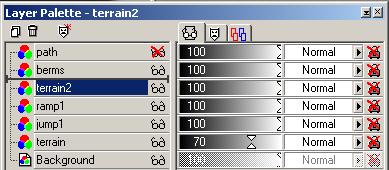
Rename Layer3 by right-clicking on it with the mouse and selecting "Rename". Give it a name like "terrain2" or "terrain path". Now remove the path layer from view by clicking the glasses next to it's name in the layer palette
The only thing left to do now is to set the opacity for the "terrain" layer. This is located in the right frame of the layer palette next to the layer name.
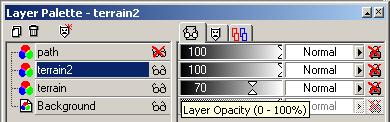
Set it to something like 60 or 75 so that you can see that there is a ditch in the terrain like this:
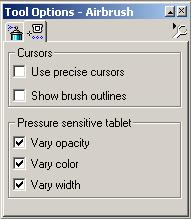
Now that that is finished we can start to make jumps. Zoom in a little on a flat section of ground. Now select the airbrush tool, hold down Ctrl and left-click where you are going to build the jump. This will set the foreground color to the color where you are going to build the jump. Now create a new layer above the "terrain2" layer and name it "jump1" or another more descriptive name. Set the airbrush settings to these
Now go into the color palette by clicking on the foreground color

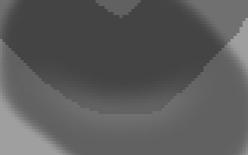
And select a shade of gray that is about 20% to 50% higher than the color which you got from the place that you are going to build your jump (in my case, I am going to build the jump at a height of about 22-22-22 so I will use a color of 128-128-128, which is about 42% higher). Now paint back and forth on your path where you want the jump to be (be sure to go outside the path width a little) until you get a nice hill in the middle of your path

To blur it, simply Gaussian Blur it with a radius between 3 and 10, although 4 to 5 is good for most medium sized jumps. Now you have a nice little jump on your path. But wait, you're not done yet, you still have to make a landing ramp. Do this by creating a new layer named "ramp1", and drawing another hill either in front of or in back of your jump, depending on which way you want the track to head.
To finish Gaussian Blur it with a radius of 7 or 8, which is good for most ramps.
To create berms, select a color that is lighter (about 20% to 35%) than the path on which you will be drawing it, and use the same setting for the airbrush as you did for the jumps, except set the step to 20 and the size to 7. Make a new layer called "berms", place it between your "path" and "ramp1" layers, then paint back and forth on the outside of the corner. Gaussian Blur it about 4 and it should look something like this
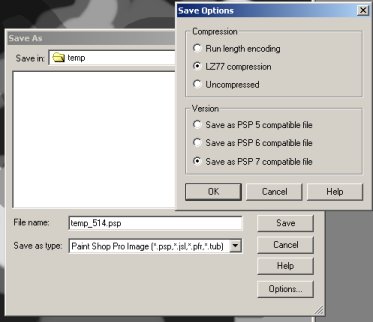
At this point, save the file as a Paint Shop Pro (.PSP) image with LZ77 Compression enabled in the options for saving it
Click on the terrain2 layer and Gaussian Blur it at about a 2 to 3 pixel radius. Click and drag the terrain2 layer to until it is just below the berms layer like this
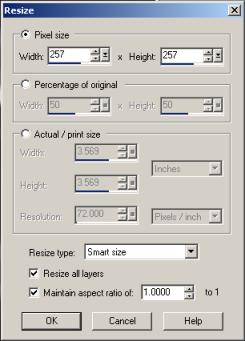
Now merge all the layers by selecting Layers>Merge>Merge All (Flatten), and resize your image by clicking Image>Resize and setting it to resize to 257x257 pixels.
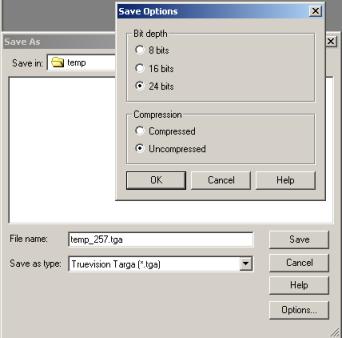
The last step is to save your image as a uncompressed 24bit Targa file
Now that you are finished creating your Targa displacement map, you can test it out with Armadillo. Simply import your displacement map as stated in the beginning, and set the Max Height to 50 to make the jumps a little larger.
Have fun, and I hope to see your tracks sometime soon!