Welcome to Devlog #5
Enemy Encounter System
Welcome back.
This week's post will be a bit more technical as we'll be showing off a system our programmers implemented to aid in the design of our game's combat encounters.
Goals
For The Sixth Sun, instead of having the combat happen evenly throughout the level, we want to engage the player in several "1 vs many" encounters that they must beat in order to progress. Enemies don't roam freely in the level, instead we wanted to set up specific spots where the waves of enemies would spawn and the player would be locked in that designated area with them. Or rather, they would be locked in there with the player.
This behavior is similar to the encounters of the modern Doom franchise games, and we aimed to replicate its possibilities and gameplay.
Spawners

From left to right (bottom): Jaguar, Giant, Boss, Shaman, Sandman
(top): Flyer, Drone
We started by creating components to hold, and explicitly identify, the enemies that we wanted to spawn in a given fight. Then, we created simple identifiers to attach to empty objects, and create a relation between enemy and their spawner. This way each spawner is specific to its enemy, and with the help of some fancy icons our designer can plan the layout of the enemies without ever needing to touch their prefabs.
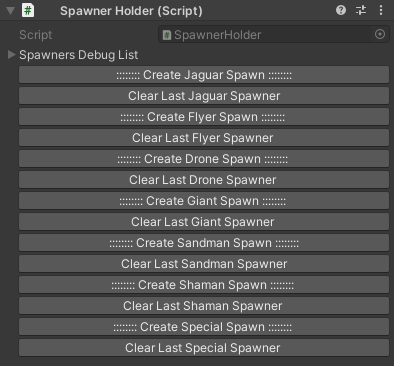
All these spawners are stored and accessed trough a simple holding component, used by other by the rest of the system when it's time to spawn enemies. For convenience we sprinkled some buttons for spawner spawning.
Flyer Waypoint Webs
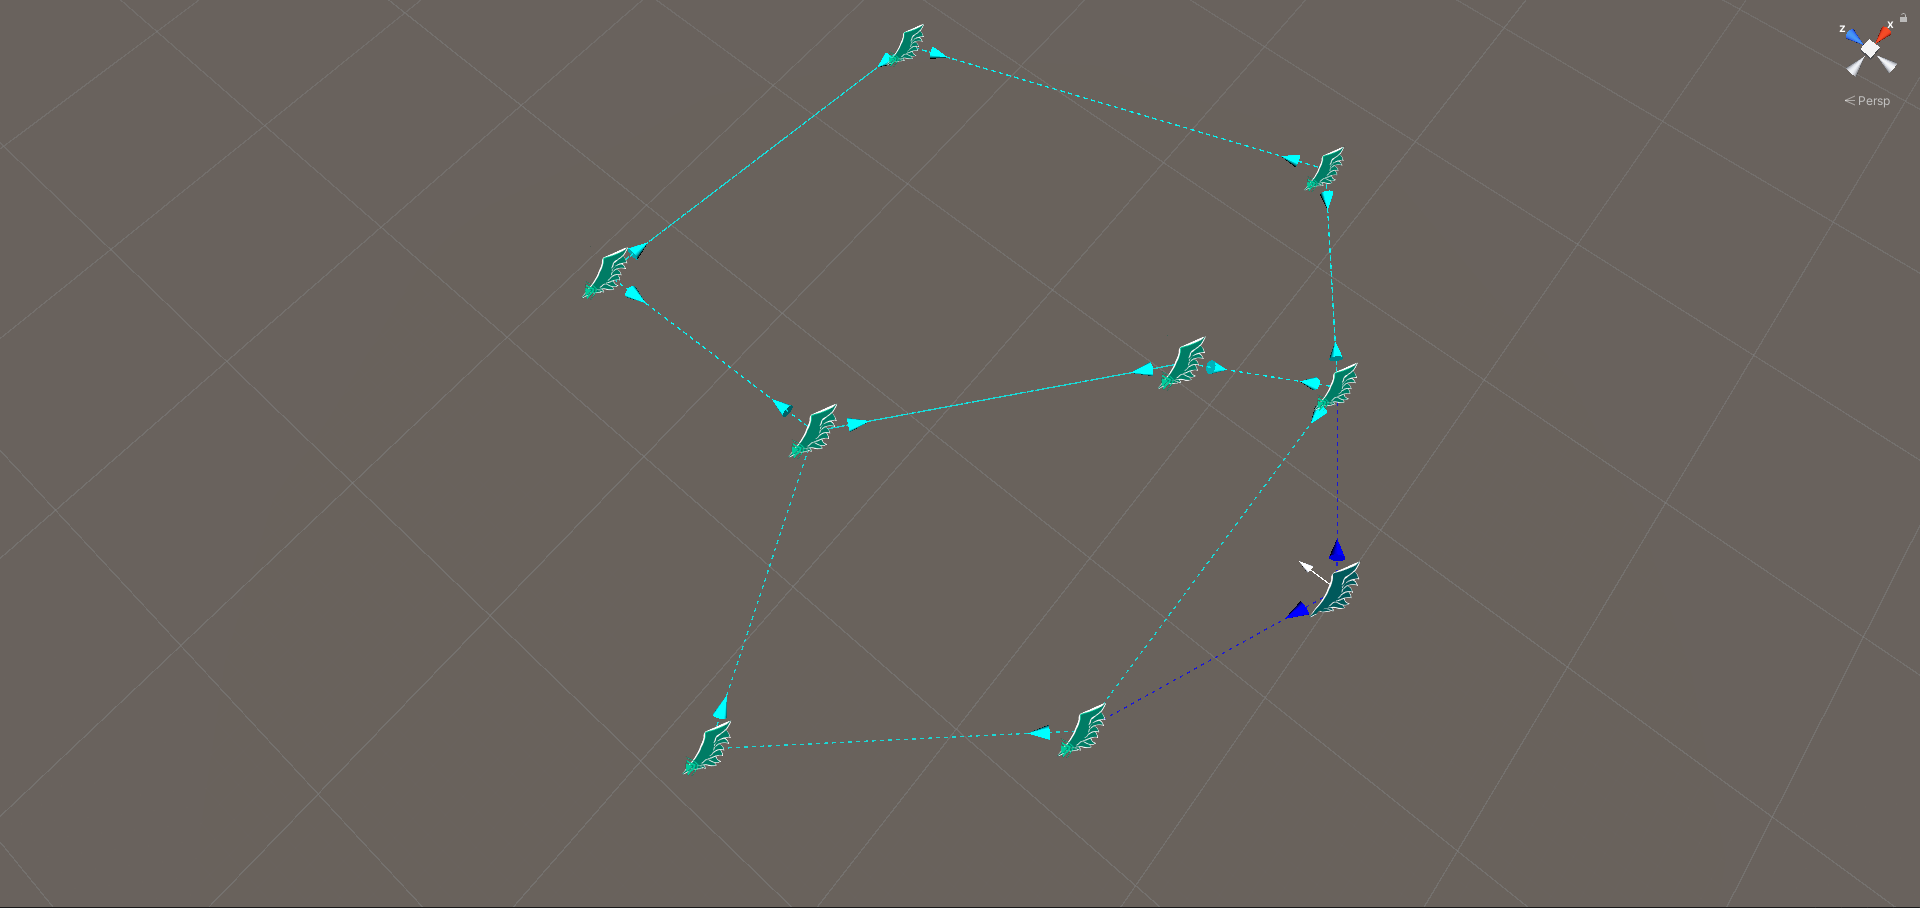
In the case of spawners for Flyers, they have the function of connection with one or more waypoints for Flyer movement, creating a 1 one outgoing connection from the spawner to the chosen waypoints. The Gizmos map out where a Flyer in this web can go, and which paths in can take from which waypoints.
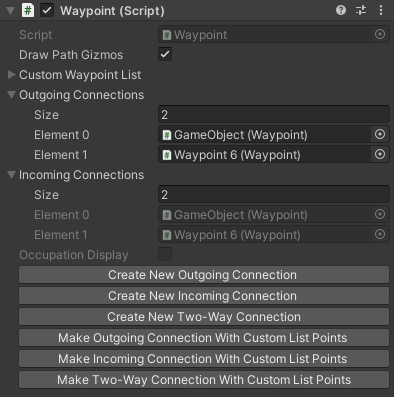
Each waypoint, in turn, stores a list of its outgoing and incoming connections, inspector buttons allow quick making of "webs" of waypoints, while also allowing to connect to other, already existing waypoints.
Encounters
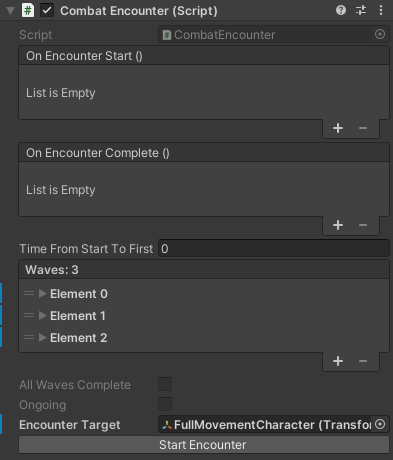
The encounter component is how our designer builds the combat encounter, it fires off a couple of events to allow us to manipulate the game world trough the inspector, and is made up of Waves. Waves are selfish, they only care about their own info, so this component takes care of grouping together and making sure they are activated at the right time, at the right order, and don't crash anything doing it.
An encounter is only marked as Complete (thus triggering the On Complete Event), when all of the waves within it are also marked as complete. Anything can start an encounter, the programmers were nice enough to offer a button in the inspector but were later forced to code in proximity triggers anyway.
Waves
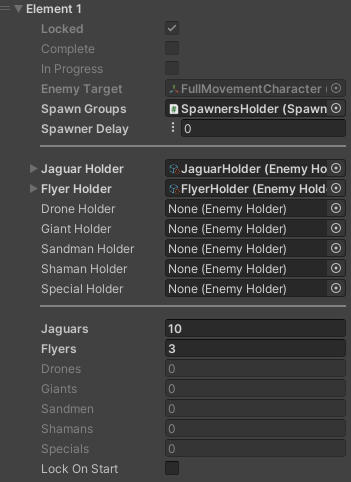
The Wave is the meat of our approach. each wave contains information regarding which enemies it will spawn, how many of those it will spawn, and the conditions that have to be met in order for the encounter to be able to move on and trigger the next wave. Each wave also has a parameter to choose what spawners it will use for the enemies it is responsible for spawning.
To better control the flow of combat, Waves have 3 statuses:
- In Progress: The enemies of this wave have spawned and are living, fighting is ongoing.
- Locked: The Wave is in progress, and the encounter component cannot advance to the next wave, if this is false, then the encounter is allowed to move on to the next wave in the order and start it.
- Complete: All the enemies spawned by this wave have been killed.
Notice how there is the option to Lock the wave on start, this will trigger the Locked state on that wave when the encounter triggers it. If this isn't ticked, then the next wave will be activated, this way we can have multiple waves active, each with their set of enemies and spawners, the recipe for a chaotic and rewarding fight.
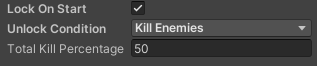
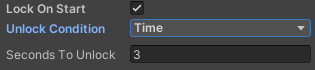
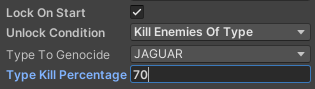
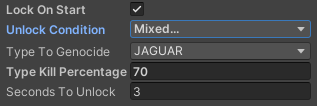
A bit more on the Locked state, when a Wave is Locked it needs to know when to be unlocked and allow the next one, in this our designer as a number of options, shown above. The Wave can have as its unlocking condition: a general percentage of its enemies killed, a percentage of specific enemies killed, an amount of time passed since it that wave started, or a mixture of any of those in which case the first condition to be met will unlock the wave.
With this system, we achieved what we set out to do. It fits our needs and is flexible enough to go a bit beyond them. Hopefully, you've enjoyed reading about it and perhaps it might even help out if you are facing similar challenges in your games.
As always, thanks for reading and you can follow our twitter for more content.
Stay tuned for more weekly devlogs!