New Playable Character Tutorial
This tutorial will cover making a new Playable Character, also known as a PC. However, this will not cover how to skin a new PC. For this tutorial, we will be making Trask into a Playable Character for TSL.
What you’ll need:
- ERF Editor
- TPC to TGA Convertor
- NotePad (should come with your computer)
- Kotor Tool
- TSLPatcher
- A lot of patience (sorry; there’s no link to that)
Step One: Preparation
- I suggest before anything else that you make a folder labeled My PC somewhere accessible.
- Open up the ERF editor and browse to your K1 or TSL folder. Open the folder labeled TexturePacks. Now, go to the ERF file labeled swpc_tex_tpa.erf; Open it to see a ton of TPC files…(still wondering about that TPC to TGA convertor I mentioned?)
- Select the head you desire to use as your new PC. In this scenerio, I will extract N_TraskH.tpc to my folder labeled My PC. So, when you select your head, click Tools. Now, click Extract selected… and point it to the folder you made in the beginning. You can now close the ERF editor.
- Now, put the TPC to TGA convertor into the folder with the TPC file. Now, open Notepad and copy the following into it:
code:for %%n in (*.tpc) do tpc2tga.exe %%n %%n.tga
- Now, save it as tpc2tga.bat (select “All Files” under “Save as type”) in the folder from the beginning. Now, in your folder double click on the file you just created. This should convert your head texture into a TGA file. Take the .tpc off of the TGA’s file name.
- (Note: This step is for K1 only.) Use KotOR Tool to extract the .mdl & .mdx with the same name as the one you extracted.
- Also, use KotOR Tool to extract the heads.2da, appearance.2da and portraits.2da from the game for you intend to make the PC.
- This should be the contents of your folder so far, other than the TPC Converter: x.tpc, x.tga, (x.mdl, x.mdx), heads.2da, appearance.2da and portraits.2da
Step two: heads.2da
- Open heads.2da with KotOR Tool or any 2da editor and make note of the row number of the original head (in this case, 68).
- Open ChangesEdit.exe, which came with the TSLPatcher program you downloaded at the beginning. Click File, New…; After browsing to your folder, click on the icon to make a new folder labeled tslpatchdata. Once inside your new folder, click Save. Now, click Modifiers, Add 2da file…; Type in heads.2da in the blank text area and click OK.
- Here’s where those making a PC for TSL have the advantage…*TSL only* Click Copy line in 2da and type in any modifier. However, I suggest heads_row_new_01.
In TSL, there are only 2 dark side transitions. Here’s how set it up for TSL with dark side transitions:
In KotOR, you may have to hex edit the model or use MDLOps. The values for KotOR’s heads.2da are as follows:
| head | your model’s filename without the .mdl or .mdx |
| headtexvvve | [YourNameHere]D4 |
| headtexvve | [YourNameHere]D3 |
| headtexve | [YourNameHere]D2 |
| headtexe | [YourNameHere]D1 |
| 2DAMEMORY1 | RowIndex |
Step two: appearance.2da
- Click Modifiers, Add 2da file…; Type in appearance.2da in the blank text area and click OK.
- Now, click Copy line in 2da and type in a different modifier than the original. (I suggest appearance_row_new_pc_01 myself.)
- Set normalhead to 2DAMEMORY1.
- For Trask, we will give him the default Republic uniform as his clothes while being able to equip armors and robes like normal PCs.

- For female PCs, just change the M to a F in the model and tex columns.
- Add the following to the end of your new appearance row:
2DAMEMORY2 RowIndex
Step three: portraits.2da
- Click Modifiers, Add 2da file...; Type in portraits.2da in the blank text area and click OK.
- Now, click Copy line in 2da and type in a different modifier than the first two. (I suggest portraits_row_new_pc_01 myself.)
- We'll use an existing PC portrait as a template to make the new row.

- For female PCs, just change Sex to 1.
Step four: Portraits/ Packing into TSLPatcher
- You will need to make a info.rtf (what TSLPatcher displays before installation of your mod) inside your tslpatchdata folder. Also, make sure you have TSLPatcher.exe inside your My PC folder. Now, double click and install it. Now, open up the game and select New Game and take a picture of your new character in the Character Generation. Crop and do what like with the picture and save it as a 32-bit TGA. Label it according to what you wrote in the new portraits.2da row.
- For ease, copy and paste your head textures into the override labeling it as the neutral head to take pictures for dark side transitions as well. Move all your files, except the .exe, into the tslpatchdata folder.
- Now, go back into ChangeEdit.exe and go to Install Files and add all your files. My advice is to set them all on Replace Existing except for the 2da files (in case the user has them in their override already). For folder name, type /override; Go back to Settings and edit the caption and everything you want. Then, click Save Changes.
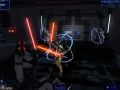
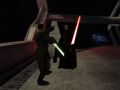
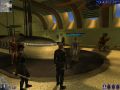
- If you have followed the tutorial, here is my portrait and end result for reference:


I hope this has helped you. 
-jcoolZombie


Thanks, i needed this :D
link dead do somethin plz "TPC to TGA Convertor"?
you are able to use kotor tool to extract a tpc as a tga aswell
i got lost half way trough...
This comment is currently awaiting admin approval, join now to view.
This comment is currently awaiting admin approval, join now to view.
This comment is currently awaiting admin approval, join now to view.