In this video, we demonstrate the usage and gameplay surrounding the cover system. As you can see, the cover system will be vital in situations where you find yourself facing overwhelming odds – multiple opponents can be quite deadly, especially since supplies tend to be fairly scarce!
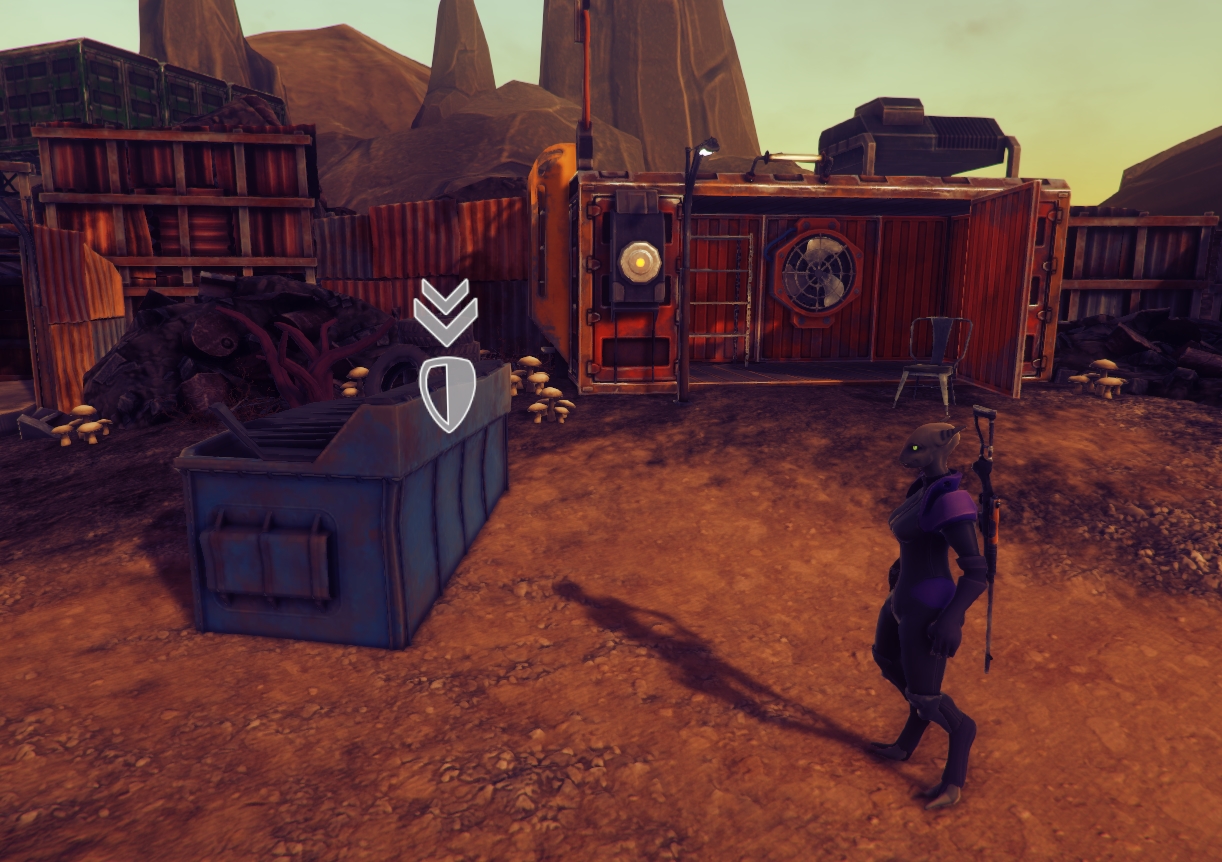
In this image, you can see the cover icon, which denotes the type and location of the object you can take cover behind. The shield indicates the type of cover: light cover, which is an empty shield, medium cover, which is half-full, and a heavy cover, which is a full shield. This affects how often rounds will penetrate the object, as well as its general effectiveness as a piece of cover. Of course, thrown explosives also exist!
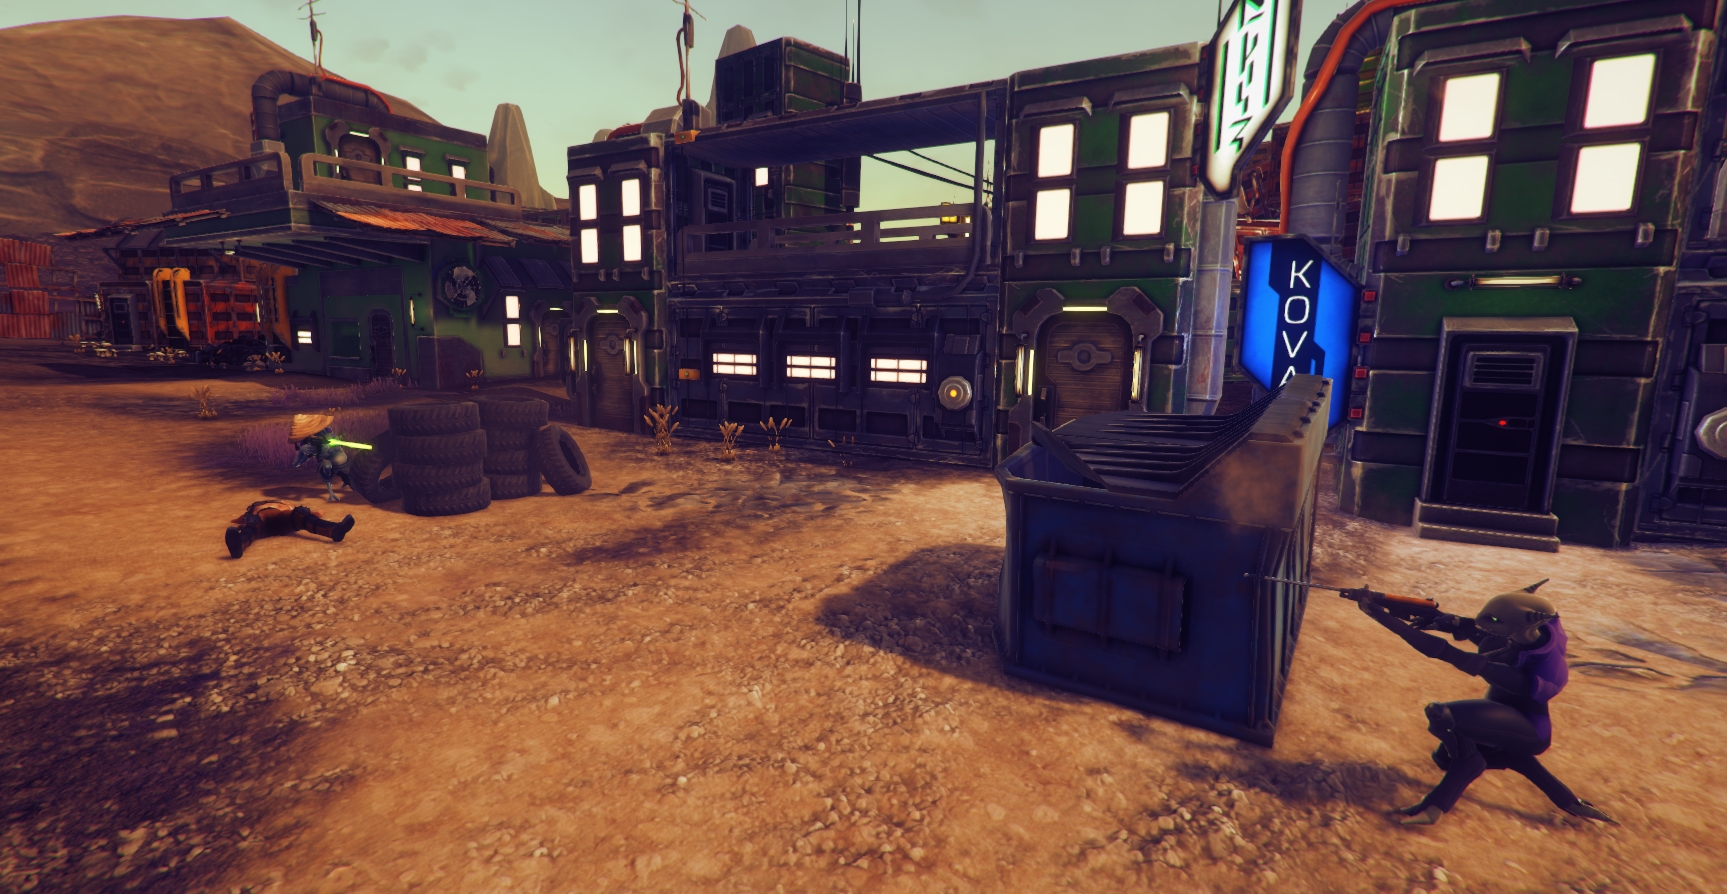
Enemies will also make use of the cover system, and they get the same effects from it. You’ll either have to time your shots right to get them, use appropriate magic, or take myriad other approaches to negate their cover. Blindly charging in can get you killed pretty quickly.
The system is still a work in progress, though, and we expect changes to be made, as well as many improvements to the system as we develop it.