Tutorial originally created by Dave Foster and posted at Morrowind-oblivion.com. Mirrored here for archival purposes.
This tutorial is aimed at modders with moderate Construction Set skills. It attempts to explain how the Oblivion construction set auto-generates the lush and beautiful scenery for the game. Now, just to clarify a point before we move on - when you play the game, the scenery is not being auto-generated in real-time. As I said, the construction set generates the scenery at the request of the modder, and according to the parameters set for the various elements required by the mod e.g. trees, bushes, rocks, and creatures. Thus, the scenery elements become static, embedded objects within the plugin file. It's a very clever scheme, that results in fabulously lush and vibrant scenery in-game, but not at the expense of rendering speed within the Construction Set. So, how does it work then? Well, initially, it all seems very confusing with a lot of parameters, but after a couple of days of experimentation, it begins to fall into place and starts to make sense. I should point out the generation of scenery to user-requirements is time consuming, depending on how many objects are being requested in total. The more cells and objects included in the request, the more time it takes to compute the results. Thus, a reasonably powerful machine is required, together with a large measure of patience. Specifying configuration parameters that result in huge numbers of objects being created can lock up even the fastest of machines, so take care before hitting the generate button.
- Step 1
Let's now take a look at the screen where all this arcane magic takes place.
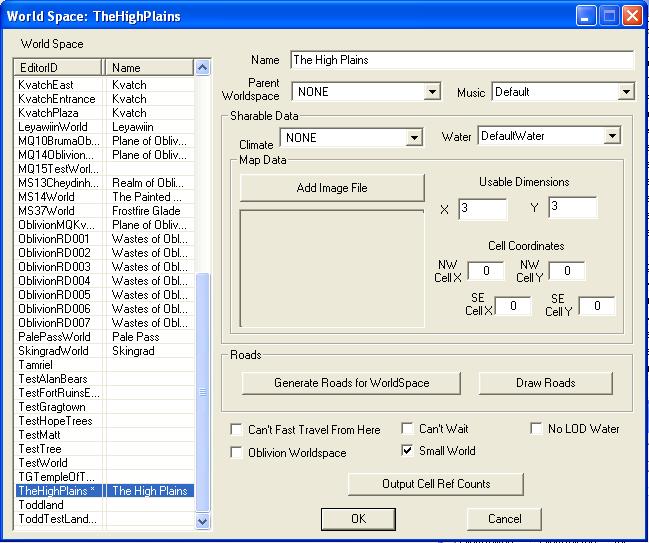
First off, we need to create some land to play around with, so go to the [World - World Spaces] menu. This is where we can setup some private space for our mod. See the screen below. Note that in the left column there is a set of names that already exist. To the right we have information for the selected space. So, start by creating your own World Space by left-clicking in the EditorID field then selecting New. Provide a meaningful ID, then click OK. You now have your own space, so find it in the list and select it. On the right, fill in the Name for this piece of land that you are going to create e.g. "The High Plains". Don't worry too much about most of the other settings for now apart from the Usable Dimensions. This is where we specify how many cells we want to use in this space. Best to start with something small, and square, so type 3 into both the X and Y fields. This will give us a 3x3 block of land to work with, which is plenty enough to see some worthwhile scenery. Ensure that the "Small World" box is ticked.
- Step 2
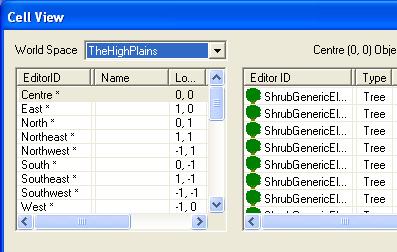
Now, that we have a World Space, we need to select it in Cell View by using the drop-down box. See the image below. Here, we see our 9 cells, which I have renamed from their "Wilderness" default setting. Click on the central cell (Centre 0,0) then go into landscape editing mode (H key). Use a fairly large setting and drag the land up to above sea level (the pink plane). Now, Use flatten to flatten off this cell and the surrounding cells. We will leave the 3x3 area flat for now, in order to avoid a few issues with slopes that come later.
- Step 3
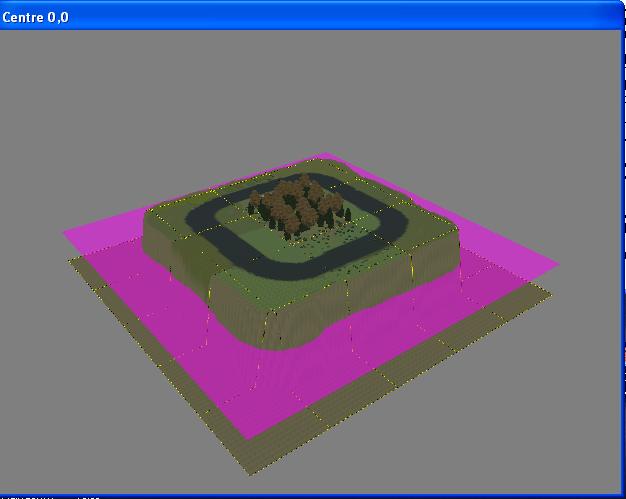
While we're at it, I might as well make the point now that, as you can see if you zoom out, your block of nine cells - raised above sea level - sit above a 5x5 matrix. This demonstrates the main advantage of a private "World space", where there is nothing in the distance. This is very advantageous in respect of rendering speeds, since only the cells being worked on need to be displayed.
- Step 4
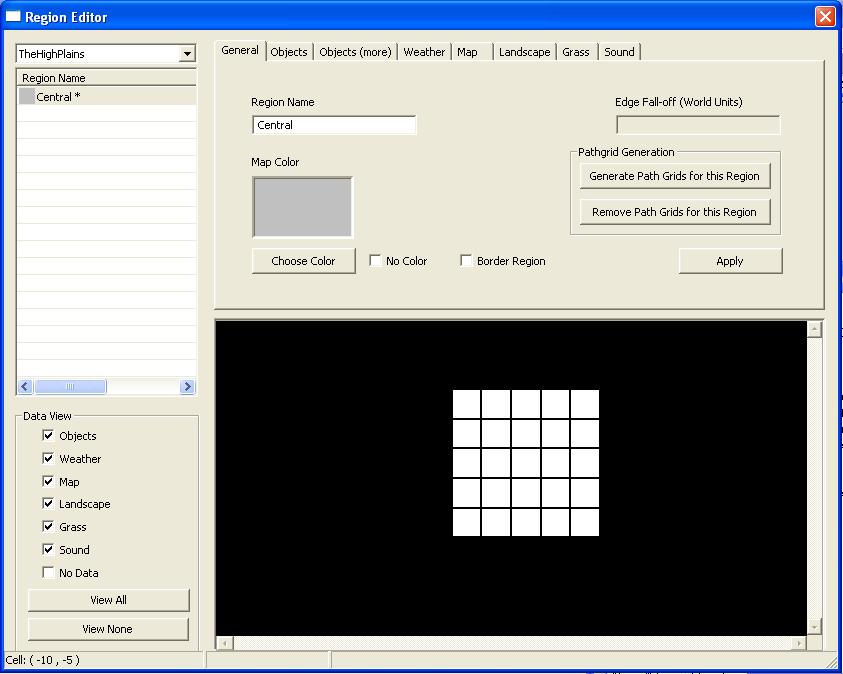
So, we have nine cells that we can landscape with various "flora and fauna" objects. Automatic scenery generation is applied to regions, so we now need to set-up at least one region before we can begin. Go to menu [World - Regions] to bring up the Region Editor. We now need to create a Central region for the centre cell. So, right-click in the Region Name column, New, then create a region called "Central". Now, select the region, and the various views will appear on the right. At the top we have the various Tabs for Objects, Weather etc., and below, we can see our 9 cells in the middle of the 5x5 matrix. You can colour the region (Choose Color) with any colour of your choosing - I made it grey. Be aware that the region you have created is not assigned to any of the cells yet. Furthermore, you can create multiple regions for various purposes. But, eventually, each cell should be linked to one of the regions. This is the same as the Morrowind Construction Set. But the main use of regions in Morrowind is to apply differing weather conditions to the various cells. Here, we can do the same, but more importantly, we can use the region to specify auto-generation objects to the cells in the region. Forget the other settings on the General Tab for now since we won't be using them here.
- Step 5
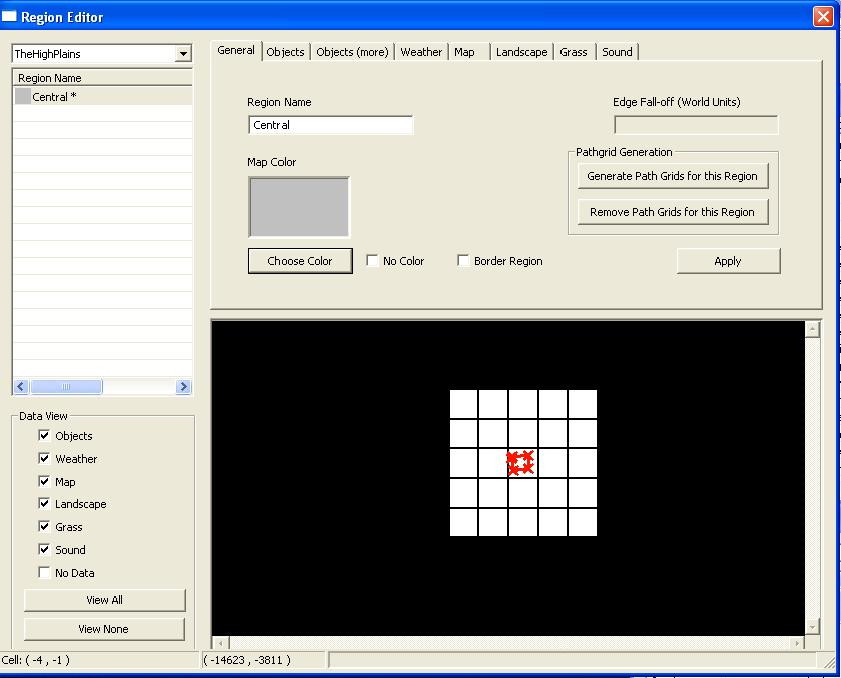
At the moment we have 9 cells and one region. We now want to assign the centre cell to the Central Region. So, hold the mouse cursor over the middle cell (confirm you have the correct cell by checking the status bar at the bottom left of the screen - it should say ( 0, 0 )"Centre". Now, left-click in the cell. A small red "x" will be created at the cursor. We are now going to continue to specify this single cell as being in the Central Region by creating a further 3 crosses in the cell, then connecting up to the first cross to form a closed loop.
- Step 6
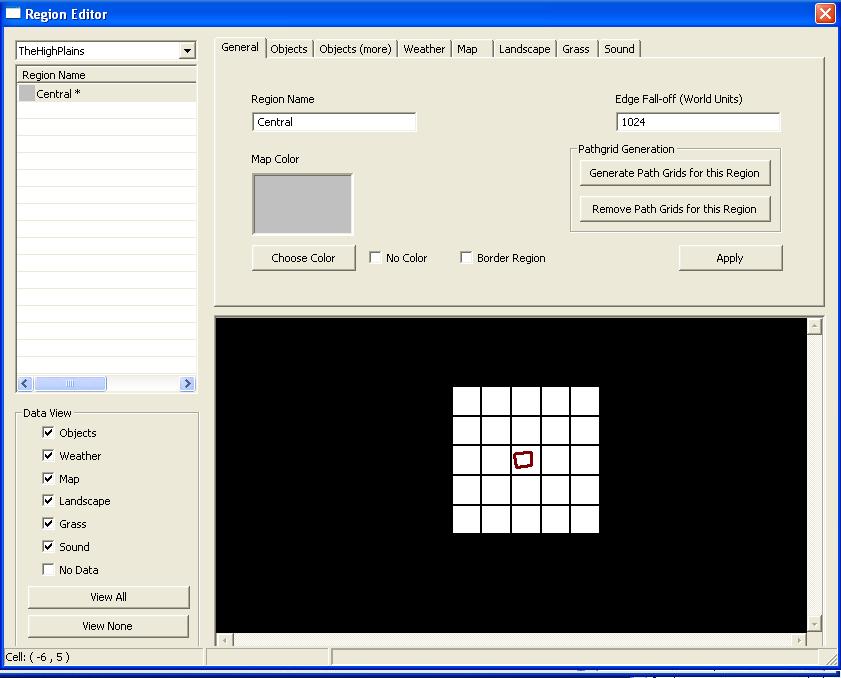
Now right-click in the cell and select "Generate Canopy Shadow Mask for this Cell". This removes the red crosses and leaves a closed loop in the cell, which indicates this cell has been assigned to the named region on the General Tab.
- Step 7
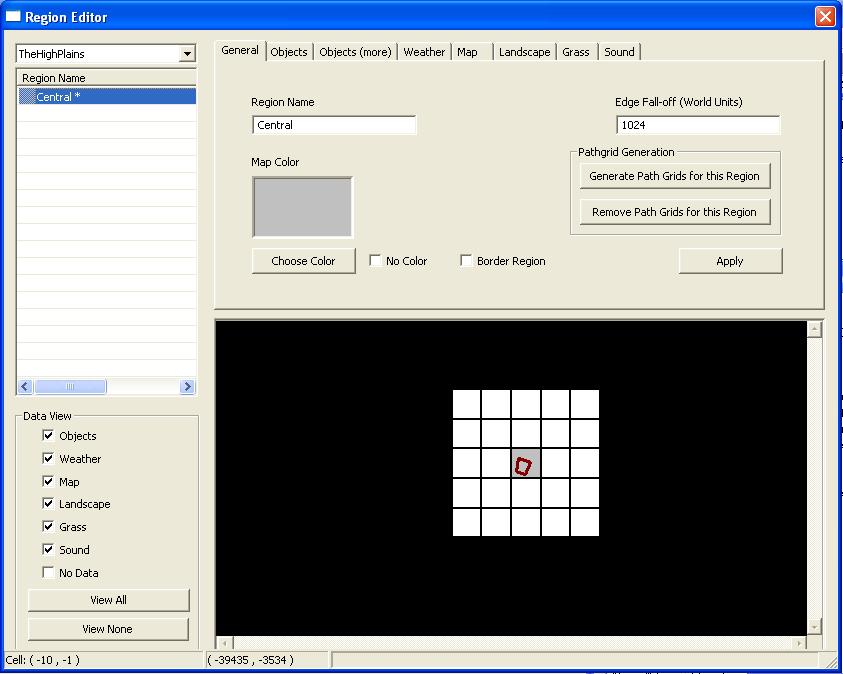
To see this now, click on the objects Tab and tick the box "Enable this type of data". The cell will now be filled with the region colour, indicating that the link has been made.
- Step 8
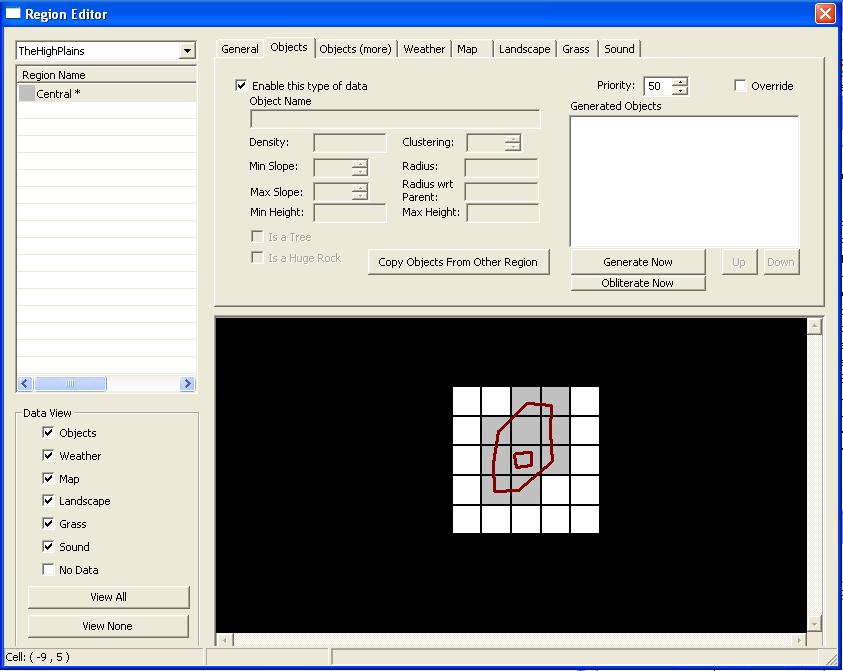
If you wanted more than one cell to be in this region, then you would put your crosses in the cells that bound the region you want to create. That means you could have more than four crosses, depending on the size and shape of the region you wish to create. Here, we have created a Central Region consisting of 10 cells. Play around with this feature a bit, since it is fundamental to creating complex regions than can be associated with auto-generated scenery.
- Step 9
So, we now have a one cell, Central region that we are going to fill with automatic scenery. This is where it starts to get interesting, albeit somewhat complicated at the same time. Don't worry, once you get the general gist of what comes next, you'll be able to experiment a bit to determine what works and what doesn't.
For the moment, we are going to keep it as simple as possible, and limit ourselves to just the "Objects" and "Grass" Tabs. So, select the objects Tab. Don't worry about the priority and override settings because we will not be using them here. First, look over on the right side..you'll see a listbox called "Generated Objects" and a couple of buttons below it called "Generate Now" and "Obliterate Now". In order to auto-generate scenic objects we will need to place such objects in the listbox then hit the "Generate Now" button after setting some parameters on the left side. To get objects into the listbox we will drag them in from the Object window. Lets start with a tree. Go to the object window and select WorldObjects->Tree. Make sure you have a clear path between the Region Editor window and the Object Window so as to allow drag-and-drop. Find the tree "TreeScotchPineForest" in the EditorID column of the Object Window and drag it into the "Generated Objects" listbox. Now, select it in the listbox. All the parameter settings on the left now become enabled for this tree, which shows as the Object Name.
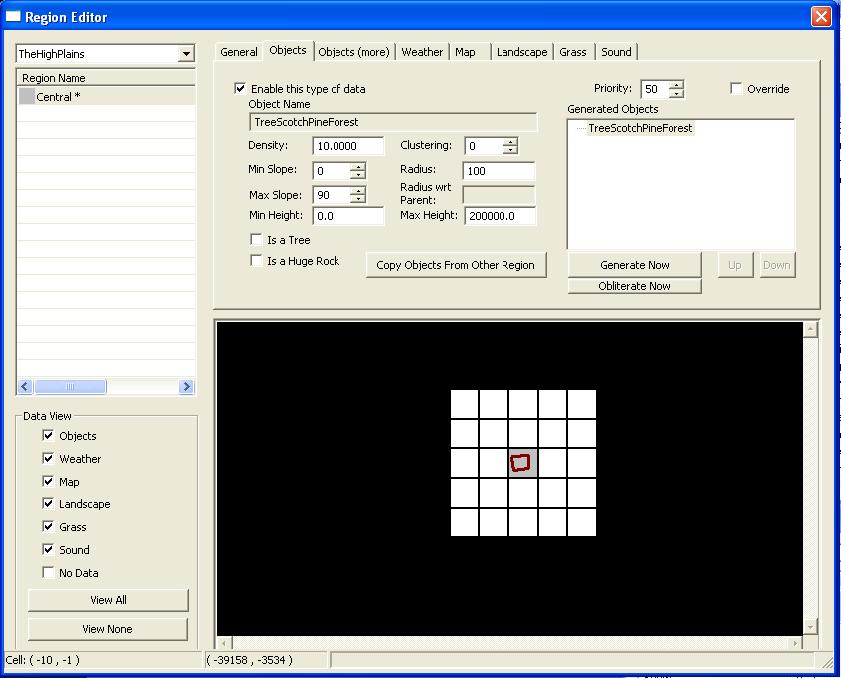
- Step 10
We now need to set these parameters in such a way as to create the number of trees and the layout we wish to see when we generate them. Various combinations of these parameter settings will result in quite distinct patterns of arrangement. Caution is always required when using any particular combination of settings since, if you get it wrong, your computer will grind away for hours with no sign of ever finishing. If you choose settings that result in a protracted wait, then it is a good idea to open Task Manager and monitor the process. If the memory usage continues to tick up past the 400Mb without any sign of finishing, then you may assume that your settings were not good. You may need to terminate the process and start again. TIP: always save your mod before generating, just in case.
At the moment, you may be thinking that finding a good combination of parameters is pure guesswork, but it isn't. I will show you a formula shortly, that will help you choose a set of parameters that will help you achieve the pattern you are looking for within the required range. So, let's discuss these parameters a bit. The most important ones are "Density" and "Radius". Secondary to these are "Clustering" and "Radius wrt Parent", followed by Min/Max "Slope".
Before we go any further, we should understand the dimensions of our Oblivion cell, since the number of objects that can be successfully deployed in any particular cell is directly dependent on the area of the cell. In Morrowind, the cell size was 8192x8192 i.e. 8k by 8k. Check out the size of your Oblivion cell now. Hold the mouse cursor over the left and right borders of your cell in the Region Editor window. An Oblivion cell is 4096x4096 i.e. 4k by 4k - which is a quarter the size of a Morrowind cell. Hence, four Oblivion cells are equivalent to one Morrowind cell. These four Oblivion cells are defined as a "Quad".
Now that we understand the area we are working with, it is time to define the parameters and their relationships. To keep it simple, we'll call the length of the side of an Oblivion cell 4000 units. This will make calculations somewhat simpler.
The "Radius" parameter is in the same units. So, if we talk about a radius of 1000 units, we understand that as being one quarter the length of the side of an Oblivion cell. This "Radius" is an indication of the distance, in units, that we require between one object and another object of the same type. So, if we specify a radius of 100 units, we are saying that each instance of the object should live in a space dictated by that value. This would then conform to the area formula for a circle (PI*R^2). But, to keep this simple, we'll call the area D^2, where D is the diameter. Actually, that's not a bad approximation, since regular Oblivion objects are, in fact, bounded by a cube.
The "Density" parameter is an indication of how dense we wish the objects to be packed into the cell. If none of the objects overlapped the space of another object, then this could be classed as sparsely packed. On the other hand, if many objects impinged on the space of their neighbours, then this could be considered to be densely packed.
When we decide how we want our space to be used, we will think about the number of objects we wish to use, or how much space we want to remain free of objects. There is a direct relationship here between the spacing and the number of objects within a given area. Here is a formula to help you decide the parameter settings for any given situation. In this formula the following symbols are used :
S indicates the length of the side of the cell i.e. 4000 units
R indicates the radius value for object spacing
D indicates the Density setting for the objects
N indicates the number of objects generated in the space
Thus, N = (S/(R * 2))^2 * D
Example : Approximately how many trees will we get in our cell if R=100 and D=10%
N = (4000/(100*2))^2 * 10/100
N = 20^2 * 10/100
N = 400 * 10/100
N = 4000/100
N = 40
I'll leave it there for the moment, and continue the tutorial when, and if, I get some spare time in the future. Meanwhile, try it out. Make the settings, click on Generate Now, then count the trees.