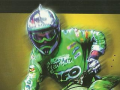
Tutorials originally written by Jan-Pieter. It was originally written for the game Edgar Torronteras' eXtreme Biker. I'm not exactly sure when these tutorials were written but he references both Extreme Biker and Motocross Mania so it likely works for both. Given they run on the same engine. Note not all of the images were archived however much of the info is still preserved. You can find the Motocross Mania YZ level editor here. The Edgar Torronteras level editor XZ is here.
Quickstart
About this tutorial
This tutorial will show you the 'classic' way to make a track for MXM, however this is not the only or even 'best' way to do it. This classic way is to have the actual track fit in the center square, then you can make a texture covering the complete track and use a (custom) tile for the outerparts.
Creating the world
After opening YZ you'll be presented with the 'Create/Load World' window. Enter a 'Track Name' at the top, this will be the name for the wld-file and the dirs used for your world. This will also be used for the ingame trackname however this can be renamed. Leave the X/Y quads sliders at 3x3, this will give you enough room to place a stadium around your track or some hills with trees. With the 'Knot Distance' slider you can adjust the size of your track (and world) without messing with your displacementmap. To replicate your old track in MXM you have to adjust this slider so the 'Track size' (at topright) matches your old track. For EB/moto-x-2000 tracks set this to about 348 for mcm1/2 to about 300. Enter all the info at topright in a text-document and press 'create'.
The entered settings in the 'Create/Load World' window might not be accurate, maybe you even want to have the track bigger to make up for the power of the bikes or you want it smaller to make it tighter. This will be changed later on, for now it's imported to find the height to displace your tracks with to make it match the relative size of your old track. Once you have found the needed height you can recreate your track/world with a different 'knot distance'/tracksize and calculate the new height.
Preparing your track
Before you can test your track there are several things you need to do.
Adding your centertexture and colormap
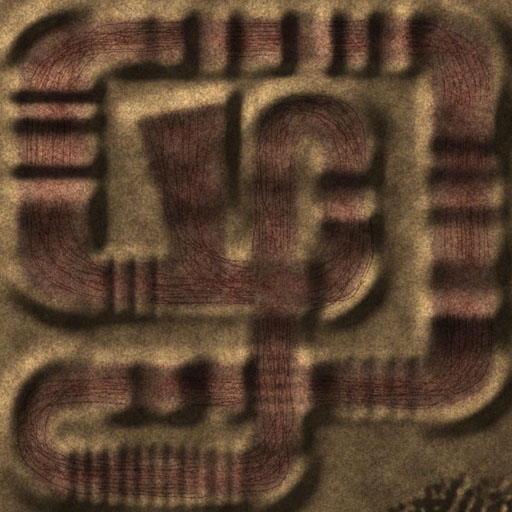
If you don't have a centertexture without shading resize your centertexture to 3061x3061 and make a white map of 577x577 this will be your 'colormap'. If you still have a seperate shadowmap and a shadingless centertexture resize your shadingless centertexture to 3061x3061, resize your shadowmap to 193x193 and use canvas size to add an (empty) border and make the map 577x577, fill the border and save it as a grayscale (no need for rgb) bitmap, this will be your 'colormap'. Go to the 'landscape' plugin and into 'landscape textures'. Use 'add center' to add your centertexture and use 'add colormap' to enter your colormap. Right-click in any window and select 'use user view' and select e.g. view 1. (YZ divides your texture in 144 parts of 256x256 called autotextureX.tga with X 0-143.) Now you should be seeing your texture and a white border. The white border cann be filled with a tile with 'add tileable'. If you want to make your own tile make it in targaformat at 256x256 and place it in your track's texture dir. Press 'add tileable' and select either a tile from the game (topwindow), your custom tile or an autotexture.
Adding your disp
If you have 3dMAX3.x or have a buddy who does you can make your new terrain better with the landscapeplugin for max, however for now you will be better of using the dispmap in YZ as we are first looking for the right size and relative height of your track, changing this will be easier using YZ. When you have found the preferred size+height you can remake the track/world in max. For the mcm1/2 tracks you need to resize your disp from 257x257 to 193x193, then canvas size it to 577 (this means adding a border to your resized disp). If you have an eb/moto-x track resize your disp from 145x145 to 193x193 then canvas size it to 577, if you have a 721x721 worlddisp for eb/moto-x resize this to 960x960 then canvas size it to 577x577. Press the 'landscape terrain' button and enter a height value of 0.4 your original height in eb/moto-x or your height in mcm1/2 at 'Disp. Amount'. Now use 'Import Terrain' to add your new disp. (Keep 'relative displacement' deselected.) Take a look at your track and see if it's about right if you are sure it's not right readd your disp again with a different 'disp amount' setting.
Adding your splinepath
You need to have a splinepath in order to test the track. Don't waste any time on making a good splinepath at this moment as the splineinfo will be in meters and if you recreate your track/world you can't use the same splinepath again as the spline path is now too small or too big. Just make a nice circle. To do this go to the 'trackpath' plugin and in any window already set to a userview as explained above rightclick and select view>top/down. Now zoom in and make a path with 'add point', make sure it is closed.
Adding fog
This is probably not mandatory but it won't hurt at all if you already turn fog on. Turn fog on with settings>fog on.
Testing your track
Save your track and without closing YZ launch MXM, select 'quick race' and baja and find your track and press start. Take a look at your track and see if the height needs to be adjusted to make the look like the old version, for now don't worry about the incorrect size of your track or the wideness. If you think the height needs to be changed, close the track and without closing mxm (alt+tab/ctrl+esc) open YZ. Pick a new 'disp amount' and import your disp again. Now go back to MXM and test it again and so on till you find the correct height. Note the correct height in the text-file made before.
Resizing your track
You now have found the correct height for this size of your track but it may be too small or too big. You now have to back up your texture dir, delete the wld-file and it's dirs and recreate your track/world. Do the same as when you started but now move the 'knot distance' around so the tracksize will be small or bigger then it was before. Once you have picked note all the new settings in the text-file made before without deleting the previous ones, we need them!. Now you have divide your previous tracksize with the new size and multiply it with the height/'disp amount' to get the new height/'disp amount'. E.g. you started with a tracksize of 350 and a height/disp amount of 40, you wanted it 25% bigger ->new size 1.25x348=433 new height/'disp amount' will be 1.25x40=50. After recreating you track/world again place your custom textures back in the track's dir but delete all the autotextures and redo the 'preparing your track'. Now save and test it again in mxm and redo all steps till you have found the correct size for your track/world and find the exact needed height.
3dMax3.x users
If your track was a lil too bumpy after resizing, you can make your terrain in max after you have found the correct size and height/disp.amount for your track/world. Open 3dmax and select the toolstab and find the landscape plugin from deibus with 'more'. Create a new world matching the final settings from your text-file and create the new world. Select the modifier tab and find displace with 'more'. You can use your unresized but canvassized disp as dispmap. Add your dispmap and set the heightvalue at strength and use a factor of 0.005 for blur. Press 'Read' on the landscapeplugin window and save your track as lnd-file redo this with several settings for blur with steps of 0.002. You can import the lnd-files same way as you added your disp in YZ, if you have made several try them out one by one and find the one which is blurred enough but not too much, making your track smooth without loosing too much detail.
Texture tutorial
About
This tutorial will explain the steps I take to make a texture for eXtreme Biker or MXMania and there are some premade tiles you can use.
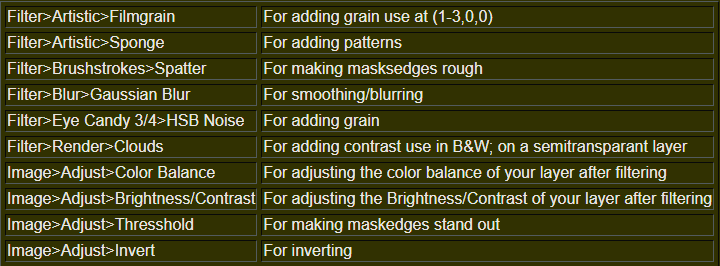
Filters and other photoshoptools
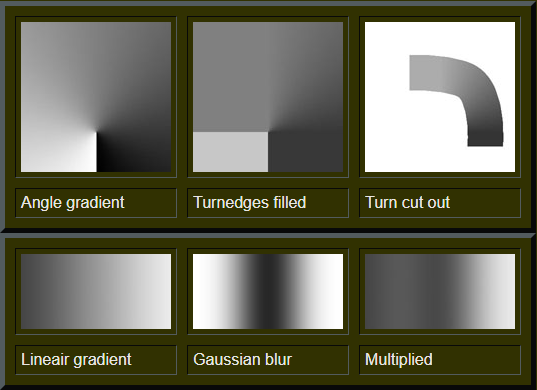
If you wanna make your own terrains or adjust them, you should familiarise yourself with at least these filters and tools:
How to make textures
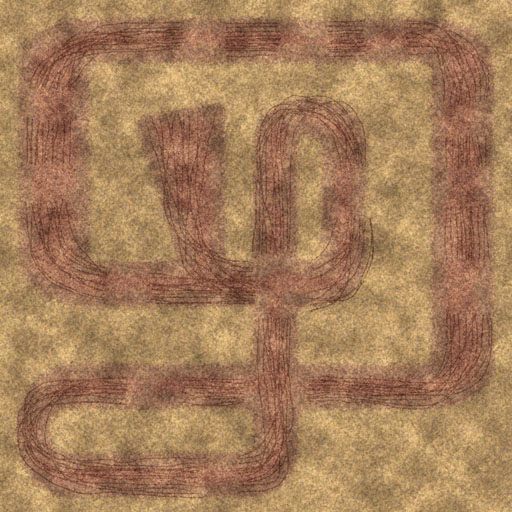
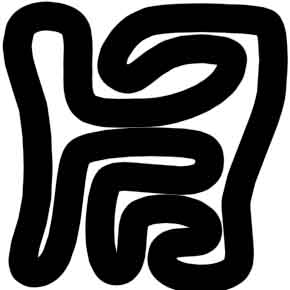
Usually a texture for eXtreme Biker/MXMania will consist of a couple of different terraintypes like grass, mud, rock etc., trails of mxbikes and perhaps some extra's like a black and white checkered start, a signature or painted arrows. The best way IMO is to make a texture by using multiple masked terrainlayers. Start by making some layers of different types of terrain, then you'll need masks to cut out the different terrains and end with the trails and the extra's. If you have at least 128MB RAM you should make all terrainlayers at 2041x2041 (EB) or at 3061x3061 (MXM), because that will give the best quality. If you have less memory make the texture half the size. Then in the end resize your final texturemap and apply a grainfilter (see below). Don't add shadows on your texture because that will lower the texturequality a lot. Your shadowmap should be added as seperate colormap in YZ or as shadowmap in XZ.
How to make terrainlayers
They're several ways to make terrainlayers. You can choose by using a pattern to fill the entire layer with or by using filters. I don't use patterns because it looks unrealistic seeing the same pattern repeated over and over, however tiles are easy to start with :)
How to make and use patterns
You can make a pattern by drawing by hand, from a picture or by using filters. Filters may not always give the result you want but it's really fast. To make a pattern tile almost seamlessly you have to make it some pixels bigger than the desired tilesize. So if you want the tileres 256x256 make one e.g. 260x260. Then apply the 'Flaming Pear' Tesselation filter to make it a seamlesstile at 256x256.
Here are some example patterns made by me
To fill your layer with the pattern first open a pattern, make a selection of the entire pattern (Ctrl-a), click on Edit>Define Pattern, make a new layer in your texture psd-file and fill it with the pattern.
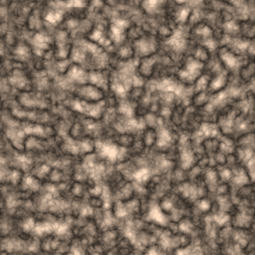
Making a terrainlayer by using filters
I will show you how you can make a terrainlayer by using filters. For this example I'm going to make a sandlayer. Important is to know the resulting texture should be bright because in the game the shadowmap will be placed over the texture making it darker. The brighter you make the texture the more contrast there will be in the game and the better it will look. You start by creating a new image at 500x500. The reason you have to start this small is because the first filter I use for making random spots has a limited dotsize. Then you can select a color to fill the image with, you can either take the color from a reallife picture or by picking one from the colorpicker. Picking colors at the colorpicker is easiest by setting the slider to brightness by selecting B of HSB. From a pic I've taken the color (155, 120, 82), because this is too dark I brighten it to (238, 184, 126). Now I filter it twice with Sponge (10, 11, 15), before filtering it again with Sponge at a lower brushsize (6, 7, 9) I Gblur (4) it and enhance the contrast with about 20. After Sponging I Gblur (3) it again and sponge (0, 4 , 3) it for the last time at this resolution. After Gblurring (1) this I use Adjust>Brightness/Contrast and Adjust>Color Balance to get a good color to continue with. It is very important to continuously monitor the brightness, contrast and colorbalance otherwise you may not be pleased with the final result and you have to start all over again.
You can now resize your texture to 1500x1500 or immediately to 2041x2041 (EB) or 3061x3061 (MXM) for some additional sponging. Now we still have to make it look like sand upclose. Better to first raise the contrast some and then sponge it with (3, 1, 5) followed by Gblur (0,5). Sponging it again could kill the texture so for the final touch I have to add grain. You can either use Filmgrain, Add Noise or HSB Noise. HSB Noise will give you the best results because it allows you to adjust the hue, saturation and brightness variation of the lumps as well as the lump width, height and fractal roughness. If you feel like it you can render some b&w; clouds on a new layer with blending set to overlay at about 20%. When you make your own texture with Sponge just look each time what settings will give you the best result.
Masks
You need grayscale masks to cut out terrainlayers to make others visible. For example your bottomlayer is grass and the layer above is sand. The sandlayer has to be cut to make the grass visible. You can just erase the grassparts with the eraser, however using premade mask based on the actual trackpath is easier and more accurate. To make such a mask you should use your displacementmap for base and in particular the trackpath, because usually you want the trackpath to be sand and outside the trackpath something like grass or lighter sand.
I always make my terrainmasks based on the trackpathlayout, if you don't have one already make one. Open the layout in a new image and canvas size it to the center. You can also use a merged down disp as background so you can see where exactly the edges of the masks will turn out. For example if you've made your disp for a 3x3 world at 577x577 canvas size your image to 193x193. Now resize the image to 3061x3061. Select your trackpath with Select>Color Range with the fuzzyness slider set to 100. Contract this selection with select>Modify>contract by about 30% of your trackpathwidth, then fill it in white on a black layer and Gblur it with about 80% of the amount of pixels you used for contracting. At the moment you have a perfect smooth transition between the innnertracktexture and the outertracktexture, however this is not what we want. Grass or sand doesn't just fade in to the dirt, the edges should be rough and sharp. The easiest way to accomplish this is to use spatter. This will make the edge rough and add (dirt)spots on both sides. Play with some different settings. If you look upclose after spattering you will see the edges are rough and spotty, but there are graylevels making the edge not stand out. To make it sharp you can use either threshold or Brightness/Contrast. If you have the disp as background you can set the blending of your masklayer to screen so you can get the edge exactly where you want it. When done Gblur (0,5) it to make it not look ugly in game.
In real life trackpaths will have wet spots in the middle or places where the sand is rougher and darker. The mask for this innerdirt should be more chaotic than the trackpath. Fortunately there's a useful filter for this in Eye Candy's Xenofex called Stain. You use it by selecting the original trackpathlayout and selecting a new layer. If you don't have this filter just paint something. This result we're also gonna Gblur and spatter, it's up to you to make it sharp or not.
Trails
You can eather draw the trails on a new layer or make a mask for the trails so they are textured. The easiest way to make a trailsmask is to expand your disp and draw it on a new layer in white. If you want to make the trails more rougher you can use Spatter.
Putting it all together
Open one of the terraintextures you made, rename it and copy and paste all other terraintextures in there in the proper order. You can add masks for non-background layers by Layer>Add Layer Mask>Reveal All. Open your premade masks and use Define Pattern and Fill Pattern to get them as masks in the corresponding layers one by one. For the trails you can use a darkened copy of a dirtlayer. To make the trails look more realistic you can use blending effects on the layer. Before we can add these effects you need to cut out the texture by using Layer>Remove Layer Mask>Apply. I recommand using Outerglow and Innerglow for blending effects both with the color black selected and set to Multiply.
Extra's like a black and white checkered start, a signature or painted arrows can be made on a new layer. Such extra's can really influence the texturequality in a bad way because it adds more colors to the texture while there's only room for 256 colors in the end. Better is to first add the texture to YZ, then open the appropriate autotexture(s) and add any extra's.
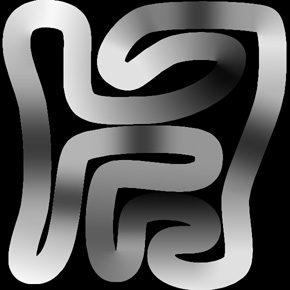
Here are some examples of finished textures of my tracks.
Texture issues
For some reason the game doesn't use all colors of the palette, colors close to each other will have the same color in the game making it look fuzzy. The only remedy is making sure the colors used aren't close to each other and the texture is grainy enough. If the final result looks too fuzzy in the game apply one of the grainfilters on the final texture.
Colormap
The colormap can be seen as a map placed ontop of the terraintextures with blending set to multiply. The colormap can be used to add shadows to your texture, but it's not limited by grayscalevalues and colors can also be used. However when adding colors you should be aware what multiplication does with colors. You can try it out yourself in PSP or Photoshop by painting on a new layer with blending changed from 'normal' to 'multiply' on a colored background. Adding colors to the colormap can be useful to add variety in places where you use (stock)tiles e.g. (mud)paths, trails and text.
When you've made a centertextures you don't have to add shadows through a colormap, you can just use a white map for it. Having shadows on your centertexture will allow your shadow to have more detail, however this will be at the expense of texturequality and the lack of shadows outside the centersquare.
Preparation
You are going to make shadows using 3dsMax3 and the Deibus' Landscapeplugin. This plugin needs to be placed in the pluginsfolder within your 3dsmax3 folder. Before opening 3dmax start up YZ and load the track for which you want to make shadows. Go to the landscapeplugin and press the 'export' button. A window will pop which allows you to save the landscape in either text or binary format, use binary format. You can exit YZ and launch 3dmax.
When you're going to use the landscapeplugin for the first time, look at right of the screen and press the 'hammer' button. You have now opened the 'utilities' tab and you'll see a couple of buttons with fancy texts on them. First we are going to add the landscapeplugin as a button.
- Press on the 'window' button next to 'more' and 'sets'.
- Increase the 'total of buttons' with 1.
- Scroll down the list of buttons at the right and press the empty one.
- Scroll down the list of plugins/utilities at the left to 'Deibus Studios'.
- Select 'YZ? Landscape Utilities' and doubleclick.
- If done correctly the empty button reads now 'YZ? Landscape Utilities'
- Press OK.
Setting up the scene
To render some shadows you first need to set up a little scene containing your trackterrain and an omnisun.
To make everything go faster you're going to change the layout. Press 'Customize'>'Viewport Configuration' and choose the 'Layout' tab and click on the topleft layout and press OK. If your screen looks messed up resize the maxwindow and put it back to fullscreen. The view should be 'Top', if that's not the case you can alter it by going back to the 'layout' tab and rightclick on the preview and select 'Top'. Go back to 'Viewport Configuration' and select the 'Rendering method' tab and select 'smooth' or 'smooth + highlights'.
Launch the landscapeplugin from the utilitiestab and press the 'Load' button and load your binary world. You'll now see on the landscapebar there's a world in memory. Change the 'Create at Res' counter to 3, if your world is only 1 square or you have a fast pc change the counter to 2, press create. A 'lowpoly' landscape is created with a random color. To change the color press 'the material editor' / 4 balls button at the main toolbar. The topleft red sphere will be selected, press the matching colored box next to diffuse and change the color to white. To assign the material to the selection being your landscape press the 3th button the horizontal toolbar (sphere+arrow+cube) and close the 'material editor'.
Select at the right the 'create' tab (pointer) and click on 'lights'. Press 'Omni' and click somewhere in your scene. You now have a sun at zero height. Press 'Select and Move' (Cross) at the main toolbar, then go to 'Tools'>'Transform Type-in'. Change the z-value to more than 400 (400 is kinda low for a sun). Now either use your mouse to drag the sun to a spot where it makes some nice shading or use the 'Transform Type-in' for it. At the right press the 'Modify' tab where you'll find editable info for your sun. Leave the 'cast shadows' deselected. By pressing on the white box you can change the color of the sun, not necessary though. Adjust the contrast of the shading with the 'multiplier' counter. If there is enough contrast but everything's to bright select 'Rendering'>'Environment' and change 'Ambient' to black or very dark. Just in case anything goes wrong beyond this point or you'd like to be able to redo it all, open notepad and enter the positional values (x,y,z) of the sun, the multiply factor and perhaps the used suncolor. You can see a preview of the shadows by making a 'quick render' by clicking on the Teapot left of 'view'.
When you look at the preview you made just before you'll see a black border around the terrainrender, use the 'Zoom' and 'Pan' at bottomright to make the borders of a new preview as small as possible. When you're done select the landscape and press delete. Go to 'Customize'>'Viewport Configuration'>'Rendering method' and select 'Bounding Box' and press OK. At the landscapebar set the 'create at Res' counter to 1 and press 'Create'. Now press the 'Render Scene' button left of the 'Quickrender' button (also a Teapot). At the 'Render Scene' window change the 'height' and 'width' to 1500x1500, press 'Files' and create a name for the rendered bitmap make it 24bit just in case. Press 'Render', this will only take less than a minute. When done exit 3dmax.
Adjusting the rendered shadow
When you look at the rendered shadow in e.g. photoshop you'll see there's a black border, what needs to be removed.
- Select the shadows.
- Copy it (Ctrl-c).
- Make new file.
- Paste (Ctrl-v).
- Resize it to worldsize (193x193/577x577 etc.).
- Grayscale it.
When you want to add some colors to your mask e.g. (mud)paths, trails and text, change the map to RGB and make the stuff on a new layer. It's not necessary but if you want the wld-file to be not too big index the endresult and save a copy of it as bitmap.
Adding colormap
Launch YZ and load your track and add the 'Colormap' at the 'Landscape' plugin > 'Landscape textures' with the 'Add Colormap' button.
Shadow plugin tutorial
Why shadows
I've seen people have applied shadows on their tracks in different ways and here's my vison on the worldshadow.
Let's for example assume we have a rgb-centertexture with 512 colours and a shadingmap with 10 shades form white to dark grey.
When you use photoshop or PSP to merge them to one rgb-centertexure you will get approximately 512x10=5120 colours. When you apply adaptive indexing on the texture you will get a index-centertexture with 256 colours. This is also the amount of colours you will get in the center in the game.
When you load the separate shadingmap in XZ and use adaptive indexing on the rgb-centertexture and also load this shadowless 256 colour centertexture in XZ, you will get approximately 256x10=2560 colours in the game.
This was just an example and for a normal shadingmap with 256 shades, you will get a factor 256 more colours in the game when using the shadowplugin leading to 65536 colours.
The only negative aspect of the shadowplugin is that you can only use a low resolution shadowmap compared to what you can use when you use merging, though the shadowmap will be nicely blurred in the game. Another positive aspect is that you will also have outerpartshadows.
I hope after this you will all use the shadowplugin.
How to make shadows
you can use export in the landscapeplugin of XZ to dump your world. To load the dumped world you should open the EBmaxscript in 3dmax and load your dumped world, though on my pc 3dmax crashes after 15 minutes when I try it this way. My pc also crashes when I try to create new world.
You can also use the 721*721 worlddisp merged with the centerdisp if you use same hightsettings, or you can use the 721*721 worlddisp seperate from your 145*145 centerdisp.
For some reason when I use the 721*721 disp for the world or the 145*145 disp for the center there appears to be a thin flat cross on the displaced world, you can avoid this by resizing the 721*721 disp or the 145*145 disp with a factor 2.
Before you start with the following you should adjust the environment. You should keep the background black for easier selection in Photoshop. The ambient in XZ is standard 0.4 and is a good value, this factor you should also use for your scene in 3dmax. Change the ambient for a factor 0.4 and ambient 256, 256, 256 (rgb) in 0.4x256, 256, 256 =102,102,102.
Don't select cast shadows for your light and don't render ambient effects.
What works for me is:
- create new center
- displace it with centerdisp, with strength same as in XZ
- place and move an omni sun where I want it
- select top for only view
- set view to box or wireframe
- create new world
- delete center
- apply white map to world
- displace world with merged worlddisp, with strength same as in XZ
- hit renderscene at about 1000x1000
Cause these steps take really long, cause of the many faces of the world it may be useful to lower the facecount of the outerparts. You can use create center, displace this and use a 5x scaled center which you displace with worlddisp. You can also create your own square which you scale to 5x centerdisp so can decide yourself where you get more resolution by adding and moving vertices.
I used the first method for SA (hight=160), just rendering center takes me a minute, rendering the world takes my 30 minutes before I can hit the renderscene button plus 65 minutes rendering. Second method should be a lot faster. Without cast shadows and ambient effects rendering takes about 5 minutes.
Before rendering the whole world you should already have tested approved the sunsettings with a shadowmap solely for your center.
Adjusting the rendered shadow
When you look at the rendered shadow in e.g. photoshop you'll see there's a black border, what needs to be removed.
- select the shadows
- copy it
- make new file
- paste
- resize it to 512x512x256 grayscale
- add the shadowmap in XZ
Track plugin tutorial
Here are some tips on how to make a trackpath where the AI is competetive. When the final trackpath makes the AI too hard, don't worry, that will only make people play the track more trying to beat them.
First some things you should know about the AI:
- The AI tries to go over the node and when it's at a node he calculates how to get to the next.
- At a straight part the AI tries to stay on the trackpathline (red).
- Without speed it can't get over steep hills.
- Make the nodes wide enough, cause AI immediately corrects when it's off the nodearea.
- For the start/finish you have to go over the startline, so make it wide or narrow enough to match your finishgate.
- You can't make unbeatable AI, just competetive, because they use the same bike and interact less with the track.
Nodeplacing
- You need multiple nodes to make the AI use the perfect line in turns, but be careful you don't put nodes too close to each other for example if you have crossings of green lines the nodes are too close or too wide. This depends of the node's wideness. If the next node is closer than the distance between the red and green line players will get "off track" when they get near the first arrow, which of course disappear, however now the arrow of the next node will also dissappear.
- Don't use the red line to form the perfect line, cause it's then that the AI keeps correcting. When the AI has to make corrections to stay on the red line or within the green line they loose bikecontrol and speed. You should form the perfect line between the red line and the outer green line in a corner, to manage this adjust the speed so they can't stay on the red line, but don't fly out the berms.
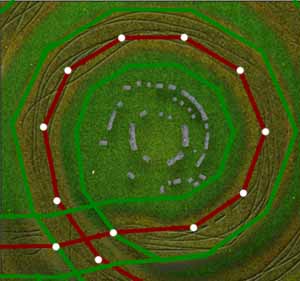
Notice the redline being in the inside of the circle. (Henge Enduro by Cliff)
- Place a node on the highest/takeoff point of a jump and on highest point of landing mount and when there's a tough part place nodes ontop of bumps, especially on those in corners.
- To find these highest points make a copy of your world and replace the centertexture for the b&w; centerdispmap. Now you can easily place the points at the correct spots. Now dump your path and read it in the normal world.
- When there's a tight corner don't select 'tight corner' only if you're absolutely sure the AI can't fly out of the turn or you got grippy physics (gravel, rough sand). For a really tight corner (hairspinlike) make the cornernode standalone (tight corner deselected), no nodes nearby.
- When you want the AI to perform stunts select the stunts after you completed the trackpath because AIproblems could be caused by stunts. Stunts you select at the node at the landing mount not at the takeoff node.
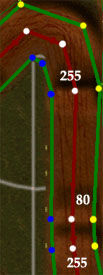
- When the AI has to go from a fast node to a slow node it will slowdown constantly so you can make a braking distance. So keep the AI on top speed till the start of the braking distance so it's slowed down when the corner starts. Example: node at begin straight part ‘topspeed’ = 255, node at begin braking part ‘topspeed’ = 255, node at begin corner ‘topspeed’ = 75, node in corner ‘topspeed’ = 75, node at end corner ‘topspeed’ = 85, node at begin straight part ‘topspeed’ = 255. Nodes close to each other in turns shouldn't differ too much in topspeed otherwise the AI will accelarate or break in the turn and loose grip. Also be careful where to place the begin of the straight part .

Notice the breaking and accelerating parts. The AI will start going over the red line till the first 100 node then comes in the red/greenline area, because the speed he will have is to high to maintain on the red line he'll use the berm. (Henge Enduro by Cliff)
- When you've got obstacles on the track, e.g. hands, adjust the trackpath so there are no objects on the red pathline.
- Don't use more than 100 nodes.
- When the AI has trouble landing on e.g. bumps or whoops lower the max speed (e.g. 80) of the nodes on the bumps or whoops.
In this last part of the track I couldn't get the AI to gain enough speed to clear the whole jump. They used to crash on the double landing bump, somehow after I lowered the speed on the first bump they didn't fell anymore. (Footballpark by AUS_Rob)
- The AI looses the most time in corners and on whoops when they start them with low speed, you got to make sure the amount of time they loose here is as small as possible.
- On a straight part of the track you don’t need to place extra nodes if it’s already a topspeed part (begin and endnode 255), though it doesn’t slow them down and can prevent human players from cheating.
Adding nodes
This how you can add nodes in a connected part of the trackpath, starting with a beginnode, middlenode(s) and an endnode:
- Select del.
- Delete the middlenode(s).
- Deselect del.
- Select the beginnode.
- Select add.
- Add new middlenode(s).
- Click on endnode.
- Deselect add.
When you screw up, forget to deselect add, and a node has three connections just delete it, cause there's no undo button.
Making alternatives routes
Alternative routes in your trackpath can be real fun and can reduce the AI starting frenzy when you have an alternative second node. Alternatives routes are supported by EB, resulting in two or more arrows showing up in the game. This is how you can add an alternative route in XZ for an existing route, consisting of a startnode, middlenode(s) and an endnode:
- Select the startnode.
- Select add.
- Add new middlenode(s) for the alternative route.
- Click on endnode.
- Deselect add.
When you dump and read the trackpath, the trackpath will stay unchanged. Unfortunately alternatives routes not supported by XZ yet.
Startline placing
Be careful about where you place the startline, cause at the start of a game there’s always a little chaos and a temporarely low framerate, if you immediately have to go in a corner the chaos will be big and lot’s of people will fall. The AI tries to go over the startlinenode, so if you place a startline after a corner, the AI comes out the corner and tries with braking and turning to go over the node resulting in AI flying off the track at the other side. So I advice to put the startline at (the begin of) a straight part.
Test the trackpath
First use one AI player, start, park your bike in the grass and hit 'Q' or 'W' to watch the AI go. Watch carefully how the AI reacts with the track and if the nodes (arrows) are placed correctly. To see how the AI reacts when it’s hindered by others and can’t always ride the perfect line use more AI players.
Adjust the trackpath
- When you see the AI fly out a certain corner, try decreasing topspeed for the nodes, untill they don’t fly out of the corner anymore and they take the corner as you want them to.
- When the AI flies over a landing mount, place or lower the topspeed of the node ontop of the bump/jump where they came off. Especially in Sxtracks you want the AI to use the entire landing mount so they can gain enough speed for the next jump.
- After you test the track in EB, hit ALT+TAB, start XZ, adjust things (except comments or track-ID), exit XZ (not necessary but recommanded), ALT+TAB and test again.
- When you load a dumped trackpath the startline could be somewhere else, just replace this.
1-bit-map (restartmap)
- When the AI have to restart on a jump or in a large ditch, the AI don't go back to gain speed but tries a while to get to the next node then falls. This is where the 1-bit-map comes into play, make the places where you don't want people or AI to restart black the other places white. This is also very important when you use water! When you or the AI crash in a black part you will restart at the last white place in your trackpath you’ve been.
- The borderline of the map defines the rest of the world.
- The easiest way to make this map is open a resized centertexture, add a new layer and paint the places where you don’t want people to restart black, where people may restart white. When you’re done save a copy and make it grayscale.
- When you make the 1-bit-map make sure the startpoint is white. Because when you not do this and people crash on the startline in black area, they finish a lap and restart at the last restartpoint making it possible to get a lap of 0-30 seconds.
Last tips
- Make frequently backups of your trackpath.
- Watch other track’s trackpaths (Henge Enduro and Footballpark, the trackpath for Sandstone Arena isn't a good example, because it was made for slippery stone physics).
- PRACTISE.
- Thank me.
Displacement tutorial
About this tutorial
With this tutorial I will teach you an easy way to make displacements for your tracks using Photoshop, though you'll be able to do the same with Paintshop Pro or a compatble paintprogram that supports multiple layers. For the method I use you don't need much artistic skills or trackbuilding experience. Once you practised making a disp with this method you can start experimenting with more complex methods. Unless you get lucky the first track(s) won't be that good, but that's ok. Making a new displacement doesn't take that long, completely finish a track can take long. Once you're satisfied enough with a track you've created you can let others test it and take all the time you want to finish it. For this method it's useful if you know how the different tools work. If you're a newby to photoshop just try some tools and see what they do or ask somebody for help. The example displacement psd-file is what I used for De Geul. It's 145x145 though in the final stage I transferred it to 721x721.
I strongly advice to start with making a sxtrack first, because a sxcrosstrack is more straightforward and you don't have to worry about a smooth hill. Also you'll get a lot of experience making all the jumps needed.
Selection
In this tutorial you'll have to make a lot of selections. The easiest way to select parts of your layer is by using the rectangular marquee tool of your toolbox. You can also add and substract by using resp. shift and alt. The magic tool can be useful, however you have to set an apropriate tolerance setting, so we're not going to use it. With Color range under the selecttab, you can select a color by clicking with the eyedropper, you'll suddenly have, on the color in the image and this one also has add and substract options.
If you've made a selection that's not entirely accurate or not how you want it, you can use the rect marq to move it, transformselection to adjust it by hand, adjust in the selecttab to modify it easier and feather to blur the selection.
Starting
XZ supports two formats for your disp, one for only the center and one for the the whole world. You can make either only a centerdisp what'll blend over the outerparts at zero height, a centerdisp what'll blend over your customworlddisp or you can make only a worlddisp.
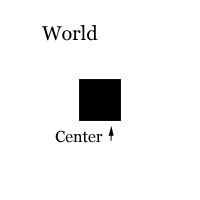
We're only going to use a worlddisp, that way there's no blending and you'll have full control over the edges of the center. Now let's make a new psd-file.
- Make a new 721x721 grayscale document with white background with name worlddisp
- Make a new 145x145 grayscale document with black background
- Select the entire 145x145 map and press Ctrl-c and close this document
- Make sure the 721x721 is zoomed out, so you can see the edges
- Press Ctrl-v
Now you have the psd where we going to work in and the black box is only a tool for you to see where the center is. It's possible to make your trackpath to go through the outerparts, however in this tut we'll keep the trackpath in the center. Zoom in till you only see the black box and deselect the black layer in the layermenu.
Trackpath
Making the layout
Select the brushtool and select your brush in the brushmenu. Doubleclick on the brush to change the brushoption. Check if the brush is 100% round and 100% hard, now you can already choose if you want a narrow or a wide trackpath. For a narrow trackpath like the Geul select a diameter of 9 for a wide trackpath select 15-20. Choose black for the color.
Sketch your trackpath on a new layer and for now don't worry about smooth corners or shaky parts all we want now is a rough layout.
Now you have a rough layout we're going to make it decent and smooth like the unblurred example in De Geul.psd. Where you have a straight part horizontal or vertical you can replace it by making a selection, delete and fill with black. For the straight parts that aren't hor or vert:
- make a new document
- make a horizontal selection with same length and wideness
- fill the selection with black
- rotate the image till the black box has the same angle as the one in your worlddisp
- select the box and press Ctrl-c
- close the document
- press Ctrl-v in the worlddisp
Now the black box is in a new layer.
- move the black box over the shaky part
- delete the shaky part
- mergedown the blackbox layer.
You can also use the linetool for this, however then you don't know the exact degree.
Next step is to make smooth corners. For 90 degrees corners I advice the inside of the corner to have a sharp 90 degrees angle as in the example, otherwise after blurring/feathering the inside will be too low. First delete the entire corner and make a selection where the corner should be. Doubleclick on a brush and change the diameter to match the corner and make a smooth corner. For hairpins you should use a bigger brush, at least two times bigger, and if necessary change the roundness of the brush and use the eraser to smooth the inside of the hairpin with the same brush, though of course with a smaller diameter.

Background
Now you have a layout you can make a background. When you're just starting you'd better skip this and just fill the background with dark gray, not black or white. When you've read the entire tutorial and made a couple of jumps and stuff, you'll be better at making a background. The background can be anything you want like 1 or more flat levels, bumps, a hill or a mountain.
Remember black will be the lowest in the world and white the highest. In XZ when you load your worlddisp you can enter the heightsetting for pure white rgb=255,255,255. When you start with the background you should think about what the highest point will be and make that almost pure white, that way you'll have the most heigthlevels for your track. When you look at the example disp you'll see I only used about 170 levels, it's enough but I should have used more. When you make hills leave enough levels for jumps ontop of the hills and for the lowest point of the background leave enough room for the trackditch. Make sure the background is smooth especially where the trackpath is going to be. I advice testing the background so you're using the correct colours for the lowest and highest parts and decide what kind of heightsetting you'll use. For 1-level sxtracks you can use a heightsetting of about 80 and for more level sx or mx 80+.
For testing you'll need to turn on fog and already have a centertexture available otherwise make a grass or sandtexture quick. If you have enough ram in your pc you don't have to close XZ or photoshop to play eb/mx2000, I don't even close photoshop if I'm working on a 60Mb big texture.psd. After testing just hit Alt-Tab or Ctrl-Esc to get back to photoshop.
Making the ditch
You'll have the best grip especially in corners if the trackpath is ditchlike. I'll show some methods to make your trackpath ditchy if you don't want to make a ditchy trackpath you'll need to make berms.
Blur opacity method
This one is the easiest and is what I used for De Geul, though it's actually only good for 1-level tracks.
- copy the trackpathlayer and name it trackpath gb op
- deselect the unblurred trackpathlayer
- select filters>blur>Gaussian Blur
- choose a blurring factor
- change the name of the layer by entering the blurfactor after gb
With the blurring factor you can change the shape of the ditch. The more you blur the smoother the trackpath gets. The Gbfactor you note in the layer's name so after testing you still know what you used and can try another factor and when you change the unblurred trackpath you still now the factor you once used.
Next we're going to change the opacity of the blurred trackpath. The higher the opacity the deeper the ditch is. With the dropper tool you can see how deep the ditch is. You can change the opacity by selecting the gbtrackpathlayer and use the slider or doubleclick the layer and change it. After changing the opacity note it in the name of the layer after op.
Feather and lower brightness method
With this method we're going to lower the brightness with a feather selection of your trackpath. Obviously this only works if you have only one background, if your background is made of several layers, copy them and merge them in to one backgroundlayer. You can't easily select blurred edges so we're going to adjust a copy of the trackpath so we can select the trackpath how we want it.
- copy the trackpathlayer
- make a new layer below it
- fill the new layer with white
- merge the layers and change the name to tp_select
- select select>color range
- move the slider to 200
- click with the dropper on the black of your trackpath
- click OK
Now you have a trackpathselection what we're going to use on the background layer.
- feather the selection with a certain factor
- select the backgroundlayer
- select image>adjust>adjust brightness/contrast
- lower the brightness
With the droppertool you can see how much you lowered the background. You should test the new worlddisp to see if you like the ditch, if not go back and change stuff. If the trackpath for the slection already is blurred enough you don't have to feather it anymore. This method I used for Troll Valley and even though I have to redo the above steps every time I change the background (not the jumps) around the trackpath, this method is great.
Berms
This method is for if you don't want a ditchlike trackpath, but want a easy method to make smooth berms. First make a trackpathselection as explained above.
- expand the selection with select>modify>expand
- make a new layer named berms
- deselect the sharp trackpathlayer
- select the bermslayer
- fill the selection with white
- make a new trackpathselection
- select the bermslayer
- delete selection
After these steps you can cut out the corners. I used this method in Bunnyhopping for the narrow berms as well for the big berms. This'll give you some silky smooth berms. If you want different sized berms in your track and not everywhere, just make some copies of the unblurred bermslayer and use different copies for different corners and play around with the expansion, Gblur and the opacity.

The above examples first show what you get after above steps. The next image shows bigger berms and already cut out, followed by the blurred version. If you want the berms sloped you can select the unblurred berm and use gradient on it.
Raised ditch
If you want a ditchlike trackpath, but you think the ditch is too low and you want the edges of the ditch to be a berm then you should do this:
- make a trackpathselection
- enlarge the selection
- feather it with a certain factor
- select your background copy
- increase the brightness of the selection
- make a trackpathselection again
- feather it with a certain factor
- select your background copy again
- decrease the brightness of the selection
I used this for Scattered Skulls and I totally love this method, though I did raise it a little too much.
Jumps
You can make real nice jumps when using the airbrushtool, though how much you blur it, it will always be lumpy and hard to change after testing. The easiest way to get jumps.
- make a new layer for the jump and give it a suitable name
- at the place where you want the jump make a selection and fill it with white
- make a copy of the layer and blur it and change the opacity
- note both settings in the copy's name

If later you wanna move or adjust the jump
- doubleclick on the blurred layer
- press ctrl-c (copying the name)
- delete the layer
- copy the unblurred layer
- doubleclick the new layer and press ctrl-v
Now the jumplayer isn't blurred or has custom opacitysettings, however you can now work with the new layer and still see the settings for the old jump.
You can also make nice jumps using the linetool, though make sure you turn off arrowheads and select anti-aliased. Use custom weight to adjust the wideness of the line. The linetool is also very useful for making dents in jumps or whoops. You can make dents by selecting the jump or whoop, create new layer and make some lines.
After you changed a couple of jumps you should test them and see if you like the shape, height or location. The height you can change with the opacity, the location with moving both jumplayers, independantly or linked, or just the original and redo the blurred version. If you don't like the shape you can try a different blur factor. When this isn't satisfying you can make the jump in two parts, a big smooth one and smaller sharp one.
When you want a jump isn't hor or vert you can paste the jump in a new document and rotate the jump and copy it back or use the linetool
If you want to make ramplike jumps you should use the gradient, though this will take a bit longer than the filled selection or linetool.
- select for the fore and background colour the start and endcolour for the gradient
- make a selection
- use transform selection if the jump needs to be rotated
- click for the selection and keep it clicked till after the selection
Now you have one side of the ramplike jump and you'll have to do the other side too. Both colours should be whiter than the background. After you're done copy the jumplayer and use gblur and change the opacity.
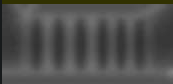
When you know how to make jumps and ramps you can make tabletops, pits and whoops in the same way. However when you make a row of tiny jumps for the whoops you can easily make it so ppl can overjump all with the first whoop or they're too low. What you can do is lower the first whoop or lower all and add 'anti'whoops between the whoops (blurred black lines).
Important note
Although I've used it before and it helps making your track smooth I strongly advice against using afterblurring on your worlddispcopy. You should always make every jump, bump, ditch or hill smooth seperately. When you use afterblurring you loose a lot of control on the disp, especially when you're using delicate jumps or tiny whoops, cause these'll disappear.
Every time you use blur use the Gaussian blur filter, because this gives you a preview of the effect and gives you the most control over the amount of blurrring.
Don't forget you can undo a lot in the history.
Displacement tutorial 2
About this tutorial
This tutorial will show a method on how to make natural motocrosstracks like those MCM2-Nationals and Deibus' mxtracks. I don't know how exactly they made those tracks, however the method I'll explain will let you make something similar in several steps without loosing control over previous steps taken. To understand and work with this tutorial you should already have some knowledge of creating tracks if this is not the case I'd advice you to first make a track using my first displacementtutorial.
The steps explained
When you look at those tracks you'll notice the trackpath is flat but also sometimes ditchshaped or ballshaped, the trackpath is in some places narrow or wide, there are no seperate berms and the hilly terrain seems almost independant from the trackpath but does always smooth over in the trackpath and provides berms in places. With this in mind I can divide the buildingprocess in several almost orthogonal parts, meaning the different parts will be as independant as possible so while making one you don't have to worry about the others and you'll always be able to go back and make changes.
The different parts are:
- The basic trackpath
- Jumps/bumps/whoops
- The terrain
- Asci blur
Step 1 - The basic trackpath
The first thing you need to do is make a rough sketch of the trackpathlayout. Open your paintprogram and make a new document of 290x290 or a factor k bigger (with k=1,2,3...) in either grayscale or in RGB. For the best visual feedback of what you're painting I'd recommend to set your monitor to 32 bit and only zoom the map with l factors (100%, 200% etc). The reason I make my grayscale maps in RGB is because I prefer the RGB slider over the grayscale slider in Photoshop. This does mean in the end the map won't be completely grayscale anymore, but this can be fixed by converting a copy of the map to grayscale. The advantage of working with a higher resolution dispmap is the connection between the different parts will be smoother, but you have to be aware of aliasing.
The layout may be a bit shaky and you can already add additional info within the sketch. If you want you can already add some terrain details like where the top of the hills will be or the lower parts or note where you're gonna put some (down)ramps or whoops. This is also the part where you have to decide if you want the terraintextures made of tiles like the stock MXMania tracks or made of 1 texture like in mcm1/2 or EB/Moto-x-2000. You'll only be able to use trails-tiles on straight parts and blocky turns.
Now you have finished the sketch you are going to make an extra wide version of your track in black. In the final step - the terrain - you will define the contour of the trackpath, where it's wide or narrow. Making the basic trackpathlayout will be easier with everywhere the same wideness. To not get any sharp edges around the track use canvas size to resize your map to 1442 or k factors bigger. Make sure you only use black and everything including the turns is smooth. This layer will be used to make selections for the next layer, the basic trackpath and will be the base for the terrainmask in step 3.
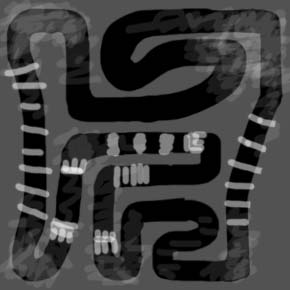
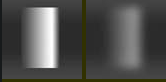
Sketch
Pentool
Stroked
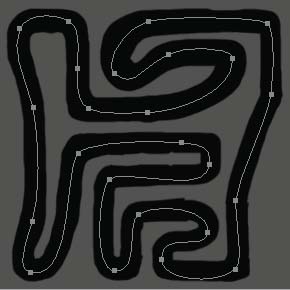
Basic path
The topleft pic shows you how a sketch could look like, the more info you add the easier the creation of the basic trackpath will be. Because I didn't felt like painting the black path myself I used the pentool. Just lay out a path then use the freeform pentooltool to add freeform points and to remove the original points. With the freeform points you can make smooth turns. Once the path is like you want it, prepare a big paintbrush with 1% spacing and (auto-) stroke the path by selecting a node and select (right-click) stroke subpath and choose the paintbrushtool. The result can be seen in the bottomleft pic. The bottomright pic is an example of a basic path.
The basic trackpath defines the basic height of the track, where it goes up or down and is the most important and toughtest part to make. The good thing is you'll already be able to test this step, which is also mandatory because before continueing with the next steps you have to make sure this basic trackpath is completely smooth and exactly how you want it. Once this is done adding the jumps and the terrain will be child's play :) Make sure not to add any jumps/ramps in this stage cause it will only make this step harder while adding a jump/ramp in step 2 will be fairly easy. The basic trackpath will look like a wide wall with hill features.
Make the trackpath piece by piece and every new piece on a new layer. For the lineair sloping parts use gradients, use the angle gradient to make ramped turns. Use the black path to select a part of the track to gradient by making a rect marquee followed by colorrange-selection with fuzzysettings of 200 to select the black of the track. For the non-lineair parts use imported blurred sections. To do this gaussian blur a wide black selection in a different white document or the other way around. Then resize it and rotate it to fit the part where you want it, when it's placed use adjust brightness/contrast to adjust it to your likings. You can also first make a part with the lineair gradient followed by a blurred part on a new layer ontop of it with 'multiply', this is used in the above example. To make the turn and straight parts blend together, make all the parts extra big so they overlap, then add masks to all the straightparts and use the lineair gradient (white+black) on the mask to make the edges fade off. After you've done with all the different parts, deselect the background, select the entire map, edit>define pattern, edit>fill (pattern) on a new layer, copy it and gaussian blur it. If some partedges aren't smooth make a copy of a part and try adjust brightness/contrast to make the parts blend together better.
Step 2 - Jumps/bumps/whoops
Once you're completely satisfied you can proceed to this step, however you can always go back and make some adjustments to the basic trackpath. If you've read and used my first disptutorial before adding jumps, bumps or whoops shouldn't be a problem. To give the track a bit more of a natural flow you might wanna add some stuff made with the paintbrush (gaussian blurred of course). Don't add any berms around the trackpath in this stage, after you've made the terrain you can better judge if in a certain place a berm is needed. If after you've completed the terrain you're not satisfied with the shape of the trackpath in places this is where you adjust it by adding ditches and bumps.
Step 3 - The terrain
This step consists of 2 parts, the terrain and the terrainmask. Because of the mask you don't have to worry about leaving open terrain where the trackpath is. First you have to make the mask. Make a copy of the black trackpath made in step 1, now use the eraser to make the trackpath narrower in places. Once you're done with the contour make a copy and either gaussian blur the entire mask or use the blurtool to blur the edges. The more the edges are blurred the more influence the terrain will have on the trackpath. The blurring has as affect the places where the terrain is higher than the trackpath, the trackpath will be ditchshaped. Where the terrain is lower the trackpath will be ballshaped. the more heightdifference between the terrain and the trackpath the more the shape of the trackpath will change. To finish the mask, copy it, place a black layer beneath it and merge them together.
You can make the terrain however you want, but make sure it is smooth enough around the trackpath. You can use the basic trackpath for base in places where you don't want the shape of it being changed. To add the mask the terrain has to be merged to 1 layer. Once you're done select the terrainlayer and use layer>add layer mask> and copy the mask in there.
Step 4 - Asci blur
When the dispmap is finished the track might still be a bit bumpy especially in turns. This is very normal and unavoidable, it occurs because you can only have a maximum of 256 heightlevels in your track when you've made a grayscale dispmap. This amount can be enough when you haven't used a large heightsetting, however if you have, not to worry. Obviously blurring the track in a paintprogram won't give you more levels, but blurring the asci heightvalues of the track will. While there isn't a tool for it yet, you can do it by making a new terrain in 3dsmax, displace it with your dispmap and set blur to a small value and export your blurred track as an asci-file. If you don't have 3dsmax you can ask someone else or nag Deibus to add the feature in the editor ;)
Final note
Mail me if you have any questions or if you know of something to improve this tutorial.
Physics plugin tutorial
Physics
What is a physicsmap
With the physicsmap you can change the physics of the track or how the ground feels when you ride it:
- Hardness
- Grip
- Smoothness
- Speed
Why a custom physicsmap
The map you make is for the center. Standard the center is sand.
Of course you don’t have to use a custom physicsmap, though it can be very useful and fun.
If there’s a part where you don’t want people to be able to go fast you can place mud/deepmud on that area and the topspeed will be limited. If you have grass in your track it’s more fun if you make it feel you’re on grass. The physics also fit very nicely in themed tracks.
How to make a physicsmap
Open XZ, select the physics plugin and click on ‘SAVE PAL’. Now you can save an ACT palette, which contains the colors referenced as affecting the bike's behaviour. When you do this in XZ1.03 you'll also get waterphysics.
To view them go to photoshop, click on arrow next to Brushes, select replace and load your act palette.
The map you make have to be indexed with custom palette after which you select the ACT palette. If you do this any other way all info is lost. The reason for this is that it is not the RGB values of the image which determine the surface properties, it's the color index for each pixel (much faster to execute in the game)...the colors are merely there to help us (the physics map creaters) to see what the surfaces will be like.
There are several ways to make the map:
- Make a new 256x256 indexed image. Just fill the entire map with a colour you select from the swatches window with the automatic droppertool.
- Resize your centertexture.psd to 256x256. If you have a different layer for each texture that needs different physics, select the entire (e.g. grass) texturepart, add a new layer, select this layer and fill the selection with the appropriated physics as for all the other textures. If you have all textures on one layer you can also try ‘colour selection’.Deselect the layers with textures on it and select the layers with physics on it and save a copy of it in bmp. Open the copy and select indexing, select the actpalette, on the tab where you can select noise and pattern select none. You should manually correct the indexed map if there are any errors.
- Resize your centertexture.bmp and change the mode to rgb. Add a new layer for which you change the opacity so you can still see the texture beneath it when you paint on this one. On this layer you paint the physicscolours. When you’re done deselect the centertexture and put the opacity of the physicsmap back to 100%. Now save a copy of it in bmp and indexe it later with the act palette.
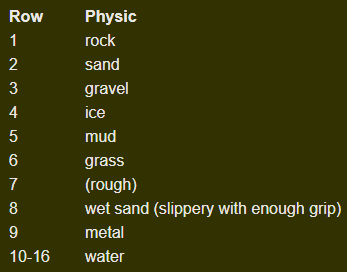
The light colours on a row are for light, the dark colours for deep or rough.
The 7 rows of shades of blue go from 255,0,0 to 0,0,7. The bright blue represents 1 cm deep water, the last color (black-blue) represents about 2m of water. You can create gradients etc (like in fantasy isl). The darker the blue, the more you sink and more drag there is on the bike, after about half the bike is submerged you will automatically crash.
How to load a physicsmap
Open XZ, select the physics plugin and load your 256x256 indexed color bitmap.
Particles
The particles is what you see coming from the backtire. The particles should match the texture you're riding on, unless you want for example dirt and grass as particles when going over grass. For the particlesmap use a resized centertexture with shadows if you like you can add noise to it for extra effects.
The outerpart's physics and particles
There are two ways to set the outerpart's physics and particles:
- You can select tile for the physicsplugin, what will tile the both maps over all the 24 outerpart squares. This can be very useful for freestyle tracks.
- If you don't select tile the physics on the borderline of the physicsmap will be stretched out over the world. For the particles the borderlines are used for the outerparts. This can be ver useful when you want all of the outerparts to be water, ice or another physic. You can also use this to make physicssegments in the outerparts.
Camera plugin tutorial
Why cameras
If you add cameras to your world ingame you can switch your view from behind, heli or user camera to tele, giving you the feeling you're watching a television. This view is great for making replays and also it's fun to ride with this view.
How to add cameras
- Click where you want the camera, then make a rectangular of what you want the camera to film. If you failed making a rectangular for a camera delete it and try again.
- You can make rectangulars within rectangulars
- Make sure all rectangulars overlap at the edges so when you ride trough the track there's no switching of cameraview to heli or behind.
Camera settings
- You can change the height where the camera is placed above the track.
- If you keep zoom at 0 there's no zooming. You can change the amount of zooming by selecting a value from 0 to 1.
- By selecting Range, Min Dist or Max Dist you can limit the area of zooming (I think).
Sound plugin tutorial
Soundformat
The format is wav, I recommand using mono 16bit-22khz to maintain some quality, you can of course per sound check what settings it should have. Keep the sounds short!
Because in the game the soundfx aren't that loud you'd better adjust the volume of the wav-file, but watch out for clipping.
Adding sound
- add wav
- select add
- click on world
- make outer sphere
- make inner sphere
- click
- deselect add
- set wav
Now you can see the coordinates in the menu and the spheresettings.
Sound options
- I advice keeping the volume at it's maximum (1).
- With 'loop' selected the sound will play continuously, good for music.
- In 'play once' you select the amount of seconds to wait to play the sound once you've entered a sphere.
- In 'play random' there are amounts random taken from X to Y seconds.
- In 'const' you should select the corresponding value of the wav-file.
- In 'rand' you can select the X and Y for the random sample rate, don't make it more than the sample rate of the sound.
Testing sound
First you should test in XZ if you've added the correct sound. Ingame you can test the sound by going in the soundsphere, if the sound sounds corrupted (too fast or weird) just replace it with the original sound in XZ, if you don't hear a sound, check if you've added any sounds you're not using otherwise increase soundvolume or adjust the wav-file.
When the track doesn't load you probably did something illegal, like having two instances with intersecting spheres and same sound.