This is a tutorial originally created by twisteddirt.com on how to import custom models into Motocross Madness 2. It is reuploaded here for archival purposes. Not all of the images were archived but most of them were. You can locate the 3dsmax exporter and the Armadillo editor here.
Motocross Madness 2 Armadillo Track Editing Tutorial
3D Max 3.1 Object & Export
by Maui_cool & Naz88
[This tutorial is for people who have some knowledge of 3d Max 3.1, photo editing programs
such as Photoshop & Paint Shop Pro and the MCM 2 Track Editor "Armadillo".]
How to make textures for an object
using Photoshop or Paint Shop Pro.
We will be making a simple haybale.Textures must be square, and power of 2 size. That means: 32x32, 64x64, 128x128, or 256x256. Always use the smallest map possible.
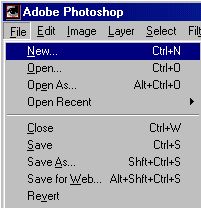
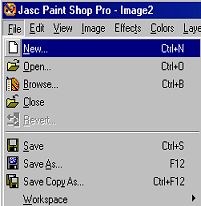
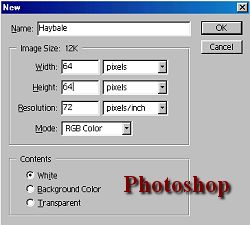
1. Open Photoshop or Paint Shop Pro.
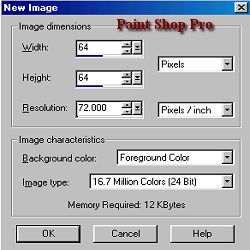
Select "File" + "New" from the menu, and make your image 64x64 (this is a small model we will only need a small map for it).
2. Ok, I am not going to show you exactly how to make a hay texture, as Photoshop could be a huge tutorial in itself on creating textures, so just paint it whatever way you wish, I am only going to show you how to save it properly to work with armadillo.
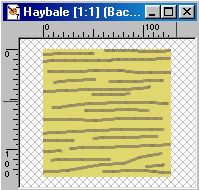
3. So now you have a texture that looks somewhat like hay? lol, all you have to do is to save a copy of this image by going to the
File Menu....Save a copy...
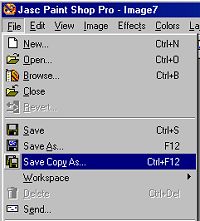
And from the drop down menu on that window, choose.....TARGA (.TGA) format.
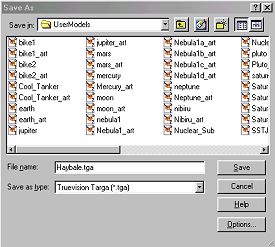
4. Save your image with the file name the same as what you plan to save the object file as, for example we are making a hay bail. so we will name this texture.... haybail.tga
- Save a copy to your "TrackEditor\UserModels\" directory.
- Save another copy to your 3D Max "Maps" directory.
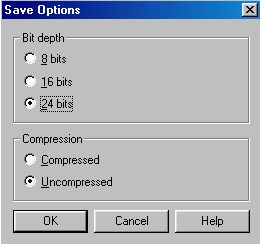
Click "Save" and another option window pops up... from that choose "24bit".
And thats all, you're ready to map your texture onto your object in 3DsMAX.
How to make a simple object with 3DsMAX.
You are going to be creating a simple rectangular haybale, by keeping it simple, you'll learn fast and there is less chance for error.
1. Open 3DsMAX R3.1.
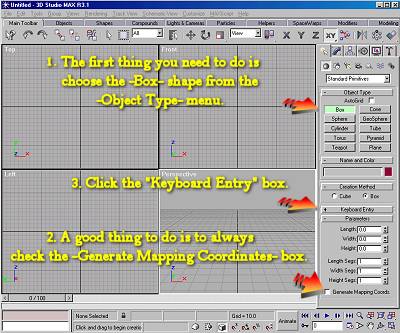
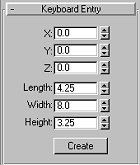
Create a simple rectangle by entering these dimensions in the "Keyboard Entry" box.
- Length= 4.25
- Height= 8.0
- Width= 3.25
- Click "Create".
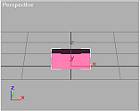
Now you have the basic object which will become a haybail by the time we are finished.
How to apply the texture to your object in 3dSmax
You should have left 3DsMAX open, so return into MAX.
Now is a good time to save your MAX scene.
[ NOTE: It is most likely best if you save it the same name as your texture and object, so in this case save as... haybale.max]
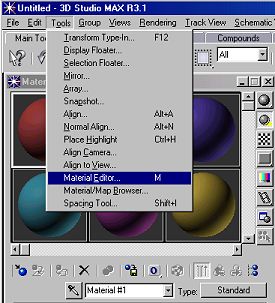
1. Now you are in MAX and looking at your object - you will now need to edit the materials. There is 2 ways to get to the material editor - you can either just push the "M" key on your keyboard, or you can go to the "TOOLS" menu and select "Material Editor". .
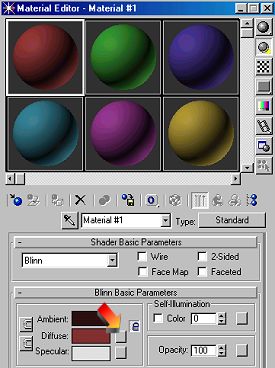
2. In the Material Editor - click the map box to the right of "Diffuse".
3. This window (below) will popup asking you for your bitmap - which is the .tga image we created in Photoshop - click on "Bitmap", then click "Ok".
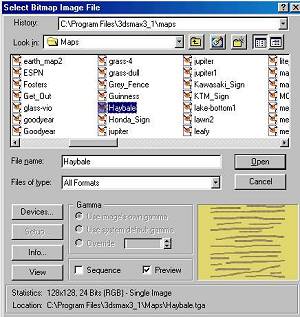
4. Another window will pop up - usually the 3D Max "Maps" folder. Pick the "Haybale.tga" which is the tga image we just created in Photoshop and click "Open".
5. You should now see your texture applied to the first material sphere in the editor in the top left corner of the Material Editor. Click the indicated button, as in the pic below, to "Assign Material To Selection".
6. Now you can render your object to see how the texture looks/fits and take a screenshot to use for the object pic in Armadillo.
- To take a "Screenshot" of your object.
- Click the "Rendering" button at the top of Max.
- When the "Rendering" window pops up, click "Render" at the bottom of the window.
- Now, take a screenshot by pressing the "Print Scrn - SysRg" button on the top of your keyboard.
- Go to your photo program of choice and click "Edit" + "Paste".
- "Crop" the pic to just the object
- Re-size it to 133x103
- Save it as a 24 bit tga and it must be named "Haybale_art.tga".
- Put it in your "UserModels" folder.
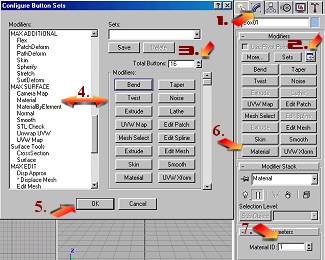
7.DO NOT skip this step. - Make sure the material you applied is "Material ID: 1".
- As in the pic below:
- 1. Click on the "Modifier" tab.
- 2. Click "Configure Button Sets".
- 3. A box will pop up - Add one number to the total in the "Total Buttons" box.
- 4. Find "Material" with the slider and drag & drop it to the empty button you just created.
- 5. Click "OK".
- 6. Now, click the "Material" button.
- 7. Look in the "Material ID" box to see if it's "Material ID:1.
We are finished creating the object.
How to export your 3d model from 3DsMAX using Unibastard.
This is actually one of the easier processes involved with making objects for armadillo, once you have your model ready, your texture saved and mapped to it.
[NOTE: Customize your 3D Max "Utilities" panel the same way we did on the last page (page 3) in "Step 7." and put "Unibastard" on the "Utilities" panel.]
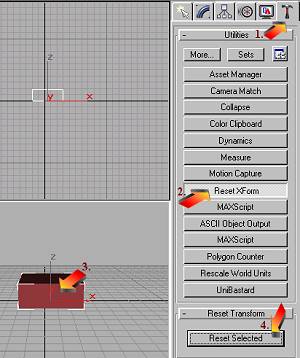
1. What you have to do now is "Reset X-Form" FIRST.
Do that by:
- 1.Select the "Utilities" tab.
- 2.Click the "Reset X-Form" button.
- 3.Click on the object.
- 4.Click on "Reset Selected" as shown below.
2. Then you must "Collapse the Stack".
Do this by:
- 1.Select the "Utilities" tab.
- 2.Click on "Collapse".
- 3.Check "Modifier Stack Result".
- 4.Click on your object.
- 5.Click "Collapse Selected".
How to export your 3d model from 3DsMAX using Unibastard.
This is actually one of the easier processes involved with making objects for armadillo, once you have your model ready, your texture saved and mapped to it.
[NOTE: Customize your 3D Max "Utilities" panel the same way we did on the last page (page 3) in "Step 7." and put "Unibastard" on the "Utilities" panel.]
1. What you have to do now is "Reset X-Form" FIRST.
Do that by:
- 1.Select the "Utilities" tab.
- 2.Click the "Reset X-Form" button.
- 3.Click on the object.
- 4.Click on "Reset Selected" as shown below.

2. Then you must "Collapse the Stack".
Do this by:
- 1.Select the "Utilities" tab.
- 2.Click on "Collapse".
- 3.Check "Modifier Stack Result".
- 4.Click on your object.
- 5.Click "Collapse Selected".
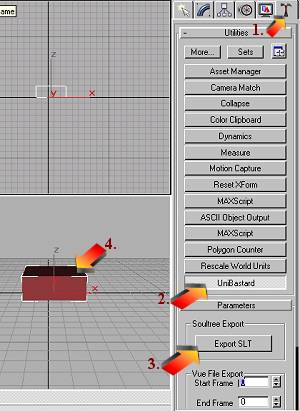
3. Now for the final step to export your object as a "Soultree" file (.slt) for use in Armadillo.
Now you are ready, listen closely, lol.
- 1.Select the "Utilities" tab.
- 2.Click on the "Unibastard" button.
- 2.Then click on the Export SLT button.
- 4.Click on your object.
4. 4.The "Save" window will pop up. Find your "TrackEditor/UserModels" folder and save it as "Haybale.slt".
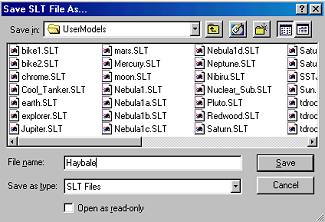
Your object is now ready to be placed on your track in Armadillo.
[NOTE: In order for custom objects to be placed in Armadillo, you MUST shorten the path to the track editor to: (yourdriveletter):\MCM2\TrackEditor\UserModels . The default path: C:\Program Files\Microsoft Games\Motocross Madness 2\TrackEditor\UserModels is much too long and has too mant spaces in it - Armadillo will crash if you try to place a custom object with this "Default" path.
To change the path, you must re-install MCM2 and the Track Editor.]
'a'ohe mea hele hikiwale ma'alahi = Nothing comes easy.....
Aloha, Maui_cool