
Tutorials originally written by zeh. Mirrored here for archival purposes. It's recommended to complete the GUI scripting tutorials as these are a sequel to those made by the same author.
If you wish to discuss Doom 3 modding I recommend joining the Id Tech 4 discord server here.
Welcome back to lesson number six (also seventh) in the GUI scripting series.
This tutorial starts the HUD series, where we'll implement a new HUD from start to finish. For those who doesn't know, HUD stands for "Heads Up Display", and it's what you see on top of the game renderings when you're playing the game: it's the health, ammo, armor, and other displays that inform the player his status. Well, we'll be creating a new HUD from scratch, and while we'll be applying it to the singleplayer game for ease sampling, it's the same concept that's used on multiplayer HUDs. Also, we'll create a new correctly set MOD in your DOOM 3 game.
Complete GUI Scripting - 6: Creating a new HUD GUI
The HUD is arguably the most important GUI element on any FPS modification; it's with what the user will have to interact with during most of his time with the game, and it needs to be used fast during crucial times (at the heat of a battle, a look at the 'health' meter must be possible in the easiest and fastest way possible).
There are two basic ways you can create a new HUD for your DOOM 3 modification. You can use the built-in HUD script and modify a few things to adapt it to your needs, or create a new one from scratch.
While it can be considered overkill in some cases - you have to re-add several features that are already built-in - creating a HUD from scratch is the right way when you are creating a new gametype that won't benefit from assets included in the default HUD. A racing game, for example, would require a brand new HUD script - a standard capture the flag game wouldn't, you would just need to add the flag stats somewhere on the default one.
In order to better broaden the possibilities for future modifications, we'll be building one from the start. Also, I won't use the built-in GUI editor for that; while using the editor would be good for creating the first raw sketches and assembling visual assets, it's just not efficient enough to test a HUD script. We'll, rather, edit the script on any text editor (notepad will do) and test it in-game, in a near-real time.
Set up us the MOD
The first step is to create a new MOD to be used by the DOOM 3 engine. Of course, a MOD or modification is something that adds new features to the original game, or replaces some of the standard content. Each MOD uses a separate workspace, and while you might try to combine mods (by putting all the files in the same place), this is usually a bad idea. We'll create a correct MOD workspace.
Look on your DOOM 3 folder. You'll probably see different files and subdirectories. In any case, this is what a standard installation of the game will look like:
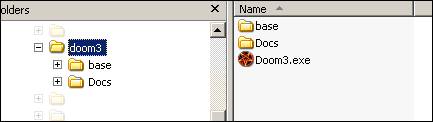
The "/base" directory contains all the main game data; likewise, MOD directories would be a sibling of this base directory and be located at the same dir.
The first step is setting up a mod is to create a new directory for our MOD; so browse to the DOOM 3 directory and create a new folder; we'll name this new folder 'classichud' (that's the example I'll use for our tutorial-built HUD; more on this later on).
This is how a standard DOOM 3 directory will look like after this 'classichud' directory has been created.
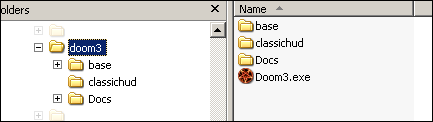
With that, our mod directory is ready to go.
Adding assets to the MOD directory
We're ready to add content to out mod. We have to create assets for our 'classichud' mod in its folder -- those assets that will replace the standard game ones. Browse to the folder you just created, and we'll create a new folder, called 'guis'.
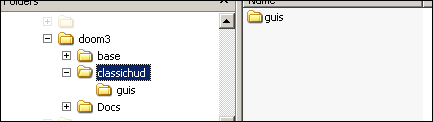
Since we will create new versions of the standard assets (a new HUD script to replace the default one), we need to be sure to place them on the correct location - the same used in DOOM 3's original paks. In DOOM 3, the singleplayer HUD is always the GUI script at <doom3>/<mod-dir>/guis/hud.gui, so that's what we need to create.
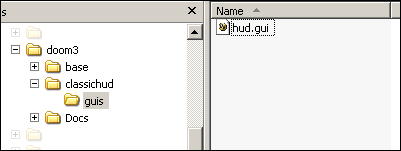
Open up notepad (or your text editor of choice), create a new empty document, and immediately save it as "<doom 3>/classichud/guis/hud.gui" -- the HUD script we'll work with.
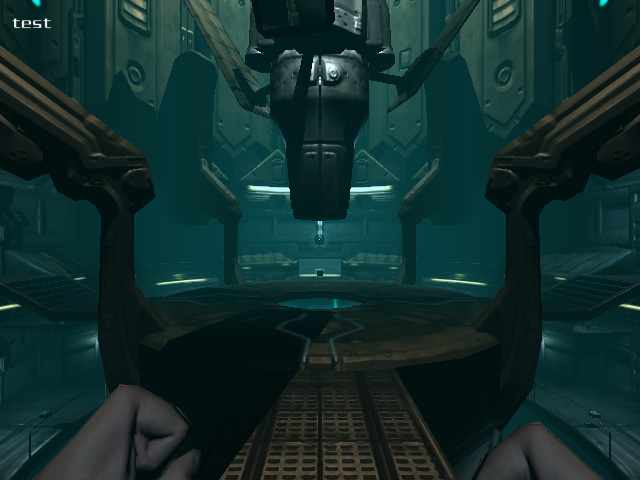
Now, with this file still opened, let's create the base of our HUD. First, we'll create a simple test template. Type this on GUI script source.
windowDef Desktop {
   rect      0,0,640,480
   visible   1
   noevents  1
   nocursor  1
   windowDef test {
      rect      10, 10, 100, 100
      text      "test"
      font      "fonts/english"
   }
}
Pretty much self-explanatory; a simple GUI script with an text windowDef that'll allow us to test if it's working. With this dummy in place, it's time for us to finally test it in game.
Launch DOOM
Keep the document still open. Now, there are two ways we can run MODs on the DOOM 3 engine: one, using a command-line argument, and two, setting up the mod and selecting it from the "Mods" menu in the game.
Calling it from the mods menu would require us to create a PK4 package (which is just a ZIP file with a different extension), so we'll instead opt for the fast choice and create a command-line argument that'll call the game running our mod. To do that, create a new shortcut to the DOOM 3 game (duplicate your original shortcut create by the game installer) and change the "target" field of the shortcut to be sure it's running the game with these parameters:
<your path>\Doom3.exe +seta r_mode 3 +set r_fullscreen 0 +set fs_game classichud +map game/mp/d3dm1What this code will do is: run the game on mode 3 (640x480), windowed, using the "classichud" mod dir, and open the map d3dm1 (Tomiko Reactor) as default. It'll be pretty handy to test the HUD script this way.
After changing those shortcuts settings, run the game to check on your HUD at work.
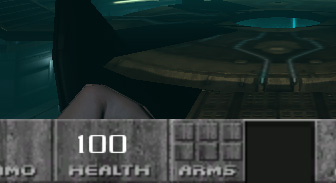
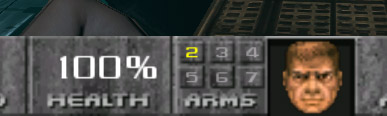
Okey! It's working or what? The original HUD is gone, and we have our lone 'test' windowDef sitting at the top left corner of the screen.
Now, here's the handy thing: alt+tab to your script editing program, and change the "test" string on the windowDef to anything you like. Hell, even change the location of the windowDef. Here's what I've done to it.
windowDef Desktop {
   rect      0,0,640,480
   visible   1
   noevents  1
   nocursor  1
   windowDef test {
      rect      10, 100, 640, 460
      text      "HELLO."
      textalign 1
      textscale 1.6
      font      "fonts/english"
   }
}
Now, save it, alt+tab back to DOOM 3, pull down the console, and type this:
reloadguisPull the console back up, and voila.
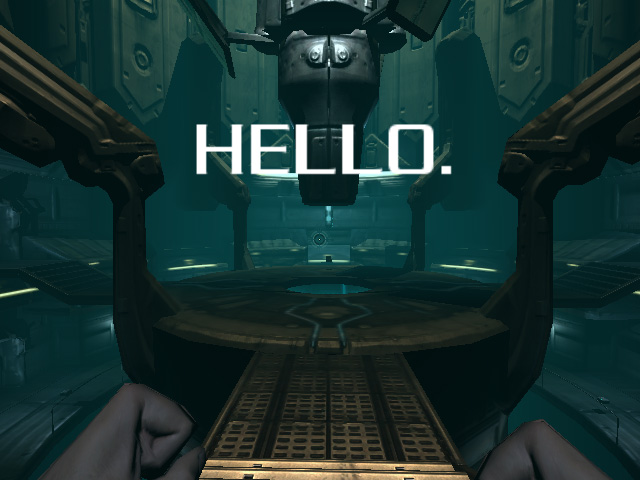
So, without reloading anything, it's easy to test the HUD in-game right after you change it, in almost-near real time. Can't get much better than that. This is how we'll create and test the HUD in the next few lessons.
This pretty much wraps up this introductory tutorial. In the next ones we'll get our hands dirty and implement a real HUD - the classic DOOM 1 HUD, with bleeding marine face and all that. See you there.
Download source and example files (1kb)
Welcome back to lesson number seven in the GUI scripting series.
In this tutorial we'll assemble the first parts of our new HUD, and we'll deal with the most basic types of interaction between the HUD system and the game itself. Since I'm splitting these HUD tutorials in several mini-lessons, this one will only cover the primary on-screen items.
Complete GUI Scripting - 7: Creating basic HUD items
We're now ready to take a step further and make our HUD actually work. While the previous lesson was just a mini-tutorial on getting an empty HUD script file ready, now we'll add real content to our customized HUD.
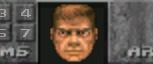
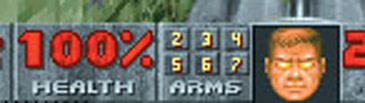
Like I said on the previous lesson, we'll build a custom HUD script based on nothing less than the classic DOOM 1 HUD. Let's have a look at it.
It's pretty much straightforward: there's a bar at the bottom showing how much ammo the player has left, his health, the guns he have available, his actual state (by using his face), his armor, the keys he have available, and the amount of ammo he has left for all kinds of guns.
In this lesson (and on the next ones), we'll create this HUD from scratch. What we will implement is:
- The amount of ammo, health, and armor left
- The marine face based on his health and some events
- The guns available (up to gun 7, or the Plasma Gun)
- Everything complete with the original fonts (*depends on SDK/.dat info release)
What we will not implement however, is:
- The keys display (has no use in DOOM 3)
- The marine face looking to the side he takes damage from
- Display for weapons 8 (Rocket Launcher) and above
- Total ammo display at the right side (the HUD scope apparently can't know the ammo of off-hand guns)
It's important to notice, however, that this is just an example of basic HUD situations and even though some of the elements from the classic HUD will be out, this tutorial will be complete in essence.
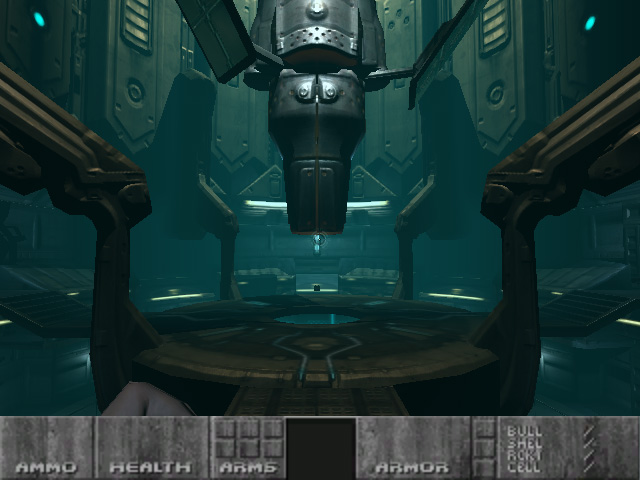
Ok, time to get down to business. Open up the HUD script we created on the last lesson, and delete everything there. As the previous script was just a test, we'll create a new one now. Let's use this code for a start.
windowDef Desktop {
   rect   0,0,640,480
   visible   1
   noevents   1
   nocursor  1
}
Ok, this creates our main windowDef. The most important thing to notice is that we're using the "nocursor 1" property -- since this is not a GUI that the player will actually interact with, this is important so a dead mouse cursor won't show.
Fire up DOOM 3 using the command-line arguments for our HUD testing as mentioned in the previous lesson, and we're ready to switch between the editor and the game to test our HUD.
<your doom 3 folder>\Doom3.exe +seta r_mode 3 +set r_fullscreen 0 +set fs_game classichud +map game/mp/d3dm1
We're now ready to add graphic assets to the HUD. Now, when creating a HUD (or any GUI script for that matter) on a specific MOD, you have to adopt some standard location from files. While there isn't any specific path you have to use, it's important to use some paths that make sense for you and for your MOD team (if you're working on a group), so things won't get chaotic (of course, if you're overwriting the original game assets, you have an specific path and filename you have to use, but that's not the case with our HUD graphics, just with the HUD script itself).
In this lesson's case, I've decided to put all GUI assets for our MOD/HUD on the <doom 3>/classichud/guis/assets folder. So create this directory, grab the example files at the end of this article, and unpack all images there.
The images we'll use were created straight from the original DOOM shareware doom1.wad file, and from some screenshots I found on google. This is an scripting tutorial, so we won't worry about creating the graphics; we'll just use the original ones and that's that.
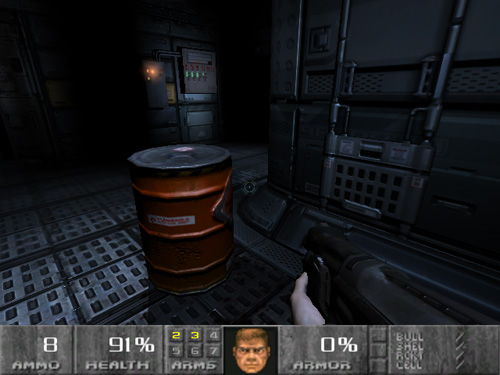
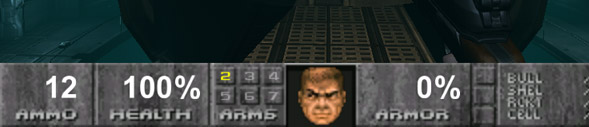
Okey. Now, with the images unpacked at <doom 3>/classichud/guis/assets, we'll add one of the most basic items from our HUD, the bottom bar.
windowDef Desktop {
   rect   0,0,640,480
   visible   1
   noevents   1
   nocursor  1

//=============================================================================
// Main bar
//=============================================================================

   windowDef base {
      rect   0,416,1024,64
      visible   1
      background   "guis/assets/hud_base"
      matcolor   1,1,1,1
   }

}
So we just added an static graphic at the bottom. Pretty simple. Of course, the lines starting with "//" are just comment lines that can be omitted; they have been added for ease of read only.
Getting back to the windowed game and doing our reloadguis command will show our progress so far.
Getting down to business, let's start adding the basic HUD fields: first, the health.
windowDef Desktop {
   rect   0,0,640,480
   visible   1
   noevents   1
   nocursor  1

//=============================================================================
// Main bar
//=============================================================================

   windowDef base {
      rect   0,416,1024,64
      visible   1
      background   "guis/assets/hud_base"
      matcolor   1,1,1,1
   }

//-----------------------------------------------------------------------------
// Standard indications: ammo, armor, health
//-----------------------------------------------------------------------------

   windowDef bar_health {
      rect   110,420,60,49
      visible   1
      forecolor   1,1,1,1
      text   "gui::player_health"
      textscale   0.6
      textalign   2
      font   "fonts/english"
   }

}
Here's something interesting. You'll notice that, on the text property of the HUD script, instead of using an static string, we used a reference to a variable -- "gui::player_health". This is something new on these GUI scripting tutorials in two aspects.
First, it's a "hard-coded" variable from the GUI scripting system -- "player_health". The GUI system has several variables that can be used to read the player health, ammo, and lots of other stuff, and "player_health" is one of them. So, "gui::<variable name>" is the right way to refer to those variables.
Second, since it's a variable, it's passed as a reference, not as a value. It means that instead of just reading the value when it starts, the GUI system will update the "text" property when that variable changes. So whenever "gui::player_health" changes, the text property of that windowDef will change, updating the health.
Now, getting back to game again, and reload the guis, let's see how it works.
And, if we take damage...
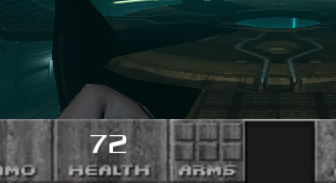
Fine. This isn't quite like the original, though; the font is wrong, and there's no "%" in the value caption.
While we can't add our custom fonts just yet, we can add the "%" value already. We can't do that by transforming the text property of the windowDef, or by concatenating any string -- the GUI system doesn't allow such 'powerful' features. We'll have to do a little hack by adding a new windowDef with the "%" text. So it gets us down to,
(...strip...)

//-----------------------------------------------------------------------------
// Standard indications: ammo, armor, health
//-----------------------------------------------------------------------------

   windowDef bar_health {
      rect   110,420,60,49
      visible   1
      forecolor   1,1,1,1
      text   "gui::player_health"
      textscale   0.6
      textalign   2
      font   "fonts/english"
   }
   windowDef bar_health_percent {
      rect   170,420,40,49
      visible   1
      forecolor   1,1,1,1
      text   "%"
      textscale   0.6
      textalign   0
      font   "fonts/english"
   }
}
Notice I've cut out part of the code, or else our source code will start to get bigger and bigger and difficult to read what has actually changed.
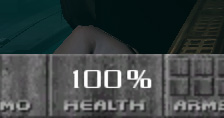
So, I just added the "bar_health_percent" windowDef. Checking results again...
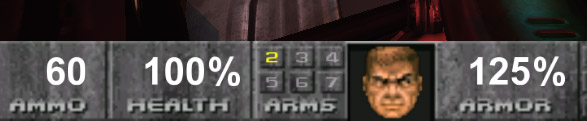
Fine. Let's do the same with the armor and ammo fields. It's kind of lengthy but pretty simple.
(...strip...)

//-----------------------------------------------------------------------------
// Standard indications: ammo, armor, health
//-----------------------------------------------------------------------------

   windowDef bar_health {
      rect   110,420,60,49
      visible   1
      forecolor   1,1,1,1
      text   "gui::player_health"
      textscale   0.6
      textalign   2
      font   "fonts/english"
   }
   windowDef bar_health_percent {
      rect   170,420,40,49
      visible   1
      forecolor   1,1,1,1
      text   "%"
      textscale   0.6
      textalign   0
      font   "fonts/english"
   }
   windowDef bar_armor {
      rect   370,420,60,49
      visible   1
      forecolor   1,1,1,1
      text   "gui::player_armor"
      textscale   0.6
      textalign   2
      font   "fonts/english"
   }
   windowDef bar_armor_percent {
      rect   430,420,40,49
      visible   1
      forecolor   1,1,1,1
      text   "%"
      textscale   0.6
      textalign   0
      font   "fonts/english"
   }
   windowDef bar_ammo {
      rect   15,420,60,49
      visible   1
      forecolor   1,1,1,1
      text   "gui::player_ammo"
      textscale   0.6
      textalign   2
      font   "fonts/english"
   }

}
Pretty much the same thing applies to these new windowDefs - using the "gui::player_ammo" and "gui::player_armor" variables, we can retrieve the values of the user ammo and armor, respectively.

Nice, we're getting there. Now, we'll add the weapon numbers, right after those health/armor/ammo windowDefs.
(...strip...)

//-----------------------------------------------------------------------------
// Weapon numbers
//-----------------------------------------------------------------------------

   windowDef gun_2 {
      rect   218, 416, 40, 40
      visible   1
      forecolor   1,1,0,1
      text   "2"
      textscale   0.25
      font   "fonts/micro"
   }

   windowDef gun_3 {
      rect   242, 416, 40, 40
      visible   1
      forecolor   1,1,1,0.4
      text   "3"
      textscale   0.25
      font   "fonts/micro"
   }

   windowDef gun_4 {
      rect   266, 416, 40, 40
      visible   1
      forecolor   1,1,1,0.4
      text   "4"
      textscale   0.25
      font   "fonts/micro"
   }

   windowDef gun_5 {
      rect   218, 436, 40, 40
      visible   1
      forecolor   1,1,1,0.4
      text   "5"
      textscale   0.25
      font   "fonts/micro"
   }

   windowDef gun_6 {
      rect   242, 436, 40, 40
      visible   1
      forecolor   1,1,1,0.4
      text   "6"
      textscale   0.25
      font   "fonts/micro"
   }

   windowDef gun_7 {
      rect   266, 436, 40, 40
      visible   1
      forecolor   1,1,1,0.4
      text   "7"
      textscale   0.25
      font   "fonts/micro"
   }

}
You'll notice most of the weapons have a "forecolor" property of "1,1,1,0.4" - that is, 40% black. The first one, though, has a forecolor of "1,1,0,1" - yellow. That's because we have already picked it up; we'll make the weapon numbers turn to yellow as guns are picked up.
Well, let's check the progress for now.

Okey. Now, to finally add the marine face..
(...strip...)

//=============================================================================
// Marine faces
//=============================================================================

//-----------------------------------------------------------------------------
// Normal face
//-----------------------------------------------------------------------------

   windowDef marineFace {
      rect   290,418,64,64
      visible   1
      background   "guis/assets/hud_face_100_center"
      matcolor   1,1,1,1
   }

}
And testing...

Looking good.
Well, this is it for adding basic HUD functionalities. On the next lessons, we'll make the marine face act accordingly to what's happening, and make the weapon numbers update. See you there.
Download source and example files (8kb)
Hi, and welcome back to lesson number eight in the GUI scripting series.
This time, we'll make the GUI script respond to a named event - the weapon pickup - and update the HUD accordingly. Following the tradition of having small topics covered in each lesson (so you can skip them individually if it's covering a topic you already know), this will be a pretty short article.
Complete GUI Scripting - 8: Using named events
One of the features that add the most power to the GUI system is the ability to respond to certain built-in events. These events include not only GUI events - onAction, onTime, etc - but also 'external' events triggered by the system. They're called "named events", and we can defined them by using onNamedEvent blocks.
Simply enough, a named event works like this:
onNamedEvent <event name> {
   <statements to execute>
}
Of course, the <event name> is the name of the event we want to capture. This is an special name, and depends on the scope you're running your GUI script. Since we're using a HUD GUI script, there are certain built in named events we can work with.
The first thing we'll do is open up the HUD script we created in the previous lesson, which is as follows.
windowDef Desktop {
   rect   0,0,640,480
   visible   1
   noevents   1
   nocursor  1

//=============================================================================
// Main bar
//=============================================================================

   windowDef base {
      rect   0,416,1024,64
      visible   1
      background   "guis/assets/hud_base"
      matcolor   1,1,1,1
   }

//-----------------------------------------------------------------------------
// Standard indications: ammo, armor, health
//-----------------------------------------------------------------------------

   windowDef bar_health {
      rect   110,420,60,49
      visible   1
      forecolor   1,1,1,1
      text   "gui::player_health"
      textscale   0.6
      textalign   2
      font   "fonts/english"
   }
   windowDef bar_health_percent {
      rect   170,420,40,49
      visible   1
      forecolor   1,1,1,1
      text   "%"
      textscale   0.6
      textalign   0
      font   "fonts/english"
   }
   windowDef bar_armor {
      rect   370,420,60,49
      visible   1
      forecolor   1,1,1,1
      text   "gui::player_armor"
      textscale   0.6
      textalign   2
      font   "fonts/english"
   }
   windowDef bar_armor_percent {
      rect   430,420,40,49
      visible   1
      forecolor   1,1,1,1
      text   "%"
      textscale   0.6
      textalign   0
      font   "fonts/english"
   }
   windowDef bar_ammo {
      rect   15,420,60,49
      visible   1
      forecolor   1,1,1,1
      text   "gui::player_ammo"
      textscale   0.6
      textalign   2
      font   "fonts/english"
   }

//-----------------------------------------------------------------------------
// Weapon numbers
//-----------------------------------------------------------------------------

   windowDef gun_2 {
      rect   218, 416, 40, 40
      visible   1
      forecolor   1,1,0,1
      text   "2"
      textscale   0.25
      font   "fonts/micro"
   }

   windowDef gun_3 {
      rect   242, 416, 40, 40
      visible   1
      forecolor   1,1,1,0.4
      text   "3"
      textscale   0.25
      font   "fonts/micro"
   }

   windowDef gun_4 {
      rect   266, 416, 40, 40
      visible   1
      forecolor   1,1,1,0.4
      text   "4"
      textscale   0.25
      font   "fonts/micro"
   }

   windowDef gun_5 {
      rect   218, 436, 40, 40
      visible   1
      forecolor   1,1,1,0.4
      text   "5"
      textscale   0.25
      font   "fonts/micro"
   }

   windowDef gun_6 {
      rect   242, 436, 40, 40
      visible   1
      forecolor   1,1,1,0.4
      text   "6"
      textscale   0.25
      font   "fonts/micro"
   }

   windowDef gun_7 {
      rect   266, 436, 40, 40
      visible   1
      forecolor   1,1,1,0.4
      text   "7"
      textscale   0.25
      font   "fonts/micro"
   }

//=============================================================================
// Marine faces
//=============================================================================

//-----------------------------------------------------------------------------
// Normal face
//-----------------------------------------------------------------------------

   windowDef marineFace {
      rect   290,418,64,64
      visible   1
      background   "guis/assets/hud_face_100_center"
      matcolor   1,1,1,1
   }

}
Now, we're going to add a new event to it. Right after the desktop windowDef properties are declared, we add a new event block.
windowDef Desktop {
   rect   0,0,640,480
   visible   1
   noevents   1
   nocursor  1

//=============================================================================
// Events
//=============================================================================

   onNamedEvent newWeapon {

   }

(...strip...)
This is the basics of our new event block. Since we're trying to update the weapon numbers on the HUD, we want to capture the "newWeapon" event, which is fired when a new weapon has been picked up. This event name came from the original HUD file, of course - reading the original script sources, from the original game, is the best way to learn how to accomplish certain goals in DOOM 3 modding. Reverse engineering is your friend.
Anyway, remember our "gun_*" windowDef declarations? They had the numbers of the weapons available for the player. Like I said on the previous lesson, most of the weapons numbers have a "forecolor" property of "1,1,1,0.4" - 40% black. When they are available, they turn into "1,1,0,1" - yellow. What we need to do, then, is discover which weapon was picked up and update the text color accordingly.
That will be accomplished by using the "gui::newweapon" variable inside of the newWeapon named event block. Just like the "gui::player_health" we discussed on the previous lesson, "gui::newweapon" is an special variable which has the number of the last weapon picked up, so it's easy to find out which weapon number should be highlighted. Let's start with a simple conditional statement.
(...strip...)

//=============================================================================
// Events
//=============================================================================

   onNamedEvent newWeapon {
      // Now turns on the correct number when a new weapon is picked
      if ("gui::newweapon" == 2) {
      }
   }

(...strip...)
the "if" statement compares the "gui::newweapon" to 2. If this is true -- meaning, the last weapon picked up was weapon 2 - the statements inside of the "if" block will be executed.
One thing to notice here is that the weapon indexing inside of the GUI system start with the pistol. So, weapon 1 is the pistol, not the fists; weapon 2 is the shotgun, not the pistol.
So, since the code inside of the if block will be executed when the shotgun has been picked up, we just need to update the "forecolor" property of the correct "gun_*" windowDef to make it bright yellow. That's easy, using the "set" command we used previously.
(...strip...)

//=============================================================================
// Events
//=============================================================================

   onNamedEvent newWeapon {
      // Now turns on the correct number when a new weapon is picked
      if ("gui::newweapon" == 1) {
         set "gun_2::forecolor" "1,1,0,1";
      }
   }

(...strip...)
Easier than taking candy from a baby. So we just need to add if statements for the other guns; we're just going up to gun 6, or the plasma gun, so...
(...strip...)

//=============================================================================
// Events
//=============================================================================

   onNamedEvent newWeapon {
      // Now turns on the correct number when a new weapon is picked
      if ("gui::newweapon" == 2) {
         set "gun_3::forecolor" "1,1,0,1";
      }
      if ("gui::newweapon" == 3) {
         set "gun_4::forecolor" "1,1,0,1";
      }
      if ("gui::newweapon" == 4) {
         set "gun_5::forecolor" "1,1,0,1";
      }
      if ("gui::newweapon" == 5) {
         set "gun_6::forecolor" "1,1,0,1";
      }
      if ("gui::newweapon" == 6) {
         set "gun_7::forecolor" "1,1,0,1";
      }
   }

(...strip...)
Let's test it. Fire up our DOOM 3 shortcut - or do a reloadguis command if you already had it running.
We have a pistol on hand...
...going to grab the shotgun...
...and voila, the corresponding number - 3 - has been lit on the HUD bar. Simple, and easy.
That's it for now. We'll use a few more named events on the next lessons.
Download source and example files (8kb)
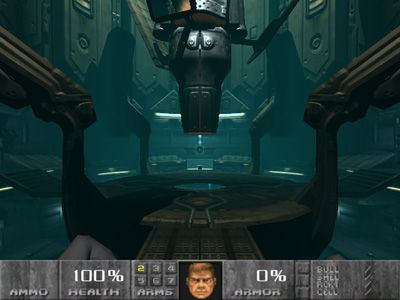
ello, and welcome to lesson number nine in the GUI scripting series. This also is the 10th lesson on this series -- it has come a long way.
In the classic HUD we're creating, we'll finally get the marine face to update. We'll use a little animation, and then some more conditional statements to respond to certain events.
Complete GUI Scripting - 9: Animating the marine face HUD
One of the coolest things the marine face could do on the original DOOM game was react to what was happening around him. He would:
- Continually look around suspiciously, rising an eyebrow as he looked to his sides
- Get a happy/twisted look to his face when he got a new gun
- Do a pain face when suffered damage, looking to the side the pain came from
- Start to bleed and look in bad shape according to his health
While we won't get him to look to the sides he took damage from - it might be possible, but I never found a way to get this information to use on the GUI system - the rest is easily doable and we'll implement that on this lesson. The first thing you might want to do is download the tutorial files for this lesson as it contains all the materials file we'll use (all the marine faces) and unzip it to the correct directories (the same <doom 3>/classichud/guis and <doom 3>/classichud/guis/assets folders we used on the previous lessons).
Anyways, here's our HUD as it is until now.
windowDef Desktop {
   rect   0,0,640,480
   visible   1
   noevents   1
   nocursor  1

//=============================================================================
// Events
//=============================================================================

   onNamedEvent newWeapon {
      // Now turns on the correct number when a new weapon is picked
      if ("gui::newweapon" == 2) {
         set "gun_3::forecolor" "1,1,0,1";
      }
      if ("gui::newweapon" == 3) {
         set "gun_4::forecolor" "1,1,0,1";
      }
      if ("gui::newweapon" == 4) {
         set "gun_5::forecolor" "1,1,0,1";
      }
      if ("gui::newweapon" == 5) {
         set "gun_6::forecolor" "1,1,0,1";
      }
      if ("gui::newweapon" == 6) {
         set "gun_7::forecolor" "1,1,0,1";
      }
   }

//=============================================================================
// Main bar
//=============================================================================

   windowDef base {
      rect   0,416,1024,64
      visible   1
      background   "guis/assets/hud_base"
      matcolor   1,1,1,1
   }

//-----------------------------------------------------------------------------
// Standard indications: ammo, armor, health
//-----------------------------------------------------------------------------

   windowDef bar_health {
      rect   110,420,60,49
      visible   1
      forecolor   1,1,1,1
      text   "gui::player_health"
      textscale   0.6
      textalign   2
      font   "fonts/english"
   }
   windowDef bar_health_percent {
      rect   170,420,40,49
      visible   1
      forecolor   1,1,1,1
      text   "%"
      textscale   0.6

      textalign   0
      font   "fonts/english"
   }
   windowDef bar_armor {
      rect   370,420,60,49
      visible   1
      forecolor   1,1,1,1
      text   "gui::player_armor"
      textscale   0.6
      textalign   2
      font   "fonts/english"
   }
   windowDef bar_armor_percent {
      rect   430,420,40,49
      visible   1
      forecolor   1,1,1,1
      text   "%"
      textscale   0.6
      textalign   0
      font   "fonts/english"
   }
   windowDef bar_ammo {
      rect   15,420,60,49
      visible   1
      forecolor   1,1,1,1
      text   "gui::player_ammo"
      textscale   0.6
      textalign   2
      font   "fonts/english"
   }

//-----------------------------------------------------------------------------
// Weapon numbers
//-----------------------------------------------------------------------------

   windowDef gun_2 {
      rect   218, 416, 40, 40
      visible   1
      forecolor   1,1,0,1
      text   "2"
      textscale   0.25
      font   "fonts/micro"
   }

   windowDef gun_3 {
      rect   242, 416, 40, 40
      visible   1
      forecolor   1,1,1,0.4
      text   "3"
      textscale   0.25
      font   "fonts/micro"
   }

   windowDef gun_4 {
      rect   266, 416, 40, 40
      visible   1
      forecolor   1,1,1,0.4
      text   "4"
      textscale   0.25
      font   "fonts/micro"
   }

   windowDef gun_5 {
      rect   218, 436, 40, 40
      visible   1
      forecolor   1,1,1,0.4
      text   "5"
      textscale   0.25
      font   "fonts/micro"
   }

   windowDef gun_6 {
      rect   242, 436, 40, 40
      visible   1
      forecolor   1,1,1,0.4
      text   "6"
      textscale   0.25
      font   "fonts/micro"
   }

   windowDef gun_7 {
      rect   266, 436, 40, 40
      visible   1
      forecolor   1,1,1,0.4
      text   "7"
      textscale   0.25
      font   "fonts/micro"
   }

//=============================================================================
// Marine faces
//=============================================================================

//-----------------------------------------------------------------------------
// Normal face
//-----------------------------------------------------------------------------

   windowDef marineFace {
      rect   290,418,64,64
      visible   1
      background   "guis/assets/hud_face_100_center"
      matcolor   1,1,1,1
   }

}
So we get our basic textfields with armor, ammo and health data, the weapon numbers, and a static marine face.
What we will do first is animate the marine so he can look around suspiciously. So open up <doom 3>/classichud/guis/hud.gui, or create a new one with the code provided above, use our classic hud testing shortcut to run DOOM 3 in windowed mode with the HUD preview, and let's get this party started.
If you remember the original game, the marine face would, from time to time, look left, right, or centered, as if he was checking if there was something to worry about on his sides. This was more of a random movement. We won't do it here, though; the animation will be scripted and not random at all -- I don't think the GUI system can handle anything random without the use of crazy engine interactions so it'll be easier this way.
Ok, so we have to create a simple animation: marine faces up front, faces left, faces up front again, then faces right, then gets back to facing up front, and continue like this on an endless loop. Easy.
This is our marine code as it is now.
(...strip...)

//=============================================================================
// Marine faces
//=============================================================================

//-----------------------------------------------------------------------------
// Normal face
//-----------------------------------------------------------------------------

   windowDef marineFace {
      rect   290,418,64,64
      visible   1
      background   "guis/assets/hud_face_100_center"
      matcolor   1,1,1,1
   }

}
What we will do now is add onTime events. Like onNamedEvents, onTime is an special event block that gets executed when a certain condition has been met - in this case, after a certain time has passed. With the use of several onTime blocks, you can create timed animations... emulating a timeline, in a sort of way.
Let's add the first onTime event.
(...strip...)

//=============================================================================
// Marine faces
//=============================================================================

//-----------------------------------------------------------------------------
// Normal face
//-----------------------------------------------------------------------------

   windowDef marineFace {
      rect   290,418,64,64
      visible   1
      background   "guis/assets/hud_face_100_center"
      matcolor   1,1,1,1

      onTime 0 {
         // set face: LOOKING STRAIGHT
         set "background" "guis/assets/hud_face_100_center";
      }
   }
}
So, when the GUI system time reaches 0 milliseconds (that is, right after starting), it sets the windowDef background to "guis/assets/hud_face_100_center". This will have absolutely no action in this case - the default background is already this. This will be used, however, when looping our animation, so we need to reset it from time to time.
Now we can simply put the other images on our animation, with different times.
(...strip...)

//=============================================================================
// Marine faces
//=============================================================================

//-----------------------------------------------------------------------------
// Normal face
//-----------------------------------------------------------------------------

   windowDef marineFace {
      rect   290,418,64,64
      visible   1
      background   "guis/assets/hud_face_100_center"
      matcolor   1,1,1,1

      onTime 0 {
         // set face: LOOKING STRAIGHT
         set "background" "guis/assets/hud_face_100_center";
      }

      onTime 2500 {
         // set face: LOOKING LEFT
         set "background" "guis/assets/hud_face_100_left";
      }

      onTime 3500 {
         // set face: LOOKING STRAIGHT
         set "background" "guis/assets/hud_face_100_center";
      }

      onTime 4000 {
         // set face: LOOKING RIGHT
         set "background" "guis/assets/hud_face_100_right";
      }

      onTime 4500 {
         resetTime "0";
      }
   }
}
Easy enough. Notice, now, that when the windowDef animation time reaches 4500 milliseconds, a new command is issued - resetTime. This command will reset the time back to 0, that is, executing the statements inside of the "onTime 0 {}" block once again, and ultimately creating a looped animation.
Now, get back to the game, do a reloadguis and let's see if it works.
Our marine starts looking right at you..
Do a quick glance at the left...
Gets back to looking straight...
Looks right...
Then gets straight again and restart the cycle.
Nice, it's working. You can play with the time values if you wish; you can make the animation faster, for example, if you want a marine face on crack.
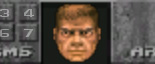
We get to an important point right now. On the original DOOM, the marine face wasn't always this mean-looking straight face. Depending on how much damage he had taken, the marine face would start to bleed and look more and more wasted. Just like the game had graphics for straight, right and left looks with a perfect normal marine, it also had graphics for looking straight, left and right for the marine in increasingly bad shape.
We have to use it on our animation cycle, then. Instead of just setting the correct face at the time, we have to set the correct face related to the health.
Getting back to our "animation reset" code block, it looks like this.
(...strip...)

      onTime 0 {
         // set face: LOOKING STRAIGHT
         set "background" "guis/assets/hud_face_100_center";
      }

(...strip...)
But instead of using "guis/assets/hud_face_100_center" as the background, we have to be able to select which is the correct image at the time. We'll do something like this:
- If the player health is higher than 79, use "guis/assets/hud_face_100_center"
- Otherwise, if the player health is higher than 59, use "guis/assets/hud_face_80_center"
- Otherwise, if the player health is higher than 39, use "guis/assets/hud_face_60_center"
- Otherwise, if the player health is higher than 19, use "guis/assets/hud_face_40_center"
- Otherwise, if the player health is higher than 0, use "guis/assets/hud_face_00_center"
- Otherwise (the player is dead) use "guis/assets/hud_face_00_center"
And, of course, this is achieved by the use of conditional if/else statements.
(...strip...)

      onTime 0 {
         // set face: LOOKING STRAIGHT
         if ("gui::player_health" >= 80) {
            set "background" "guis/assets/hud_face_100_center";
         } else {
         }
      }

(...strip...)
Notice that on the IF line, I'm comparing the built-in variable "gui::player_health" against 80. If it's higher than or equal to 80, use "guis/assets/hud_face_100_center" as a background. If not, skip to the "else" block, where we will do other checks. To make a long story short, this will be the end result.
(...strip...)

      onTime 0 {
         // set face: LOOKING STRAIGHT
         if ("gui::player_health" >= 80) {
            set "background" "guis/assets/hud_face_100_center";
         } else {
            if ("gui::player_health" >= 60) {
               set "background" "guis/assets/hud_face_80_center";
            } else {
               if ("gui::player_health" >= 40) {
                  set "background" "guis/assets/hud_face_60_center";
               } else {
                  if ("gui::player_health" >= 20) {
                     set "background" "guis/assets/hud_face_40_center";
                  } else {
                     if ("gui::player_health" >= 1) {
                        set "background" "guis/assets/hud_face_20_center";
                     } else {
                        set "background" "guis/assets/hud_face_00_center";
                     }
                  }
               }
            }
         }
      }

(...strip...)
This may look bad to read, but it's how it goes with nested IF statements. It continuously check each condition, until it finally finds out the background value it has to use. Unfortunately, the GUI system doesn't seem to have switch statements or single-line IF statements, so this is probably the simplest way to do it.
Anyway, let's check how (and if) it works in game. Back to the game, do a reloadguis, and do something to take damage (I usually just fall from the bridge).
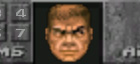
Hey, cool - our marine nose's bleeding! (off-topic: You know what this means...)
However, there's something wrong. As soon as the animation cycle starts and the marine looks to the right and left sides, his face is back to the normal, brand new state.
That is, of course, due to the fact that we only changed the first step on the animation cycle. We have to add conditional IF statements on all other time blocks, so he'll look to the sides using the correct animation. This can be lengthy, but it's easy enough - just a repetition of the concept used above - so here we go.
(...strip...)

//=============================================================================
// Marine faces
//=============================================================================

//-----------------------------------------------------------------------------
// Normal face + look around animation
//-----------------------------------------------------------------------------

   windowDef marineFace {
      rect   290,418,64,64
      visible   1
      background   "guis/assets/hud_face_100_center"
      matcolor   1,1,1,1

      onTime 0 {
         // set face: LOOKING STRAIGHT
         if ("gui::player_health" >= 80) {
            set "background" "guis/assets/hud_face_100_center";
         } else {
            if ("gui::player_health" >= 60) {
               set "background" "guis/assets/hud_face_80_center";
            } else {
               if ("gui::player_health" >= 40) {
                  set "background" "guis/assets/hud_face_60_center";
               } else {
                  if ("gui::player_health" >= 20) {
                     set "background" "guis/assets/hud_face_40_center";
                  } else {
                     if ("gui::player_health" >= 1) {
                        set "background" "guis/assets/hud_face_20_center";
                     } else {
                        set "background" "guis/assets/hud_face_00_center";
                     }
                  }
               }
            }
         }
      }

      onTime 2500 {
         // set face: LOOKING LEFT
         if ("gui::player_health" >= 80) {
            set "background" "guis/assets/hud_face_100_left";
         } else {
            if ("gui::player_health" >= 60) {
               set "background" "guis/assets/hud_face_80_left";
            } else {
               if ("gui::player_health" >= 40) {
                  set "background" "guis/assets/hud_face_60_left";
               } else {
                  if ("gui::player_health" >= 20) {
                     set "background" "guis/assets/hud_face_40_left";
                  } else {
                     if ("gui::player_health" >= 1) {
                        set "background" "guis/assets/hud_face_20_left";
                     }
                  }
               }
            }
         }
      }

      onTime 3500 {
         // set face: LOOKING STRAIGHT
         if ("gui::player_health" >= 80) {
            set "background" "guis/assets/hud_face_100_center";
         } else {
            if ("gui::player_health" >= 60) {
               set "background" "guis/assets/hud_face_80_center";
            } else {
               if ("gui::player_health" >= 40) {
                  set "background" "guis/assets/hud_face_60_center";
               } else {
                  if ("gui::player_health" >= 20) {
                     set "background" "guis/assets/hud_face_40_center";
                  } else {
                     if ("gui::player_health" >= 1) {
                        set "background" "guis/assets/hud_face_20_center";
                     } else {
                        set "background" "guis/assets/hud_face_00_center";
                     }
                  }
               }
            }
         }
      }

      onTime 4000 {
         // set face: LOOKING RIGHT
         if ("gui::player_health" >= 80) {
            set "background" "guis/assets/hud_face_100_right";
         } else {
            if ("gui::player_health" >= 60) {
               set "background" "guis/assets/hud_face_80_right";
            } else {
               if ("gui::player_health" >= 40) {
                  set "background" "guis/assets/hud_face_60_right";
               } else {
                  if ("gui::player_health" >= 20) {
                     set "background" "guis/assets/hud_face_40_right";
                  } else {
                     if ("gui::player_health" >= 1) {
                        set "background" "guis/assets/hud_face_20_right";
                     }
                  }
               }
            }
         }
      }

      onTime 4500 {
         resetTime "0";
      }

   }
}
So here we go. You'll notice that if the health is less than 1, it will never get updated on the animation cycles too - he's dead, there's no looking around animation.
Well, back to the game, reloadguis, wait for him to look around and...
Nice. He even looks a bit more worried when looking to the left. Let me take more damage for the effect to be a bit more obvious...
Cool.
Now, one more thing, something not so obvious but that should not be forgotten. While our animation looks and works good, we have to make sure the marine face gets updated as soon as he is hit; or else, we're at the risk of having a bright looking marine face when he's barely alive, even if it's for just a few seconds.
So we have to use one new named event - "updateArmorHealthAir". This HUD event is fired up when there's some change on the armor, health, or air values, so it's fired when the player takes damage.
Getting back to the begin of our HUD script file, it looks like this.
windowDef Desktop {
   rect   0,0,640,480
   visible   1
   noevents   1
   nocursor  1

//=============================================================================
// Events
//=============================================================================

(...strip...)
So let's add the main block for our event.
windowDef Desktop {
   rect   0,0,640,480
   visible   1
   noevents   1
   nocursor  1

//=============================================================================
// Events
//=============================================================================

   onNamedEvent updateArmorHealthAir {
   }

(...strip...)
Easy enough. What we need to do is make sure the marine face windowDef gets updated with the right face. We don't need to have all those IF statements again to check which one is the correct marine face to be displayed, though; since the marine face uses an animation, we just need to reset its time -- it'll automatically fire up the updating animations. So we just do a resetTime again, this time with two parameters so we can reset another windowDef 'remotely'.
windowDef Desktop {
   rect   0,0,640,480
   visible   1
   noevents   1
   nocursor  1

//=============================================================================
// Events
//=============================================================================

   onNamedEvent updateArmorHealthAir {
      resetTime "marineFace" "0";
   }

(...strip...)
Easy. Now, when the player takes damage or grabs some health, his animation will restart and immediately update the face with the correct one. Test it in-game if you want; I won't provide a screenshot for this change because it won't make much sense (it'll be the same as the previous ones).
We can now add the next step in our marine face: makes him grin when he grabs a new gun.
We could make it in two ways: first, when a new gun is picked up, change the "background" of the marineFace windowDef to the grinning face for a while. Or second, create a new windowDef with a grinning face and make it visible or invisible.
I tried the first option, since it'd be easier with less windowDefs, but in the end I had some trouble with resetTime. While you can change the time the windowDef is at the moment, if you have some alternative 'animation paths' to follow, there's a big can of worms to be dealt with. When you do a resetTime, it looks like all previous time code blocks are executed, so I couldn't have alternative animations... it's complicated to explain and I don't want to extend much with personal ramblings on this lesson, so suffice to say I decided for the second alternative.
So we will have a simple (hidden) grinning windowDef at the same position of the original marine face. When a new gun is grabbed, the animation on this grinning windowDef is activated: it makes itself visible, makes the normal marineFace invisible, and after a while gets back to normal. This is probably easier for the engine to do, since there will be no file reading involved, just toggling windowDefs visibilities on and off. While I don't believe the background setting we did in the normal cycle of the marine face is heavy at all - backgrounds get cached by the engine - you never know what to expect.
Anyways, back to our HUD code, we have the marineFace windowDef.
(...strip...)

//-----------------------------------------------------------------------------
// Normal face + look around animation
//-----------------------------------------------------------------------------

   windowDef marineFace {
      rect   290,418,64,64
      visible   1
      background   "guis/assets/hud_face_100_center"
      matcolor   1,1,1,1

(...strip...)
We'll add a new windowDef, marineFacePickup, and make it invisible, right above our marineFace windowDef (order doesn't matter anyways).
(...strip...)

//-----------------------------------------------------------------------------
// Pickup (happy) overlay
//-----------------------------------------------------------------------------

   windowDef marineFacePickup {
      rect   290,418,64,64
      visible   0
      background   "guis/assets/hud_face_100_pickup"
      matcolor   1,1,1,1
   }

//-----------------------------------------------------------------------------
// Normal face + look around animation
//-----------------------------------------------------------------------------

   windowDef marineFace {

(...strip...)
Notice how the "marineFacePickup" windowDef has a "visible" property of 0 - it's hidden by default.
Now, we need a timed animation. This animation will be fired when a new weapon is picked up, and it'll simply make the marineFacePickup windowDef visible while hiding the normal marineFace windowDef. It goes like this...
(...strip...)

//-----------------------------------------------------------------------------
// Pickup (happy) overlay
//-----------------------------------------------------------------------------

   windowDef marineFacePickup {
      rect   290,418,64,64
      visible   0
      background   "guis/assets/hud_face_100_pickup"
      matcolor   1,1,1,1
      notime   1

      onTime 0 {
         set "marineFacePickup::visible" "1";
         set "marineFace::visible" "0";
      }

      onTime 800 {
         set "marineFacePickup::visible" "0";
         set "marineFace::visible" "1";
      }
   }

(...strip...)
Okey, there are a few things to be considered. First, notice I've added a new property to the windowDef "notime" with a value of "1". This tells the GUI system that, even though this windowDef has some time event blocks, they should not be used right now, they shouldn't fire up by default - they will be fired manually through a resetTime command. By using "notime 1", you have the ability to create complex animations elsewhere - animations that can be fired when you desire.
Now, looking at the animation: when it is fired (time 0), it simply makes itself visible and hides the original marineFace. When it reaches 800, it gets back to normal. Pretty easy.
We're almost ready to go. While our happy marine face is done, we still have to fire it. Now, remember we already used a "newWeapon" named event on the previous lesson...
(...strip...)

   onNamedEvent newWeapon {
      // Now turns on the correct number when a new weapon is picked
      if ("gui::newweapon" == 2) {
         set "gun_3::forecolor" "1,1,0,1";
      }

(...strip...)
...we just need to add one more command to this event: resetTime firing up the animation on "marineFacePickup".
(...strip...)

   onNamedEvent newWeapon {
      // Makes the marine face happy
      resetTime "marineFacePickup" "0";

      // Now turns on the correct number when a new weapon is picked
      if ("gui::newweapon" == 2) {
         set "gun_3::forecolor" "1,1,0,1";
      }

(...strip...)
Great. Save, do a reloadguis on the game, and let's test.

So we're getting close to the gun...
...and grabbing it. Notice the happy look in the face of the marine. Mad happy.
It's all fine and dandy, but there's something wrong. Of course, our marine already had his nose bleeding, but when he grabs the shotgun, he's all fine again. Obviously, the health/bleeding states also apply to the happy marine face, so we have to add conditional statements to the marineFacePickup animation too. Just like the previous marineFace animation, we do it with one big nest of if statements at the "onTime 0 {}" event block, this time right after everything visible or invisible.
(...strip...)

//-----------------------------------------------------------------------------
// Pickup (happy) overlay
//-----------------------------------------------------------------------------

   windowDef marineFacePickup {
      rect   290,418,64,64
      visible   0
      background   "guis/assets/hud_face_100_pickup"
      matcolor   1,1,1,1
      notime   1

      onTime 0 {
         set "marineFacePickup::visible" "1";
         set "marineFace::visible" "0";
         // set face: PAIN STRAIGHT
         if ("gui::player_health" >= 80) {
            set "background" "guis/assets/hud_face_100_pickup";
         } else {
            if ("gui::player_health" >= 60) {
               set "background" "guis/assets/hud_face_80_pickup";
            } else {
               if ("gui::player_health" >= 40) {
                  set "background" "guis/assets/hud_face_60_pickup";
               } else {
                  if ("gui::player_health" >= 20) {
                     set "background" "guis/assets/hud_face_40_pickup";
                  } else {
                     if ("gui::player_health" >= 1) {
                        set "background" "guis/assets/hud_face_20_pickup";
                     }
                  }
               }
            }
         }
      }

      onTime 800 {
         set "marineFacePickup::visible" "0";
         set "marineFace::visible" "1";
      }
   }

(...strip...)
Getting back to the game, and doing a "reloadguis; map game/mp/d3dm1" console command to reset the map...
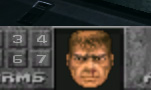
The marine is in a bad shape, then we approach the shotgun...
...now he's in a bad shape and happy. Mad happy.
Great! We got our marine looking to the sides, changing his face according to his damage status, getting happy when he grabs a new gun... what else?
The pain look, that's what else. When the marine gets hit, his face stretches in pain. Just like the weapon pickup we did above, this is done with a new overlay windowDef with a timed animation and an event block, but there's a little twist I'll discuss further. Let's get started.
This is part of our code right now, the beginning of the marineFaceHappy windowDef.
(...strip...)

//=============================================================================
// Marine faces
//=============================================================================

//-----------------------------------------------------------------------------
// Pickup (happy) overlay
//-----------------------------------------------------------------------------

   windowDef marineFacePickup {

(...strip...)
We'll add a new windowDef on top of it (again, order doesn't really matter): marineFacePain.
(...strip...)

//=============================================================================
// Marine faces
//=============================================================================

//-----------------------------------------------------------------------------
// Pain overlay
//-----------------------------------------------------------------------------

   windowDef marineFacePain {
      rect   290,418,64,64
      visible   0
      background   "guis/assets/hud_face_100_paincenter"
      matcolor   1,1,1,1
      notime   1

      onTime 0 {
         set "marineFacePain::visible" "1";
         set "marineFace::visible" "0";
         // set face: PAIN STRAIGHT
         if ("gui::player_health" >= 80) {
            set "background" "guis/assets/hud_face_100_paincenter";
         } else {
            if ("gui::player_health" >= 60) {
               set "background" "guis/assets/hud_face_80_paincenter";
            } else {
               if ("gui::player_health" >= 40) {
                  set "background" "guis/assets/hud_face_60_paincenter";
               } else {
                  if ("gui::player_health" >= 20) {
                     set "background" "guis/assets/hud_face_40_paincenter";
                  } else {
                     if ("gui::player_health" >= 1) {
                        set "background" "guis/assets/hud_face_20_paincenter";
                     }
                  }
               }
            }
         }
      }

      onTime 500 {
         set "marineFacePain::visible" "0";
         set "marineFace::visible" "1";
      }
   }

//-----------------------------------------------------------------------------
// Pickup (happy) overlay
//-----------------------------------------------------------------------------

   windowDef marineFacePickup {

(...strip...)
No big deal here: it works just like the marineFacePickup windowDef. The first real difference done is the time on the second block (500 instead of 800), since I wanted the "pain" face animation to last shorter. The rest has been adapted to work with the pain backgrounds and marineFacePain windowDef accordingly.
There's one catch, though. You see, when the marineFacePickup animation was fired, we made it visible and hide the standard marineFace.
(...strip...)

      onTime 0 {
         set "marineFacePickup::visible" "1";
         set "marineFace::visible" "0";

(...strip...)
But since we're dealing with two overlay windowDefs, now, this won't do. We could have the marine grab a gun at the same (or at a close) time he suffered damage, so we'd end up with two different overlay windowDefs standing on top of each other.
To avoid this, we'll have to make sure that when each animation/overlay windowDef is activated, it disables all previous overlays. So we need to make sure the marineFacePickup disables the marineFacePain windowDef, and vice versa. We do this by adding one more line to the blocks, like this:
(...strip...)

      onTime 0 {
         set "marineFacePickup::visible" "1";
         set "marineFacePain::visible" "0";
         set "marineFace::visible" "0";

(...strip...)
Easy enough. After doing this where it's needed, this is what our "overlay" windowDefs will look like.
(...strip...)

//=============================================================================
// Marine faces
//=============================================================================

//-----------------------------------------------------------------------------
// Pain overlay
//-----------------------------------------------------------------------------

   windowDef marineFacePain {
      rect   290,418,64,64
      visible   0
      background   "guis/assets/hud_face_100_paincenter"
      matcolor   1,1,1,1
      notime   1

      onTime 0 {
         set "marineFacePickup::visible" "0";
         set "marineFacePain::visible" "1";
         set "marineFace::visible" "0";
         // set face: PAIN STRAIGHT
         if ("gui::player_health" >= 80) {
            set "background" "guis/assets/hud_face_100_paincenter";
         } else {
            if ("gui::player_health" >= 60) {
               set "background" "guis/assets/hud_face_80_paincenter";
            } else {
               if ("gui::player_health" >= 40) {
                  set "background" "guis/assets/hud_face_60_paincenter";
               } else {
                  if ("gui::player_health" >= 20) {
                     set "background" "guis/assets/hud_face_40_paincenter";
                  } else {
                     if ("gui::player_health" >= 1) {
                        set "background" "guis/assets/hud_face_20_paincenter";
                     }
                  }
               }
            }
         }
      }

      onTime 500 {
         set "marineFacePickup::visible" "0";
         set "marineFacePain::visible" "0";
         set "marineFace::visible" "1";
      }
   }

//-----------------------------------------------------------------------------
// Pickup (happy) overlay
//-----------------------------------------------------------------------------

   windowDef marineFacePickup {
      rect   290,418,64,64
      visible   0
      background   "guis/assets/hud_face_100_pickup"
      matcolor   1,1,1,1
      notime   1

      onTime 0 {
         set "marineFacePickup::visible" "1";
         set "marineFacePain::visible" "0";
         set "marineFace::visible" "0";
         // set face: PAIN STRAIGHT
         if ("gui::player_health" >= 80) {
            set "background" "guis/assets/hud_face_100_pickup";
         } else {
            if ("gui::player_health" >= 60) {
               set "background" "guis/assets/hud_face_80_pickup";
            } else {
               if ("gui::player_health" >= 40) {
                  set "background" "guis/assets/hud_face_60_pickup";

               } else {
                  if ("gui::player_health" >= 20) {
                     set "background" "guis/assets/hud_face_40_pickup";
                  } else {
                     if ("gui::player_health" >= 1) {
                        set "background" "guis/assets/hud_face_20_pickup";
                     }
                  }
               }
            }
         }
      }

      onTime 800 {
         set "marineFacePickup::visible" "0";
         set "marineFacePain::visible" "0";
         set "marineFace::visible" "1";
      }
   }

//-----------------------------------------------------------------------------
// Normal face + look around animation
//-----------------------------------------------------------------------------

(...strip...)
There's still one catch to this code, though. If, for example, a damage animation is fired, then a pickup animation is fired, the marine face will get back to normal as soon as the damage animation finishes. This could be avoided with the use of some auxiliary variables, but it'll be a rare case and I'll chose to ignore it. It'll never be anything so blatant as having two faces activated at the same time on top of each other.
Now we need to get this pain animation fired just like we did with the pickup animation. This is done using the "updateArmorHealthAir" name event again, just like we used it to reset the marine face status. This is what our updateArmorHealthAir event block looks right now.
windowDef Desktop {
   rect   0,0,640,480
   visible   1
   noevents   1
   nocursor  1

//=============================================================================
// Events
//=============================================================================

   onNamedEvent updateArmorHealthAir {
      resetTime "marineFace" "0";
   }

(...strip...)
We can't just fire up the marineFacePain animation when there's a change to health, though: this event is fired when there's damage (less health) or when a health pack is picked up (more health). This is the twist I mentioned earlier: we need to make sure the animation only gets fired when the new health is less than the previous health, that is, damage has been done.
To do this, we need to use an auxiliary variable. I'll call it "lastHealth", since it'll control the last known player health. We add a new variable by declaring it as float on the windowDef properties declaration -- in this case I'll use the desktop windowDef itself.
windowDef Desktop {
   rect   0,0,640,480
   visible   1
   noevents   1
   nocursor  1
   float lastHealth 0

//=============================================================================
// Events
//=============================================================================

   onNamedEvent updateArmorHealthAir {
      resetTime "marineFace" "0";
   }

(...strip...)
I've also initialized it with a value of "0".
What we have to do - in the "updateArmorHealthAir" block - is this: check if the current health is more or less than the previous known health.
If it's more, the player has grabbed a health pickup, so just update the marineFace normally.
If it's less, fire up the damage animation.
After this is done, update the auxiliary variable "lastHealth" with the current value, so we know what to compare to in the next iteration of health update. So here we go...
windowDef Desktop {
rect 0,0,640,480
visible 1
noevents 1
nocursor 1
float lastHealth 0
//=============================================================================
// Events
//=============================================================================
onNamedEvent updateArmorHealthAir {
if ("lastHealth" != "gui::player_health") {
if ("lastHealth" > "gui::player_health" &amp;&amp; "gui::player_health" > 0) {
// Health change, less
resetTime "marineFacePain" "0";
} else {
// Health change, more
resetTime "marineFace" "0";
}
set "lastHealth" "gui::player_health";
}
}
(...strip...)Easy. You'll notice I also added a "lastHealth" != "gui::player_health" condition - this way, the animation update will only get fired when there's a change in health. Or else, we'd have the risk of having the marineFace animation reset when the player picked up armor or his air supply level changed.
Back to the game, testing again through doing a reloadguis and resetting the map...
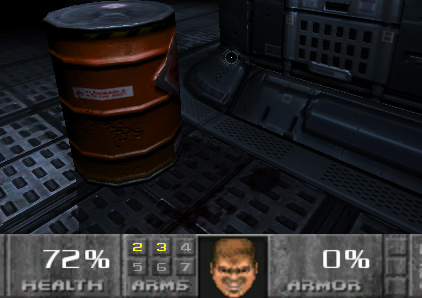
We're on the top of the bridge...
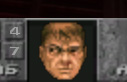
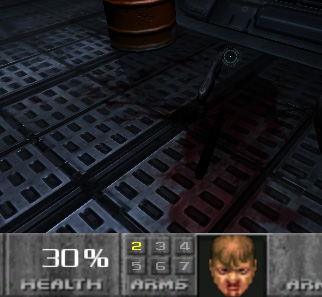
...the marine falls down, takes damage, and makes a pain face.
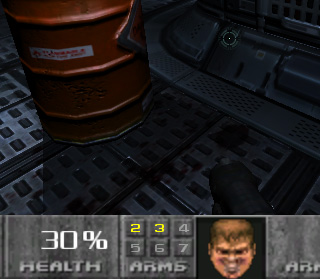
We get next to the health pack...
...and sure enough, the pain animation doesn't fire - rather, his face updates and he stops bleeding.
Wew! That's it, our marine face works. That was kind of long, but covered animation and a few more events and conditional cases to a great extent. I'm pretty happy with the results, even though the marine can't look to the sides he's taking damage from.
The next lesson - hopefully, as I depend on information probably present on the SDK - will be on putting the original DOOM fonts to work, making the graphic assets on our HUD 100% like the original. See you there!
Download final mod files in DOOM 3-friendly PK4 format (42kb) (use on the "<doom 3>/classichud" folder)
Hello, and welcome to lesson eleven in the GUI scripting series. Would you believe it? It has been almost an year since the last tutorial posted by me (#10, Sept 05/2004). I'd like to apologize for that. I've been focusing on school - I'm getting my bachelor's degree on digital interface design - and some other real life issues. Even though I had already a few more tutorials planned and partly written, I never had the time to finish and post them. Fear not! Here they are, slowly but surely. With a couple more games using the DOOM 3 engine coming along, I think there's still plenty to be said about the GUI system.
Anyway, we're still on the classic HUD series, using the original DOOM HUD as an example for out GUI scripting. We will now get our hands really dirty and make fonts work. This font subject will be split into a few different tutorials, since there's a lot to be said about it; let's get to it already.
This tutorial uses the previous tutorial's finished files as a basis, so you might want to download it to work along.
Complete GUI Scripting - 10: Using custom fonts
I know it's been a long time, but do you remember where we left off?
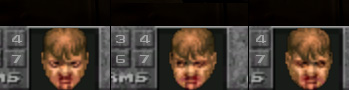
Oh yeah. We have our basic HUD, our marine face, it looks around, it bleeds, and all that. There's something wrong, though: It's still using the original DOOM 3 font on the health display...
...This is the original DOOM (enlarged for effect). A big, redish, bloody-looking font. We'll just create this font for DOOM 3 then.
One thing that must be said about font creation for games is that it has come a long way since the original DOOM days, though. Games used to be restricted to one resolution only (320x240 in the case of DOOM) and were pretty much low-resolution, so fonts were done pixel by pixel, as a normal graphic image. That made sense at the time, but nowadays, games have to adapt to a plethora of different resolutions (as well as different aspect ratios) and have to work on higher resolutions. That's why it doesn't make sense anymore to create a new font from scratch on any image editor just by pushing pixels around; it would be an enourmous task and the end results wouldn't be worth it.
That's why using fonts on FPS games today is accomplished by importing existing curve-based fonts (as in TrueType fonts) and, if needed, editing them to add visual effects.
That's what we'll do today: create a new font from scratch, but based on an existing true type font. So the first step we have to do is a conversion.
From what I've learnt, the main tool used for that task is Q3Font, by RR2DO2. As the name implies, this was created for Quake 3, but since DOOM 3 uses the same font format, it works just the same. However, from now on, we'll be using ExportFontToDoom3, a new tool created by forum member Grid (original thread here).
So, download ExportFontToDoom3, and extract it anywhere on your computer (I'm personally using <doom 3>/_tools/d3font).
Next up is deciding which font to work with as a basis. Normally, you'd find the font that works best with your art, or create a new font from scratch using tools like Fontlab or Typetool. In our case, though, since this is just an example, we'll work from a generic font: I've chosen Arial Bold for this task.
So, go to your font dir (Start > Run, "fonts"). Find Arial Bold on the list (or whichever font you want to use instead) and copy it to the clipboard (CTRL+C). Navigate back to your ExportFontToDoom3 folder - the folder which contains the ExportFontToDoom3.exe file, among others - and paste the file (CTRL+V). Even though you copied the 'font' name from the fonts folder, it will paste the real font file - arialbd.ttf in my case.
Since ExportFontToDoom3 is a command-line tool, we'll be using good old DOS to do the trick, so open up the command shell (Start > Run, "cmd") and navigate to the correct drive and directory by using the CD command and the alike. Once you're on the ExportFontToDoom3 dir, try running it to make sure it's running fine. A message displays.
E:\doom3\_tools\d3font>ExportFontToDoom3.exe
ExportFontToDoom3 v1.02.
Grant Davies 2005.
Error: No font file name specified.
Usage: ExportFontToDoom3 <font file name> [-size <point size>] [-xOffsetFix <fix type>] [-textureFormat <format>] [-noXOffsetWarnings] [-name <name>]
Of course, since I supplied no parameters, it has generated an error. So let us try and supply the first parameter, the file font name.
E:\doom3\_tools\d3font>ExportFontToDoom3.exe arialbd.ttf
ExportFontToDoom3 v1.02.
Grant Davies 2005.
Exporting Arial 12pt.
This font will be offset by 1 pixels.
Wrote texture page "Arial/Arial_0_12.tga".
Font exported successfully.
Exporting Arial 24pt.
This font will be offset by 1 pixels.
Wrote texture page "Arial/Arial_0_24.tga".
Wrote texture page "Arial/Arial_1_24.tga".
Font exported successfully.
Exporting Arial 48pt.
This font will be offset by 3 pixels.
Wrote texture page "Arial/Arial_0_48.tga".
Wrote texture page "Arial/Arial_1_48.tga".
Wrote texture page "Arial/Arial_2_48.tga".
Wrote texture page "Arial/Arial_3_48.tga".
Wrote texture page "Arial/Arial_4_48.tga".
Font exported successfully.
What the hell just happened? Well, since we supplied no size parameter, it has created fonts for the default sizes - 12, 24 and 48.
Also, using a generic font name like "Arial" isn't a good idea. We'll change it to BloodNumerals, in respect to the original art asset name on classic DOOM. This is done via the "-name" parameter.
So delete the "Arial" folder it just created and let's try again:
E:\doom3\_tools\d3font>ExportFontToDoom3.exe arialbd.ttf -name BloodNumerals
ExportFontToDoom3 v1.02.
Grant Davies 2005.
Exporting bloodnumerals 12pt.
This font will be offset by 1 pixels.
Wrote texture page "bloodnumerals/bloodnumerals_0_12.tga".
Font exported successfully.
Exporting bloodnumerals 24pt.
This font will be offset by 1 pixels.
Wrote texture page "bloodnumerals/bloodnumerals_0_24.tga".
Wrote texture page "bloodnumerals/bloodnumerals_1_24.tga".
Font exported successfully.
Exporting bloodnumerals 48pt.
This font will be offset by 3 pixels.
Wrote texture page "bloodnumerals/bloodnumerals_0_48.tga".
Wrote texture page "bloodnumerals/bloodnumerals_1_48.tga".
Wrote texture page "bloodnumerals/bloodnumerals_2_48.tga".
Wrote texture page "bloodnumerals/bloodnumerals_3_48.tga".
Wrote texture page "bloodnumerals/bloodnumerals_4_48.tga".
Font exported successfully.
Better now. Looking into the /bloodnumerals folder, you'll notice that, apart from the image files (the font is split into several different files for performance), it has also created some .dat files. These are the font headers, where it stores information saying where's each glyph, their size and so on.
You can close the command shell by now (by typing exit). We can now take our font to the game!
Navigate to the MOD folder - in our case, <doom 3>/classichud. Create a new "fonts" folder, then create an "english" folder inside of it, and move the whole original folder created by the ExportFontToDoom3 tool - the bloodnumerals folder - to this location, creating <doom 3>/classichud/fonts/english/bloodnumerals.
Done. Next, we have to change our GUI files so they can properly use the new font. Get back to the MOD folder, go to the <doom 3>/classichud/guis folder and open our old friend hud.gui on your text editor of choice.
In this file, you will see several entries which make use of the "fonts/english" font. Like this:
	textscale   0.6
	textalign   2
	font   "fonts/english"
This is the font we used on the health display - it's one of the default fonts. We will, instead, use bloodnumerals, our new, ass-kicking font. So find all occurrences of "fonts/english" and change it to this:
	textscale   0.65
	textalign   2
	font   "fonts/bloodnumerals"
Two important things to notice: First, I've changed the textscale property from 0.6 to 0.65. This is, of course, to make the text a bit bigger. It also fix an artifact on how the font was resized. Then, more importantly, notice the font name isn't "fonts/english/bloodnumerals", as you would expect from its path name, but rather just "fonts/bloodnumerals". I don't know why it has to be that way, but apparently the font location is hard coded on the engine so you have to use that /fonts/english/<fontname> path for font folders while using /fonts/<fontname> as the location on the GUI parameters. Granted, this is probably due to localization, but it's still weird.
Okey, we're ready to test and see if that worked. Fire up DOOM 3 and let's check it out.
By the way, this is the command line I'm using to test, so I can go straight to a map running the MOD. It's windowed so I can just do a reloadguis command to test changes I made on the GUI source by alt-tabbing to my text editor with no crazy video reloads.
E:\doom3\DOOM3.exe +seta r_mode 3 +set r_fullscreen 0 +set fs_game classichud +map game/mp/d3dm1Of course, this is using my own DOOM 3 path, so be sure to change it to fit your correct locations.
Anyways, I fire DOOM 3, and check it out...
HOORJ. It works. However, it's still pretty dumb, and suck as much as the previous font, just in a different way. It's far from being a kick-ass, BloodNumerals font!
This is it for now, though. This tutorial was meant to show on how to export normal fonts and get them in the game. There's still a lot to be said about fonts on DOOM 3 and on games in general -- we'll get there. On the next tutorial we'll learn how to make this font not so sucky-sucky by actually editing it and adding some visual eyecandy. See you!
Download final mod files in DOOM 3-friendly PK4 format (116kb) (use on the "<doom 3>/classichud" folder)
ExportFontToDoom3 mirror downloads (just in case the original one isn't working!)
ExportFontToDoom3 Windows binary v1.02 (459kb)
ExportFontToDoom3 Source code v1.02 (31kb)
Hi! This is lesson twelve in the GUI scripting series.
Still on the classic HUD series, we'll now make our custom font a bit more... custom, adding some eyecandy to it. Again, you might want to get the final files from the previous tutorial before starting this tutorial.
Complete GUI Scripting - 11: Editing fonts
Okey, we have our HUD basically working, with our new almost-ass-kicking, almost-spanking-new fonts...
...but it's still very far from what we actually expect. For starters, it's not red, and it doesn't have any of the cool effects the original DOOM has. We could make it red on the GUI script, but since we want a bit more than that, we'll just open up this font and mess with it.
You see, one of the cool things about using fonts from images on games is that you can add as much eyecandy as you wish to it. Of course, using images also has its downsides, but we'll discuss this later.
Remember the font files we created? We'll edit them (you can edit other fonts if you wish instead). So navigate to our MOD dir (<doom 3>/classichud/fonts/english/bloodnumerals) and you'll see the font TGA files. Since we'll only have to edit a few glyphs - our HUD only uses numbers and the "%" symbol - and at one of the sizes only, we'll just open one of those files. Locate "bloodnumerals_0_48.tga" and open this on your image editing program of choice (it has to support alpha channels). I'm using Photoshop for this, so this is what I get when I open the file.
What the hell? Well, of course, since the font is a bunch of transparent symbols, it's represented by the alpha channel, and not by the image color itself. Those squares you see are actually the font bounding boxes. This image could be totally white and the result in the game would be the same, but believe me having the bounding boxes displayed really helps most of the time. Knowing the limit of each glyph is gold (if the font wasn't made with the ExportFontToDoom3 tool discussed on the previous tutorial it'll show up all white instead).
Since we want to know the fonts properly, go to the Channels tab on Photoshop, and activate the Alpha 1 channel so we can see it.
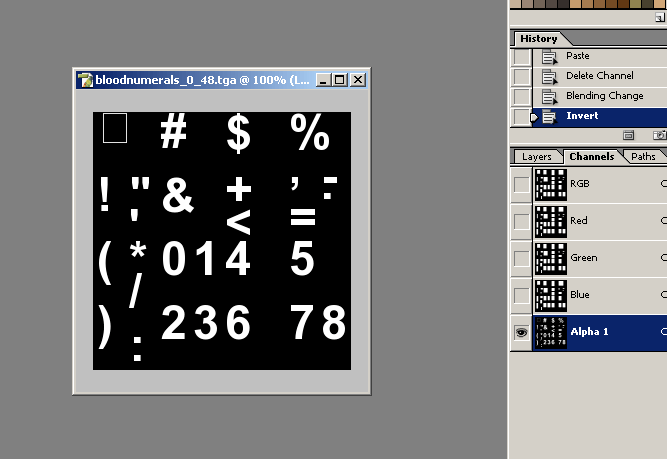
(Depending on your Photoshop's calibration, this might have a yellowish appearance instead. It'll work just the same, don't worry).
The first thing we want to do is to properly create a new layer with the real font transparency so we can edit it. So,
1. CTRL+Click Alpha 1 on the channel list to select its boundaries
2. Go back to the Layers tab
3. Add a new normal layer to your document (Layer > New Layer). I've called it "glyphs"
4. Fill the selection with white (Edit > Fill > Use White, Mode Normal, Opacity 100%, Preserve Transparency off)
5. Deselect everything (CTRL+D)
At first, nothing will appear to have changed. It's because our new layer has the same colors as the background layer, which contains the font bounding boxes. We could just go up and fill the background layer with black, but since we want to preserve it for reference, we'll create a new layer to work as a mask of sorts.
1. Add a new normal layer to your document (Layer > New Layer). I've called it "shadow"
2. Fill it with black (Edit > Fill > Use Black, Mode Normal, Opacity 100%, Preserve Transparency off)
3. Set its opacity to 80% on the layer list
4. On the layer list, click and drag it so it's below the "glyphs" layer but on top of the background
This is the final result.
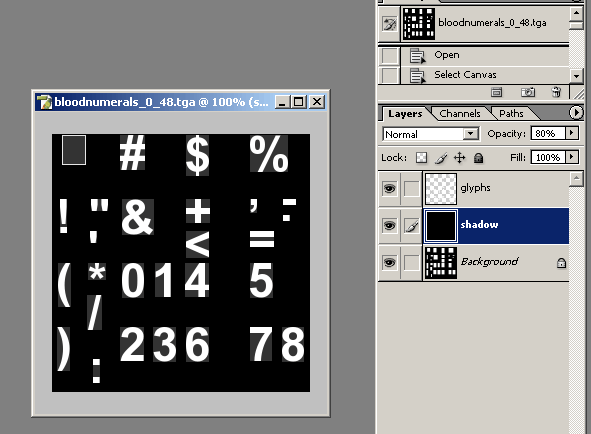
We're ready to play with the fonts. This is not a Photoshop course, though, so I won't get into much detail on what I've done, specially because this edition isn't necessarily done with Photoshop only; if you wish, you can download the final files and check the PSD file instead.
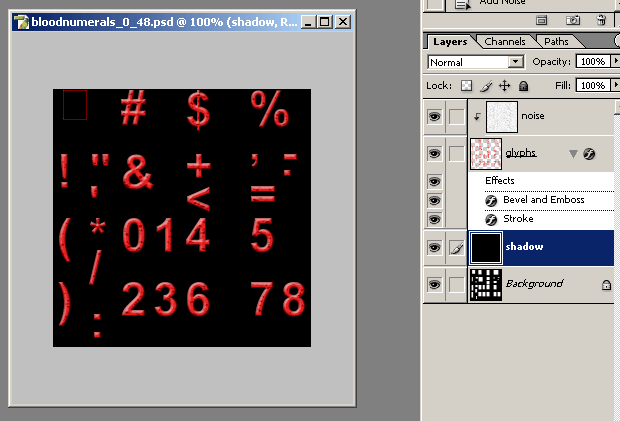
So this is the final edited file. It's ugly, I know; I just added a few effects. On this screenshot, notice I made the "shadow" layer 100% opaque just to see how it worked against a black background.
You must be asking why I kept the background layer anyways. Well, this is because those boxes, like I said, are the font bounding boxes - each glyph is saved on its own rectangular area. Although you can edit the font image files after it's converted to a proper DOOM 3 font, changing its appearance or its transparency, you can't go past the original bounding boxes - DOOM 3 would just ignore it. When editing my font, everychange I did was inside of the existing font area. Of course, I could have changed the transparency, even replacing them by new characters altogether; however, I would still be restricted to the bounding area.
Back to the font. Now, we have to export this Photoshop file as a proper TGA file with an alpha channel. So...
1. Delete the shadow layer, and the background layer
2. CTRL+Click the "glyphs" layer to select its transparency bounds
3. Save this selection to a new alpha channel (Select > Save Selection > (Any name)
4. Go to the "Channels" tab and delete the old alpha channel (Alpha 1)
5. Go back to the "Layers" tab. You have to flatten your work but still keep the transparency. In my case, since I used layer effects and layer grouping, I do Layer > Merge Visible (SHIFT+CTRL+E)
6. Since our transparency mask will fall on pixels which aren't exactly black, if we just fill the background with black, we will actually lose color information (a 10% transparency of red would become a 10% transparency of 10% red and 90% black). So instead we do a weird trick:
6.1. Duplicate the only layer you have (Layer > Duplicate Layer, or ALT+L+D ENTER)
6.2. Merge the two layers (Layer > Merge Down, or CTRL+E)
6.3. Do this 8 times (2^8 = 256). This will make all non-100% opaque pixels "bleed out" and fill the pixels with their complete color.
7. Create a new layer, fill it with black, and move it below the actual font layer
8. Finally, flatten your image (Layer > Flatten Image). You must have your fonts with hard-looking edges and black background.
9. Save your TGA on the same location the original TGA file was (File > Save As, Format TGA, Alpha Channels ON, 32bits/pixel). Be sure to have a backup of the original bloodnumerals_0_48.tga file, just in case
(Steps 2 to 4 can be skipped if you haven't changed the original image transparency)

Weird, but done. Let's test it and see how it performed.

Well, if it was ugly on the PSD file, what you expected in the game? ![]()
Anyways, it's working nice (from a technical standpoint at least). Although the bounding box poses some real limitation, this can be dealt with: if you have to create fonts that go beyond the original area (as in when using some glow or shadow below it), you'll have to redo the font on the image, using a smaller size in a way that the effects are still keept inside the area.
On the next tutorial... I don't actually know what I'll talk about. Not exactly. See you there anyways!
Download source and example files (55kb)
Download final mod files in DOOM 3-friendly PK4 format (145kb) (use on the "<doom 3>/classichud" folder)


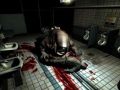

A great tutorial !
Many thanks for such work.
Cheers.