Before we start on this tutorial, I want to point out that you want to have Reality Factory installed to C:/RealityFactory. When you install Reality Factory, the installer will suggest C:/Program Files/RealityFactory, so make sure to change it to just the C drive! If you didn't do that, the level editor RFEditPro can give a whole lot of error messages because of missing files. This is sort of a bug in the installer.
Alright, now that that's out of the way, open up RFEditPro (you can find it in the 'tools' map).
When you start up, anyone with prior experience in constructing levels for Half-Life or Quake will have a familiar sight. The simularities don't stop there: Reality Factory's underlying engine, Genesis 3D, is based on the same BSP algorithm that Half-Life, Quake, and other earlier FPS games also use.
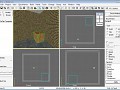
The editor is split up into four views: the camera view, the front, side, and top. The right windows, and the bottom left window will be used to create and edit our objects and building blocks, while the camera view will be used to view our level in 3D while we are constructing it.
Start a new map (file >> new). Notice how our map has a blue box in the side views. You can use the mousewheel at any time to zoom in or out. Try zooming out to a comfortable level, and press the enter key on your keyboard. You have now created your first brush! You should hear a little sound when you pressed enter, indicating that you created something new in your map. Like in Half-Life or the early Quake games, the levels are made out of blocks that you put together. If you look in the camera view, you should see a bunch of weird looking smileys from the stock texture that's been put on the cube. If you hold the right mousebutton inside the camera window, you can move around to view the level, and you can use the mousewheel to fly around! This is crucial for navigating around your level later on.
If you look at the top of the editor, just underneath the 'change' tab, there's a button with a blue box and a mousepointer in it. This is the brush and entity creating tool. As long as you have this button selected, you can create brushes with the enter key on your keyboard. Next to that button with the blue box, is a button with a green box and a mousepointer. Select that, and click on your brush to modify it. If you look to the right of that same row of buttons, there's a button with four arrows on it. Select this button if you want to move your brush around. With this selected, click and hold down the mousebutton in one of the side views to drag your brush to another position. The rotate button next to that does just that: with this button selected, drag your brush in any direction in one of the side views to rotate it around.
Now, as you've noticed, we only created a hollow cube so far. If you want to create complex geomitry, you're going to need to create independant blocks that connect to eachother.
To do this, simply select the button with the blue box again. Notice the information at the right side of the screen, where it says 'box template'. Click the button down there that says 'customize template'. All the above functions that were greyed out, are now available. Click and select the dot that says 'solid'. This will make your brush solid with no 'insides'. In the tool bar at the top, there is a tool called 'scale brush' (you can read it if you hover over it with your mouse). With this, you can resize your brushes (don't forget to select them first with the green box tool!). If you create a few brushes, you should be able to put them together to make a four-sided room. Just make sure all the brushes are sealing off the level! If there are any 'leaks', the game will have trouble compiling. Fortunately, the editor's snap-to-grid function helps you with locking your brushes into the right place. By default, the grid is set at 8 texel, but if you want to move your brushes around with more precision, just go to project >> level options and select any number below the default at 'grid snap'.
If you like to give your brush a different texture, simply select your brush using the green box button, go to the 'textures' tab on the left side, and double click on the texture you want to assign it to your brush!
Once you experimented a little with the brushes and created a simple room (you can even use a simple hollow cube for the sake of testing), its time to put in your player start so we can test it.
To do this, simply click on the 'templates' tab (if its not highlighted yet) on the left side of the screen. If you look down, you can see the 'entities' tab. If you click in it, you can look through the list of entities that are available to the engine. NOTE: if you installed Reality Factory in the wrong way, you will NOT be able to see the whole list, but only a really short list! Go through the list, and select 'PlayerSetup'. This will determine the setup for our player character. As you can see in the editing windows, the entity will appear as a small blue box with a cross in it. You can place it just like brush, by hitting enter. Now, make another entity, but this time, create 'PlayerStart'. This will determine the location of our player character. Ofcourse, make sure you move it into a suitable location! That means, not into the ground, or through the ceiling, since this entity will be your starting spot.
Once you did that, you can save the level, and click the 'Build bsp file' button from the tools (its next to the little refresh button) to begin playtesting your level. Just leave the compile settings as they are for now. Just make sure 'preview in Reality Factory' is selected, and click 'ok' to begin previewing.
Now you should see the menu screen for Reality Factory, and click through that, you should be able to see your level and walk around in your creation!
For now, I hope this little tutorial provided you with enough information to get you started with experimenting in RFEditPro. From this point on, you can basically find out alot of things simply by experimenting with them. For example, you can hover your mouse over buttons to find out what they do. Reality Factory also comes with a help-file that is packed with information about all the different entities the engine comes with. If you still get completely stuck somehow, you can always go to Reality Factory's official forums to find out more and delve deeper into the material.
Happy editing! :)