Part 1 - Introduction
Before you go on, and read this tutorial, there are a few things you need:
- 3DS Max 6/8/9 with Alamo exporter, and importer
- Photoshop with Nvidia tools
- Or other image editing software capable of exporting an image as a .DDS, with alpha channel
Anywyas, you want to get into modding? Well, I've got the guides for you. Over the next few weeks, I'll talk about some of the various skills needed for modding. Today, I'll be teaching about how to rig a starship.
Part 2 - Readying a game model
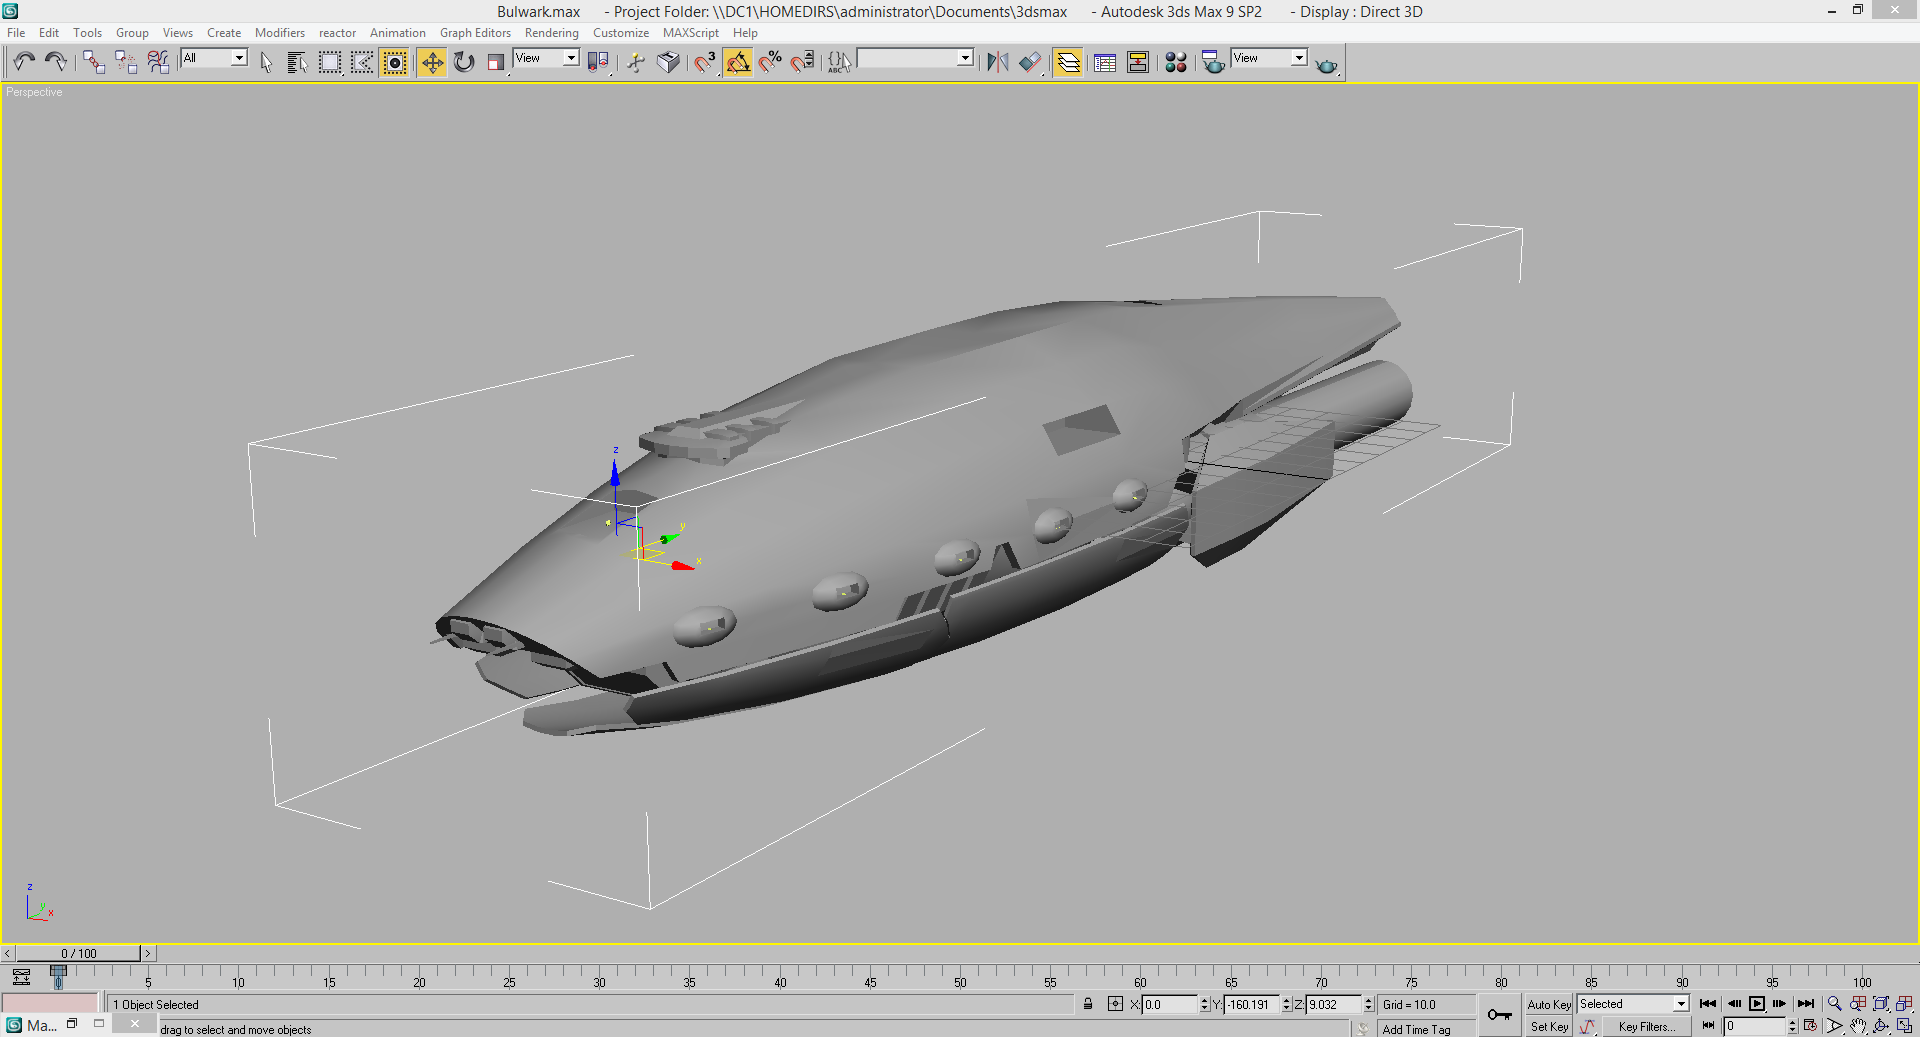
The very basic thing of in game models, is the actual mesh. For this, you need to import the model in 3ds Max in a compatible format.
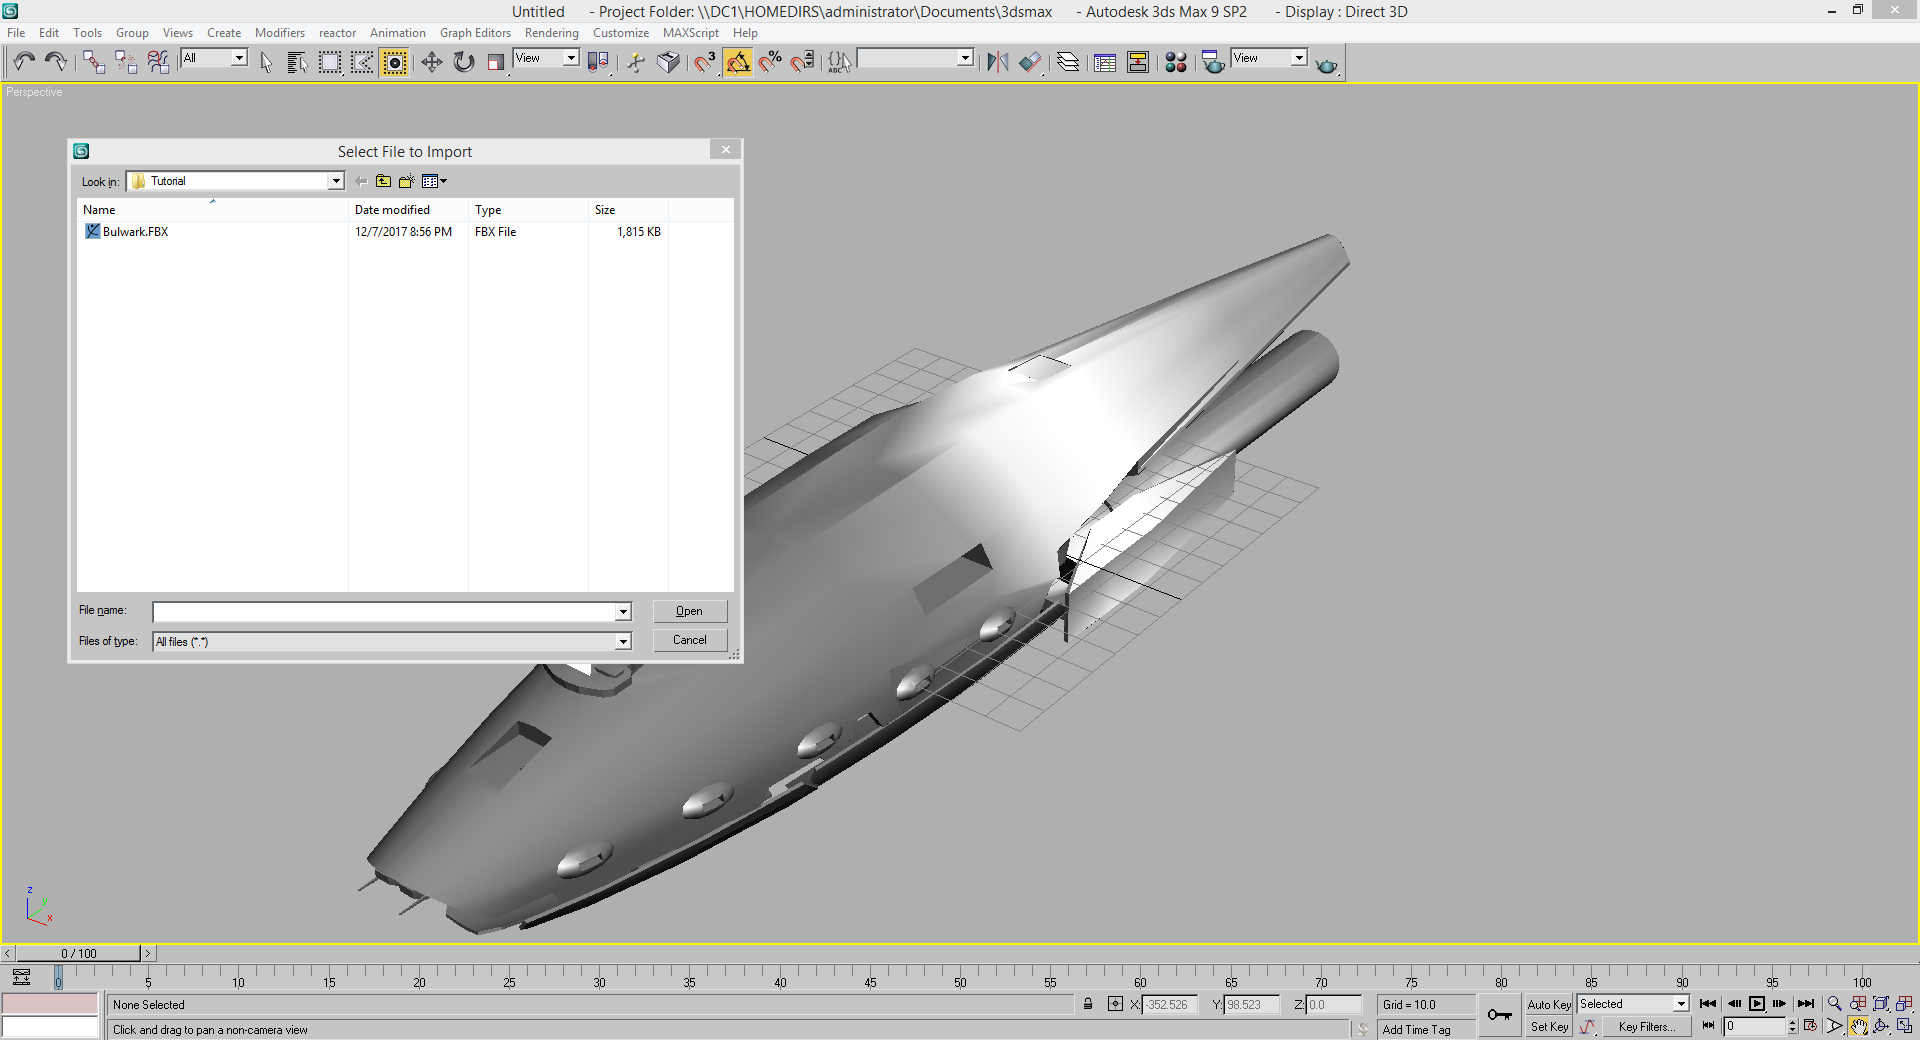
In order to do this, you need to go to the top left and click "File". Move down the window that popped up, and click "Import". This will open another new window with "Select File to Import" at the top. Once this is open, go down to "Files of type", click the grey box, and select "All files (*.*) at the bottom. This will allow you to see all files in any format. Once that's done, make you way to the folder where the model is located, and import it. Once that's done, you should get a grey model similar to that in the image above.
In order to get bones you can work with, I like to import an existing .ALO model.
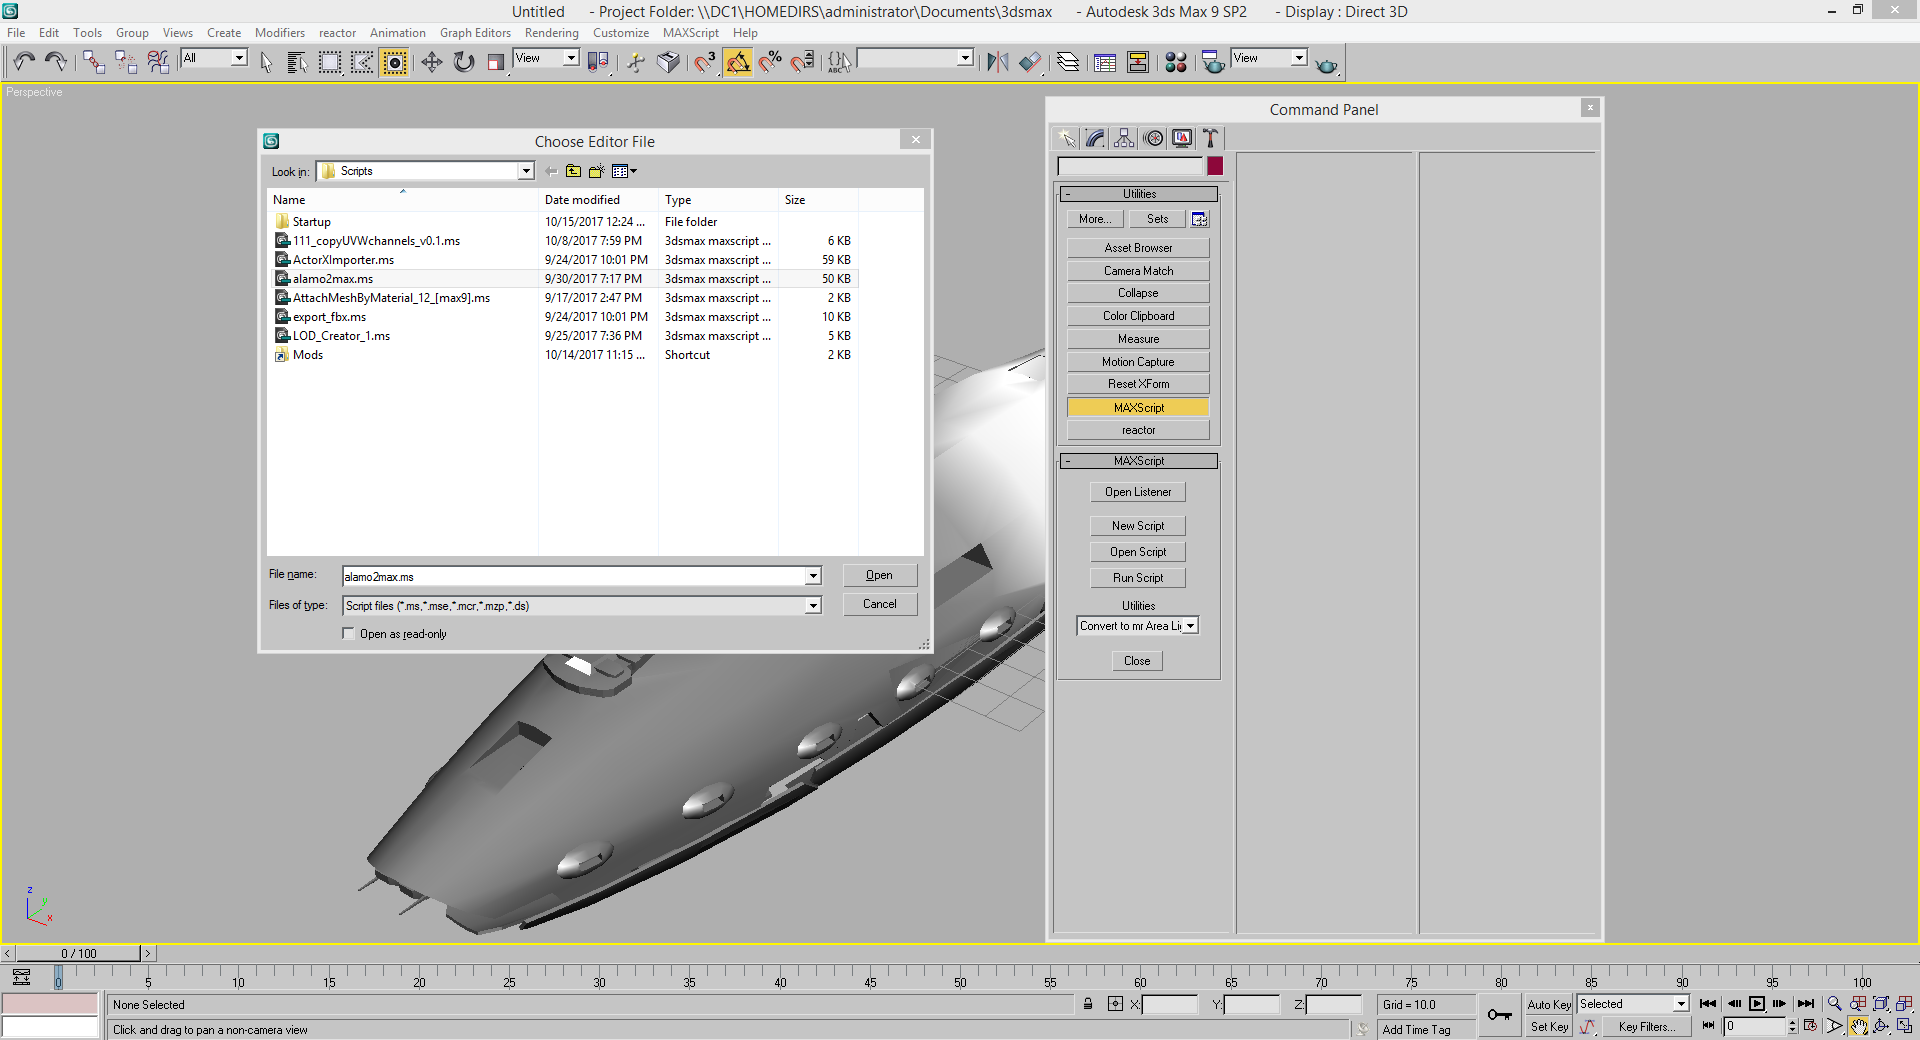
To do this, go to your control panel, and click "Utilities" (Hammer at the top right), then click "MAXScript", then "Run Script", and "alamo2max.ms".
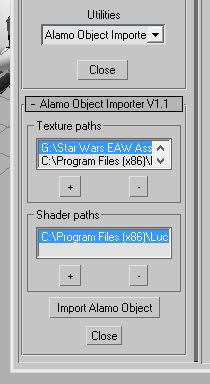
Once that's done, click the down arrow under "Utilities". This will bring up a menu with "Alamo Object ImporterV1", and "Convert to mr Area Lights". Click the "Alamo Object ImporterV1", this will bring up the importer, like in the image above. You'll need to add paths for the model textures and shaders.
For shaders you'll need to install the map editor, this will create a folder called "Source" in the "Mods" folder. You'll need to direct the Shader path to the Folder called "Shaders" in Source -> Data -> Art -> Shaders.
For textures, it's a similar process. Just direct the Texture paths to -insert mod name here- -> Data -> Art -> Textures.
Once this is all done, you can import an .ALO model. Click "Import Alamo Object", and a new window called "Import Alo" will appear. You'll need to make your way to the model you want to import, and import it.

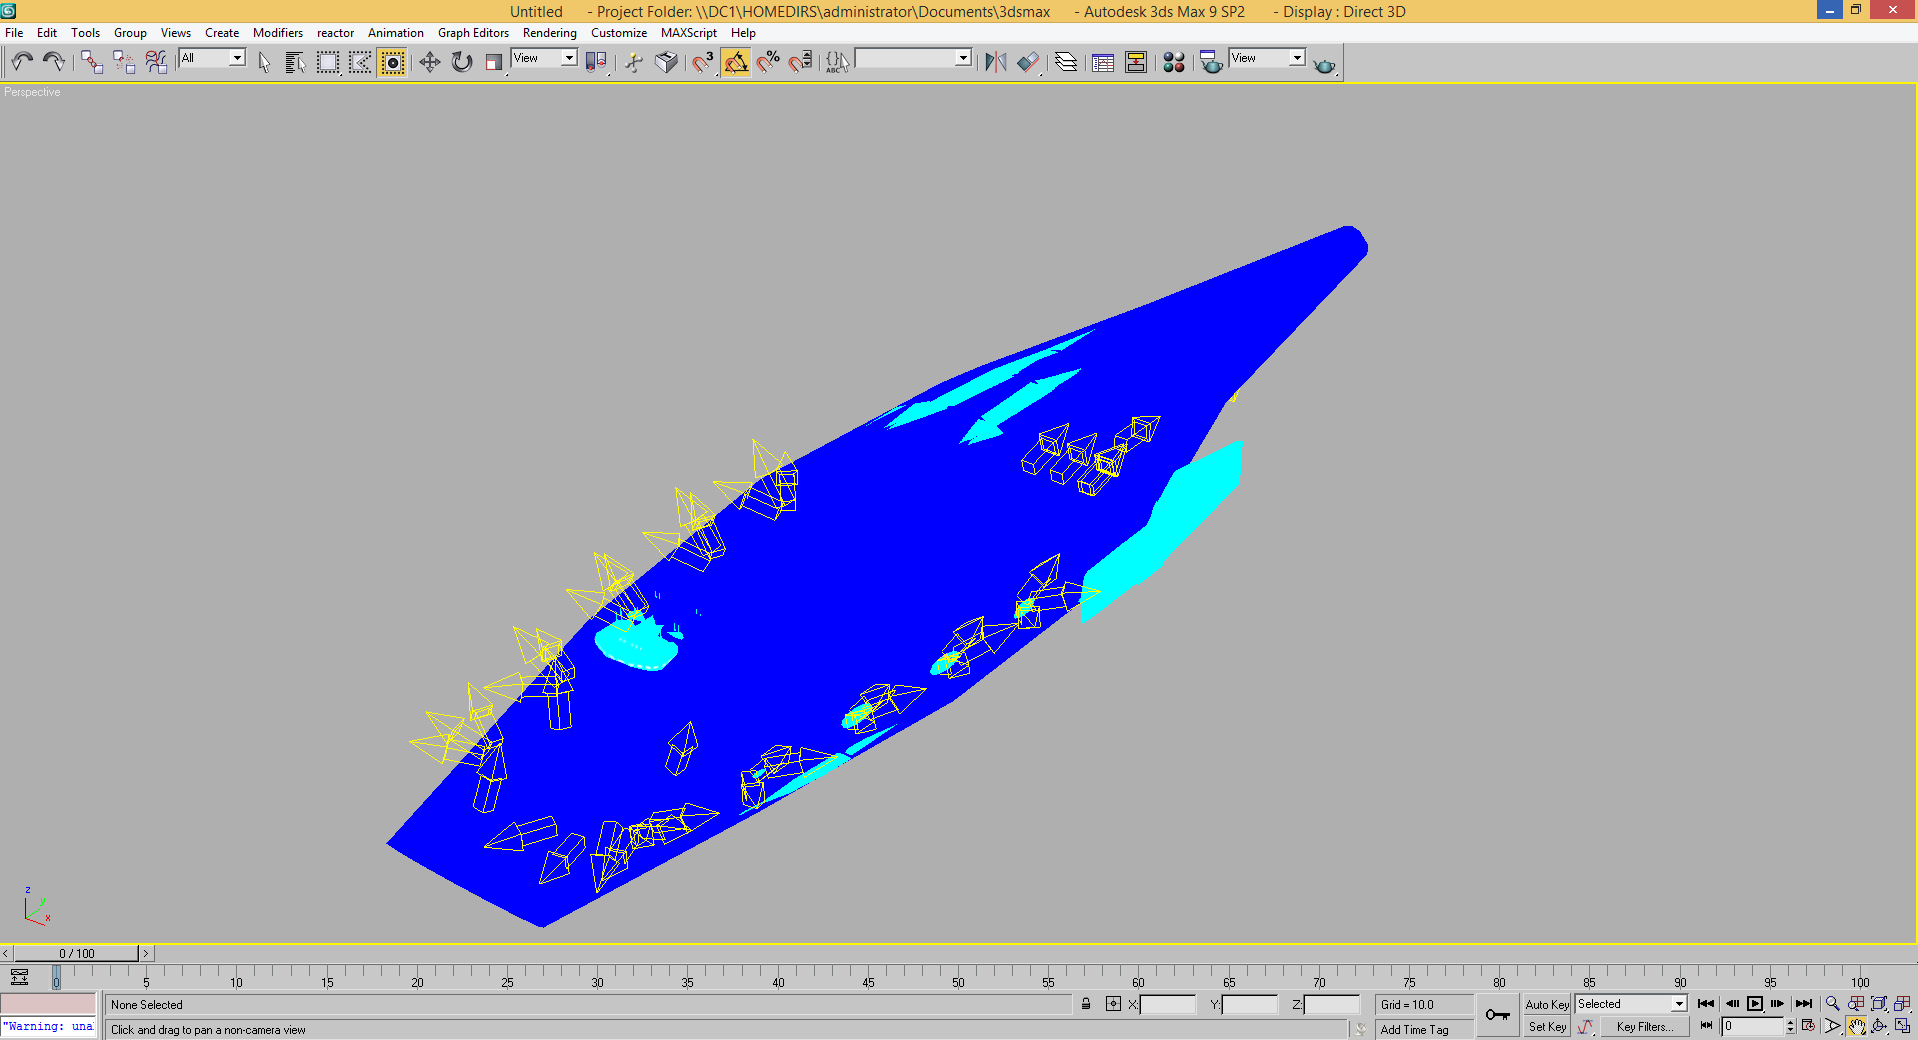
Then another window pops up called "Importing...", with a wire frame of the Eclipse. In a little bit, another window pops up called "Select the attachment bone", I prefer to click none. Once the import is complete, you'll see a blue, and yellow mess.
The dark blue, is a low-poly collision mesh, the light blue is a shadow mesh, the yellow arrows are the particles for the game, and the yellow boxes are bones.
For our purposes, we only need one bone set. So go into your schematic view (The button to the left of the 4 colored balls), and delete every imported thing except for one bone set.
I then like to reset their rotations to (0,0,0). To do this, click the circle to the right of the 4 arrows at the top, and set all 3 numbers in the white boxes at the bottom to zero.
Now, you've got your meshes, and bone set, and you're ready to do the real work.
Part 3 - Rigging
Now, with this, it's fairly easy but repetitive. Once you've got the basic down, it's just a matter of rotating the bone right.
For rotating turrets, you need the blue bone point up, and the green going opposite to the way you want the turret facing. So if you want the turret facing forward, having the green arrow pointed backwards, the red arrow doesn't matter.
For firing hardpoints, you need blue pointing up, and red pointing forward, the green arrow doesn't matter.

Now, for how bones should be set up.
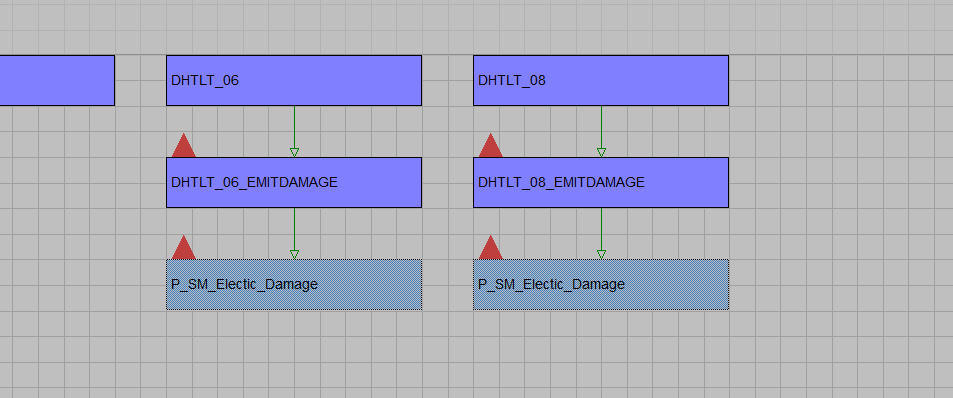
Bones should be linked with the attachment bone as the base. I like to go -TURRETTYPE_##- -> DMG_TURRETTYPE_## -> DMGPARTICLE. You can find the linking tool to the right of the block arrow at the top left.
You might find the naming scheme odd, this is purely for making the rigging process easier. I like to go to "Tools' -> "Rename Objects" and use the tool.
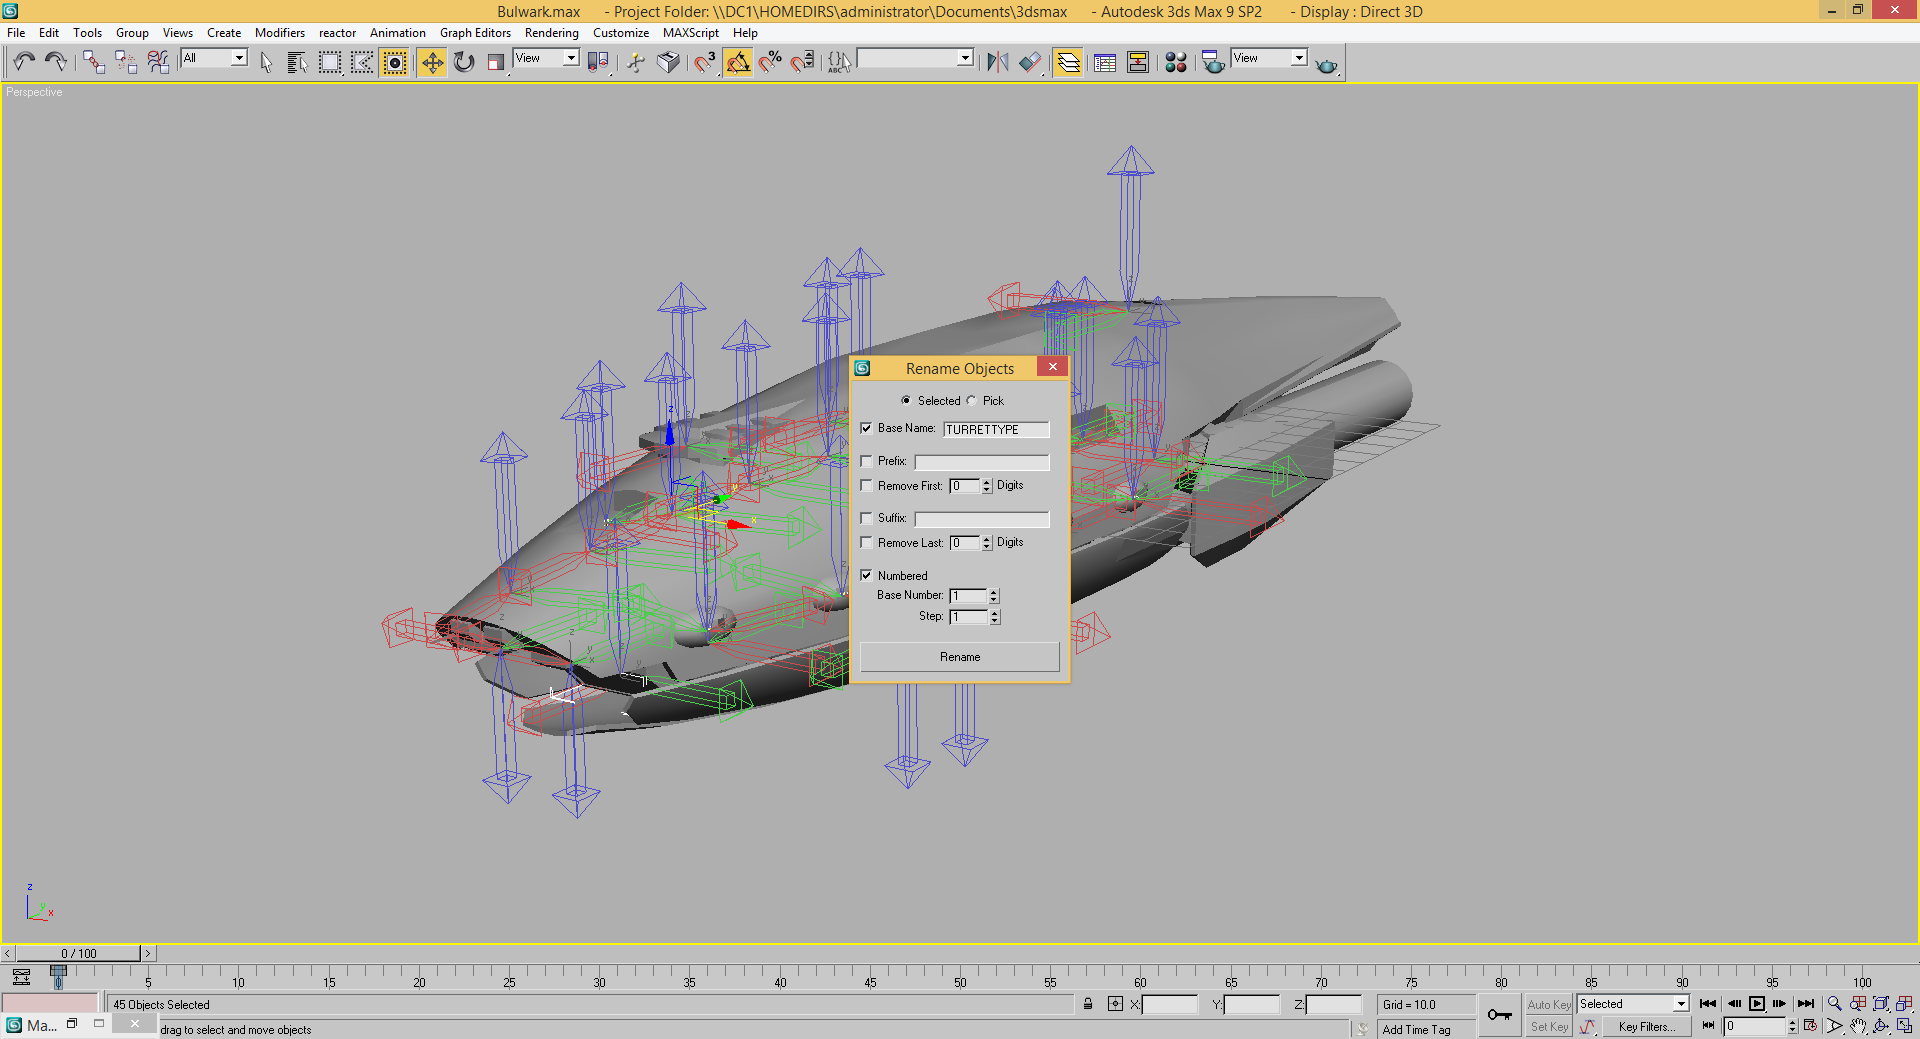
To use the rename tool properly, select every bone you want to rename. So here were renaming the attachment bones, make sure "Base Name" is check marked so it's active, and add the turret type you want. Then go down, and check off "Numbered", and set the base number to 1, and leave 1 step for it to a double digit number. And then click rename.
The same processes applies for damage bones, and particles. Just have the base name DMG_TURRETTYPE, or whatever the particle model name is (IE: AB_Fire.ALO), and remove the .ALO from the base name.
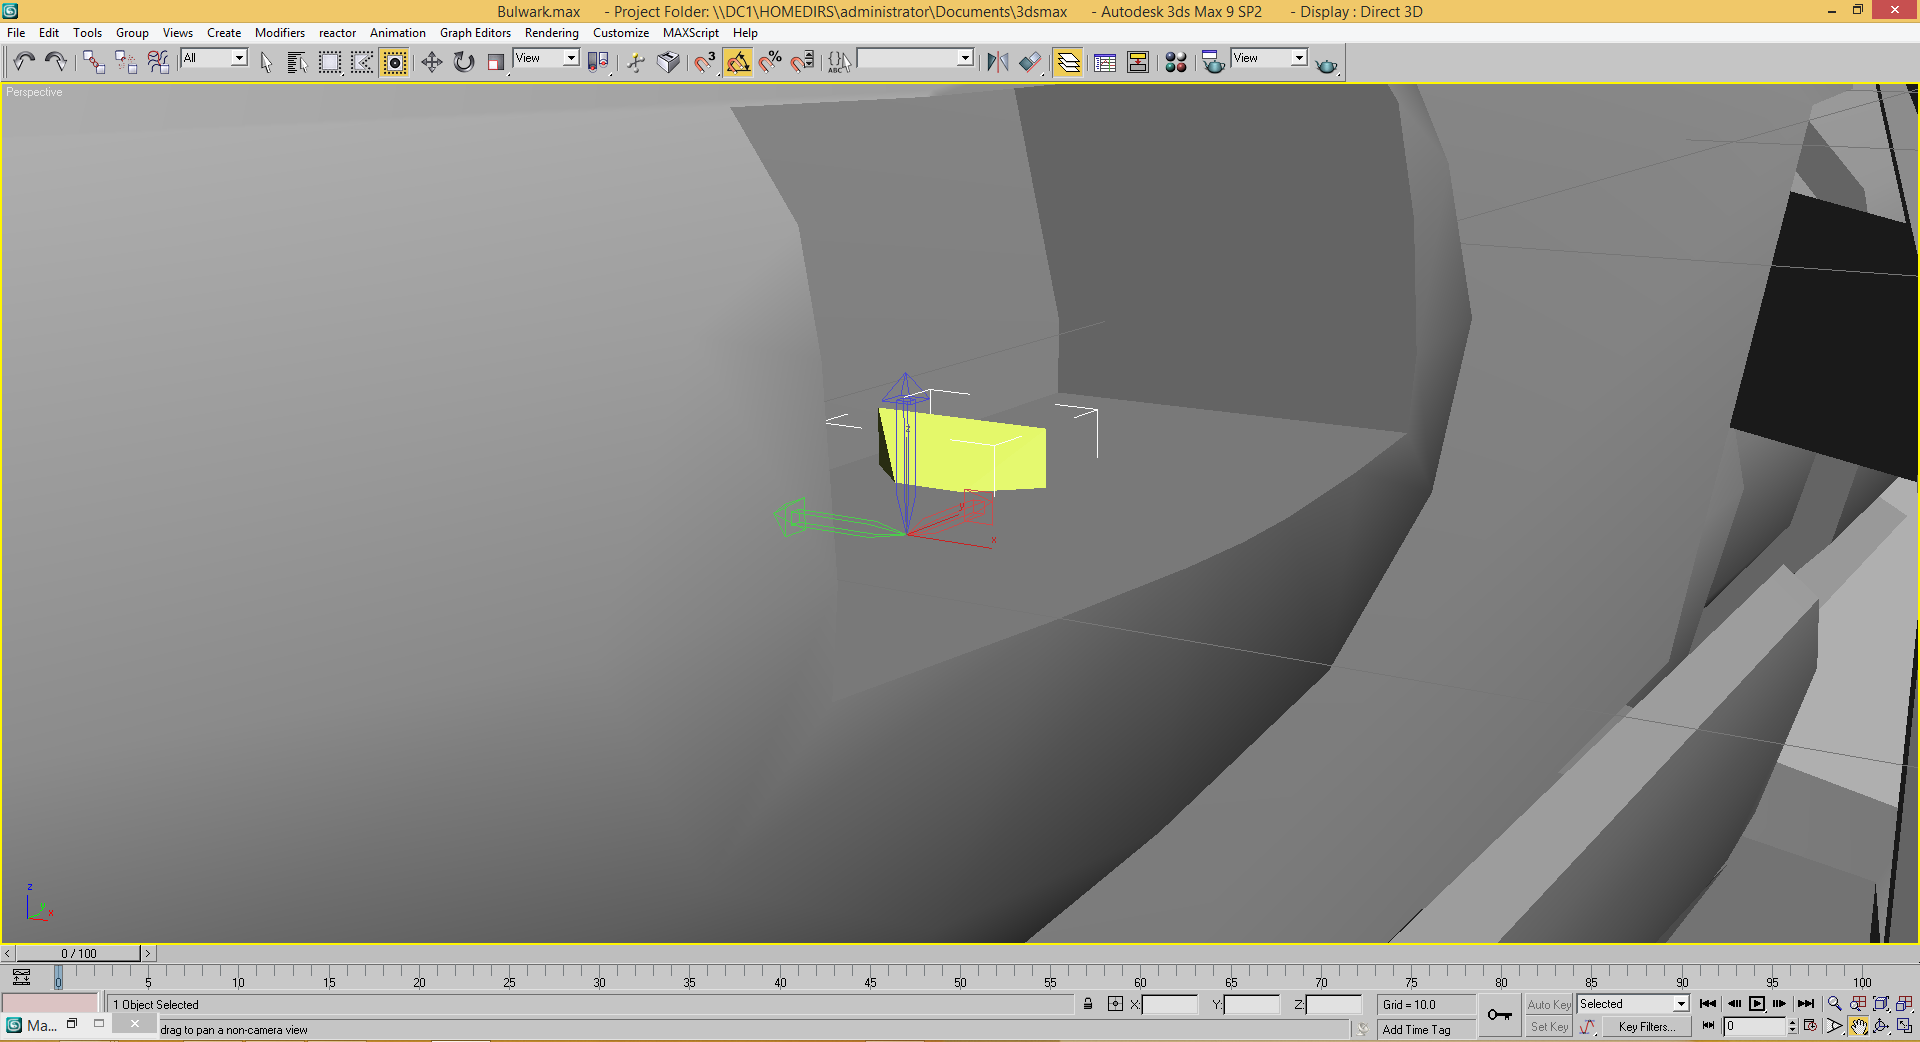
Now that you've got the basics of how to set up your bones, you can move them into position. To move objects, click the "Select and Move" tool at the top, and have the thing you want to move selected. So either select the bone stack, or the base attachment bone to move all three bones.
To move up and down, use the blue "Z-axis" arrow. To move left and right, use the red "X-axis" arrow. To move forward and back, use the green "Y-axis" arrow. You can also move on abject on two planes by hovering over the square between them, and moving it. (IE: Z and X, Z and Y, X and Y)
Rotating the bone is a similar process, move back over to the "Select and Roate" tool. You can rotate the bone along the X, Y, and Z axis (Colored arcs), you can rotate based on current camera position (Grey arc), or you can rotate on all 3 axises (Center ball). Just keep in mind the basic guidelines you need to follow.
Once you have all your bones laided out, it's time to texture, and add the fancy dodads.
Part 4 - Textures, and Special Meshes
First, let's deal with collisions, and shadows.
Generally, people used to create a low poly mesh for the collision mesh, this is just added work. It's as simple as selecting all the pieces to your hull mesh, going to "Utilities", clicking "More..." at the top, and then clicking "Alamo Utility"
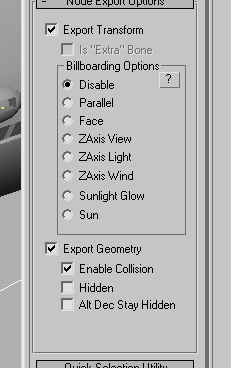
Work your way down, and click "Enable Collision". Congratulations, that's a lot easier then what people used to do.
Now for shadows, these can be incredibly tricky (Truthfully, I haven't quite fully gotten them down myself). If they were done right, it's as easy as going to the blue 90 degree arc or the "Modify" tab, clicking the down arrow on the modifier list, and selecting Cap Holes from that list.
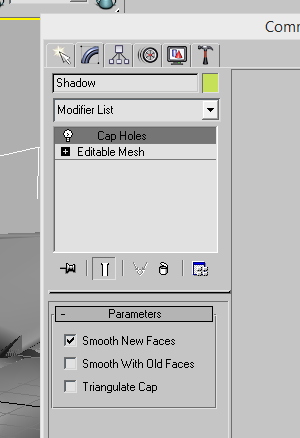
If not, that's where the real killer comes, You'll need to find and stray polygons, and remove them, or fill them in. I just really wish Petro would just update FoC with whatever shadow generator they created for Universe at War. Anyways, make sure this is named, and that you can come back to it later.
Now for textures, you'll need to go into Photoshop, and open them. For your diffuse/color map, go to "Channels" and add a new channel. If it's not black, you'll need to fill it in with black. Then you'll need to save it. So go to "File" -> "Save As.." and select D3D/DDS (*.DDS"; *.DDS). Note this format is different than Intel Texture Works, the Intel version can't be used with FoC.
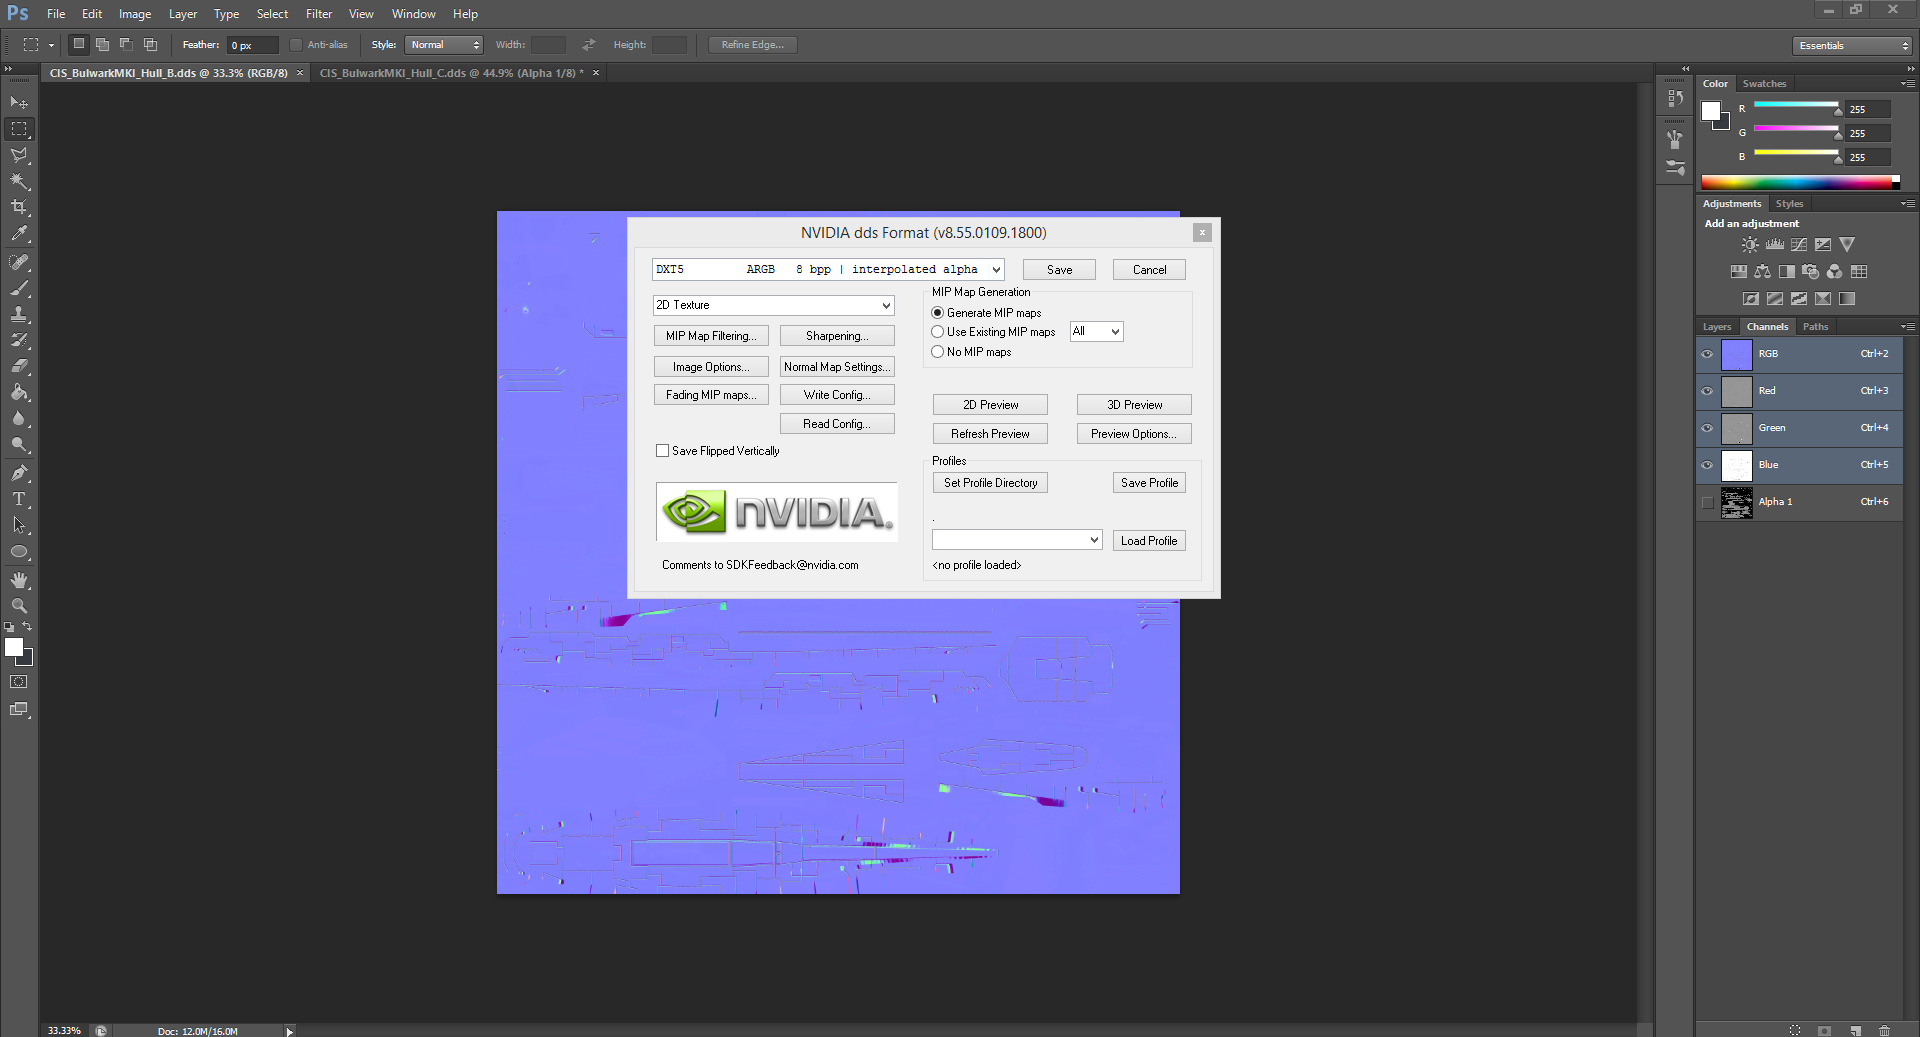
Once your saving the file, a window will pop up called NVIDIA dds Format. Bring down the format window and select DXT5, and select Generate MIP maps. DXT5 helps preserve some detail, and MIP maps help keep the game semi playable by reducing texture resolution if needed. MIP maps, will increase file size however.
Normal maps are a bit different, some times they might be an odd color like dark blue, green, or yellow if your porting. Make sure the blue channel is white, and that the red and green are a grey color. Now unlike the diffuse, you'll need to add a specular map to the texture. This can either be prepainted (IE: Substance Painter), or you can take a diffuse map and darken it. Either way, you'll need to paste it into the alpha channel of the normal map.
Once both maps are exported, go back to 3DS Max. It's time to texture.
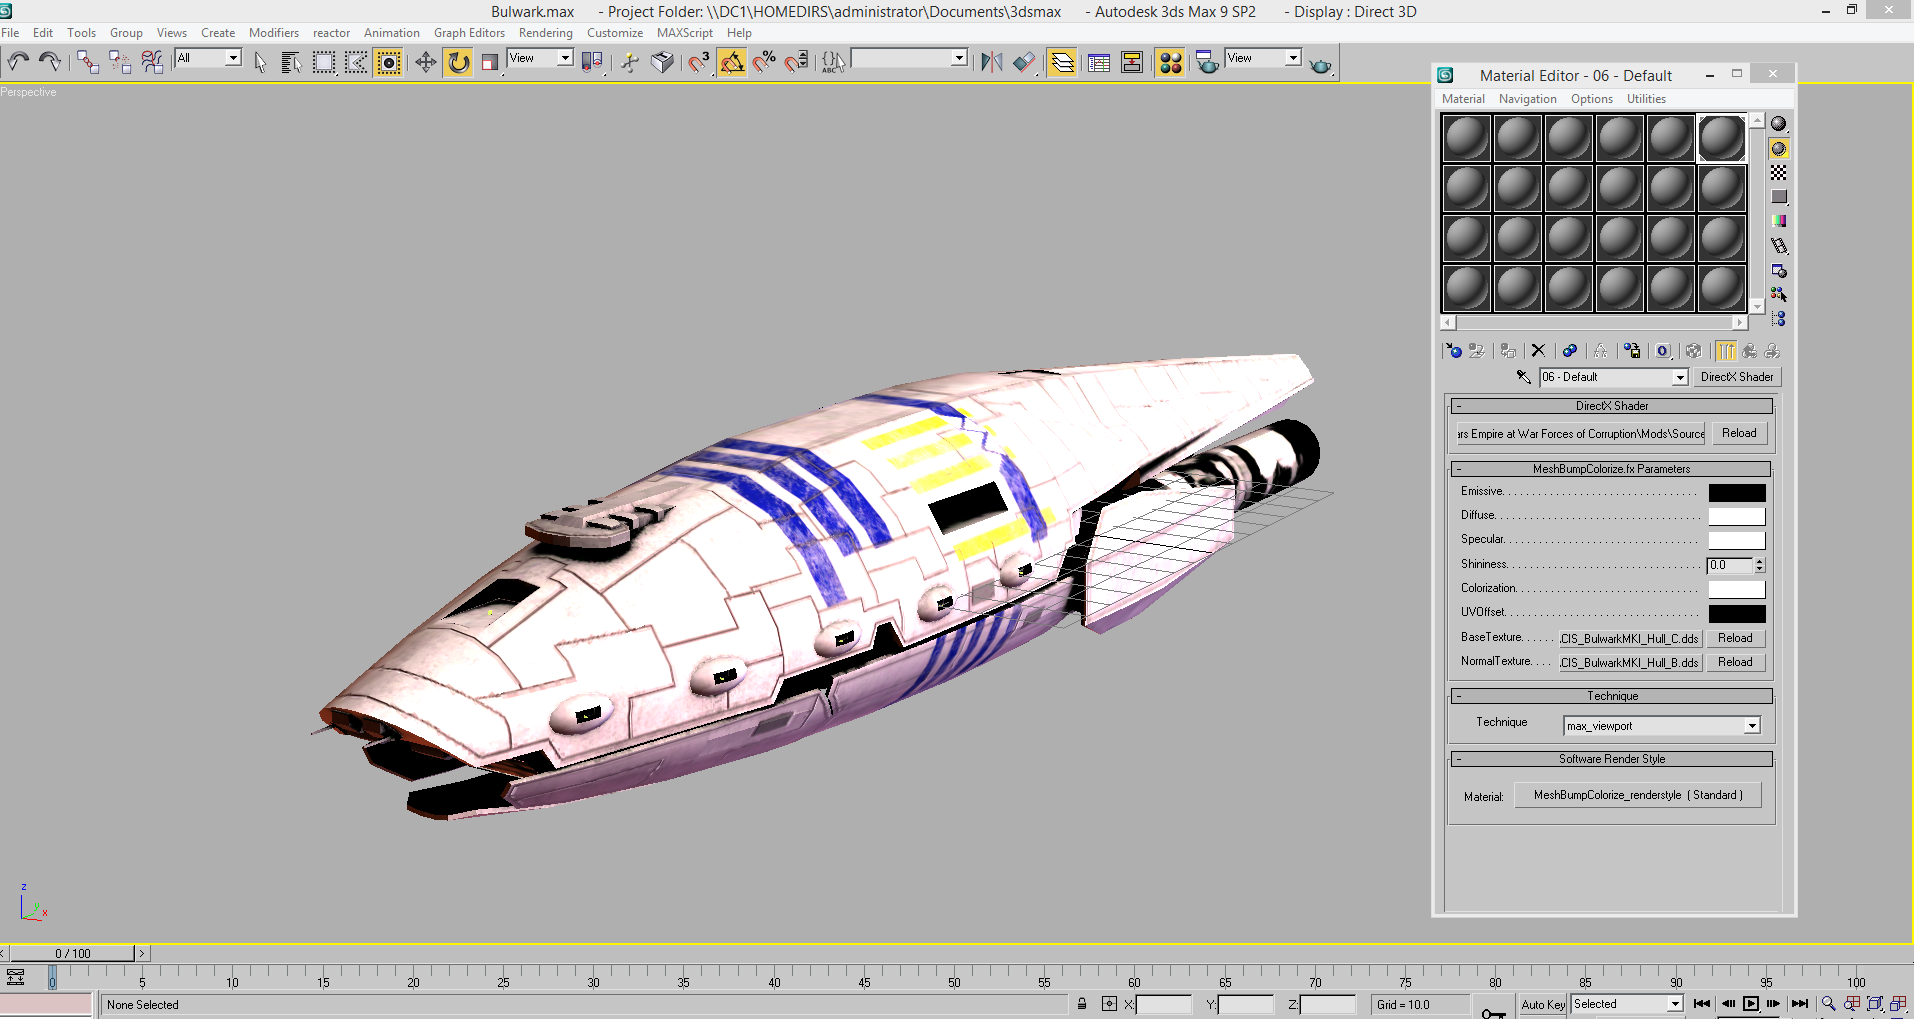
Remember the four colored balls from before? Click then, that'll open you material editor. To create a new material, click standard, and then click DirectX Shader in the window that popped up.
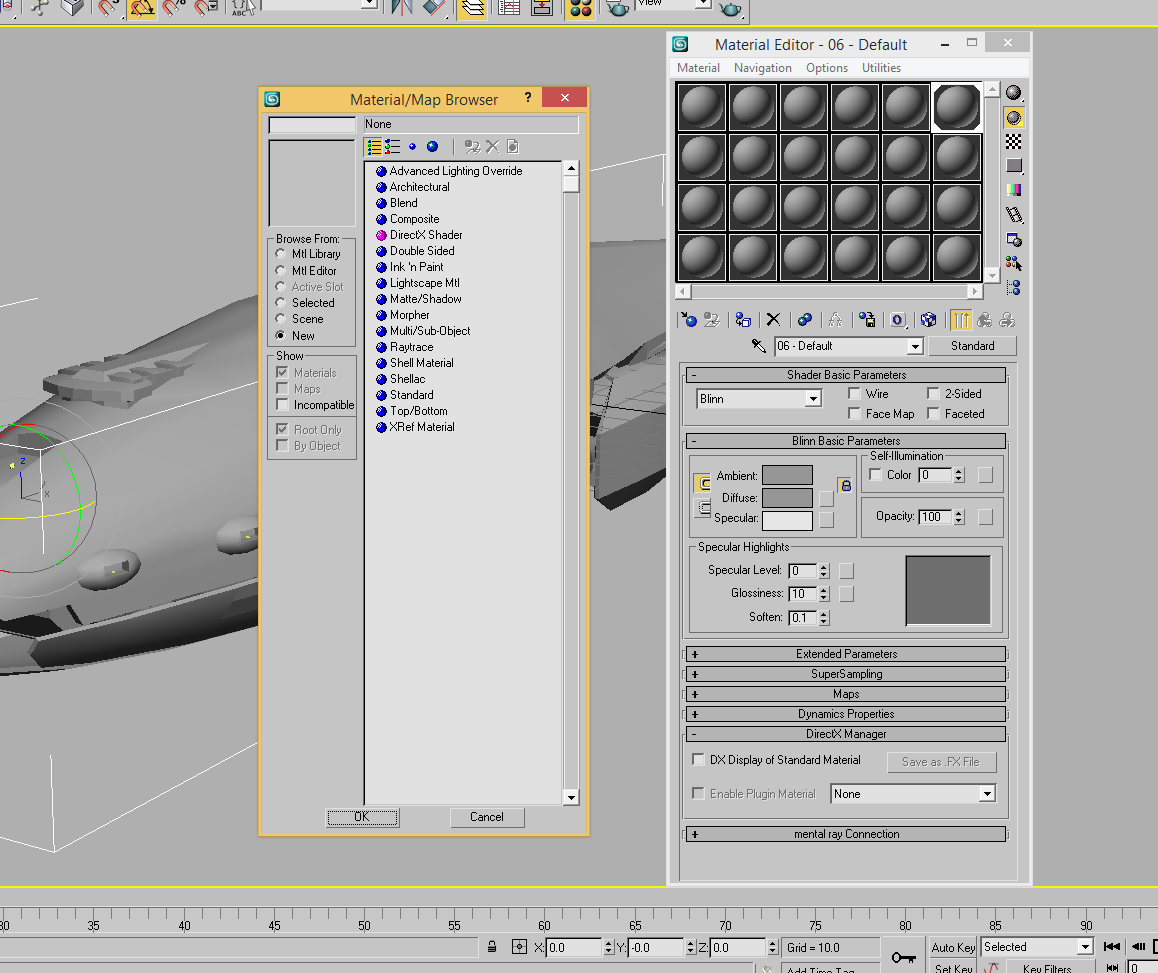
Then selected "Discard old material?", and click OK. A plain DirectX shader will appear. You'll then want to click the file path at the top. Make your way to you shader folder and select "MeshBumpColorize.fx". In the new shader, go down to BaseTexture and select "None". This is your color/diffuse map, and is what gives the ship it's color. You'll then need to make your way to the color/diffuse map you exported earlier, and select it. Same process for NormalTexture, just with the normal map. Once that's done, select the mesh you want to texture, and click "Assign Material to Selection" on the material panel, or the blue ball and white box button. Your ship will take in a reddish hue, this is normal.
If your settings are similar to below, your good to move on.
So, you might have also have seen some other shaders, I'll explain what the main ones you'll need do.
- MeshAdditive - Used for transparent meshes, that have a glow (IE: Lights). Acts similar to additive in PS, and Paint.Net. The darker the color, the closer it is to invisible.
- MeshAlpha - Used for things you want to have an alpha to. (IE: Low poly props). A bunch of the props from Pandemic-Front 2 use alpha to make them look more detailed. The Kashyyyk towers come to mind. This shader will hide anything black in the alpha channel.
- MeshCollision - Used in collision meshes, but we already have a different method
- MeshGloss - Similar to MeshBump, just lacking a Normal Map. Good for low res stuff that just gets ruined with a generated bump map. (IE: Clone Wars Adventures files)
- MeshShield - Used to create moving shield effect of things like the vanilla MC80 shield ability, can also be used to simulate hangar shields
- Things with a RSkin prefix are used for skinned infantry, I'll get into that at a later date.
Anyways, remember that shadow mesh from before? Lets add the right shader to it. You'll need to create a new DirectX shders, but instead of using MeshBumpColorize.fx, use MeshShadowVolume.fx. Then apply it. There's nothing else you need to do. It's normal for the shadow to be a light blue.
Now, if you want to do a shield effect you'll need MeshShield.fx. Once you have a DirectX shader with MeshShield.fx, you'll need to export the shield mesh as a .OBJ. I recommend exporting this mesh as selected, so you don't take the whole ship. Then you're free to experiment with the physics of the shield shader.
So, you've got your mesh, it's textured, rigged, has a shadow, and has collisions enables on it. What else to do other than export it? So to do this, go to File -> Export, change the file type to either Alamo Object, or all formats and export the model as FILENAMEHERE.ALO
For the model and textures to work, you'll need a new mod folder. So go to "Mods", and create a new folder. Call it whatever, just don't leave a space in the name. Then go into the new folder, and create a DATA folder. In that DATA folder create an ART folder, with two folders called MODELS and TEXTURES. Your .ALO model goes into the models folder, and the .DDS files go into your textures folder.
How does one go about getting 3ds max with the alamo importer/exporter
3DS 6/8/9 are all discontinued, but you might be able to find a trial version sitting out there.
I will look around cause I have been trying to find a version for some time now, I would think a trial version is limited or could only be used for so long like a few days weeks
Nice Tutorial, dude.
But you can also use paint.net as it can also export .dds stuff :P
Thanks. I originally used Paint.Net, but I like that I can insert a specular map with Photoshop.
That sounds actually pretty handy :3
It seems to be a very useful tutorial. Thank you, Barlex :)
I have an error with the exporter alo. I have the 3ds max 9 and I miss this error: Loading DLLs
DLL <C: \ Program Files (x86) \ Autodesk \ 3ds Max 9 \ plugins \ max2alamo.dle> failed to initiazile.
Error code: 127 - The specified process was not found.
I have Windows 7 64 bits and a 2GB graphics card, 12GB of RAM and a 3.4GHz processor and 4 cores. I do not think my pc is the problem. Because it does not recognize the plugin?