The Industrial Commissariat

Intro
The Industrial Commissariat is the Soviet economy structure, and the counterpoint to the Allied Ore Purifier. This is the building that allows Soviet vehicles to outnumber their rivals!
It is essential to build this structure if the Allies have built an Ore Purifier, however even if that is not the case, it is a structure that you should build in order to maximise your tank and aircraft construction efficiency.
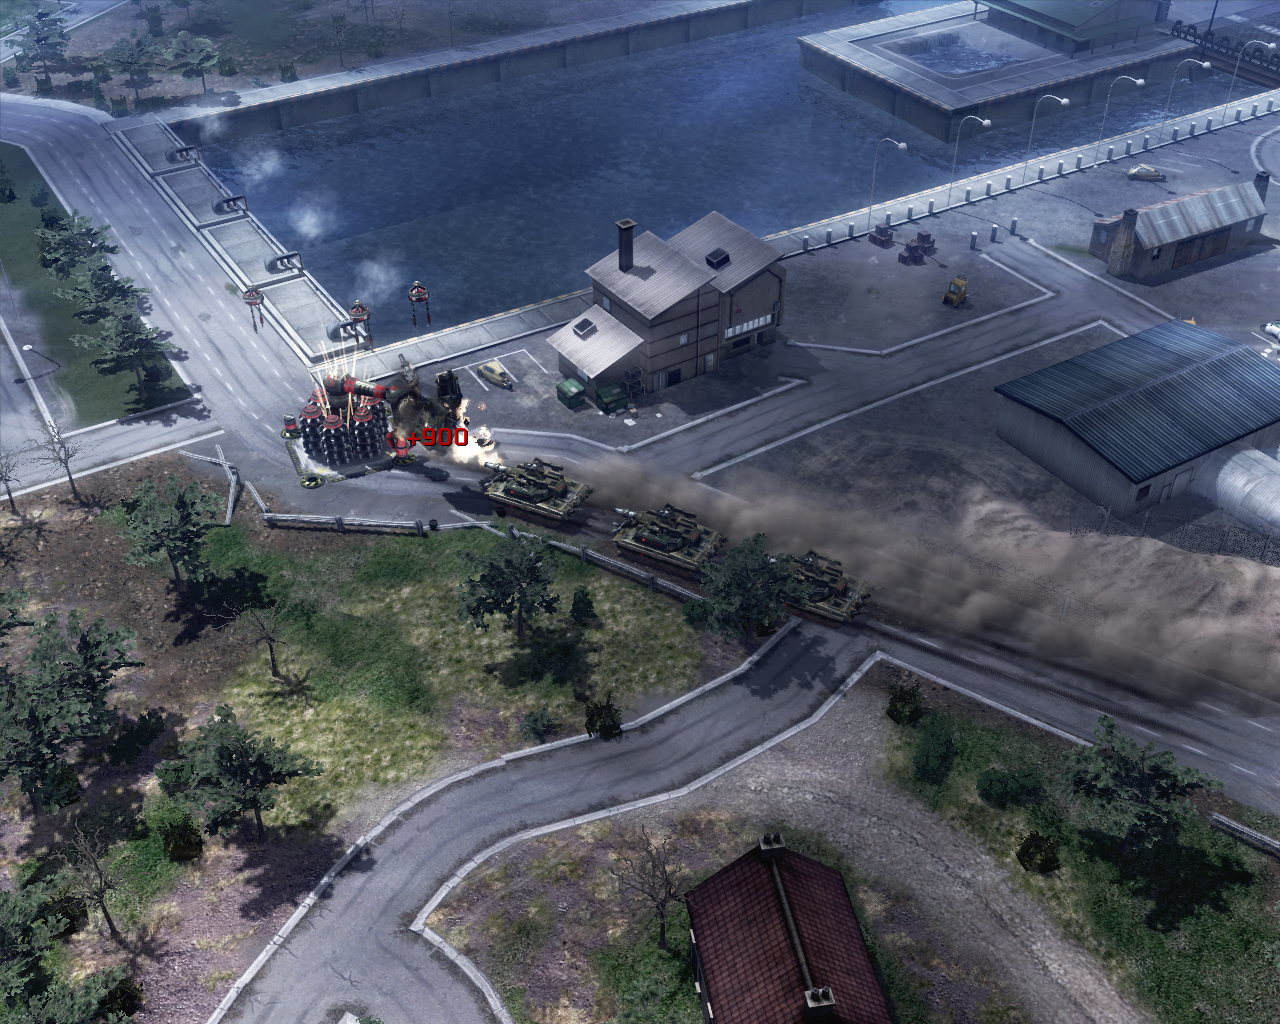
As you can see in the above image, it draws a tremendous amount of power from your base, and as such, it would definitely help if you had a Nuclear Reactor up before you place this building inside your base.
Further Details
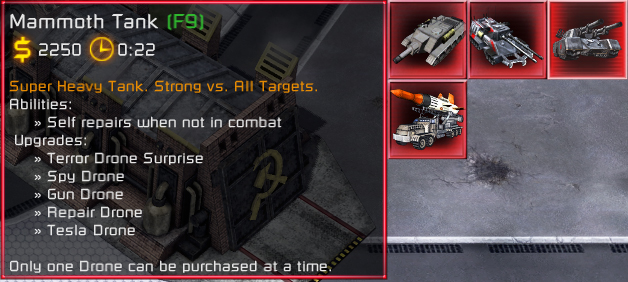
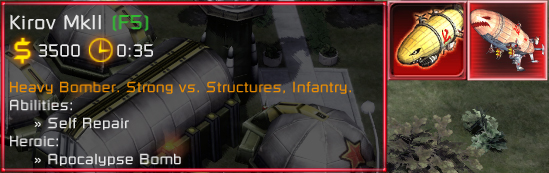
The Industrial Commissariat does what the Industrial Plant did in Yuri's Revenge. To refresh, it decreases the price and build-time of vehicles, and aircraft, by 25%.
The simplest example that I can give is were the units are exactly the same by default: The Allied Harrier and the Soviet MiG. They have the same health, armour, and weapon, and also both cost $1500, and take 15 seconds to build. If they are both given an order to attack each other, they will mutually destroy each other!
However once the Industrial Commissariat is placed, the MiGs price is reduced to $1125, and the build time is reduced to 11 seconds! In other words, the Allies will now be losing a more expensive unit, instead of a fair trade, and to replace an airfield full of Harriers would take 1 minute (4 x Harriers at 15 seconds each), vs 44 seconds for an airfield full of MiGs (4 x MiGs at 11 seconds each).
The image series below should give you another idea of what this means.
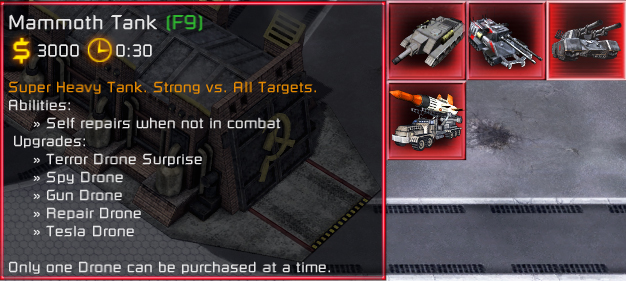
Without Industrial Commissariat
With Industrial Commissariat!
Without Industrial Commissariat
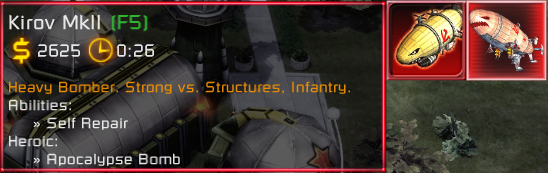
With Industrial Commissariat!
It is interesting to note that any vehicles that you have bought after the Industrial Commissariat has been placed, can be recycled in the Grinder at cost! This is because the Grinder bases its scrap refund on the default cost of the vehicle, not the adjusted Industrial Commissariat cost.
Get back the full amount of money spent!
Of course, since you still lose the time that you took to build the vehicle, it is not that great, but in the extremely rare case were this could be useful, it is there as a feature.
Finally if you play maps that are saturated with gem fields, or play with a trainer that grant huge amounts of cash, you should still build the Industrial Commissariat, due to the fact that it speeds up how quickly vehicles and aircraft are produced.
Overproduction
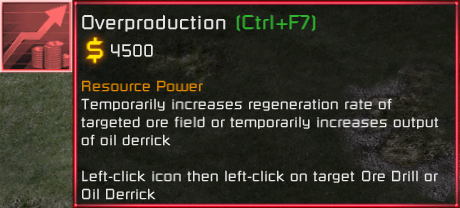
The Overproduction support power was introduced based on the idea that the Ore Purifier ends up being the superior economic structure. There are multiple reasons why this is probably true, but that is not the scope of this article.
The Overproduction support power is available as soon as the Industrial Commissariat is placed, and can be used on either oil derricks (your own, or your teammates), or any ore drill on the map (shroud permitting).
The price is deliberately steep because this is considered a luxury support power. If you are floating enough cash to use the power, then great, if you believe it is worth using.
Oil Derricks
As far as the 2 main target groups go, this one will always produced the same result, IE it is consistent. The usage on ore drills has massive variance which will be discussed later.

Emergency measures!
Using the power on an oil derrick will increase it's output by a factor of 5, for 2 minutes. Standard oil derrick is $20 a second, so a boosted oil derrick is $100 a second! for 120 sec = $12,000!
If we deduct the $4500 cost, that leaves us with a gain of $7500.
What is important to note here is that it will take 45 seconds for you to get back the cost of using the support power from the boosted oil derrick, that is significant because you might not be able to afford that in a very close match.
The predictability of the above is the most important feature, in a vs match, wild variances are never desired.
In case you are wondering, on custom maps were there are oil derricks right next to each other, yes, it is possible to boost more than one derrick if they are within the special power's select-target cursor!
There are maps that have no oil derrick though so...
Ore Drill
Using the support power on an ore drill will boost the output of that drill by a factor of 4, for 5 minutes!
While with the oil derrick, it is obvious when it is boosted due to the increased money, with an ore drill you have to pay more attention. A boosted ore drill will be turning faster, and will also spark and have smoke pouring out of it, to show that it is being overworked!
While the faster ore seeding (not growth which is separate) has an obvious financial benefit, it is impossible to put a fixed cash amount that a player would get from a boosted ore\gem field.
This is because the the boost is applied over the existing ore spread rate, and this can vary on a map-by-map basis, and even on a field-by-field basis!
As a basic rule it would be better if you use it on either a gem field ( if available ) or an empty expansion field. Why an empty expansion field? because typically they have a much higher regrowth rate than a starting field, so using the Overproduction to further boost the regrowth rate has much more dramatic results.
The time-lapse shown in the 2 images below show the Rift map gem field with, and without, the Overproduction applied. The time-lapse is 5 minutes, reduced to around 6 seconds.

With Overproduction 5 minute time-lapse

Normal growth. 5 minute time-lapse
If possible it is better for you to leave the field untouched during its boost period for as long as you can. This is to allow as much of the ore\gems to mature as possible, which would mean you get a higher return, versus harvesting the new growth, which is worth a lot less (in TW this amounts to the lesser value new growth filling less of your harvester vs the mature growth, which fills more).
Either way there is a risk associated with using it ( particularly in a human vs human scenario, not so much vs the AI ).
Of course both allow you to assist a teammate at significant cost to yourself, but with significant upside for them.
Conclusion
I hope this article has helped you better understand this structure, and especially the support power that it has added.
Crush your enemy using communist industry!


great
Wow!