---------------------------------------
Stellar Stars - Development Blog Post #110
---------------------------------------
To begin with, today's new game patch for Stellar Stars adds the ability for you to chat with other players! And in the spirit of sharing, here are 3 simple steps that you can follow to easily add chat to your game!
Before beginning, I am going to assume that you are using Unity to create your game. If you're not, some steps might not apply to you. But without further a due, let's begin!
Step 1 - Set Up Photon Chat
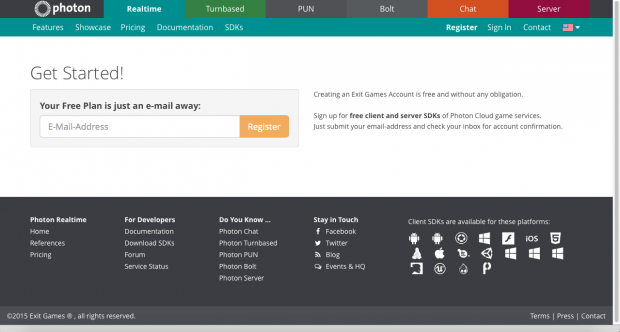
In my perspective, Photon is currently the most user-friendly engine for adding multiplayer chat to a game. So head over to Photonengine.com and create an account.
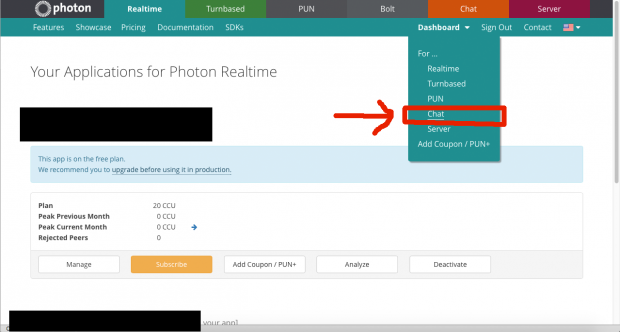
Once you have created your account, use the Photon dashboard and choose Chat like so.
At the newly loaded page, scroll down to the bottom where you can see the button which says "Create a new Chat App". Click on it!

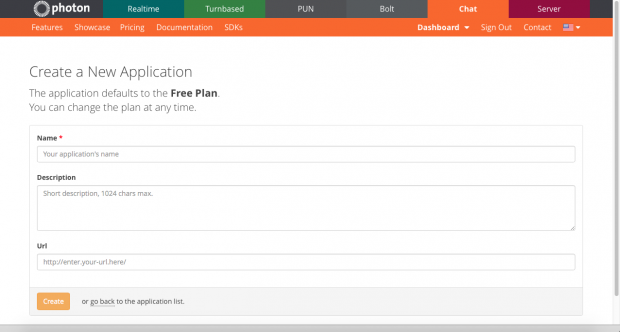
Fill in the name, description and the link to your game and you are good to go! Once you have created your new app, you can go back to the dashboard and check out the new addition to the list!
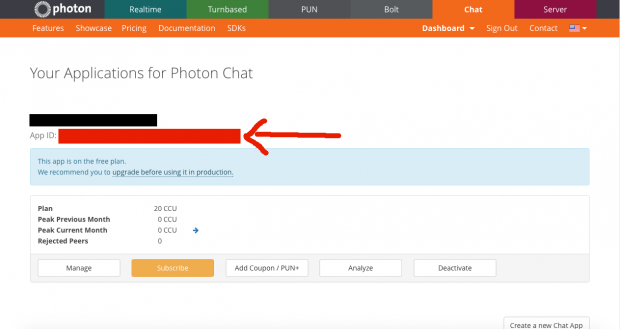
From there, grab the App ID that was created for your new Photon application (as shown in red above)!
Once you have done that, grab the Photon Unity Networking (PUN) from Unity's asset store!
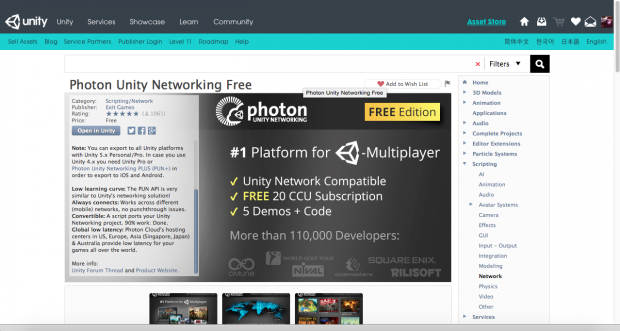
After you have finished downloading it from the asset store, import it to your project in Unity. For adding chat using Photon, there is no need to specify the App ID in the Photon server settings menu. You will do it later when you call Photon to connect to the chat servers.
Step 2 - Connect To The Chat Servers
In order to use Photon Chat, make sure that you declare that you are using the library for it. You will also need to extend the IChatClientListener interface. So that will look something like this:
using ExitGames.Client.Photon.Chat;

public class GameChatClient : MonoBehaviour, IChatClientListener {
}
The IChatClientListener interface is necessary as it provides a number of methods that will be called in various situations. For example, knowing when you are connected to the chat servers will allow you to start subscribing to chat channels. Don't worry as I will go into more details about that later on.
To connect to the chat servers, you will first need to decide on a connection protocol (I'm using UDP). You will also have to create a ChatClient
ExitGames.Client.Photon.ConnectionProtocol connectProtocol = ExitGames.Client.Photon.ConnectionProtocol.Udp;

ChatClient chatClient = new ChatClient(this,connectionProtocol);
Next, you will need to choose a chat region. Choose the region that is nearest to have the best chatting experience.
chatClient.ChatRegion = "US";For Photon Chat, there are only 3 regions to choose from. If you aren't from the States, you can either choose "EU" for Europe and "Asia" for anywhere else.
I would also recommend to give every player an unique identifier in chat. A user name might be helpful.
ExitGames.Client.Photon.Chat.AuthenticationValues authValues = new ExitGames.Client.Photon.Chat.AuthenticationValues();
authValues.UserId = "uniqueUserNameHere";
authValues.AuthType = ExitGames.Client.Photon.Chat.CustomAuthenticationType.None;
After you have set the connection protocol, the chat region and the user ID, it is time to finally connect to Photon Chat.
Using the App ID that you have gotten from creating your Photon Chat app above, call the Connect() method using the ChatClient.
chatClient.Connect("YourChatAppIDHere", "0.01",authValues);You can pass in any version number or text in the Connect() method's 2nd parameter. But do remember that players can only chat with other players using the same version.
*IMPORTANT PLEASE NOTE*---------------------------------
This is extremely important! You will need to do this in order for Photon Chat to work! If you are using Unity, you should have an Update() method somewhere in your script. Place this in it.
void Update() {
    if (chatClient!=null) { chatClient.Service(); }
}
This is needed because if you do not call Service(), the ChatClient would not even connect to Photon Chat. I have spent many hours trying to figure out why it wasn't connecting. And I don't wish that for you.
Basically, by making the ChatClient call the Service() method continuously, it will maintain the chat connection. That allows you to receive new chat messages and to connect to Photon Chat.
-------------------------------------------------------------
To be notified when you are connected to Photon Chat, add this:
public void OnConnected() {
    chatClient.Subscribe(new string[] { "channelNameHere" }); //subscribe to chat channel once connected to server
}
Once you are connected, Photon Chat calls the OnConnected() method. So if you want to subscribe to any channels, that's where you can do so!
Step 3 - Sending/Receiving Messages
In order for players to chat with each other, you will need them to be subscribed to the same channel. By the way, this is how you can get notified of the subscription to a channel:
public void OnSubscribed(string[] channels, bool[] results) {
    Debug.Log("Subscribed to a new channel!");
}
Now, in order to send someone else a message, use this:
chatClient.PublishMessage("channelNameHere", "Enter Message To Send Here");And if you want to see what new messages were received, add this:
public void OnGetMessages(string channelName, string[] senders, object[] messages) {

    int msgCount = messages.Length;
    for (int i = 0; i < msgCount; i++) { //go through each received msg
        string sender = senders[i];
        string msg = messages[i];
        Debug.Log(sender + ": " + msg);
    }
}
The OnGetMessages() gets called whenever you receive a new message on any subscribed channel. You can easily find out who sent what message by doing a simple loop (as shown above).
Now that is 1 last thing to note - always disconnect from Photon Chat when you do not need it anymore.
void OnApplicationQuit() {
     if (chatClient != null) { chatClient.Disconnect(); }
}
So depending on your game, these 3 simple steps should help you add chat to it easily! And to make things easier for you, I have included a sample chat script for you to download and try out!
Lastly, remember to experience today's new chatty patch for Stellar Stars! Enjoy!


Excellent writeup!
Thanks! Glad you found it helpful! :D