Hey Everyone,
Its been a long time since our last post. But trust me that we have been hard at work, on our grind, slowly moving towards our project's realization. With that being said, I thought I would share how the our modular actors are set up in Unreal Engine 4. Below you will find the breakdown of just that.
Scenario:
In Project Grand Vault the player's home is inside of Havenlock City, and separating the different districts as well as serving as entrances are our City Gates.
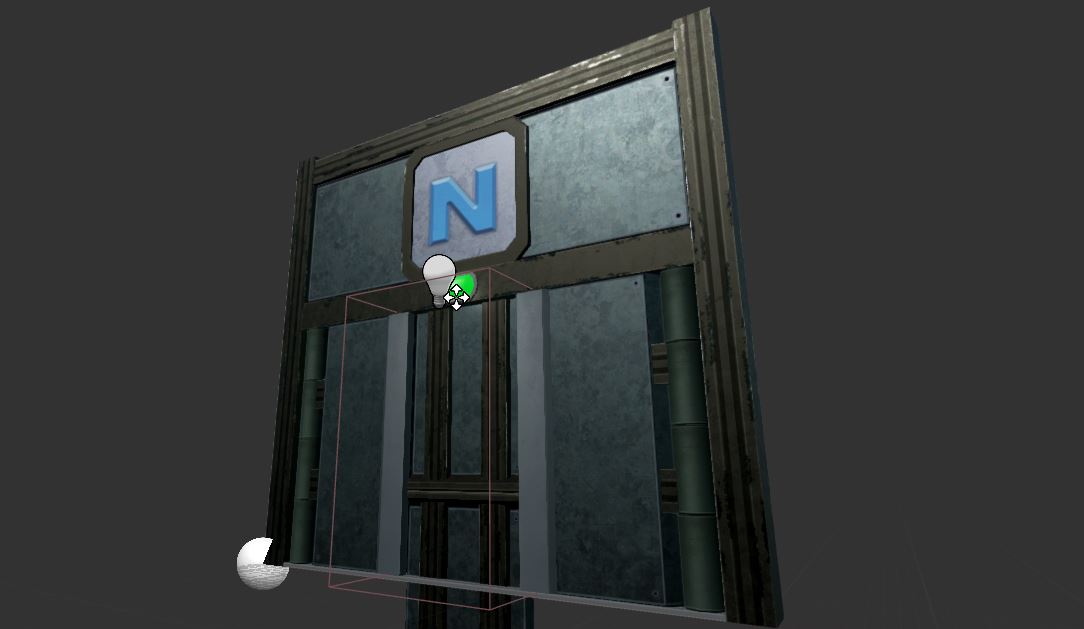
These gates use the same material and textures but they look to different UV space to identify their orientation (N,E,S, & W). Additionally gates can be locked or unlocked depending on the players progression in the story/current task in the game. This is the scenario and problem, the solution is to set up a modular actor that can be set and controlled, rather than having multiple instances of the same actor.
City Gate Component Breakdown:
Below you can see the breakdown of all the different components that make up our City Gate actor. There is the GateMain-the main body of the gate, the two parts of the DoorSlider-which make up the sliding doors, and the GateLight. These are all of the static mesh components. The two remaining are the PointLight-which actually emits our light, and the TriggerVolume-that when our character has to enter to be able to interact with the gate.

Blueprint Graphs:
To give our asset the desired instructions, we set up the blueprints as follows.
Event Graph:
This allows our character to interact with the gate when they enter the trigger volume. And when they do it calls a custom event that drives the gate sliders to open, and then close if the character leaves the trigger volume. A variable was also created, a boolean that defines if the gate is active. It drives a branch function that if true, will allow the gate to open. In the future we will call a function that will trigger a dialogue box detailing that the gate is locked, from the false pin.
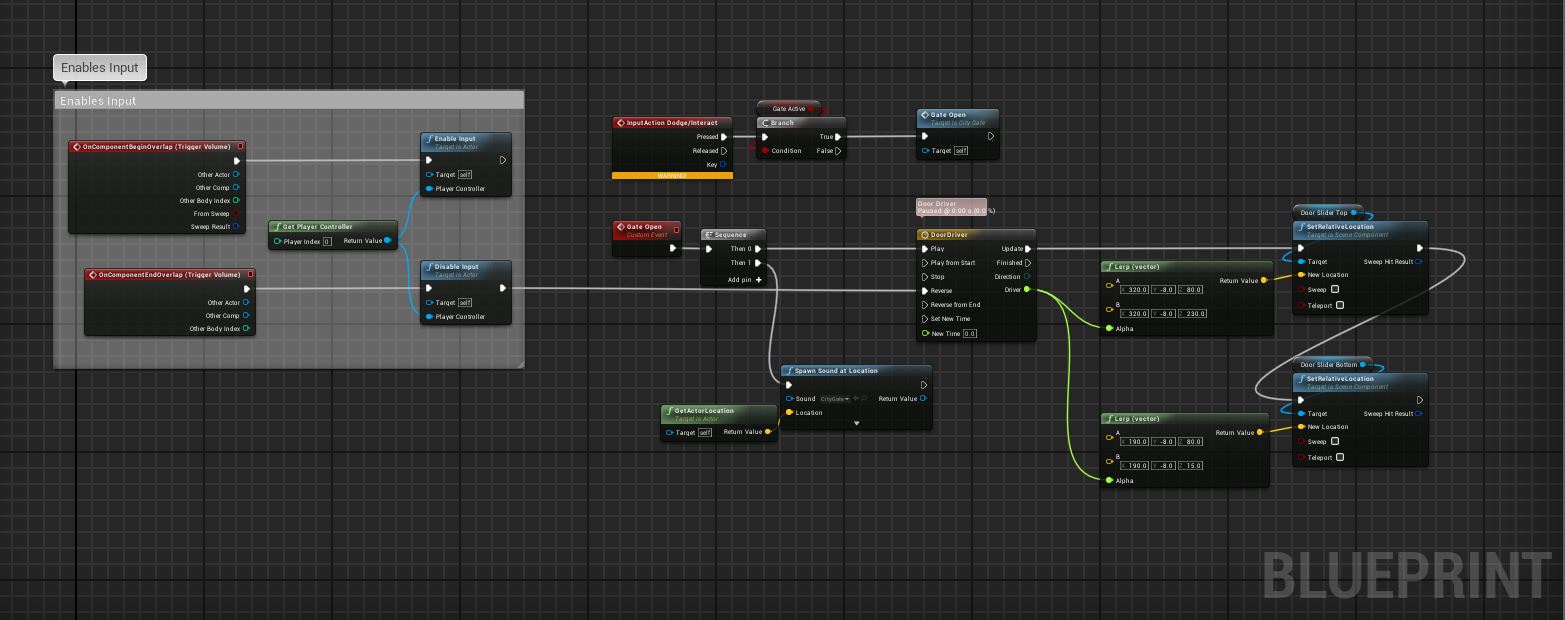
In short, this allows our gate to open if the gate is active.
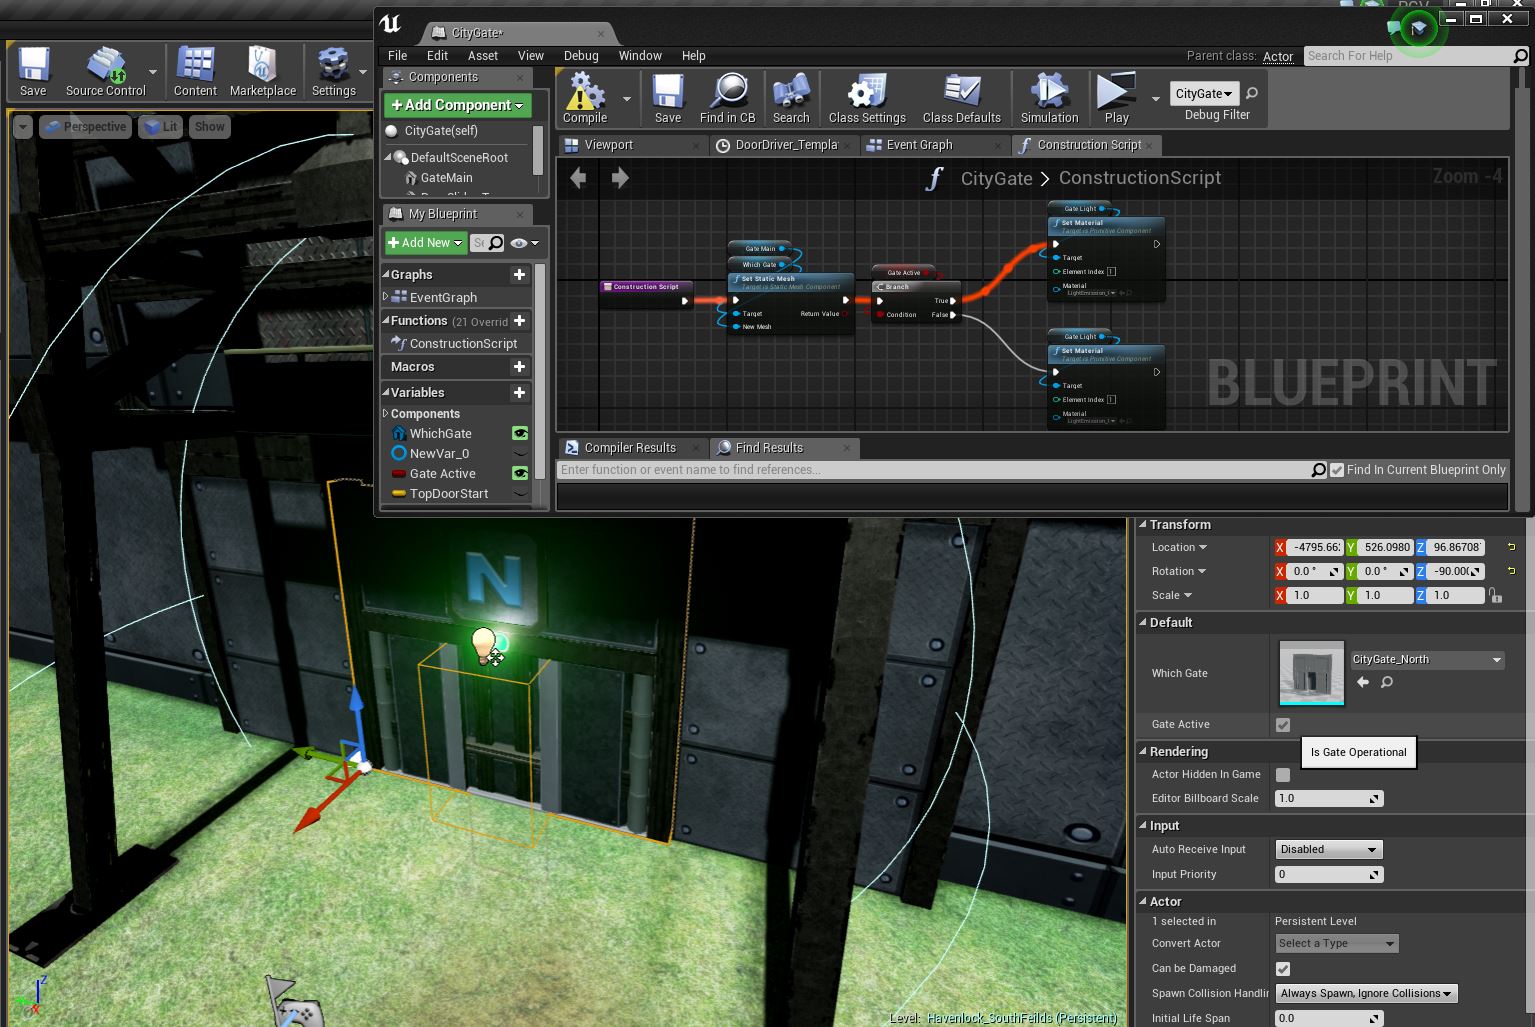
Construction Graph:
But we now need a way to define if the gate active, and which orientation this gate points to. Using the construction graph I created a second variable (this time defining a static mesh), then another branch node defined by the GateActive boolean variable. This time defining the material of the Gate Light Mesh, True being green and False being Red.
Important Note - Both variable have been set to public. This allows us to control it form the detail panel

And with both construction graphs in place we are able to dynamically set the gate orientation as well as the gate status via the detail panel from a single actor. Which is obviously a way better way to have it work when compared having multiple actors that do the same thing.
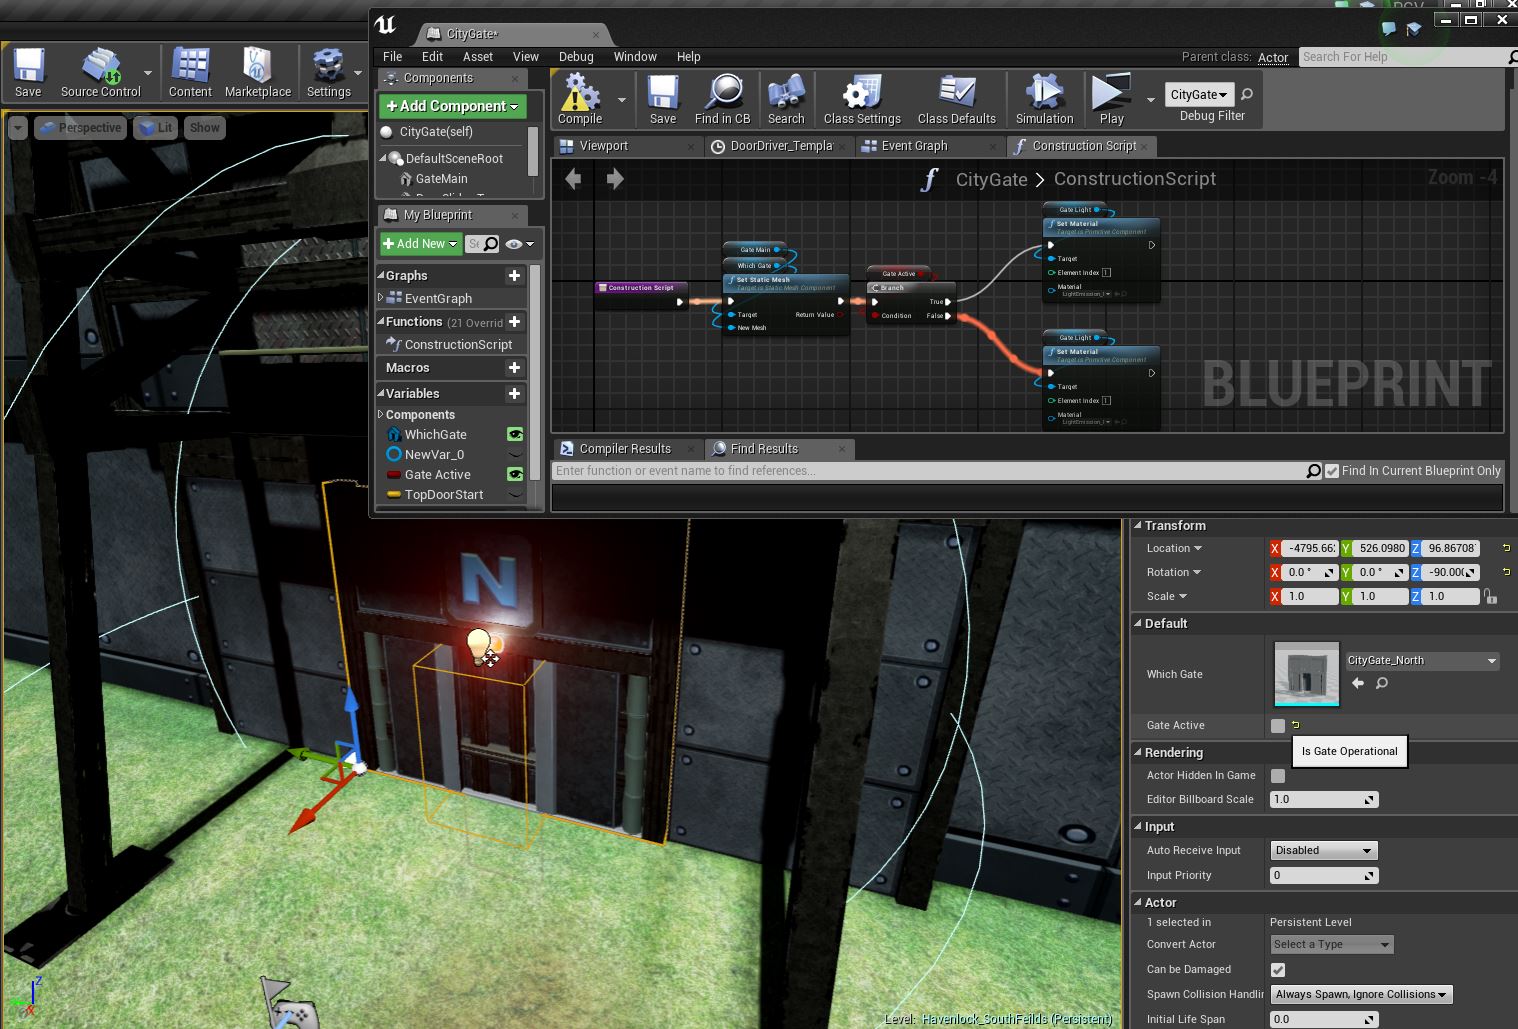
And voilà! we can set it as needed, and it lock and unlocks functionality dynamically!
I hope you guys found this look inside our dev processes insightful.
For even more media follow us on our various social media platforms.
Instagram.com
Twitter.com
Deadcellgames.tumblr.com