After the first tutorial about Normal Mapping, I am often asked about normal maps made by a 3d model. This is a popular technique to add details to 3d models used in games because it keeps the polygon count low but adds details like you would find on a high poly model.
As always, I’m using 3ds max 2008.
Click on the Images to view them fullsize in a new window!
Would you give me an Example of a Rendered Normal Map?
Yes, sure, here it is, I modeled some quick "bars" which are a good example to show depth.
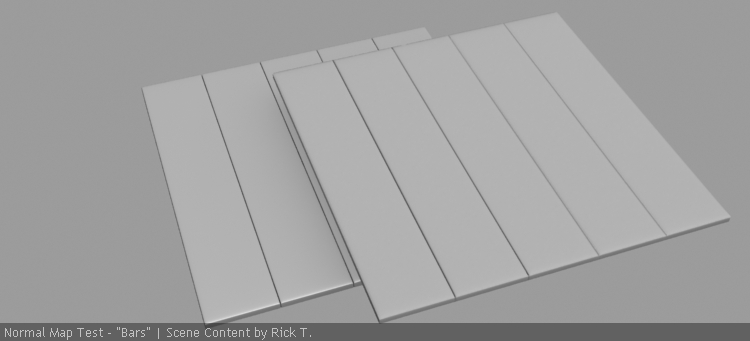

If you look at the high poly mesh on the left and the low poly mesh on the right you can see they basically look the same. Also this even works with lights.
The lines will reflect like they are going inwards, just like high poly mesh.
Practical Tutorial
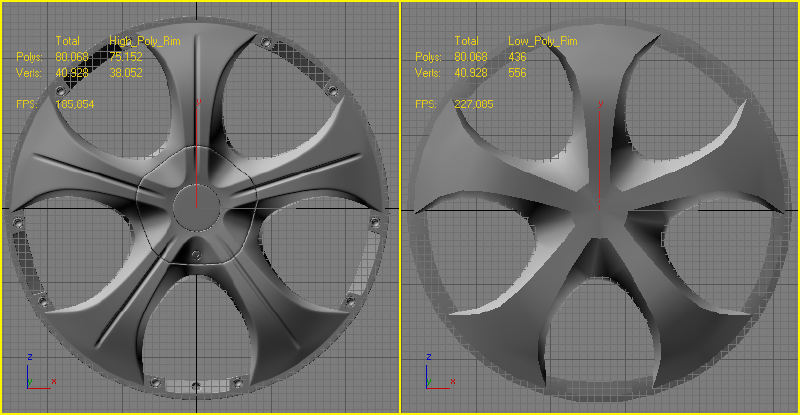
I prepared a mesh that was part of a rim I was modeling. I suppose you got a mesh you want to normal map and you set up the UVW's correctly already. To show you how this is done this rim has 2 objects, one is the “role model" for the normal map, a mesh with 75.152 polygons, and one is a low poly mesh, which I will use for the car in games, it only has 436 polygons
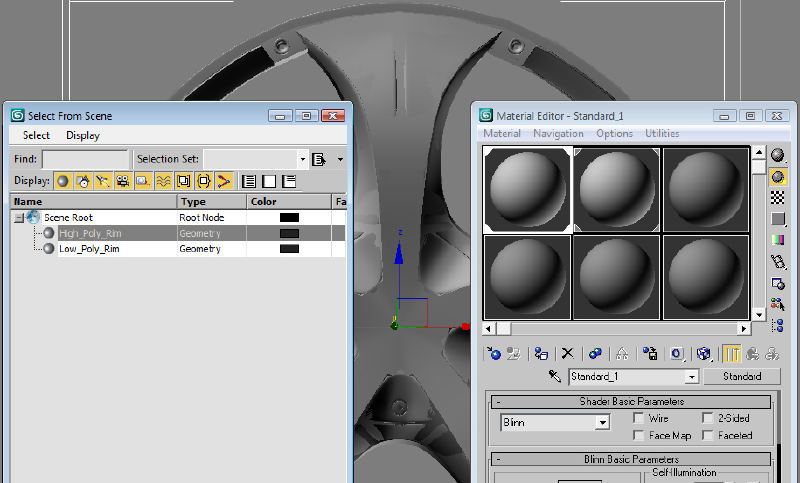
At first I renamed the role model to "HIGH_POLY" and the game mesh to "LOW_POLY" and assigned empty materials to both objects, then made sure that I had both meshes laying exactly on top of each other.
Then I selected my low poly mesh and went to Rendering > Render To Texture and put in my settings.


In here, first make sure that you selected the right object, under "Name" it should say it’s your low poly mesh. Then activate Padding and set it to at least 2, this is important so you won’t have seams at the edges of your map.
Enable projection mapping, this is the most important thing, its projecting the map. By clicking on "pick...” you are choosing the mesh you want to project - this for sure - is your high poly mesh [1.], select it and press "Add" [2.].
Under "Options..." activate "Use Cage" [1.], this important for later, then click on "Setup..."[2.], the Render Menu will pop up, Enable [1.] Your favorite Super sampler, "Max 2.5 Star" [2.] is always a good choice. Close the Render Menu again and leave the options menu.
Make sure you activated "Sub Object Levels", "Full size" and the mapping channels like shown on the picture, otherwise it could happen than not everything will show up on the normal map or your UVW's will get reset.
Next I selected the maps I wanted to have rendered... this time I only wanted the normal map, so I click on "Add...” select it from the list [1.] and click on "Add Elements" [2.]. On other occasions I render out the diffuse map and specular map too. Set the maps to anything between 512 or 2048, I used 1024 in this example. and set it to use the right map slot, I activated "Output Into Normal Map" too, which should put the map automatically into the right slot inside the material, if this will not work, you'd have to do it automatically later.
Do NOT click render yet, we need to set up the Cage first.
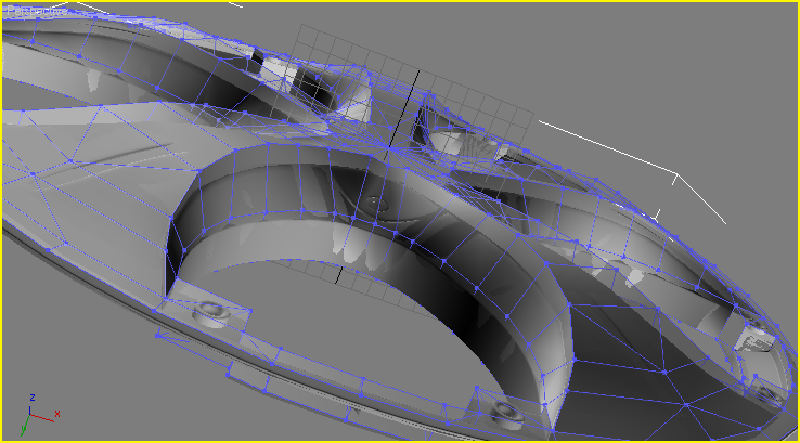
Now, you might have noticed your low poly object just got a new entry in the modifier list, that’s the projection mapping cage, this is important, because it sets up how the samples will hit the mesh and reflect the depth of the high poly object. Once Inside the Projection modifier change to cage mode [1.].
And set the cage to shaded mode [2.], so you can see it better, while realigning it, which is what we will be doing after we hit Reset [3.].
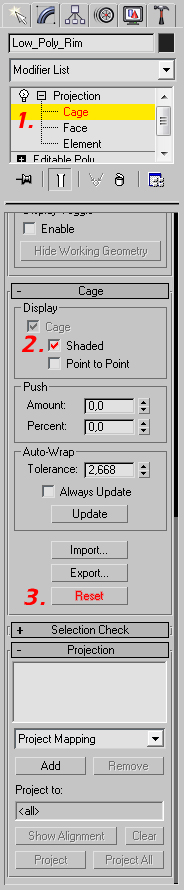
Now just select and move the cage points just like when you build a mesh. Until every blue line is at least a bit above the mesh, this is important because it sets the way and space samples will travel.
at this point, my Max crashed...but that shouldn’t really happen to you :p
When finished, you can click Render, and ...wait...
after that, check if the material you assigned to the low poly object got a new entry at "bump map" now, if not, go and enable "bump" [1], then set it to an amount around 100 [2], and click on "None" [3]. select "Normal Bump"[4.], click ok [5.], then click the "None"[6.] behind "Normal", select "Bitmap" [7.] and select your normal map.

The Finishing Line
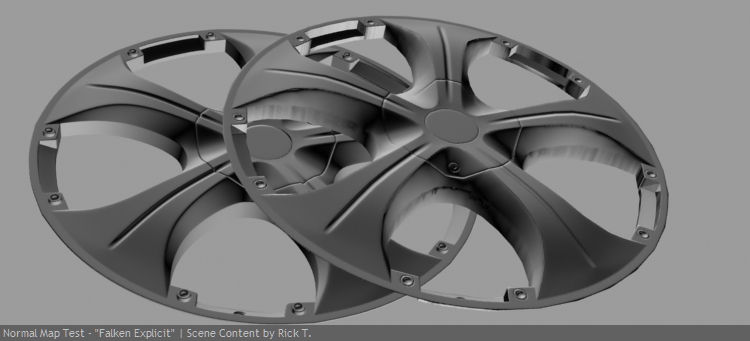
Now, just hide your High Poly Object, and Render (or hit Shift + Q)
If everything went right, your low poly object should now look allot like the high poly one. A few adjustments by hand might be necessary but altogether everything should be fine.
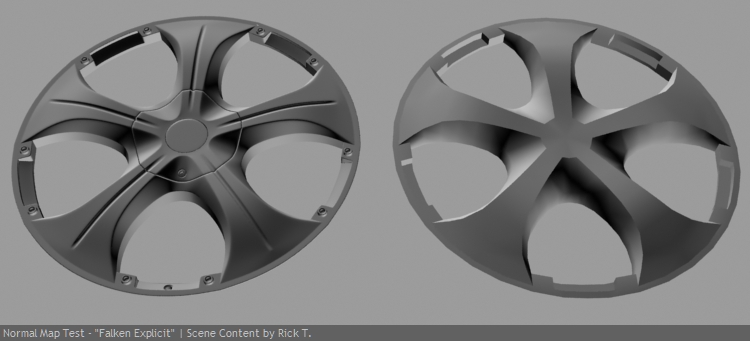
Here are some pictures of what we just accomplished:


Download this tutorial as *.PDF file from here or read the original article on NFSCars.net here.
Thanks for reading, and if you have any questions, ideas or critics, feel free to contact me,
- Rick.