Location
AddonsFilename
RenX_3DS_Max_Edition.1.zipCategory
GUILicence
ProprietaryUploader
Mortalc13Added
Updated
Size
4.37mb (4,578,836 bytes)Downloads
99 (1 today)MD5 Hash
632819343694f4be1ac696b2ccc5a658Embed Button
Embed Widget
Description
Recreation of the RenX GMax game pack for 3DS Max 8.
Introduction:
This is a recreation of the RenX GMax game pack, and contains the community created/modified Westwood W3D Asset Export and W3D Import tools as well as a custom UI styled to the original RenX game pack. The reason for making this is to help with easing the transition from GMax into 3DS Max by making it look like GMax/RenX but with all the extra features that 3DS Max has to offer.
Installation:
1. - Copy everything from the "GamePack Addon\Program Files or Program Files (x86)" folders into your 3DS Max 8 directory:
Program Files -> C:\Program Files\Autodesk\3dsMax8
Program Files (x86) -> C:\Program Files (x86)\Autodesk\3dsMax8
2. - Extra step, skip to step 3 if you're not using the C:\Program Files (x86) install path. Go to your 3DS Max 8 directory and make a copy of the 3dsmax.exe named 3dsmax - Copy.exe or you can rename it but be sure to update the name of the .exe file in the shortcut.
3. Copy the shortcut corresponding to 3dsMax's install location to your desktop or wherever you keep your shortcuts.
4. - To set up the shortcut icon right click on the shortcut and click properties, click on the Shortcut menu tab, then click on change icon and Browse to C:\Program Files or Program Files (x86)\Autodesk\3dsMax8\GamePacks\Westwood\RenX and choose the RenX.ico file or if you prefer the original RenX icon copy the icon from the "Original RenX Shortcut Icon" folder to C:\Program Files or Program Files (x86)\Autodesk\3dsMax8\GamePacks\Westwood\RenX and change the icon in the shortcuts properties to update it.
5. - Extra step, skip to step 6 if you prefer the original W3D UI icon. If you want to use the larger W3D UI icon you need to copy the UI folder from the "Icons\Larger W3D UI Icon" folder into your 3DS Max directory and replace when prompted. ***Don't worry it only replaces the W3D icons and nothing else.
6. - Launch the shortcut
Uninstallation:
To uninstall just delete the following from your 3DS Max 8 directory:
1. - The GamePacks folder
2. - The 4 W3D_xxx.bmp files from the "UI\Icons" folder
Then delete the shortcut
Features:
Supports Windows XP, Vista, 7, 8, 10
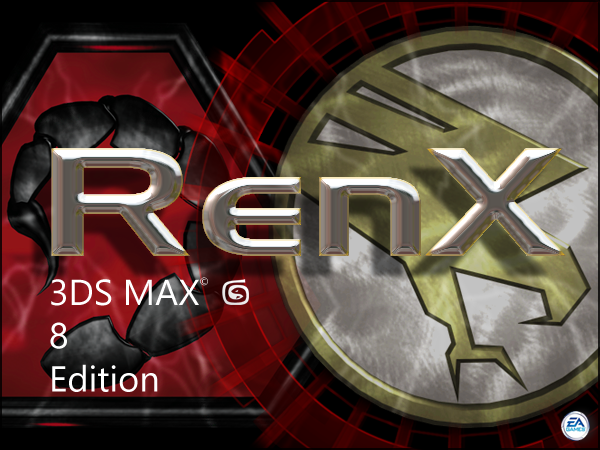
Custom RenX startup Splash image
RenX Themed UI
HD and classic RenX icon
Original and larger W3D UI icon
Coolfile W3D Importer v1.07
Seagle/Sloth W3D Importer v1.16
eWs-Clone/Abjab W3D Importer v1.16b
Coolfile W3D Importer v2.0 (fixed version)
EA/Westwood LotR BFME Toolkit with modified W3D Exporter
Fixes & Changes:
1. - Removed a typo/extra character from Coolfile W3D Importer v2.0 and restructured the script to work as a UI macro button. It would constantly crash saying "createDialog requires a rollout class, got undefined" or it would only import once and refuse to work until a new 3DS Max instance was opened.
2. - Edited all of the W3D Importer macro scripts to have menu categories with the "W3D Importer vX.X" naming scheme, also edited their tooltips with the "Author W3D Importer vX.X" naming scheme and are visible when hovering the cursor over the icons.
Issues:
This pack is complete and functional however there are a few issues;
1. - If you want to customize the Menu/UI, you'll need to copy the RenX UI files (RenX.clr, RenX.cui, RenX.kbd, RenX.mnu, RenX.qop, RenX.ui) from C:\Program Files or Program Files (x86)\Autodesk\3dsMax8\UI to C:\Program Files or Program Files (x86)\Autodesk\3dsMax8\GamePacks\Westwood\RenX\UI to C:\Program Files or Program Files (x86)\Autodesk\3dsMax8\UI then open 3DS Max normally and make the customizations. When finished click on the Customize button on the top toolbar, click Save Custom UI Scheme then copy all of the UI theme files (i.e. RenX.clr, RenX.cui, RenX.kbd, RenX.mnu, RenX.qop, RenX.ui) from C:\Program Files or Program Files (x86)\Autodesk\3dsMax8\UI to C:\Program Files or Program Files (x86)\Autodesk\3dsMax8\GamePacks\Westwood\RenX\UI. Launch the shortcut for the RenX Game Pack then click on the Customize button and Load Custom UI Scheme.
2. - If you want to customize the Track View/Curve Editor, you'll need to launch 3DS Max normally and make the customizations then right click on the top toolbar and click Save Layout or Save Layout As, if you want it to be the default Layout then Save Layout As and name it "default" without quotes. Go to C:\Program Files or Program Files (x86)\Autodesk\3dsMax8\UI and copy the Trackview.ini file to C:\Program Files or Program Files (x86)\Autodesk\3dsMax8\GamePacks\Westwood\RenX\UI replace the existing Trackview.ini.
3. - If you want to use custom/different directories you'll need to edit the 3dsmax.ini in C:\Program Files or Program Files (x86)\Autodesk\3dsMax8\GamePacks\Westwood\RenX\ and change/type in the new directory paths.
4. - If you have any Max Scripts you want to combine with this Game Pack you'll need to copy them to C:\Program Files or Program Files (x86)\Autodesk\3dsMax8\GamePacks\Westwood\RenX\Scripts and/or Scripts\Startup
***These issues are mainly caused because 3DS Max doesn't officially support using subdirectories for UI files. As far as functionality goes everything else has been tested and confirmed working including Havok's Reactor Toolset.
How to access the included W3D Importers:
Coolfile W3D Importer v1.07 is the first W3D UI icon on the main toolbar
eWs-Clone/Abjab W3D Importer v1.16b is the second W3D UI icon on the main toolbar
Coolfile W3D Importer v2.0 (fixed version) is the third W3D UI icon on the main toolbar
Seagle/Sloth W3D Importer v1.16 is located in Command Panel->Utilities->MAXScript in the Utilites dropdown box
Notes:
1. - To ensure support for Windows 8+ please make a copy of 3DS Max's executable in C:\Program Files or Program Files (x86)\Autodesk\3dsMax8 named "3dsmax - Copy.exe" without quotes or if you chose to rename it then make sure to update the .exe file's name in the shortcut.
2. - If you get the error "--Runtime error: Out of scripter memory - use options to increase" press F11 to open the Max Script Listener then type/copy&paste "heapsize += 10000000" without quotes and press enter, you may need to do this twice or more depending on the size of the model you're trying to import. If you want 3DS Max to run this command on startup then copy one of the provided startup.ms files from the "Modified Startup Script" folder to C:\Program Files or Program Files (x86)\Autodesk\3dsMax8\GamePacks\Westwood\RenX\Scripts\Startup and replace the existing startup.ms file.
Credits:
This pack was put together by DemonicXTC/Mortalc13
All additional credit for the included plugins and scripts go to their respective owners.
Preview
Post a comment
RTX Remix
RTX Remix is a modding platform by NVIDIA, which allows modders to create stunning HD remasters of classic games (see all supported), with ray tracing and DLSS.
This gui is NOT RTX Remix compatible. Learn more about ModDB's collaboration with the Remix community to organize all compatible games,. Hide this dialog.
Community Rating
Average
-0 votes submitted.
Related Games

C&C: Renegade
First Person Shooter
Related Engines

SAGE (Strategy Action Game Engine)
Proprietary
Related Groups

Electronic Arts
Developer & Publisher

Westwood Studios
Developer & Publisher
Tags
Update 12/08/2022:
Updated a few things in the readme.txt, readme.rtf as well as the file description, added a fix for the error "--Runtime error: Out of scripter memory - use options to increase" under the Notes section, and included screenshots in the archive.
Update 12/24/2022:
Added more variations of the startup script to accommodate larger file imports, also included a patch to fix the "Runtime error: Can't load Button images: bitmap:" error when opening the Unwrap UVW Edit menu. To install the patch for previous installation just copy the Icons folder from this archive found in GamePack Addon\Program Files or Program Files (x86)\GamePacks\Westwood\RenX\UI\"Icons" to C:\Program Files or Program Files (x86)\Autodesk\3dsMax8\GamePacks\Westwood\RenX\UI\.
Update 02/16/2022:
Fixed a bug in Coolfile's W3D Importer v2; if "Auto-Bind type" is unselected the plugin will hang and has to be closed then reopened to continue importing files. This bug mostly affected GMax but the Importer's menu didn't behave correctly for GMax or 3DS Max; If "Auto-Bind" is unchecked, then "Split by dependencies" should be forced checked with the "Auto-Bind type" buttons disabled, and if "Split by dependencies" is unchecked, then "Auto-Bind" should be forced checked with "Auto-Bind type" buttons enabled. A patch is included to replace the old macroscript created by the plugin. To install the patch for previous installation just copy the UI folder from this archive found in "Patches" to C:\Program Files or Program Files (x86)\Autodesk\3dsMax8.
can you do one with different path ( C:\Program Files (x86)\Gmax )
Yeah I can, I'll probably get this pack updated with a few changes and possibly a few additional fixes. Sorry for the late reply, I never got a notification either via email or my web browser.