Hello! My name is Maciek Machowicz and I’m lead programmer and game designer at Swimming Scorpions.
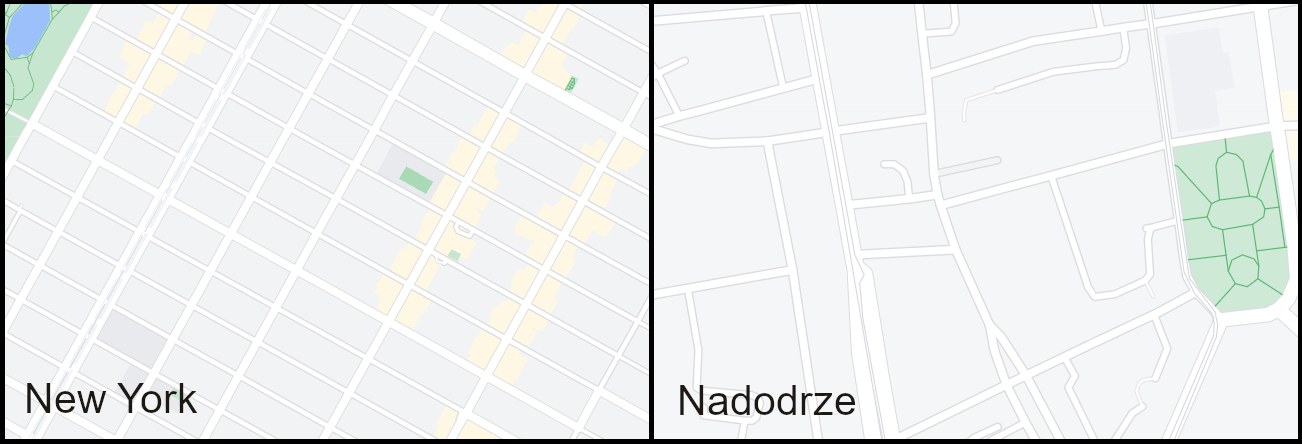
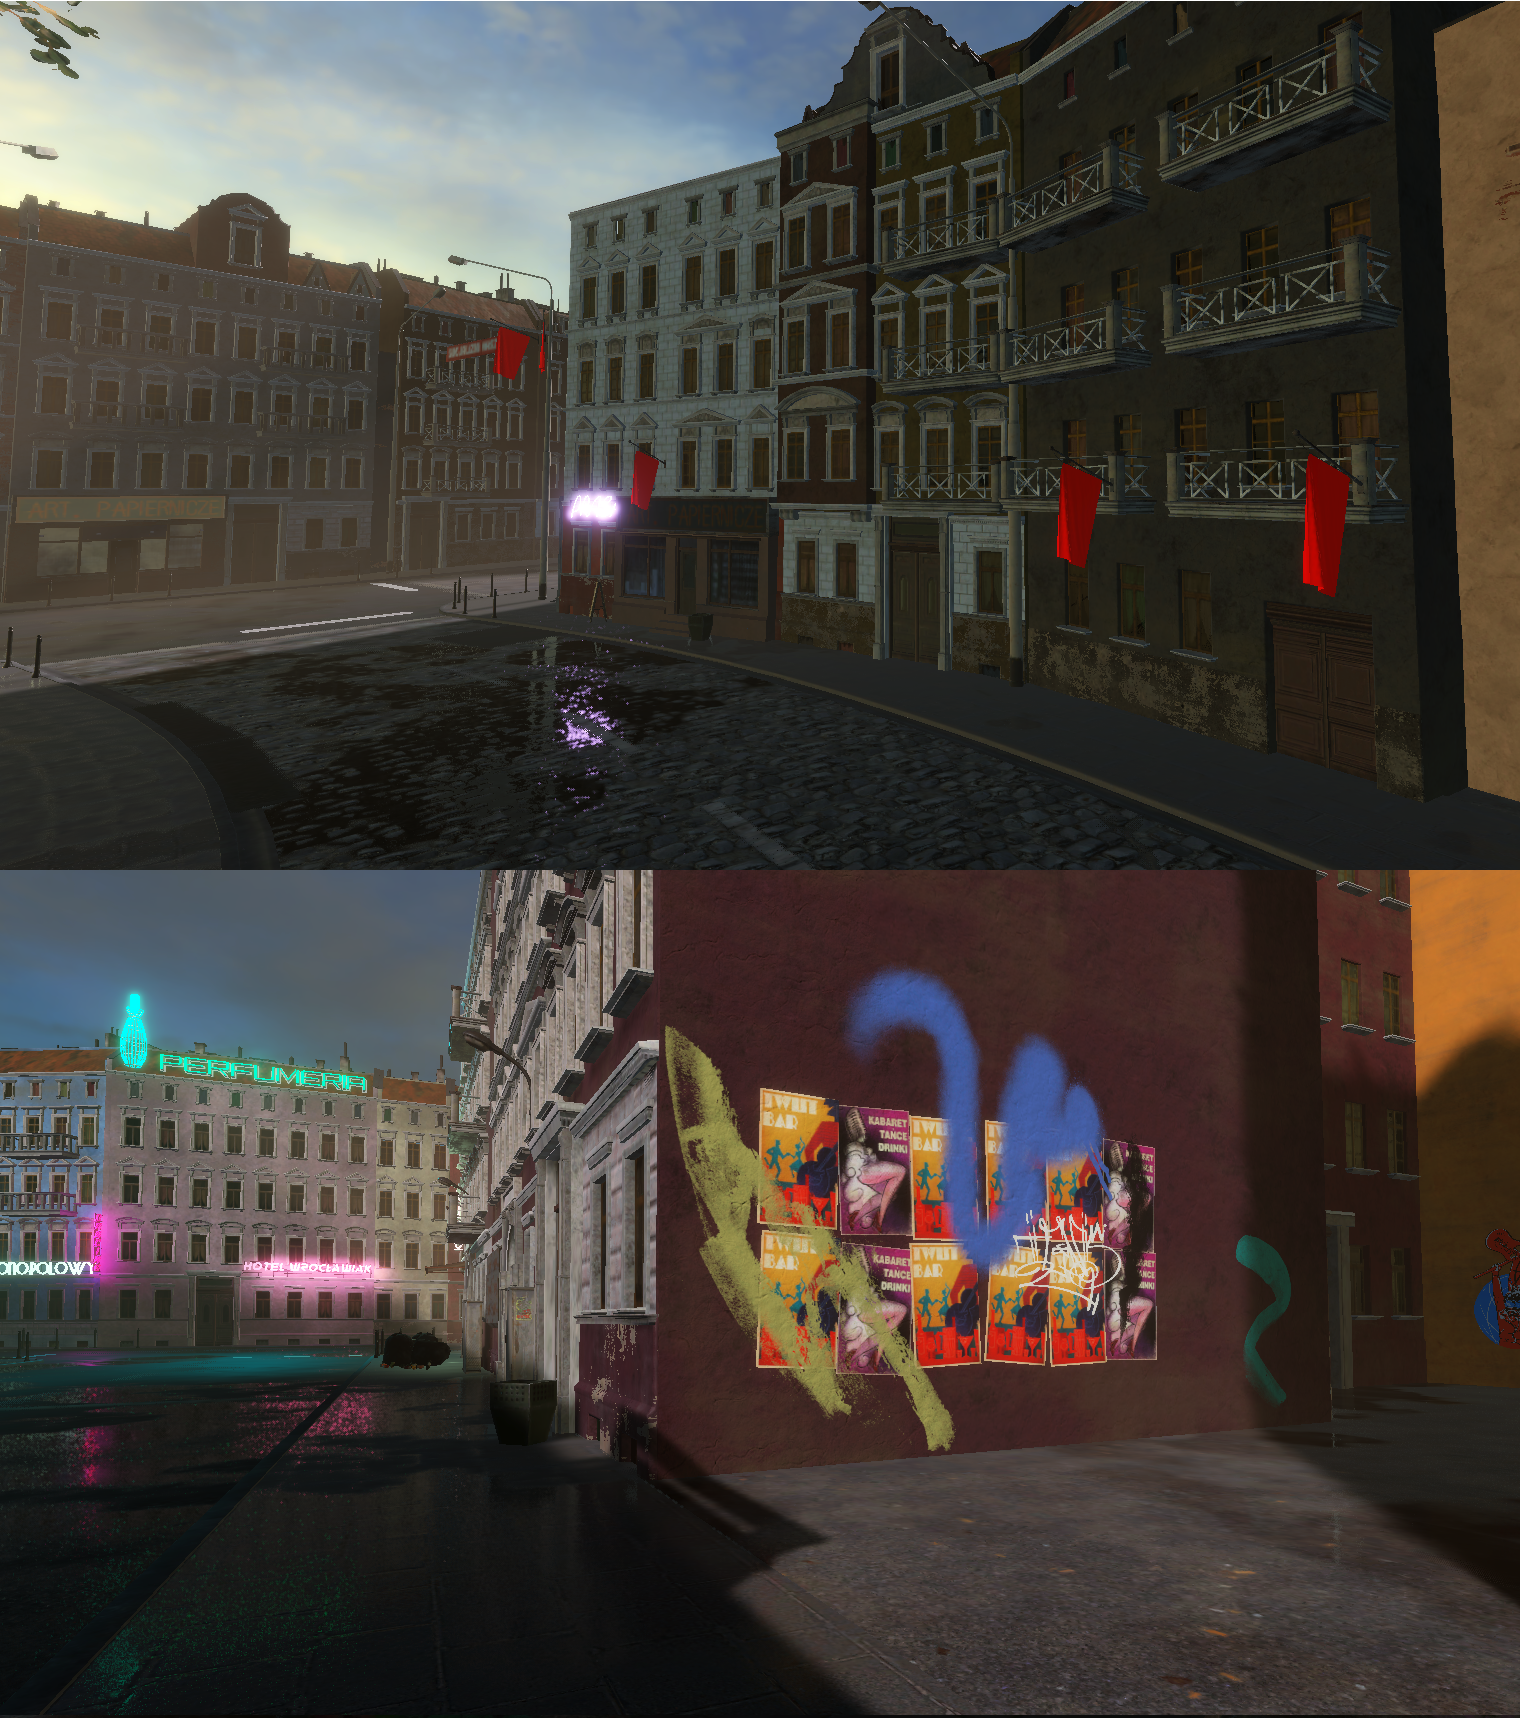
For Petrol Blood we wanted to recreate the look and atmosphere of eastern European cities during the 80’s. As a small indie studio with limited resources, we have to develop the right tools and set our scope accordingly to be able to accomplish that goal. In this post I want to share the lessons we learned during the process and the city block generator itself.
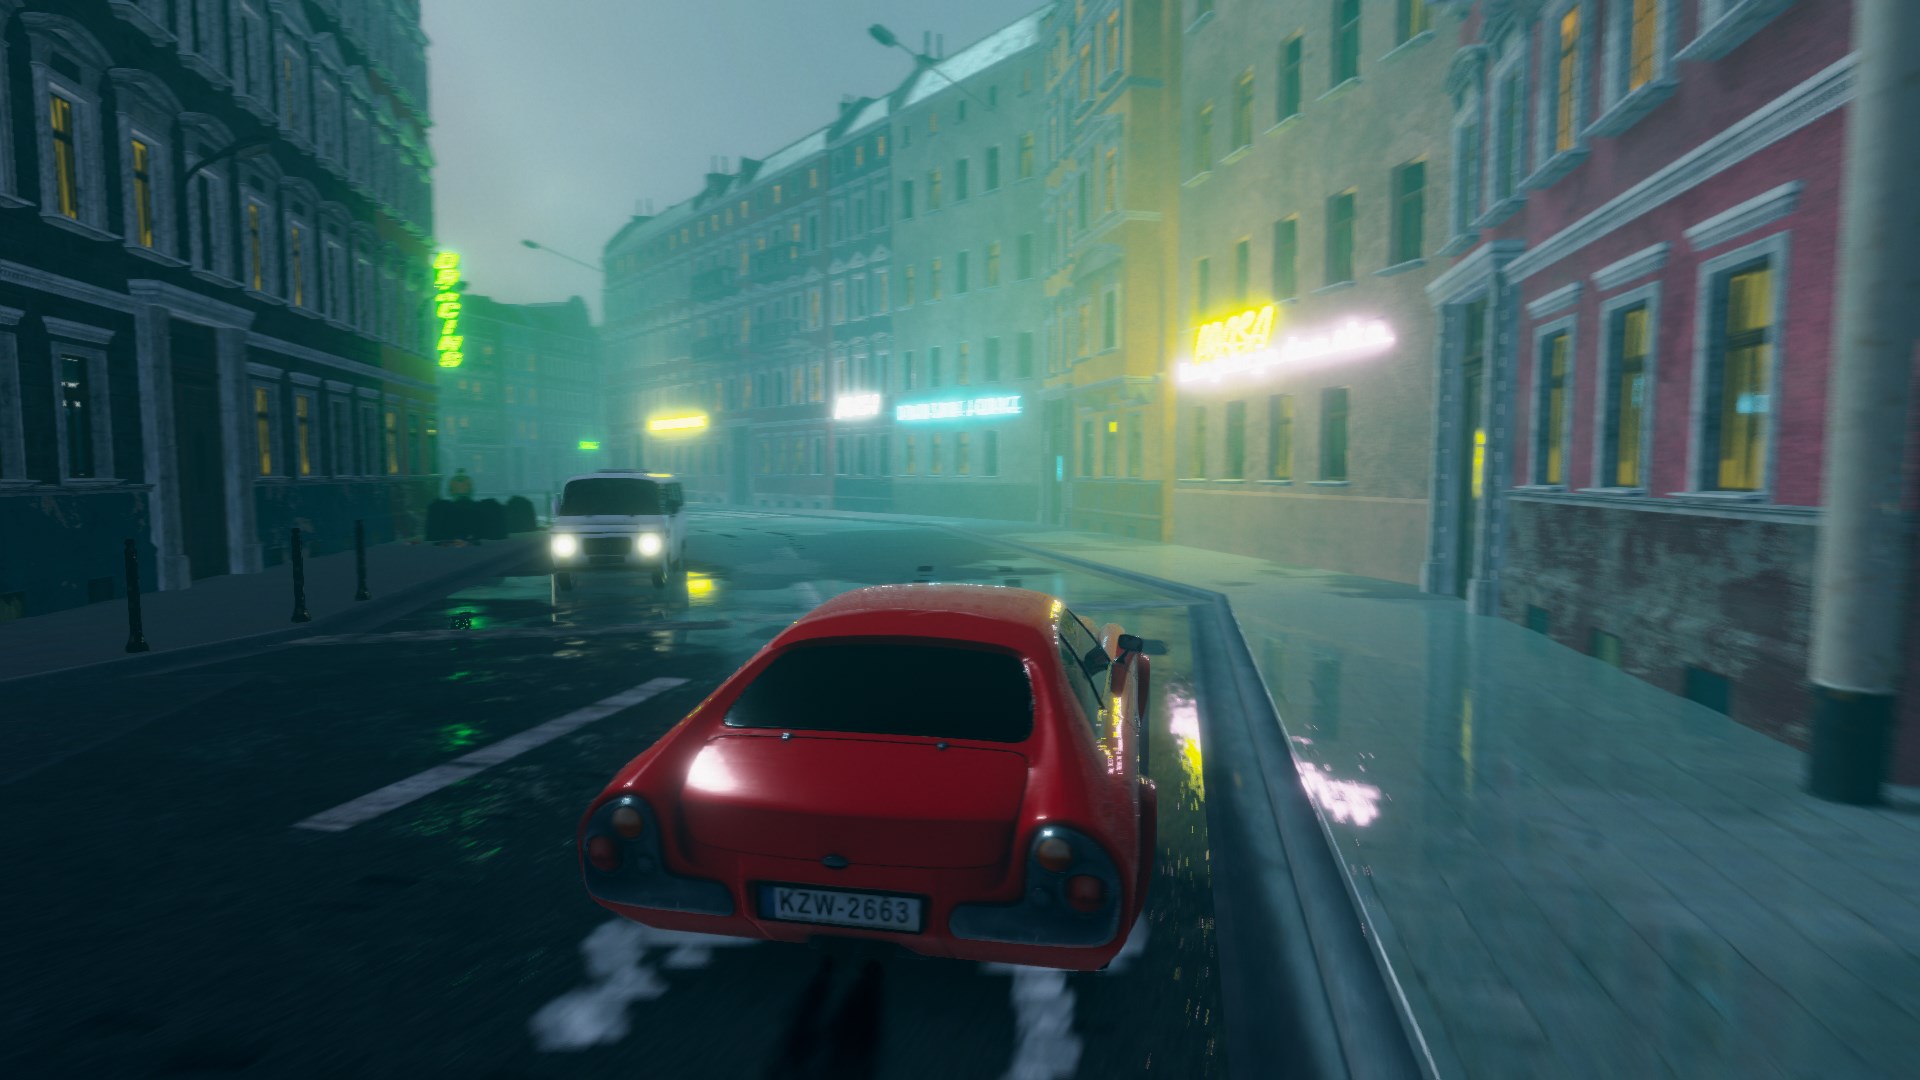
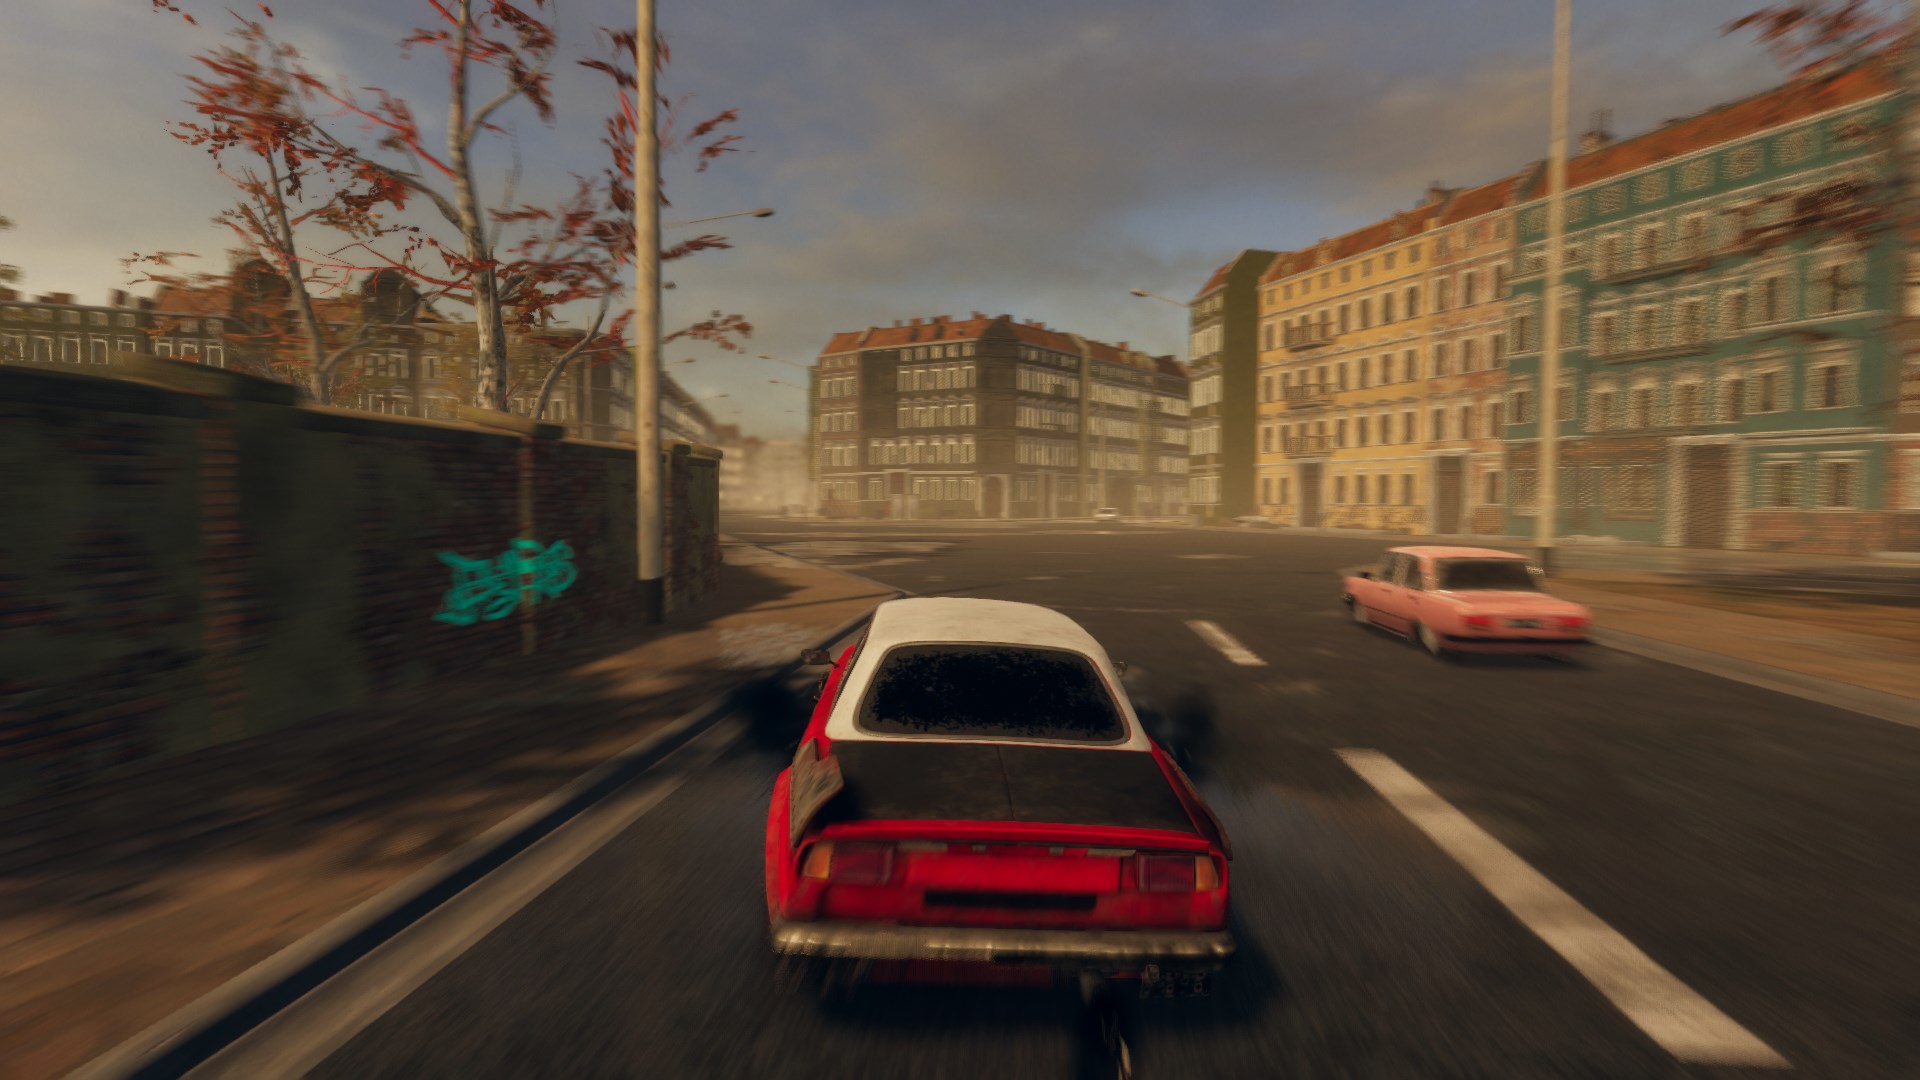
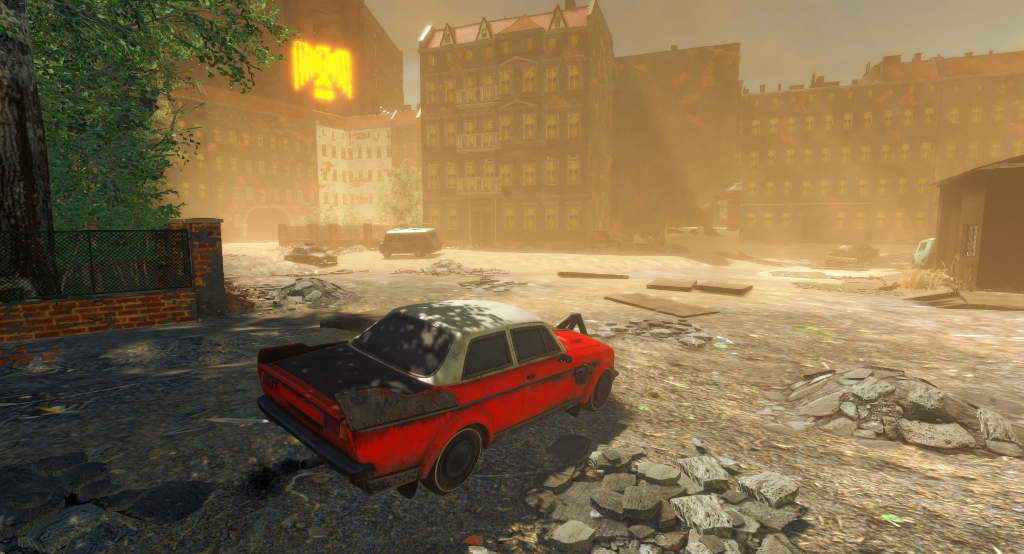
Petrol Blood is an open world vehicular combat game, with mission oriented structure similar to the classic Driver. It is set in eastern European cities during the Cold War era.
1. Project requirements
The first two locations being the Nadodrze district of Wrocław and the center of Prague.
We try to set up our environments loosely based on real life maps, modifying them to better fit our scope and gameplay, but still keeping the likeness of the place.
European cities are usually not planned on a grid pattern that is popular in the United States, which complicates things a bit.
To create such environments we needed a tool that would do as much of the level art work as possible, just leaving the unique details to be adjusted manually. At first, we have tried building a couple of streets by hand. Even setting up a couple of city blocks took ages for the team, so I strongly recommend against that, if you don’t have at least fifty bored level artists at hand ;)
The next requirement that we set, is that our city must look good from the top-down (old GTA1-style camera) and also have nice backyards where we will often be hiding from the regime’s police forces.
With those requirements in mind we need our tool to place the whole buildings, rather than just placing flat facades along the street and call it a day.
2.Roads
Before we get to the buildings, we need to have the city roads placed first. Figuring out the system for those is essential, as any significant changes to the streets will most likely result in a lot of level art rework. At first, we tested popular street builders from the asset store. Unfortunately we weren't happy with the results. The streets come out either too wavy as the little adjustments of their angles pile up, or we don’t have enough control to create an interesting look. In my opinion those plug-ins were better suited for a racing loop than a city environment at the time.
Next option was a node based generator, that will create intersections and connect them with straight roads. We saw this being used in other games before. However, the locations that we wanted to recreate have plenty of curved roads and big, unique crossroads. A node model doesn't seem to be able to achieve this look.
We instead decided to create reusable modules to build our streets with and are pretty happy with that choice.
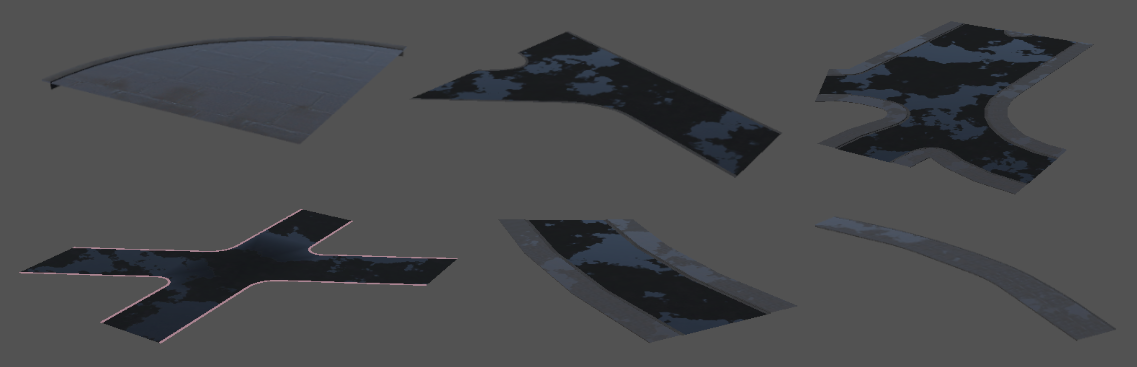
With this approach we can both have street variety along with maintaining most of the outlines straight, as matching a row of buildings to a wavy street is just a painful experience. Modules are planned to be reused throughout the game, but to add more authenticity to our environments we also create a couple of one-use unique crossroads.
All roads should be planned on a grid by your 3D artists, so they will fit nicely with one another when you start to place them on your level. Just like you will be making a tile based board game.
You should take your time to balance the number of modules, both simple and unique, to give your level artist enough flexibility while not going over budget.
Choosing the road system may also impact the non-graphic aspects of your game.
For example, we place navmesh modifier volumes (for traffic AI) on the module prefabs, so we don’t need to adjust them later.
3. Setting up the editor tool.
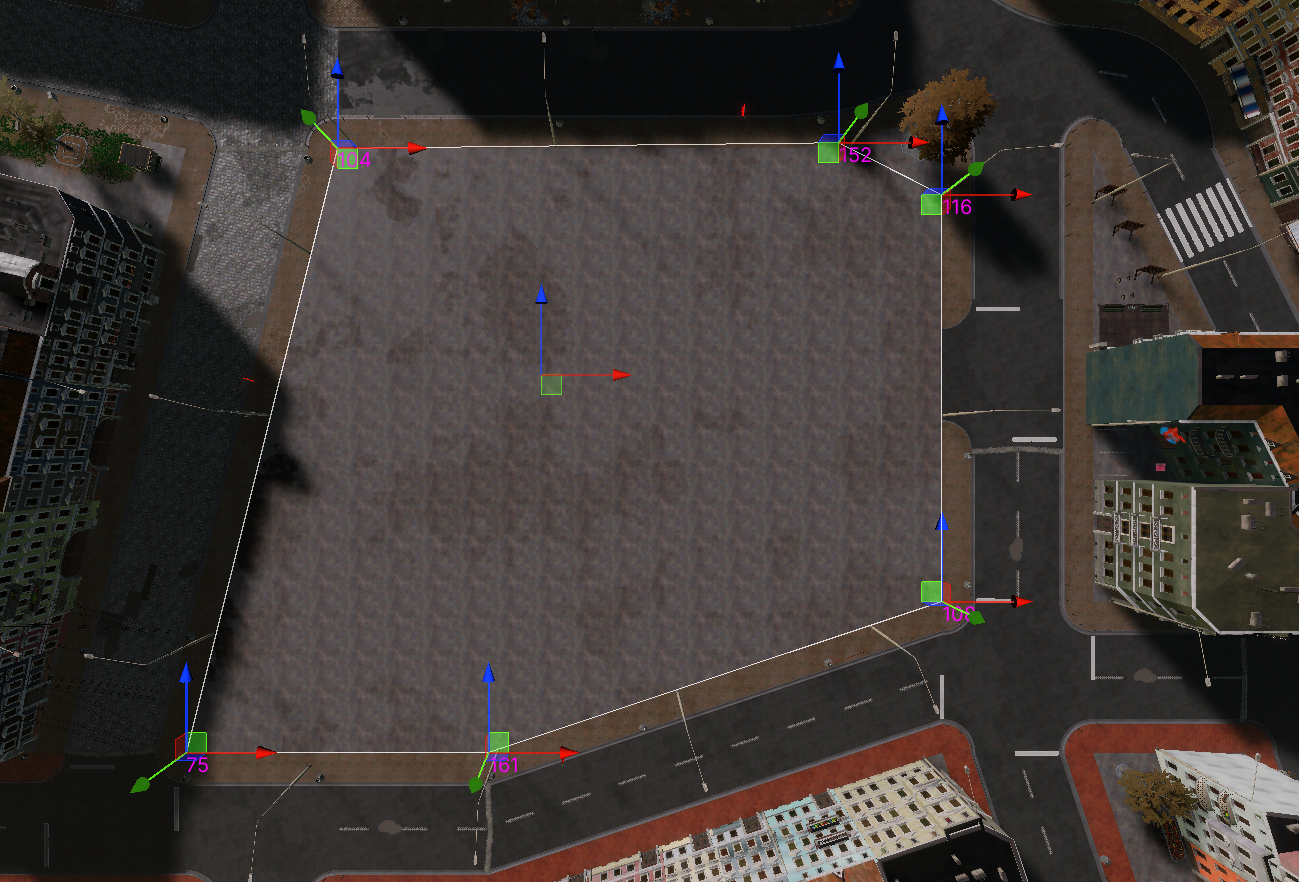
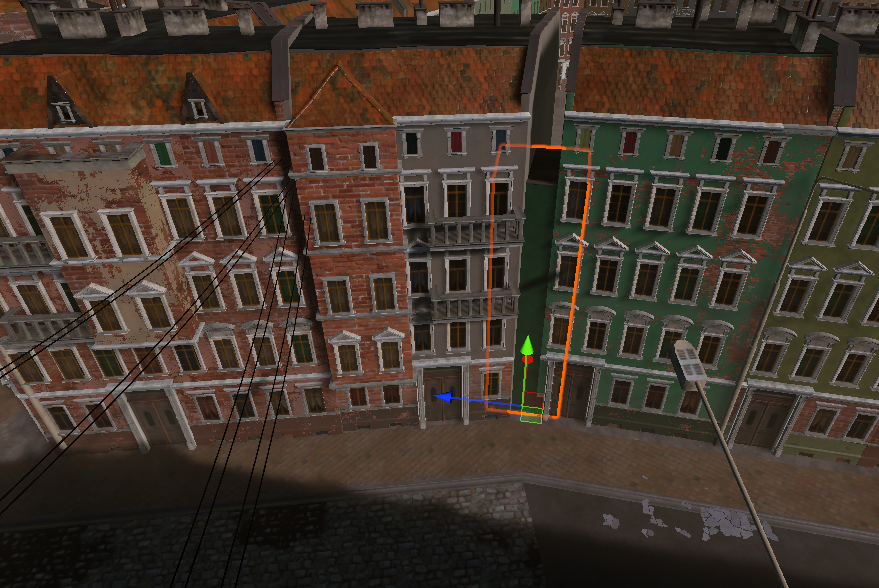
First script is a simple polygonal curve that will determine where rows of buildings will be generated. It is based on Vector3 points, so our city may have various ground levels.
As a bonus, we can later reuse the same curves for other generators, for example to set up street props.
Code - CityBuilderCurveInspector - UI part
Based on the curveBase (or its extension CityBuilderCurve with a couple additional variables in our case) we set up the tool UI for the editor. The minimum we need is to add and move new points on a curve. I also added information about the angle value for debug reasons.
4. The generator itself
When we have the tool UI figured out we can proceed to the actual generator.
Basically it works in two steps:
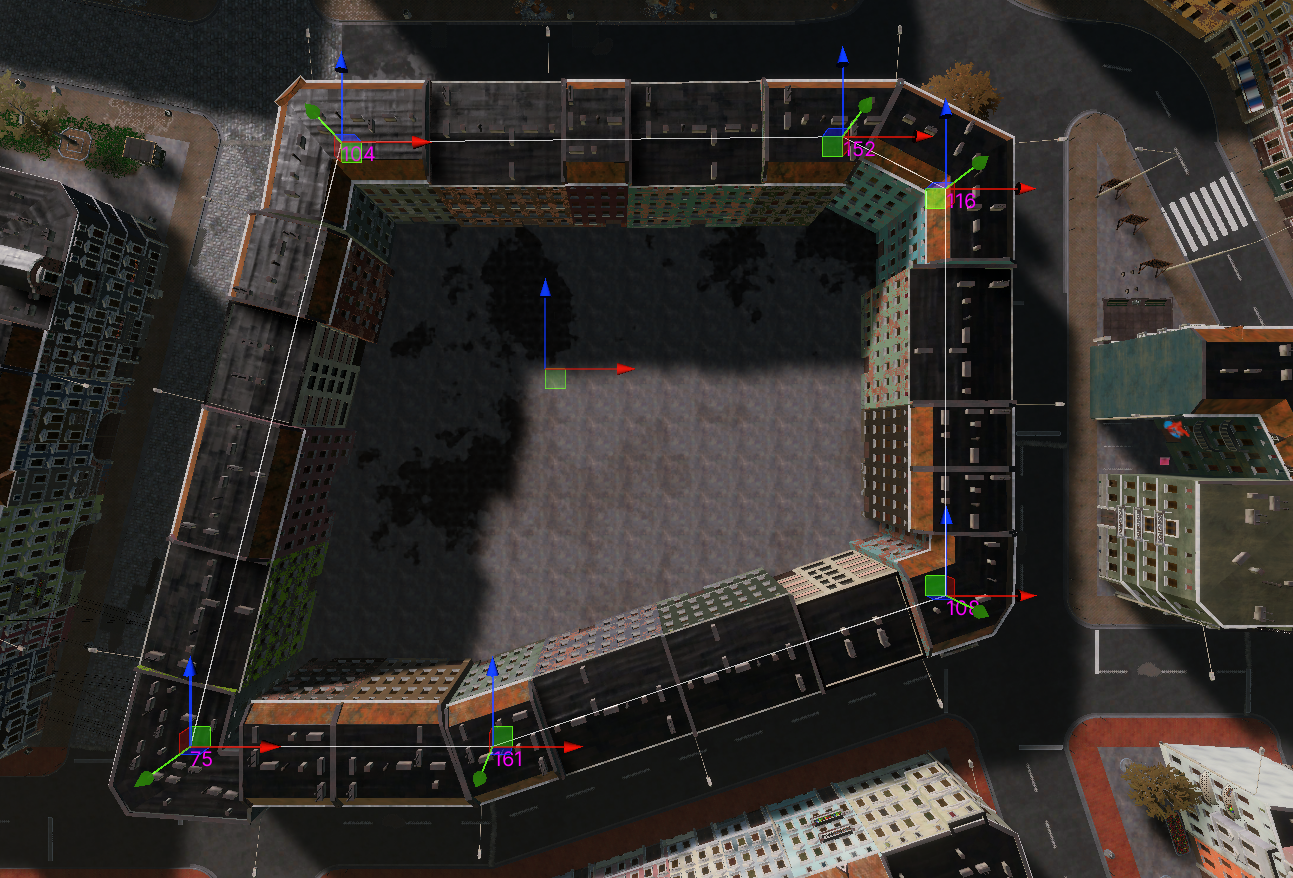
1. Place the corner buildings on all curve points. Building prefab is chosen, so its side walls are roughly perpendicular to the angle arms at this specific point.
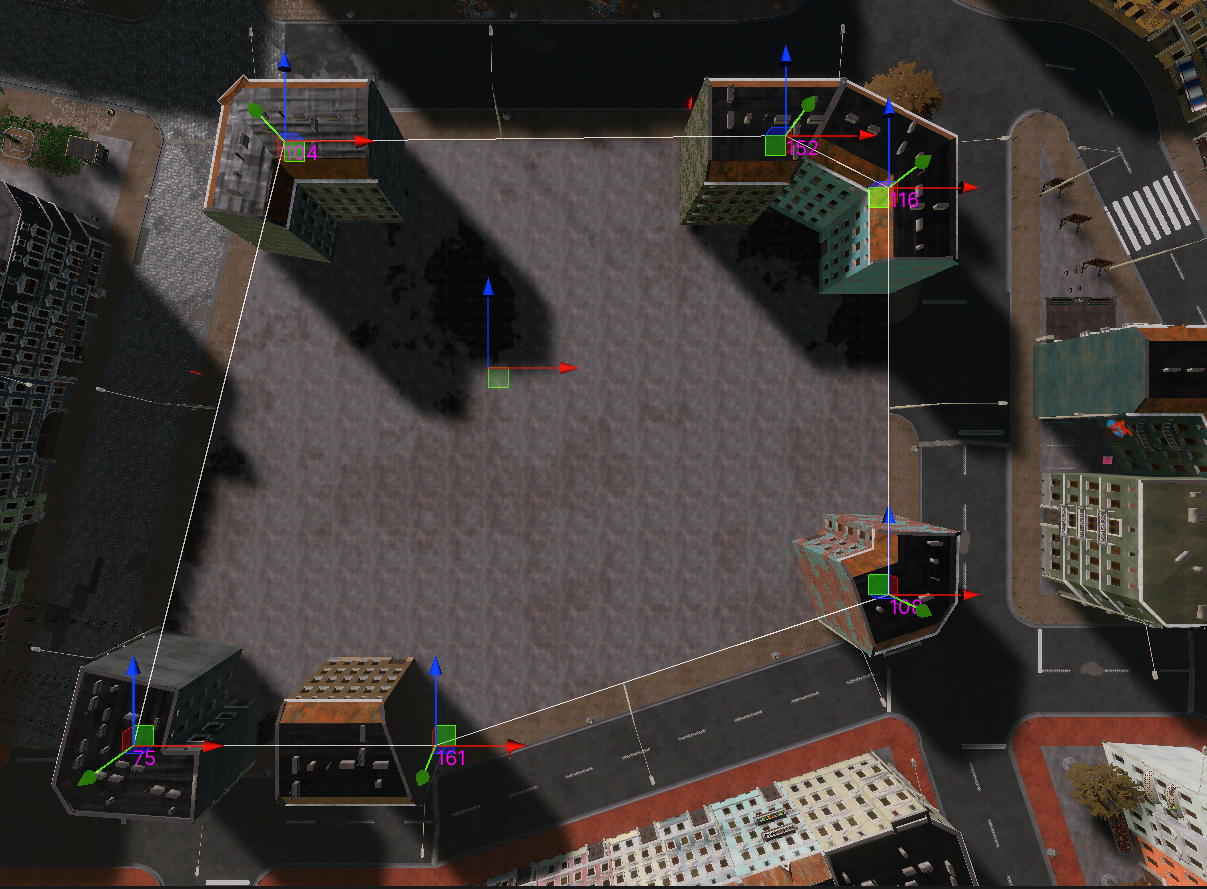
2. For each point on a curve, generate a building row, starting on the wall of the corner building at this point, and then place buildings along the line towards the next point, as long as there is still a gap where we can fit a new building. Then place a small and plain wall module to fill the gap between the last building of the row and the next corner.
Code - CityBuilderCurveInspector - create block part
Code - CityBuilderCurveInspector - generateBuildingsRow part
Code - CityBuilderCurveInspector - findFittingBuilding part
Code - CityBuilderCurveInspector - getAngle part
Notes:
-For the system to work properly we needed convex colliders on our building assets. If your colliders doesn’t have this option checked, you just need to set it to true (GetComponent<MeshCollider>().c on prefab initialization and then just set it off after all the buildings are placed.
- generateNewCornerBuilding method is selecting the best fitting corner building prefab for the given angle. In our case we made a prefab fo every 10 degrees, with extra prefabs at 85,95, 175 and 185, but ignoring some less used angles. You can replace any corners that were missing with the default small simple box building and them make small adjustments manually. I would suggest setting the polygonal curves as soon as you have the road network ready. Next figure out which corner angles are more popular and should be modeled. Obviously you can use building mesh generator for this if you have one.
- Curve points should be placed around the main object’s pivot in order to calculate the angles properly.
5. Building assets for the generator.
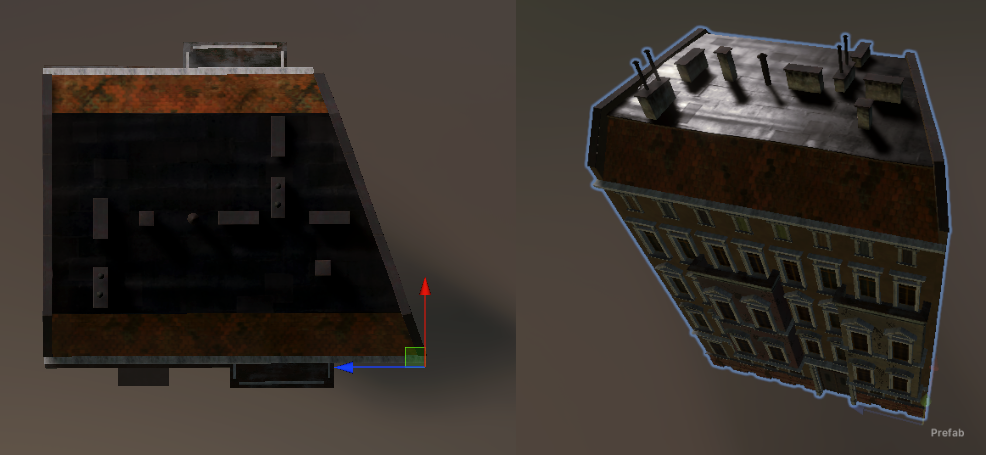
All of the building prefabs must have its pivot placed at the front, down, and right corner.
We have three types of building for the generator:
1. Simple, boxy tenement to fill the rows along the lines. It has a more decorative facade at front, a simpler back for the backyards and plain walls on each side.
2. Corner building. The wall that is angled is always the one to the right (where the pivot is located)
3. Narrow wall to fill the small gaps.
6. System expansions
Smaller details can be added at random to further enhance our level art at the same time we are placing our buildings. For example storefronts, balconies, decorative motifs or graffiti.
I hope you will find this article interesting and maybe it will be useful for your own virtual cities.
Urban environment is some of the most work demanding game settings, but with the right tools and planning it can be achieved even with limited resources of an indie studio.


nice