PCSX2-QT TEXTURE REPLACEMENT TUTORIAL
/// ABOUT
Latest builds of PCSX2 have implemented a new function called TEXTURE REPLACEMENT which allows to load custom textures into any game. This tutorial will cover how to configure PCSX2 (now a.k.a PCSX2-qt or PCSX2 nightly) to load and apply your custom liveries for the Ace Combat games for the PS2.
While this tutorial is hosted on AC04's section, its contents can also can be applied to AC5 and ACZ.
/// REQUIRED FILES AND/OR PROGRAMS
• The latest nightly build of PCSX2-qt. You can download it from its official website.
• Custom liveries in PNG format for the aircraft of your choice. The ADDONS section of the AC04, AC5 and ACZ's ModDB pages contain user-submitted liveries. Some of these submissions contain the custom aircraft livery texture in PNG format besides the required GIM/GFP one. If the livery package you want to add doesn't come with the required PNG files (which also must be semitransparent) kindly request its submitter to include them.
The amount of PNG files that an aircraft will require will depend on the game:
AC04 will need two textures:
- One will be used for display in the hangar and the other will be used for display during a mission. Their resolutions must be 512x512 px.
AC5 and ACZ will however require four (in some cases, five) texture files to mod an aircraft's livery:
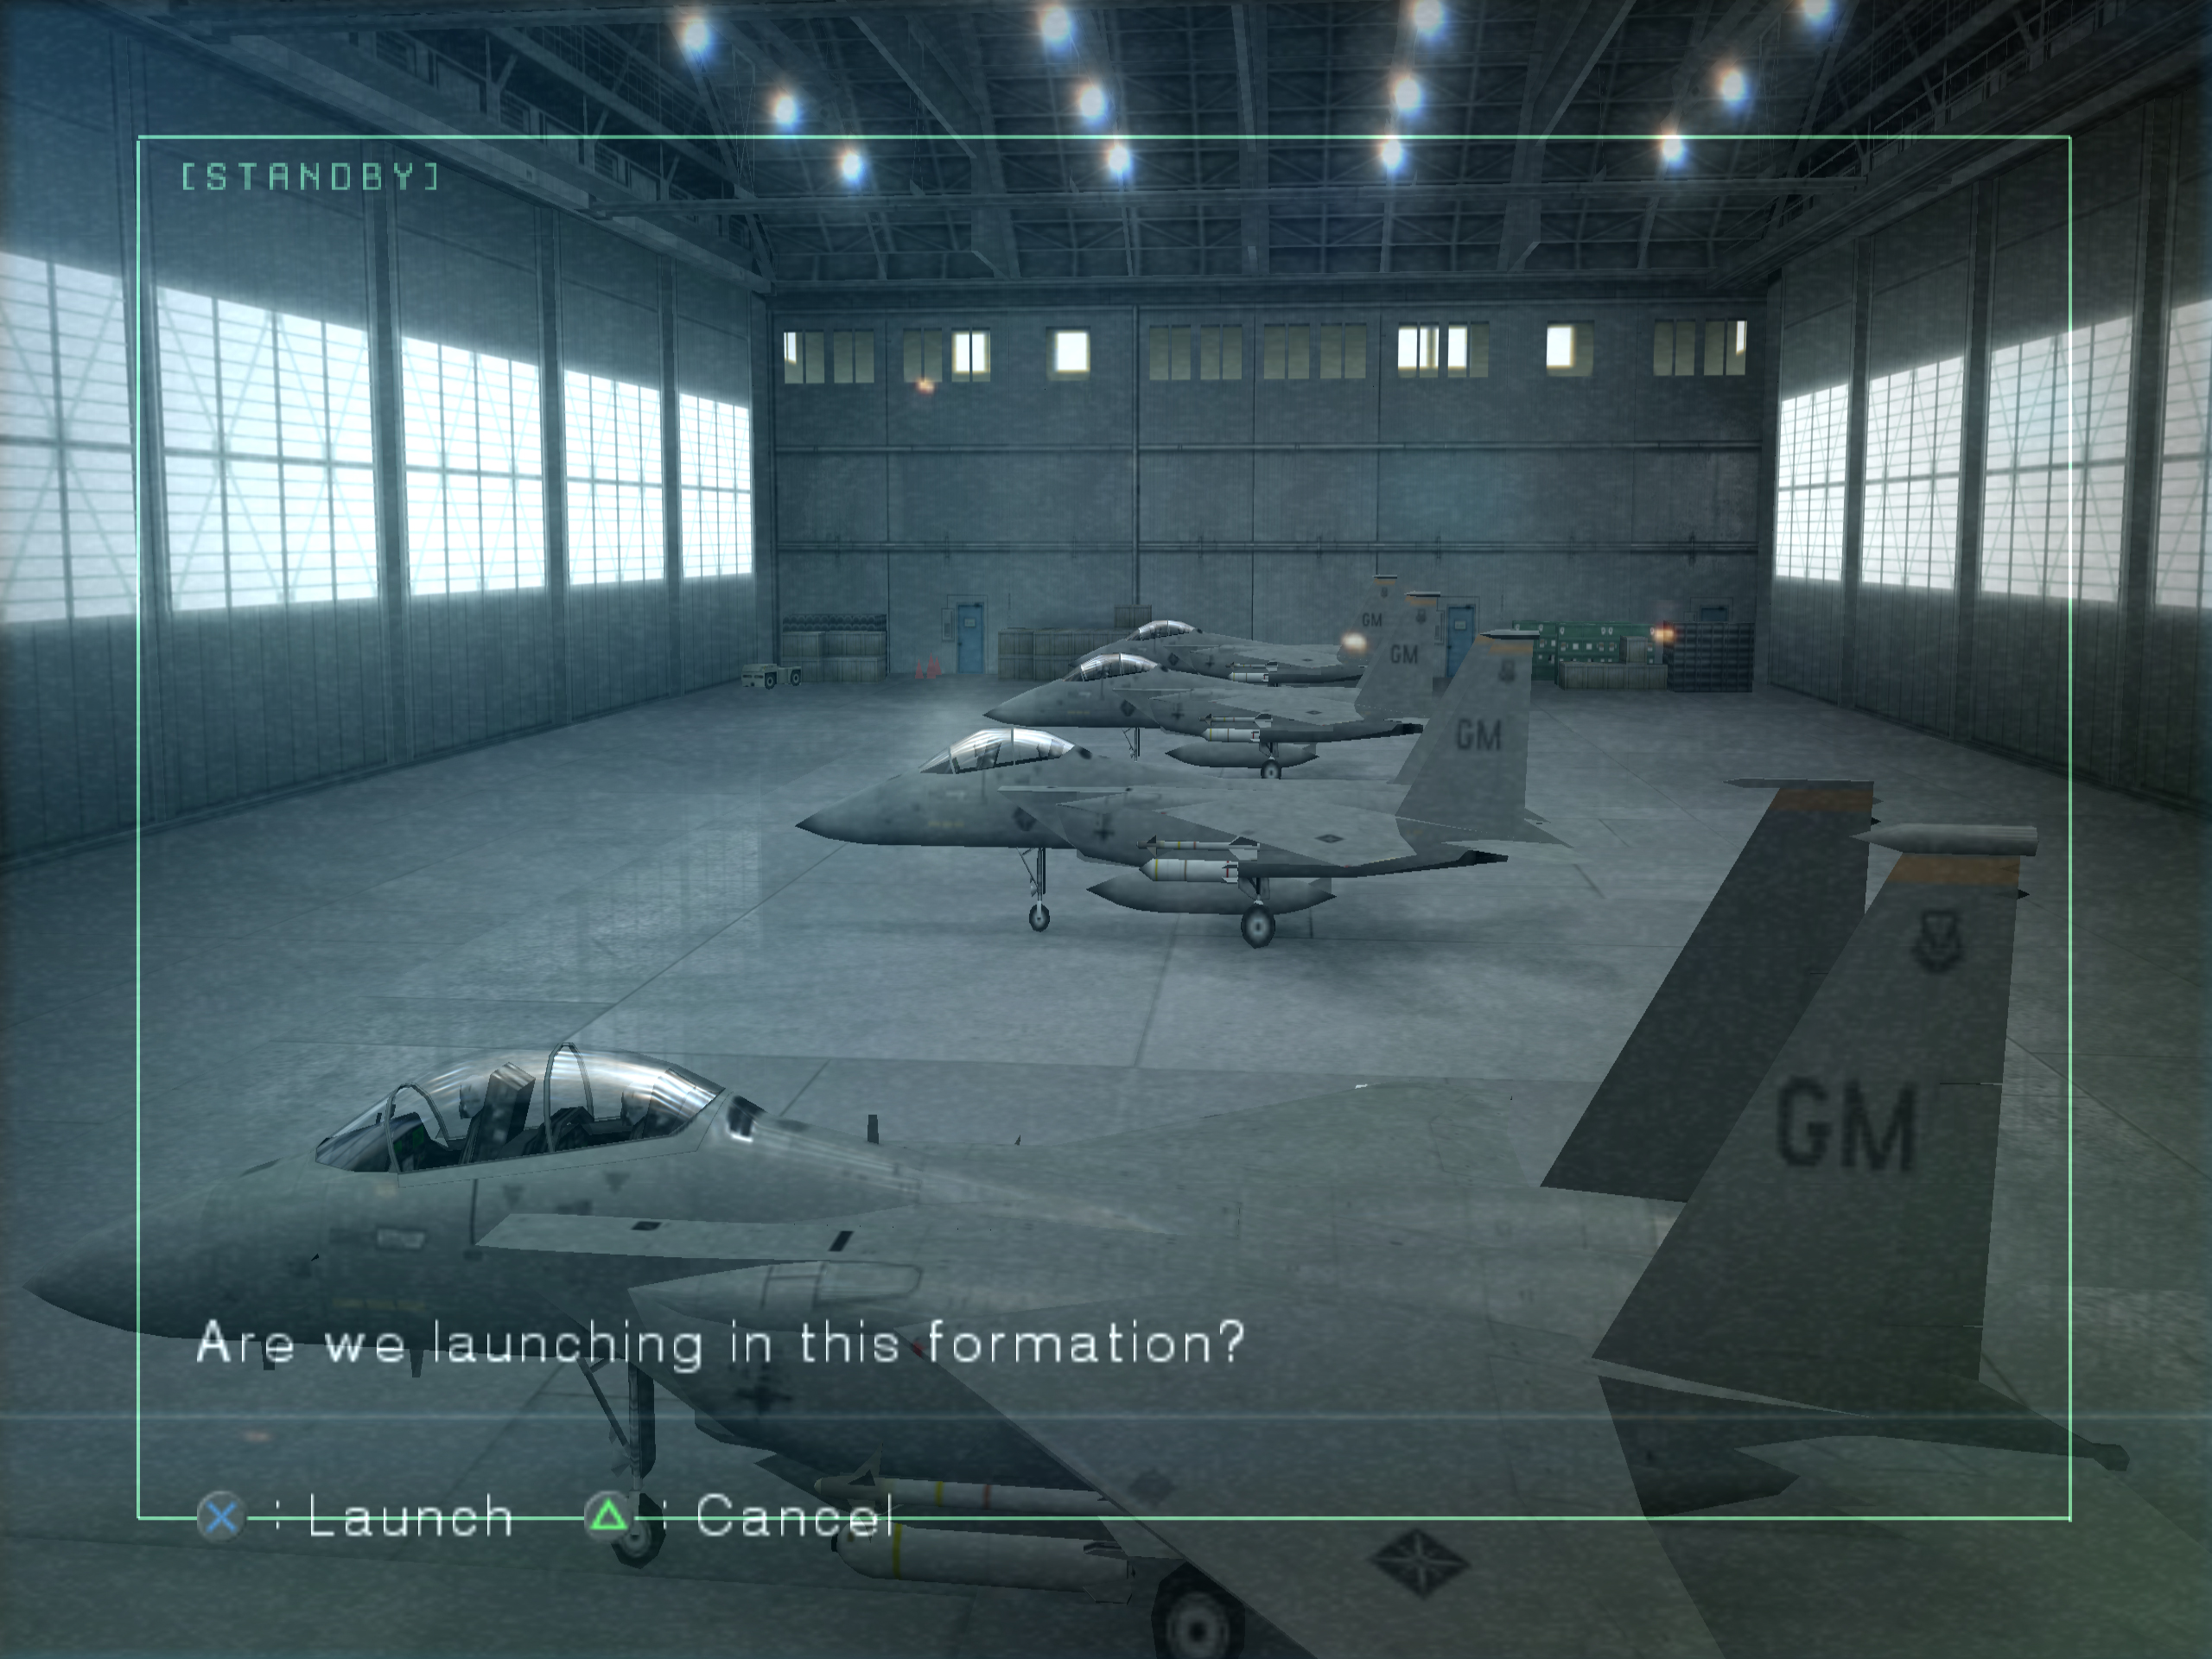
- Two "high-quality" textures (512x512 px) will be used for player's aircraft displayed during a mission and for when the camera is focused on the current aircraft selected in the hangar.
- One "mid-quality" texture (256x256 px) that will used for when the camera focuses on another aircraft causing forcing the previously selected aircraft to switch to a "mid-poly" model and for the wingman model during a mission.
In AC5, for some reason specific aircraft and/or livery color will require an extra "mid-quality" texture that will be used by the wingman's "mid-poly" aircraft model during gameplay. This doesn't seem to apply to ACZ, however.
- One "low-quality" texture (128x128 px) that will be used when wingman is flying to a far distance from the player's current position, switching to a "low-poly" version of the aircraft's model.
This might be a bit confusing to understand, please check the ACE COMBAT 5'S AIRCRAFT TEXTURES section from the ACE COMBAT 5: CUSTOM TEXTURE CONVERSION AND INJECTION tutorial for a slightly better explanation with images.
• An UNMODIFIED ISO file of AC04/AC5/ACZ. It must be the USA region releases of the games:
Ace Combat 04: Shattered Skies
Region: USA
Serial: SLUS-20152
Version: 1.00
CRC-32: 3462D403
MD5: 8C7CBADB78B2EEBEABBF546E0C1D0372
SHA1: AAA707214AEA7F8F9C2904C4B5E00C372C943533
Ace Combat 5: The Unsung War:
Region: USA
Serial: SLUS-20851
Version: 1.00
CRC-32: AA955654
MD5: 8FCC89EAF8A5481BCE65EF713D42A6C1
SHA1: B0823E719AFAC1D6B9C4CE1697BD6B8546382E8D
Ace Combat Zero: The Belkan War:
Region: USA
Serial: SLUS-21346
Version: 1.00
CRC32: F7E98EEB
MD5: 61C016FAD9D992DEE8DCB0AEC2A6C31F
SHA-1: E72C3D5FD27BCD6C71CDD1A5BEE26956BC625E43
Emphasis on UNMODIFIED. Will explain the why later in the tutorial.
• Filename hashes list. You can download them from here. Said lists come in XLSX format to open with Microsoft Excel or just plain formatted text files.
/// CONFIGURING PCSX2 TO FIX MOST OF ACE COMBAT-EXCLUSIVE GRAPHICAL EMULATION ISSUES
Latest builds of PCSX2 have finally fixed most of the graphical glitches found when emulating Ace Combat games. User PositronCannon2 uploaded a video showing how configure PCSX2 to solve these issues.
The TEXTURE REPLACEMENT function will NOT work if PCSX2's renderer is set to SOFTWARE mode!.
/// TEXTURE REPLACEMENT TUTORIAL
ACE COMBAT 04: SHATTERED SKIES:
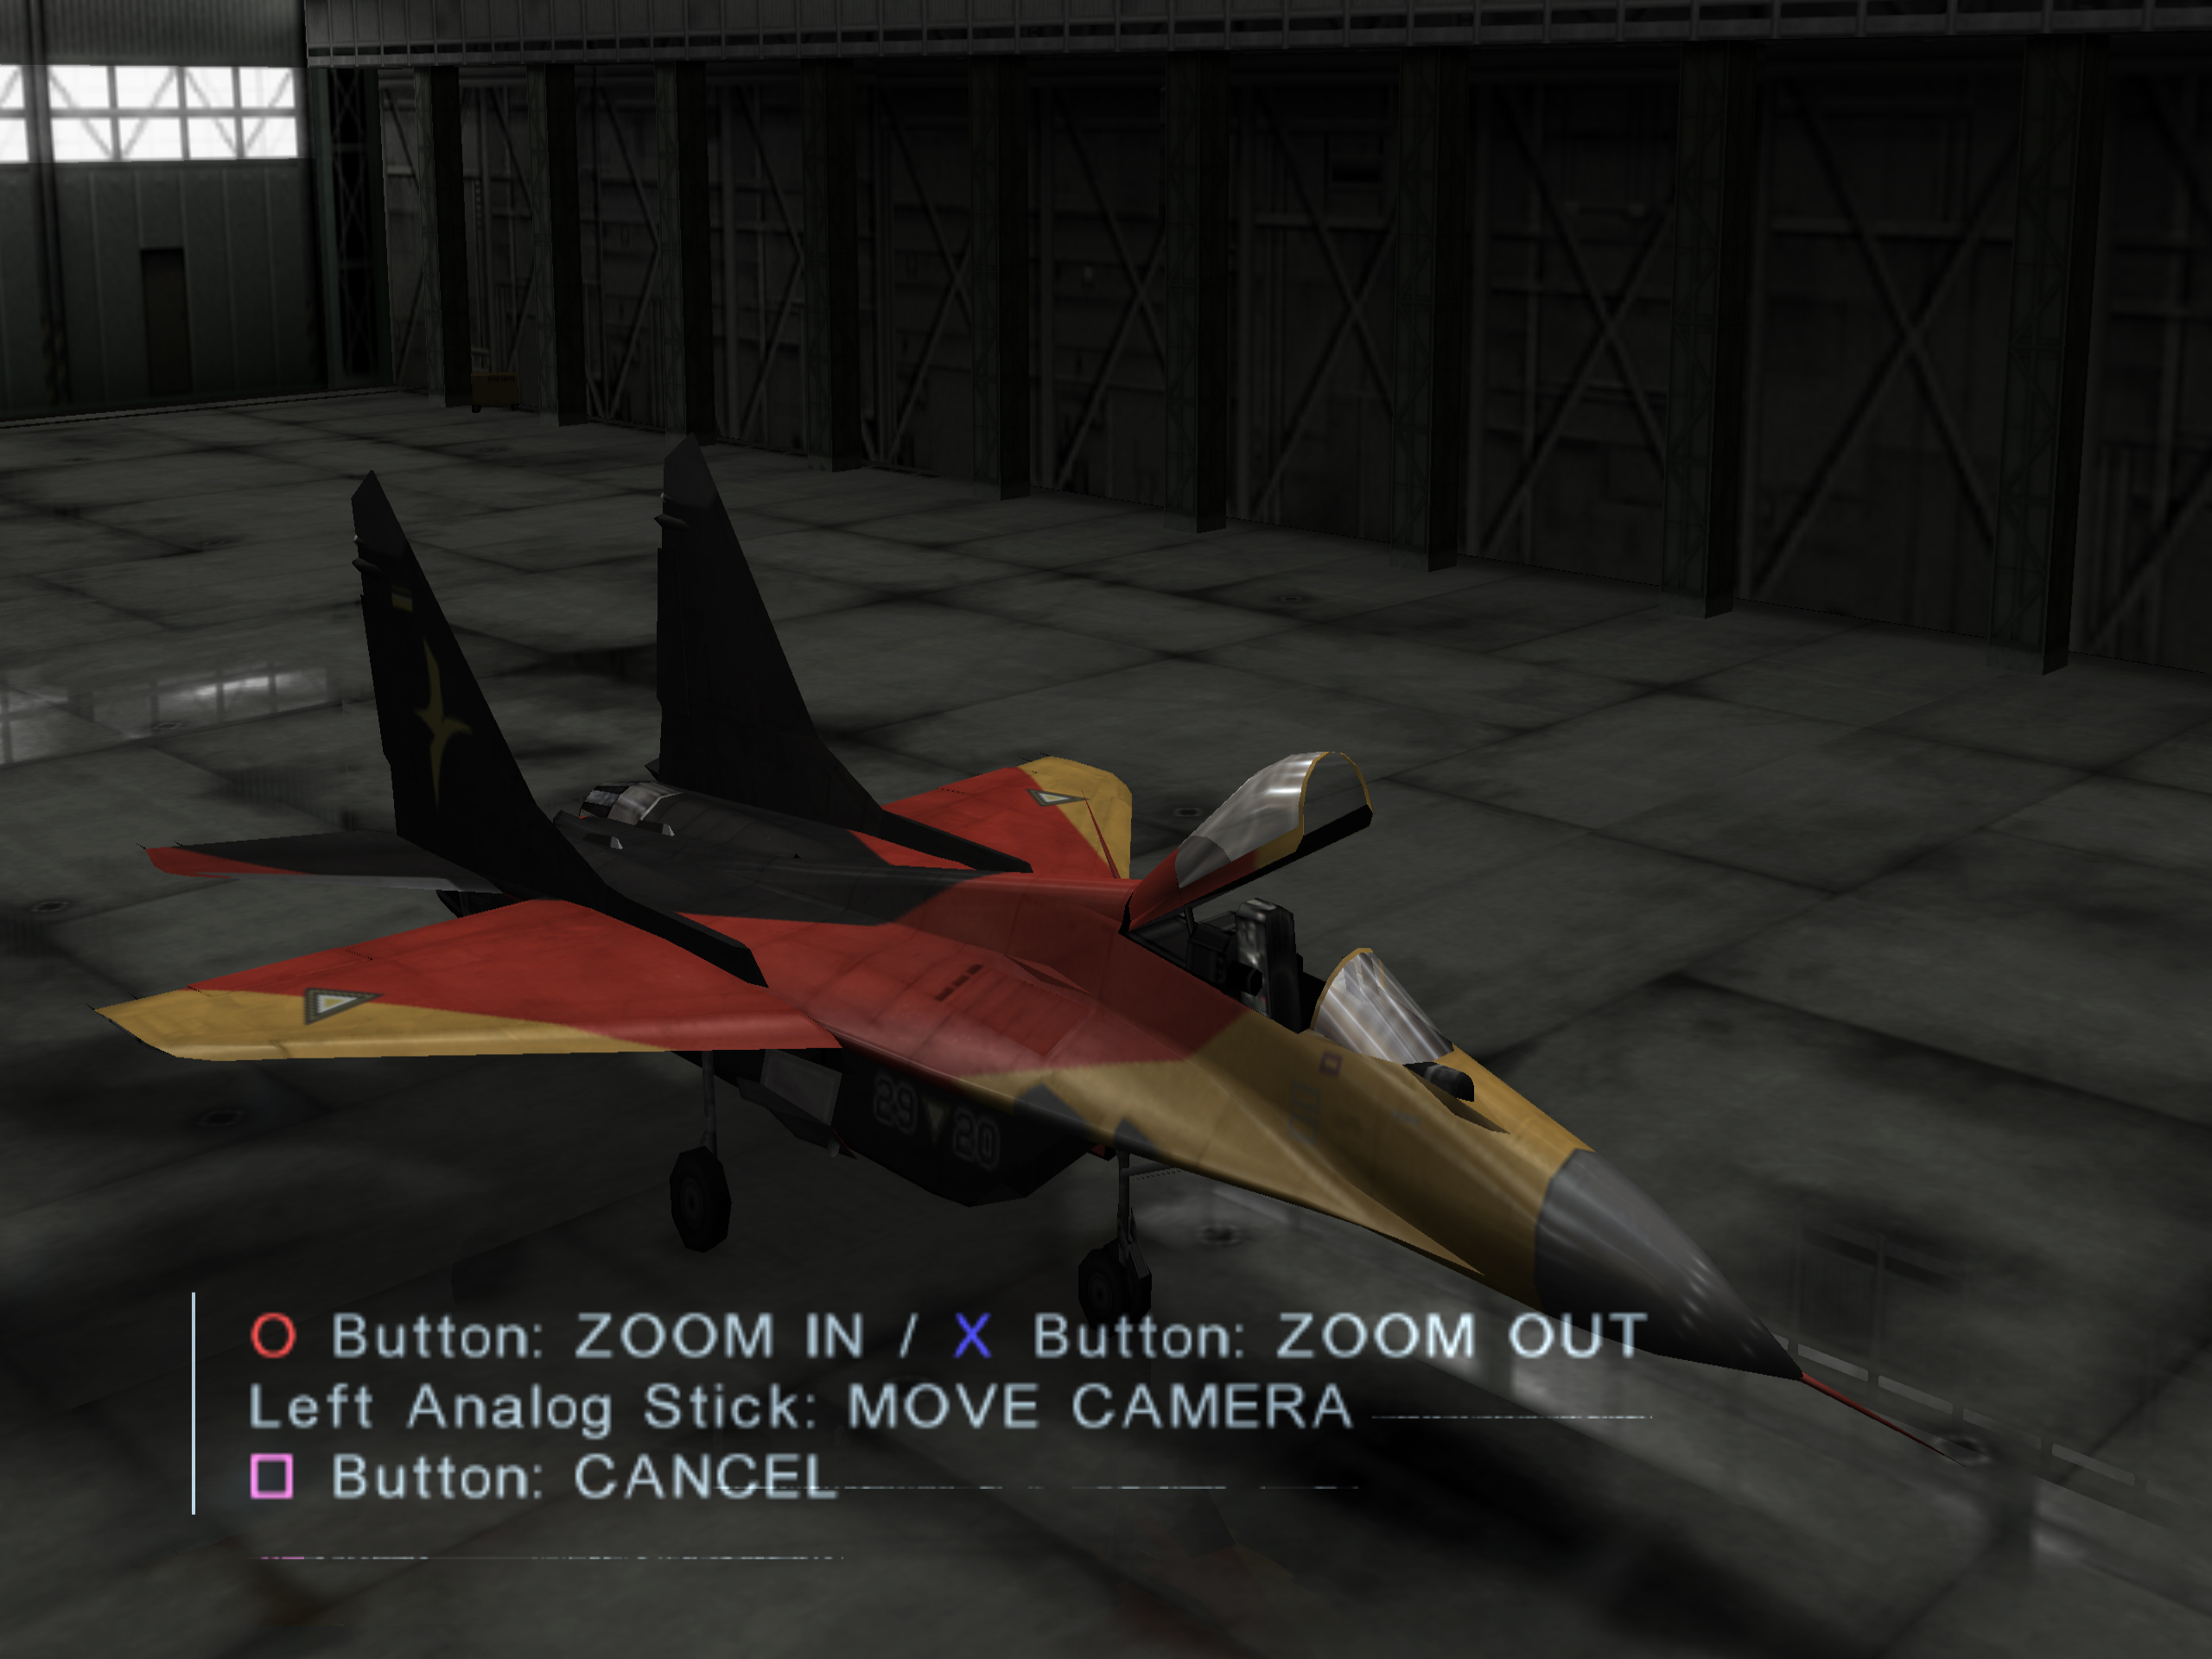
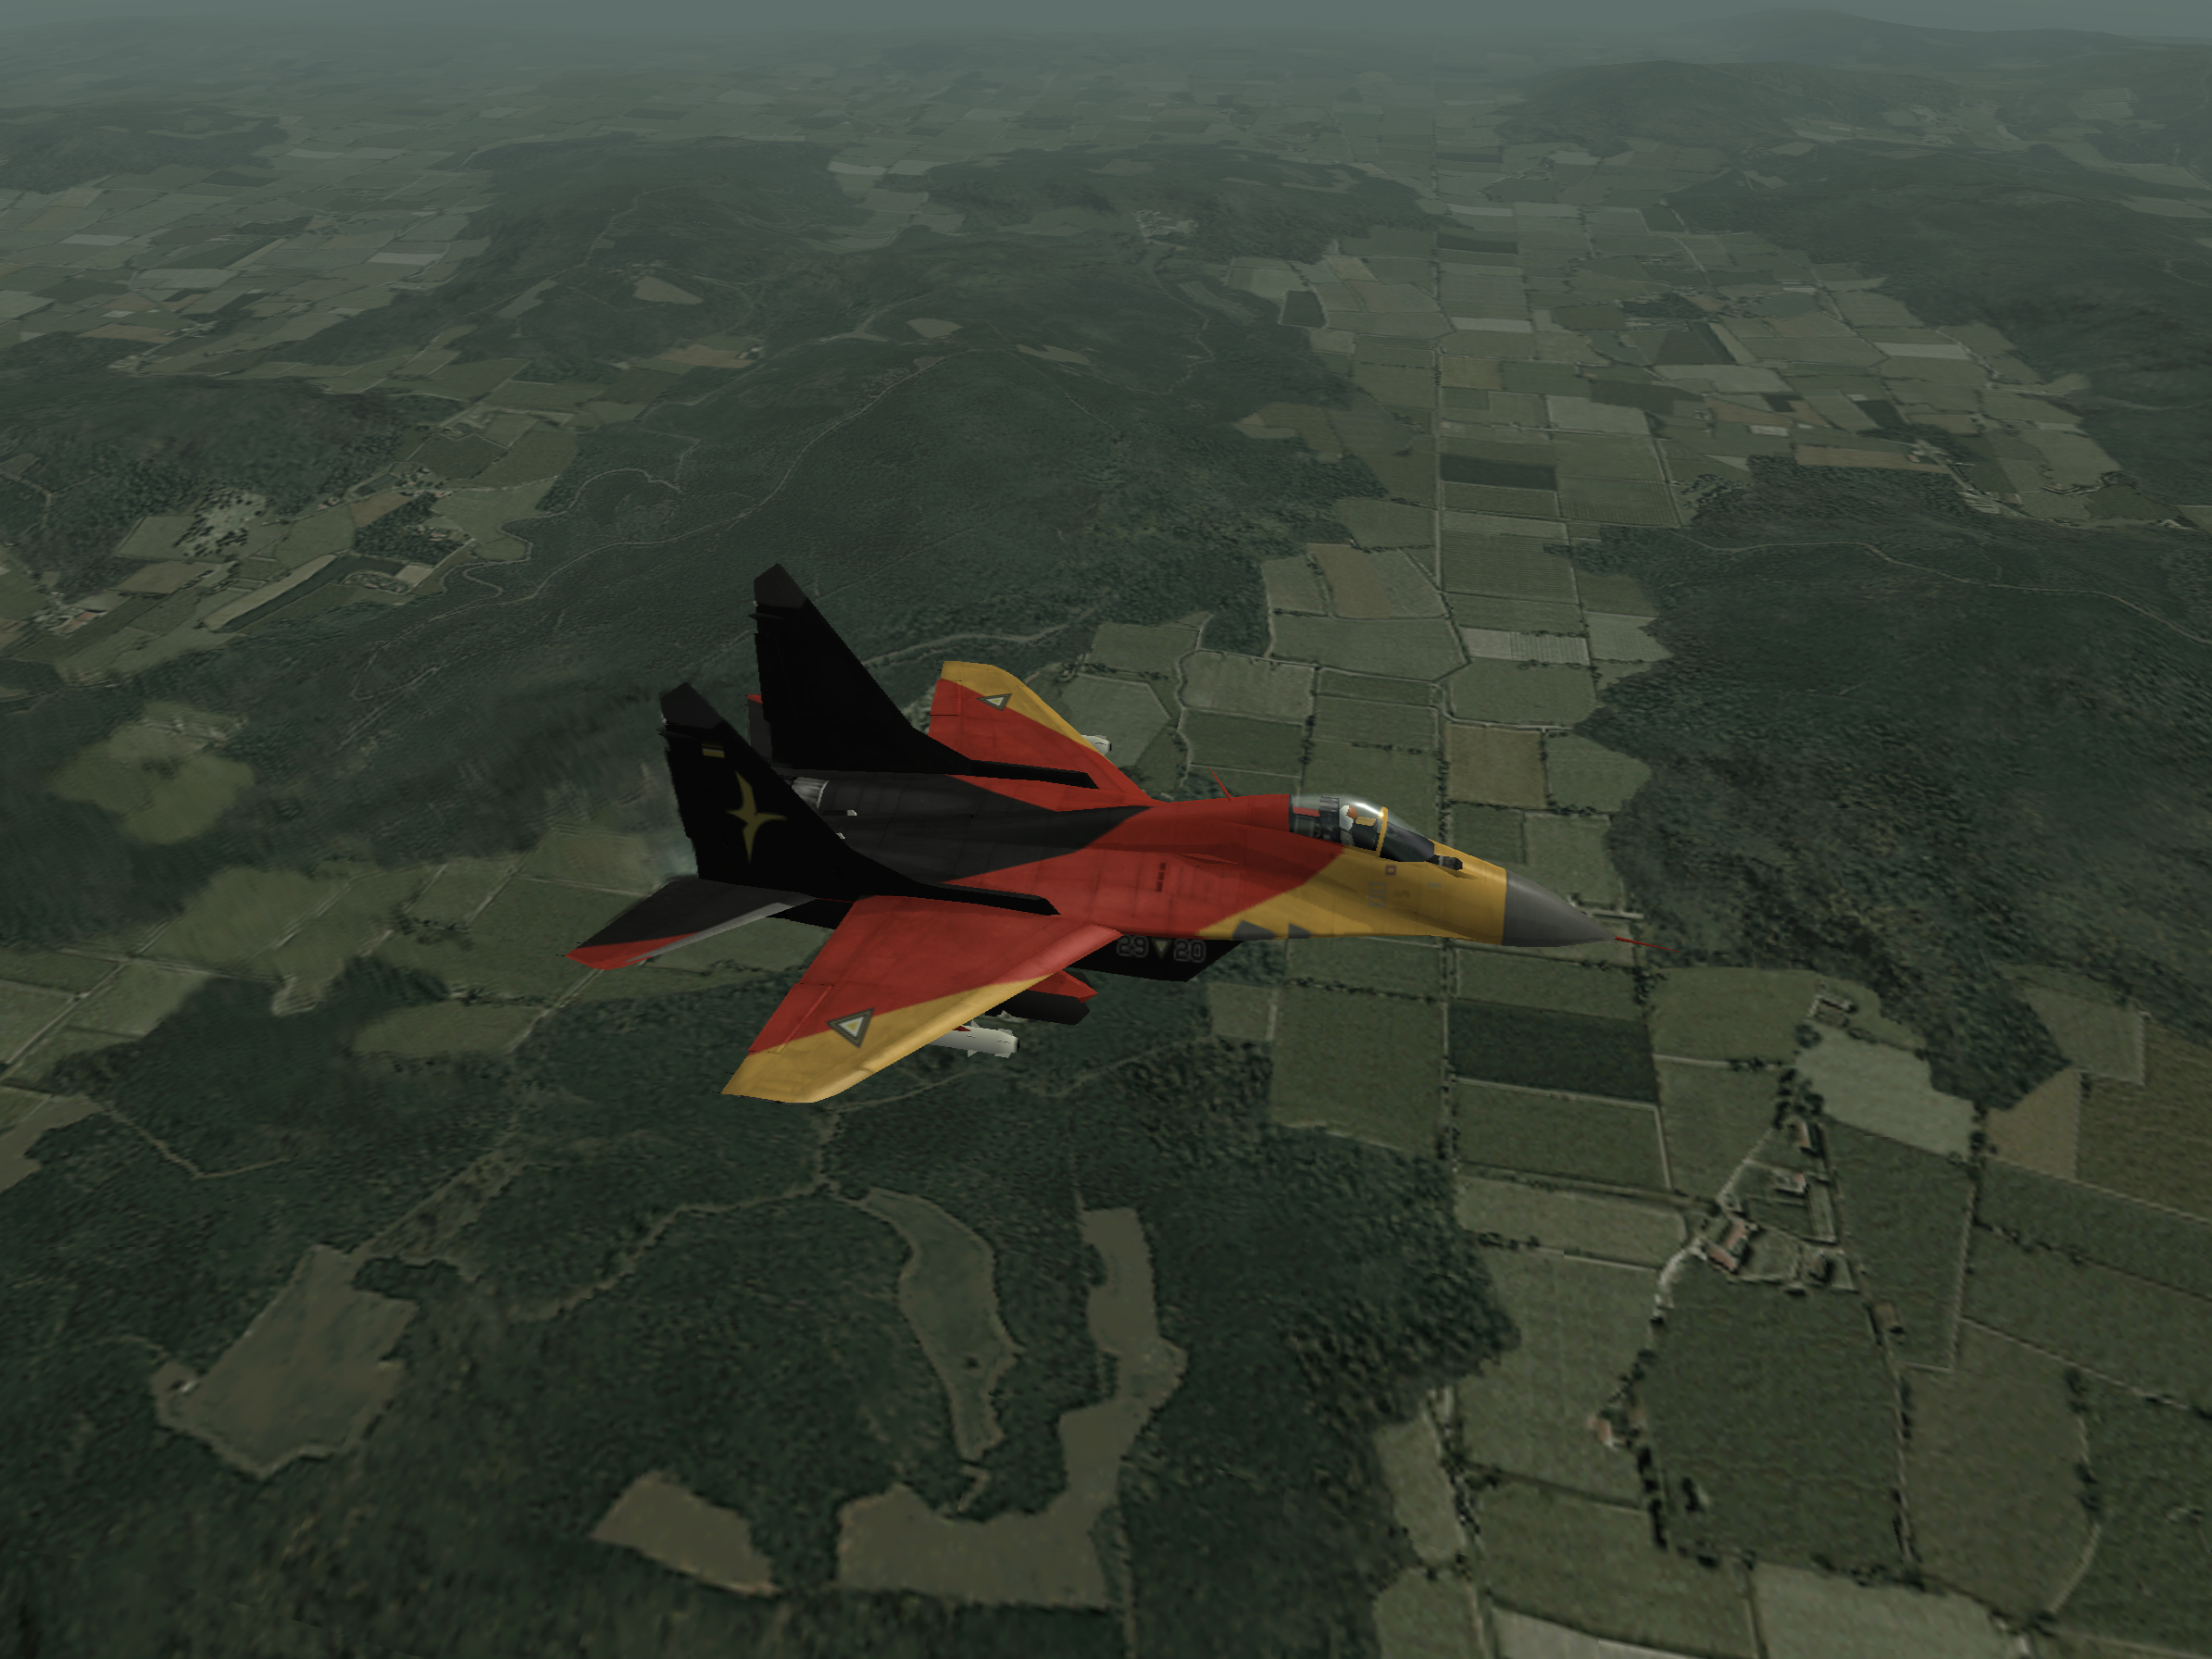
For AC04's tutorial we'll replace the special livery -MRKOS- of the MiG-29A Fulcrum with the -Jagdgeschwader 73- livery created by BelkanLoyalist. Download the file and look for the PNG file. If there's just one single file then make another copy of it.
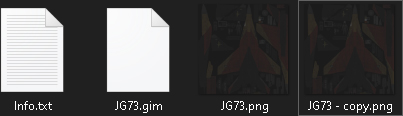
Open the ACE COMBAT 04 SHATTERED SKIES FILENAME HASH LIST sheet or text file. The information is grouped as the following:
AIRCRAFT: name of the aircraft.
COLOR: the name/identifier of the aircraft's livery
HANGAR: contains the filename hashes that are used while the aircraft is being displayed in the hangar (as well the shop).
GAMEPLAY: same as the above but these hashes are used while the aircraft is in a mission.
FILENAME HASHES: groups both HANGAR and GAMEPLAY hashes.
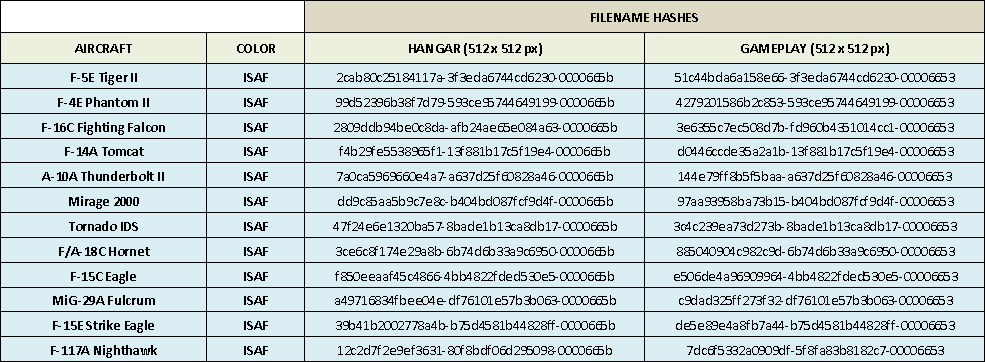
An example of how the AC04 sheet looks like.
Since we are replacing the Fulcrum's -MRKOS- livery as an example for the AC04 tutorial, look for the MiG-29A and -MRKOS- cells under the AIRCRAFT and COLOR columns.
![]()
You'll see that in the MiG-29A -MRKOS- row there are two more cells with alphanumeric strings. The first cell is the filename hash that is used by the aircraft being displayed while selecting/buying one in the hangar/shop. The second cell is the hash that is used by the aircraft during a mission.
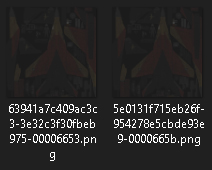
Copy the first hash under the HANGAR column and use it as the new filename of the original PNG file. Now copy the second hash and use it as the new filename for its copy.
HANGAR (512 X 512 px):
5e0131f715eb26f-954278e5cbde93e9-0000665b.png
GAMEPLAY (512 X 512 px):
63941a7c409ac3c3-3e32c3f30fbeb975-00006653.png
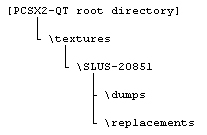
We now need to create a path from where PCSX2 will load our textures from. For this step I will use the "texture" folder placed in the same location as the PCSX2 executable. If you don't see this folder create it and rename it textures.
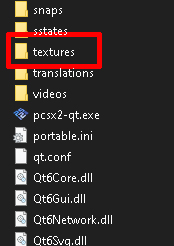
Inside it create another folder and rename it SLUS-20152 (uppercase letters are required). This name is the region code of the US release of AC04. Click on it then create two new folders and rename them as dumps and replacements. The texture directory structure should look like this:
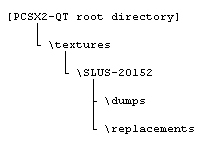
Now move/copy the two PNG files into the replacements folder.
Open PCSX2, go the menu bar and look for the SETTINGS option. Click on it and select GRAPHICS. A window will pop up with the options to configure rendering settings. Click on the TEXTURE REPLACEMENT tab and you'll be shown the following settings.
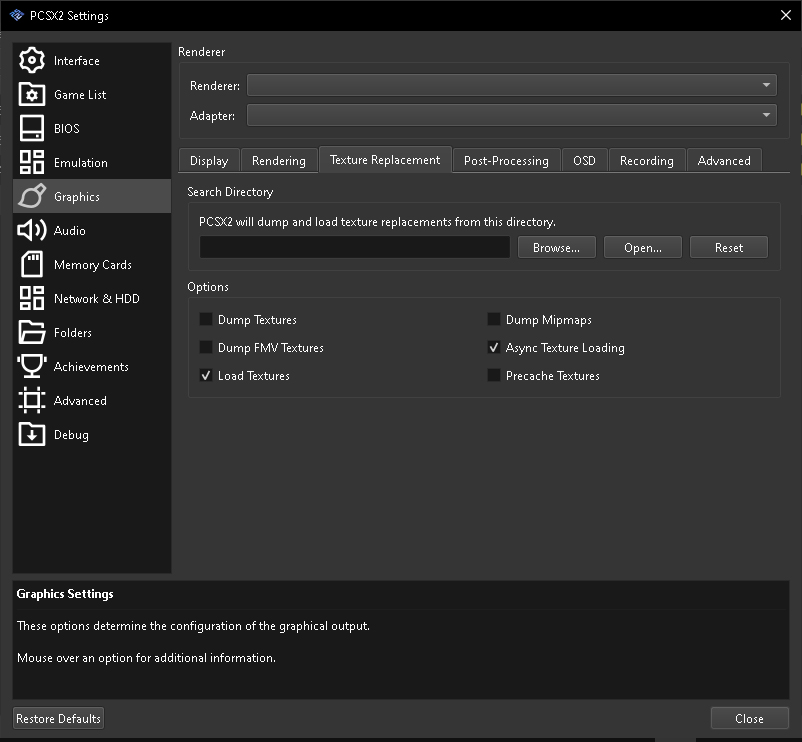
SEARCH DIRECTORY:
This is where PCSX2 will load our textures from (as well dump to). By default the custom textures will be loaded from the TEXTURES directory, which is located in the same location as the PCSX2 executable, unless changed. I suggest you to not to change it but if you have a personal folder for your files as long it respects the directory structure previously described then go for it.
OPTIONS:
Some loading/dumping options. Tick LOAD TEXTURES and leave the rest of the options as they are. I don't recommend having both LOAD and DUMP TEXTURES enabled at the same time because it can cause performance issues.
Close the PCSX2 settings window then run the game. Go to the hangar, select the MiG-29A then the -MRKOS- color and go into a mission. You should be seeing the custom livery applied to the aircraft.
Keep in mind that you can have up to three custom liveries (ISAF/ERUSEA/SPECIAL) for each aircraft available for use in the game.
ACE COMBAT 5: THE UNSUNG WAR:
The process to change the liveries in these games is the same as described in the AC04 section but this time not only you'll need a texture for your aircraft but also for your wingmen's, for both hangar and in-mission display.
For this section's example we'll replace F-15E's OSEAN livery with Garuda's. You can download the F-15E -GARUDA- livery here. You'll find four textures in PNG format inside the PCSX2-QT texture replacement folder.
In the TEXTURE folder, create a new one and name it as SLUS-20851. Inside it create two new folders and name them dumps and replacements. The texture directory structure should look like this:
Open the ACE COMBAT 5 THE USUNG WAR FILENAME HASH LIST sheet or text file. Just like in the AC04 one the necessary information will be grouped by aircraft, livery color and the hashes used by which aircraft and where.
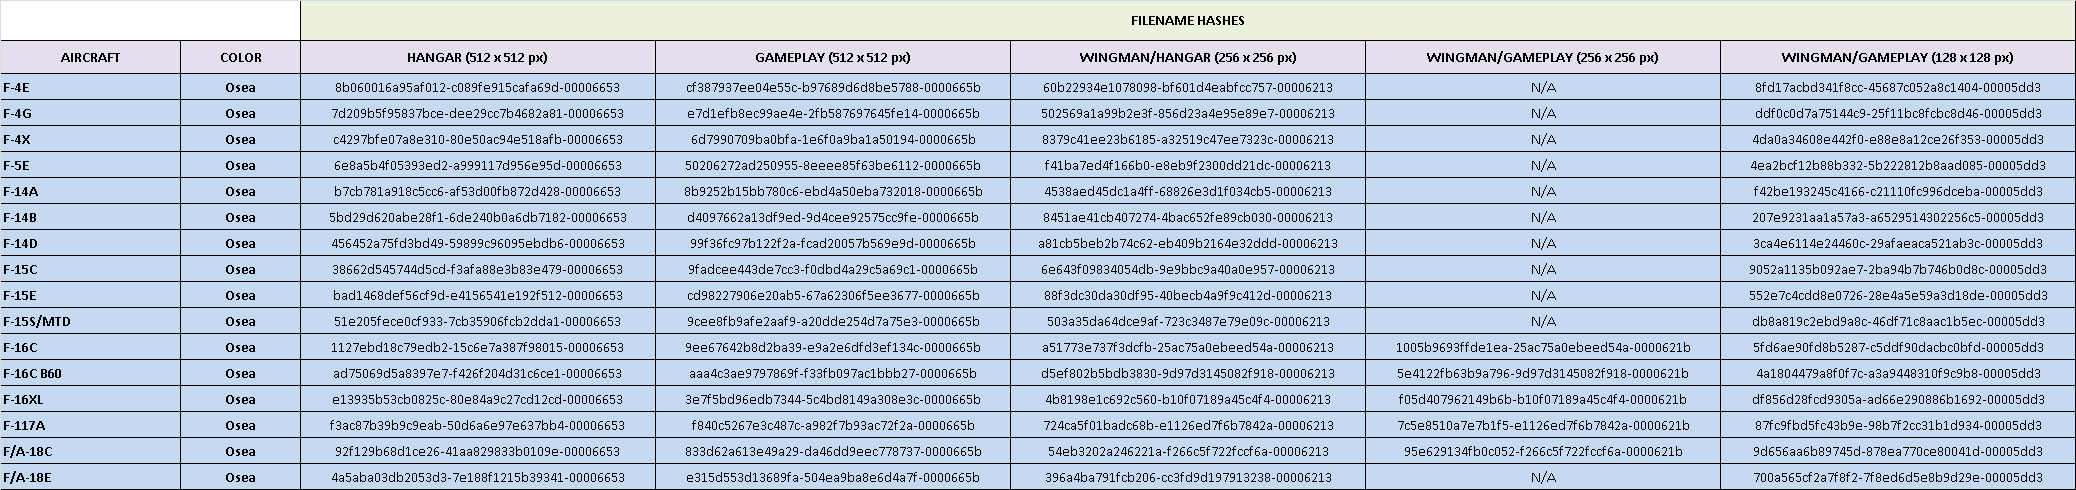
An example of how the AC5 sheet looks like.
Look for the F-15E and OSEAN entries under the AIRCRAFT and COLOR columns. Unlike the AC04 hash list, this sheet (as well the ACZ one) also contains the filename hashes for the textures used by your wingman and whose image resolution are lower than the textures used by the high-poly aircraft.
![]()
Grab the PNG files and rename them with the hashes provided seen above. If you have trouble identifying which hash you should use as your texture's new filename you can check at the top of the table next to the GAMEPLAY/HANGAR headers the texture resolution used. Since we are replacing the osean livery of the F-15E your PNG files should be renamed as the following:
- HANGAR (512 x 512 px):
bad1468def56cf9d-e4156541e192f512-00006653.png
- GAMEPLAY (512 x 512 px):
cd98227906e20ab5-67a62306f5ee3677-0000665b.png
- WINGMAN/HANGAR (256 x 256 px):
88f3dc30da30df95-40becb4a9f9c412d-00006213.png
- WINGMAN/GAMEPLAY (128 x 128 px):
552e7c4cdd8e0726-28e4a5e59a3d18de-00005dd3.png

Grab the renamed files then drop them into the replacements folder that we created for AC5. Run PCSX2 and select the F-15E with the osean livery for you and your wingmen. If you followed this tutorial down to the letter then the Garuda's team livery should be visible.
SPECIAL CASES:
While most of the aircraft roster will require four texture files to completely change a livery, some planes and/or livery colors will require five texture files instead. This extra texture file is used specifically by your wingman's aircraft model during a mission. The resolution of this texture is as same as the one used by the "mid-poly" aircraft model in the hangar.
The filename hashes for these "special cases" are provided under the WINGMAN/GAMEPLAY (256 x 256 px) column in the list provided for AC5. For example, if you want to change the RAZGRIZ livery used by the MiG-29A you'll need to rename your five texture files to:
- HANGAR (512 x 512 px):
605c68ec4951b0d5-50e61009a343c8f8-00006653.png
- GAMEPLAY (512 x 512 px):
aed46bb983e3424d-4d93b3d4d2ec0ad8-0000665b.png
- WINGMAN/HANGAR (256 x 256 px):
d694da707313d6dc-18d435d578a3875f-00006213.png
- WINGMAN/GAMEPLAY (256 x 256 px)
aff716c238452867-18d435d578a3875f-0000621b.png
- WINGMAN/GAMEPLAY (128 x 128 px):
6d79aa19f97e8471-3722f272576de3f3-00005dd3.png
The reason of why some planes require an extra texture file is unknown. Just like in AC04, you can have up to three custom liveries for each aircraft available in the game. The 512x512 px filename hashes also are compatible with the planes used in the Operation Katina mode.
ACE COMBAT ZERO: THE BELKAN WAR
The steps to change liveries is the just as the same as described in the AC5 section. You can find the filename hashes for this game in the ACE COMBAT ZERO THE BELKAN FILENAME HASH LIST, all grouped by categories.
Just like in AC5 and AC04, the textures directory structure should be like this:
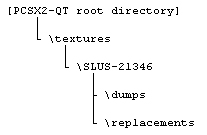
You can find the hashes for Pixy's F-15C and PJ's F-16C's wingman aircraft textures at the end of the list. The steps to change their liveries are the as same as described in the AC5 section.
One thing you must keep in mind when modding PIXY/PJ's livery for the player's aircraft is that the 512x512 px hangar texture used for the player's F-15C/F-16C model is also shared with the wingman's aircraft model. For example, if you have modded the PIXY COLOR livery, when the camera changes its focus to Pixy's aircraft from yours, you'll see that his aircraft will briefly show the livery you modded into the PIXY color.
Unlike AC04 and AC5, you'll need up to five/six texture packs to change all the liveries of a single aircraft.
You can keep the SLUS-20152, SLUS-20851 and SLUS-21346 folders existing at the same time inside the textures directory. PCSX2 will automatically check and load any (properly named) texture available in the replacements folder belonging to the game currently being emulated.
/// A NOTE ON USING ISO FILES WITH MODDED CONTENT
The filename hashes provided in this tutorial are compatible only with unmodified, "vanilla" ISO files. These hashes are useless if the contents of the ISOs were modified, such as GIM file injections or rebuilt from scratch (in AC5/ACZ cases).
However, if you have an ISO with aircraft mods in it you can use PCSX2's texture dump function to get your own filename hashes.
For example, let's say you have an ISO file of ACZ with the S-32 aircraft mod with a custom livery applied in it. You'll need to play the game with the texture dumping option enabled, select the S-32 in the hangar and fly a mission with it then get the filename hashes of the aircraft's textures that were dumped to the dumps folder so you can replace the S-32's livery using the obtained hashes.
Keep in mind that these custom hashes can be only used with the modded ISO file that was used to create them.
/// I'D LIKE TO CREATE MY OWN LIVERIES, ARE THERE ANY TUTORIALS AND ASSETS AVAILABLE?
Yeah. You can find then on the index pages of AC04/AC5/ACZ on ModDB.
Ace Combat 04 - Modding Tools and Tutorials Index
Ace Combat 5 - Modding Tools and Tutorials Index
Ace Combat Zero - Modding Tools and Tutorials Index
/// FILE NAMING CONVENTION
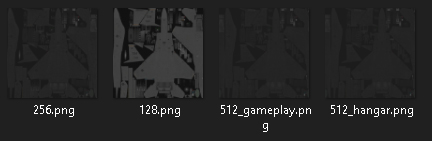
If you're planning to submit your own liveries in PNG format for use with PCSX2-qt's texture replacement option, I'd like to request you to name them in a way that will make for the user that downloaded them easy to identify them. As you've read in the tutorial, the games use various texture resolution sizes for an aircraft's livery so I thought in recommending renaming them using the resolution size of the texture as prefix and where it will be used as the suffix, something like this:
- 512_hangar.png: this 512x512 px texture will be used for the "high-poly" aircraft model in the hangar.
- 512_gameplay.png: this 512x512 px texture will be used for the "high-poly" aircraft model controlled by the player during a mission.
- 256_wingman_gameplay_hangar.png: this 256x256 px texture will be used for the "mid-poly" aircraft model in the hangar and by the wingman's aircraft model during a mission.
- 256_wingman_gameplay.png: same as above but this one will be used by specific wingman aircraft model during a mission only.
- 128_wingman_gameplay.png: this 128x128 px texture will be used exclusively by the wingman's aircraft model during a mission.
Of course you can use any other filename as long the user can identify and use the right filename hash on one of these textures.
/// DON'T FORGET ABOUT *.GIM/*.GFP FILES!
Before this tutorial was published most of the liveries provided in the AC04/AC5/ACZ ModDB pages were provided in the native texture format these games use (*.gim) as well in a packed format for custom AC5 ISO files (*.gfp).
If you are creating a custom livery and plan to submit it please consider including them in GIM format (GFP if submitting for AC5) alongside the PNG files. I've gotten reports from users that real Playstation 2 consoles can read ISO files with injected GIM files so they also requested for some liveries to be available in this format if possible. Also there are users that for some reason can't run the nightly version of PCSX2 so they are stuck with the last stable version of the emulator (1.6.0) which doesn't support texture replacement and they will have add custom textures via the GIM injection method.
/// APPLYING THE LIVERIES
The emulation requires to be stopped then started again for the emulator to load the new textures. You'll have to do this every time you drop a new livery into the replacements folder.
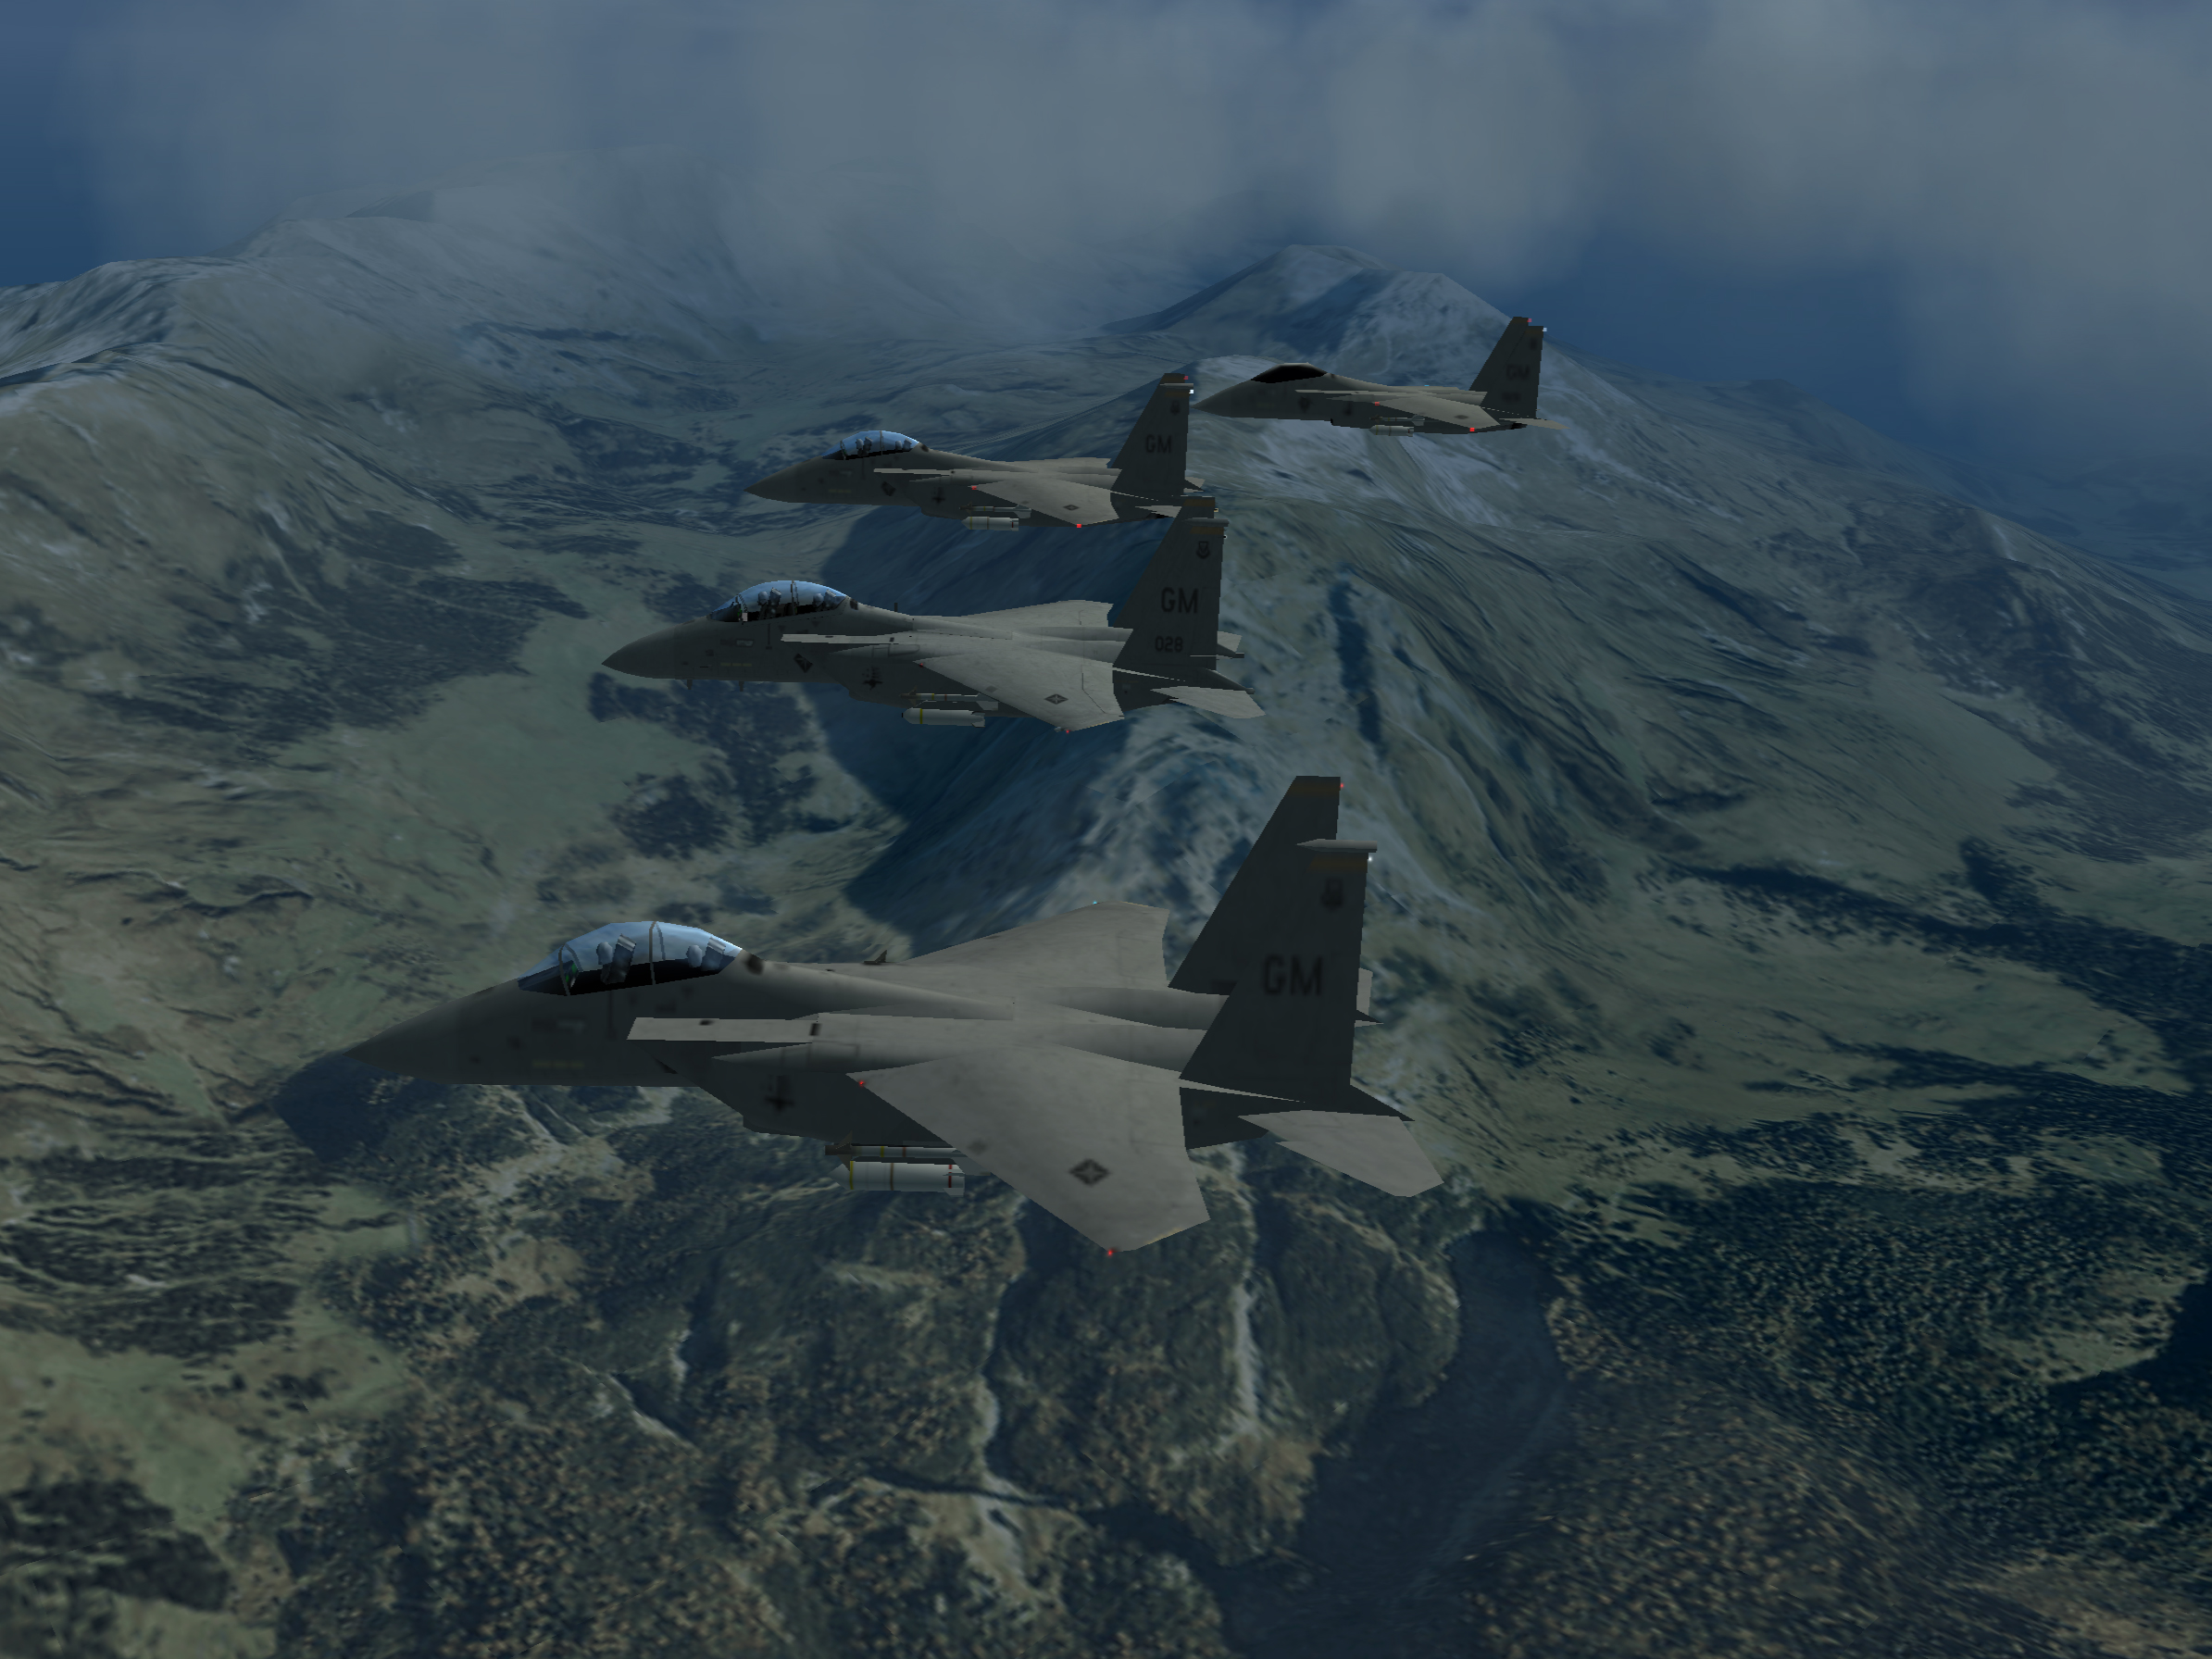
This tutorial's page thumbnail used the following liveries for the aircraft featured in it:
• F-22A -PHOENIX- from the AIR COMBAT PACK by Comebackking41
• Su-35 -SCARFACE•ONE- by BelkanLoyalist
• F-22A -ACAHL•C06- from the F-22A Raptor -GRYPHUS- pack by me (death_the_d0g)
• Eurofighter Typhoon -UPEO- by me (death_the_d0g)
Well, that's all I think. Let me know if you have trouble following this guide. Real life duties and lack of motivation can delay my replies (sometimes by a long time).
Will be also be updating the tutorial correcting wrong information, grammar mistakes or changing things as I see fit so please check this tutorial once a while.


This is awesome, never thought I'd see direct texture injection
Thank the PCSX2 dev team for finally adding the option.
Nice, and you make a wonderful tutorial thanks buddy. Finally the dev team do that!