Ace Combat 04: Shattered Skies - Texture file creation and conversion
///DESCRIPTION:
This tutorial will guide you on how to prepare your custom aircraft livery images and convert them to the texture format used by AC04.
///REQUIRED FILES AND PROGRAMS:
- Have Python 3.8.5 (or higher) installed in your computer.
- Any image editor (any is fine has long you can create multiple layers and use blending modes in it).
- Have OPTPiX iMageStudio 3 installed in your computer.
- ACE COMBAT TM2 to GIM CONVERTER script (available here).
- Custom aircraft texture to process.
- Ace Combat 04: Shattered Skies - Original texture file pack
- PCSX2 emulator.
NOTES:
- OPTPiX iMageStudio 3 is a very old tool (released in 2001) so I don't guaranteed it will work on newest Windows OSes. If the program isn't compatible with your OS, well, tough luck.
- On Windows 10 OPTPiX iMageStudio 3 might require to be run with administrative rights.
- Due to OPTPiX iMageStudio 3 being proprietary software a link to it won't be shared in this tutorial.
- This tutorial will not teach you how to design liveries. The author of this tutorial assumes that you have your custom livery ready to process.
- It goes without saying, always make a backup of your files.
For this tutorial I will be using Adobe Photoshop CS6. The image modifications used in this tutorial don't use Photoshop-exclusive effects/actions (although some layer blending options might have different names between applications) so I believe that your image editor of choice should be more than enough.
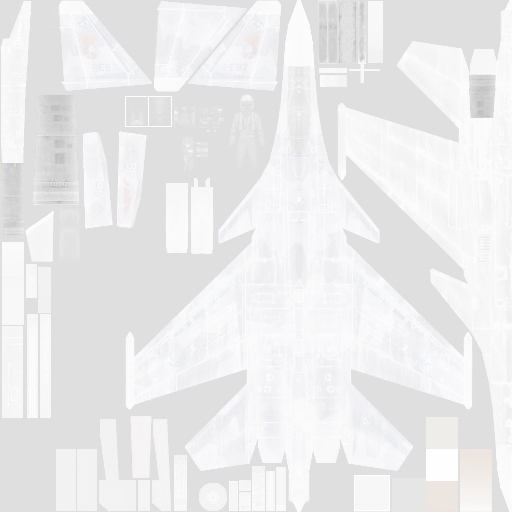
I'll be also using BelkanLoyalist's -SCARFACE- livery for the Su-35 (available here) as an example for this tutorial too, but you can use your custom livery if you want.
Before starting, your custom livery image must use a resolution of 512x512 pixels because AC04 uses these image dimensions for the textures used by the player-controlled aircraft.
///PART 1: PREPARING OUR CUSTOM LIVERY TEXTURE
Open your custom livery then open one of the reflection maps found in the folder of aircraft that you want to create a texture from (in this tutorial I'll be taking the reflection map from the Su-35 Super Flanker subfolder, located in the Ace Combat 04: Shattered Skies - Original texture file pack folder). The reflection maps can be identified by their [aircraft name]_[color]_REFLECTION_MAP naming pattern. They are grayscale images and are almost the same so you can use any of them.
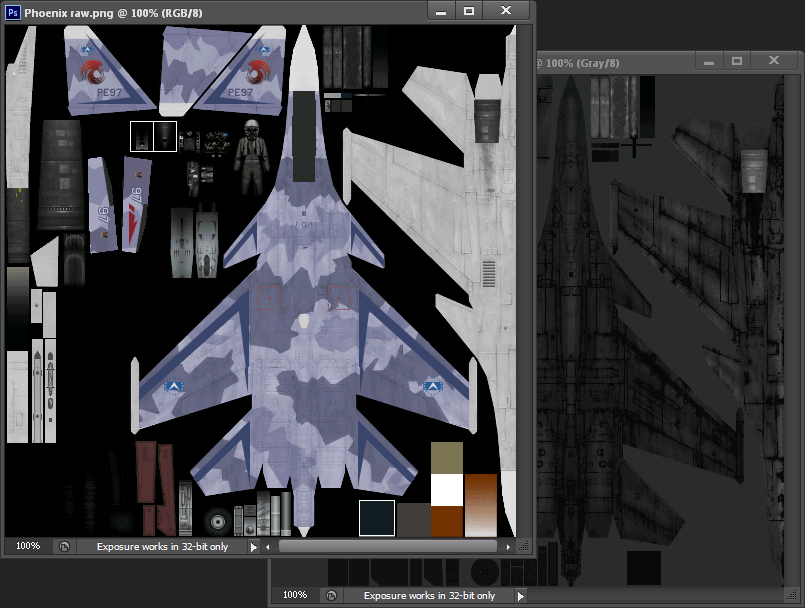
With the custom livery open in your image editor, rename its layer to BASE TEXTURE and create a new layer above it, rename it as SOLID COLOR then with the Paint Bucket Tool fill it with the color #010101. Set this layer's blending mode to LIGHTER COLOR (or the equivalent of your image editor).
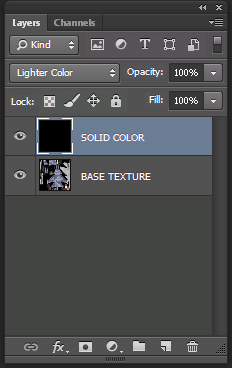
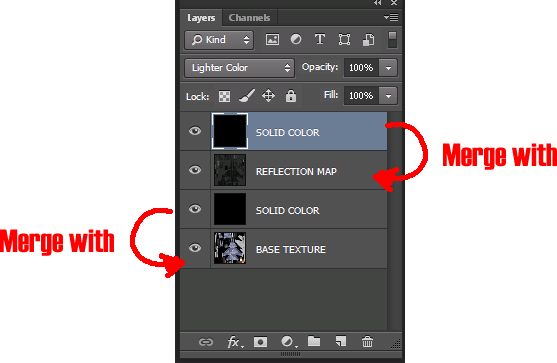
Create a new layer above the one filled with the solid color and rename it REFLECTION MAP. Copy the reflection map that you opened previously and paste it on this layer. Clone the layer with the #010101 color value above then set its blending mode to LIGHTER COLOR. You should have now four layers: the base texture, its reflection map and two solid color layers sorted in the following order:
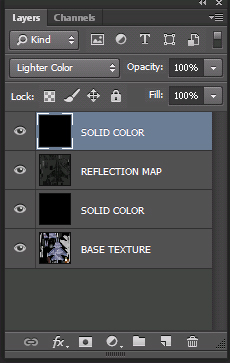
The SOLID COLOR's layers blending mode must be set to LIGHTER COLOR (or the equivalent of your image editor)
Merge the solid color layers with the ones that are below them:
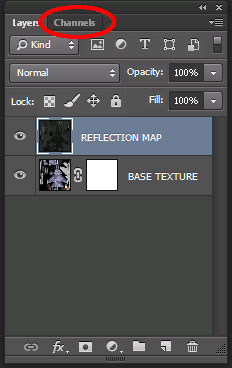
Select the BASE TEXTURE layer and create a layer mask/vector mask/alpha channel from it:

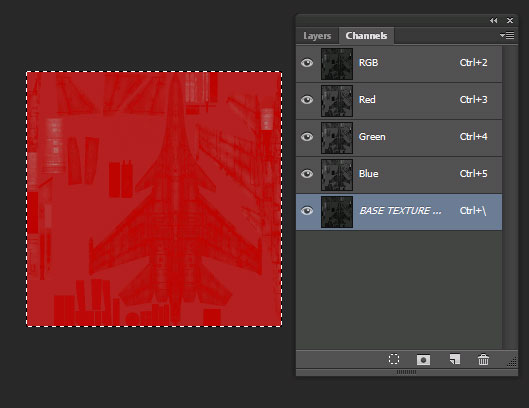
Select the REFLECTION MAP layer and copy it. Switch to the layer mask in the CHANNELS tab and paste it there.
Switch back to the LAYERS tab, right-click on the little clip between the BASE TEXTURE layer and its layer mask and select APPLY LAYER MASK.
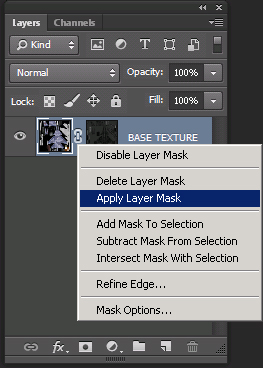
The final result will be a semi-transparent image:
Delete or make invisible the REFLECTION MAP layer and save the image as a transparent PNG file. The project we opened in Photoshop is not longer needed so you can close it without saving it.
Note:
Latest versions of PCSX2 can now replace directly game textures with a PNG file equivalent (similar to what PPSSPP does). You can read the tutorial here.
If you're creating custom liveries to submit, you could stop here but there are users that play the game in real hardware or use an older version of PCSX2 and they have requested the custom liveries to be added as a GIM file if possible.
Please consider continuing the tutorial so you can get a GIM file to include with the PNG files when submitting your custom livery. Thanks!
///PART 2: IMAGE CONVERSION
From PNG to TM2
Run OPTPiX iMageStudio 3 and open (or drag into it) the image we previously saved:
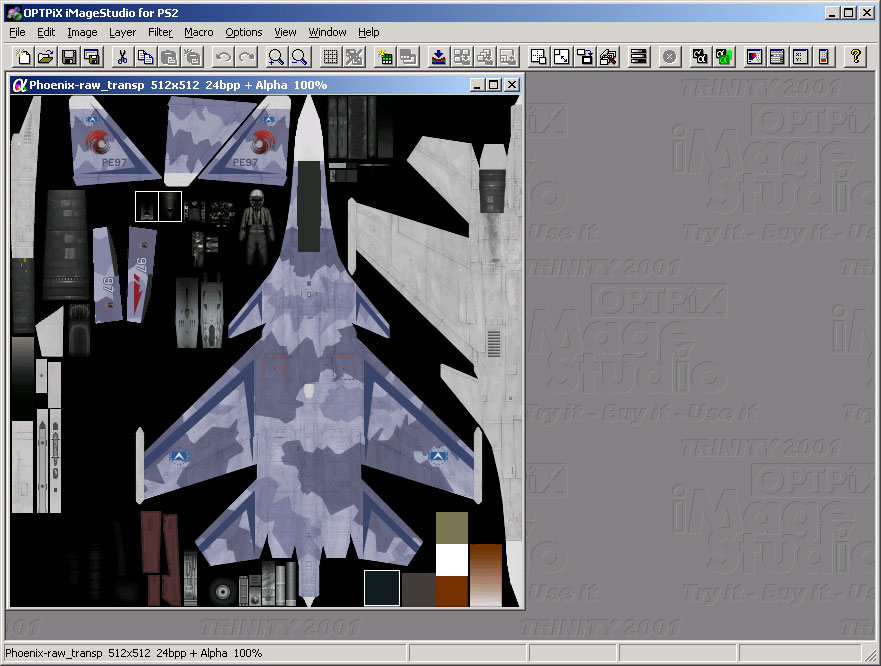
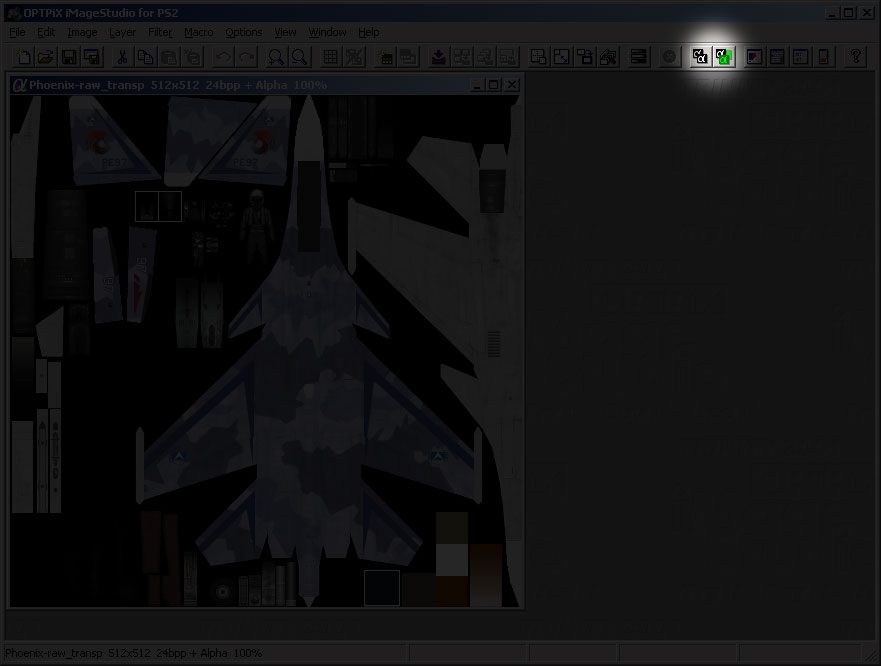
You'll see that the image will be shown as a "flat" image instead of transparent but don't worry, the transparency is still there. Click on any these two buttons and the program will show the image with the alpha channel applied (right button) or just the alpha channel only (left button).
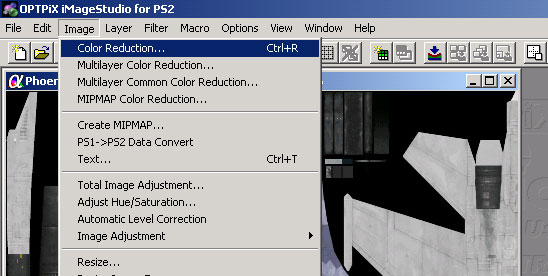
Go to the menu bar and click on IMAGE. Select the COLOR REDUCTION (CTRL+R) option:
A new window will pop up:
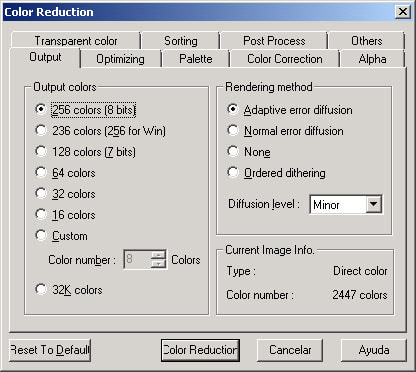
Configure the settings in yours to match the the ones in picture shown above. Now on the same window click on the ALPHA tab:
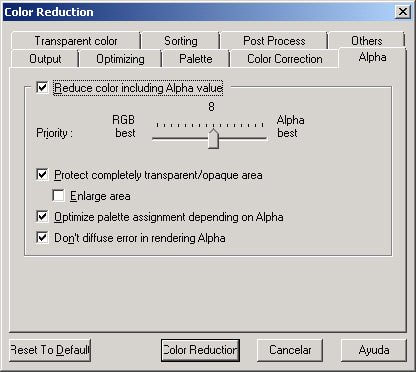
Configure your settings so it matches with the ones in picture shown above too. Click on the COLOR REDUCTION BUTTON then FINISH. A new window will be opened containing our livery with the reduced color palette in front of the original PNG one which you can close, by the way.
Save this new image by clicking the SAVE AS button on the tool bar (the icon has a image of a diskette on it) or just hit CTRL + SHIFT + S. Give the file a name and a saving location. In the TYPE field select TIM2 FILE (*.TIM2) and click OK.
One last window will pop up, the FILE SAVING OPTION window. You'll be asked to set the attributes of the TM2 we're saving so configure yours to match the settings to the ones shown in the picture below:
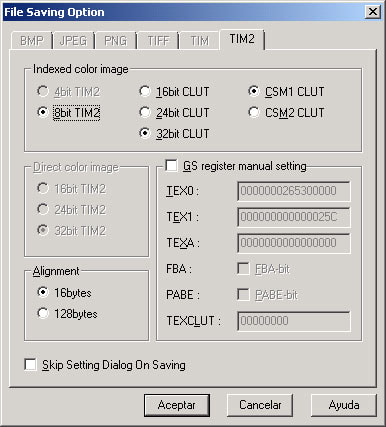
Click ACCEPT and the TM2 file will be saved to the specified location.
From TM2 to GIM
Go to the TM2 to GIM folder, copy or move the TM2 file we saved to the TM2_IN folder then run the ACE COMBAT TM2 to GIM converter script. Once it is done processing the archives in the TM2_IN folder the converted files will be placed in the GIM_OUT folder.
You can delete the TM2 files in the TM2_IN folder if you want.
///PART 3: LIVERY INJECTION
Copy the GIM files that you copied from the GIM_OUT folder and follow this tutorial.
///ADDEMDUM:
RESERVED COLOR VALUES
AC04's 3D rendering engine reserves the values #000000 and #FFFFFF for other things so saving our texture file with these colors in its palette will cause graphic glitches on the plane and in some extreme cases, game crashes.
The pictures posted above are from Ace Combat Zero: the Belkan War, but they perfectly show the same graphic issues you might experience if you export your texture files containing the reserved color values and inject them to AC04.
To avoid these issues we created a layer on top of the BASE TEXTURE and filled it with the #010101 color value, then changed its blending mode so it affects the colors of the BASE TEXTURE when applied/merged with it, modifying its color palette by "neutralizing" the reserved values it might contain (i.e #000000 will become #010101 and #FFFFFF will become #FEFEFE or something like that).
REFLECTION MAPS AND YOU
In computer graphics a reflection map is a type of map that will define how much from a precomputed texture/material will be "reflected" on a given object. Ace Combat 04's rendering engine uses the alpha channel of a player-controlled aircraft texture file as a reflection map.
In order to simulate the shine of an aircraft's metallic fuselage (aswell other parts) the rendering engine will apply the environment map on the aircraft model and the reflection map will define which sections of the aircraft will reflect said environment map aswell how much of it will be reflected, based on the color pixel values of the reflection map.
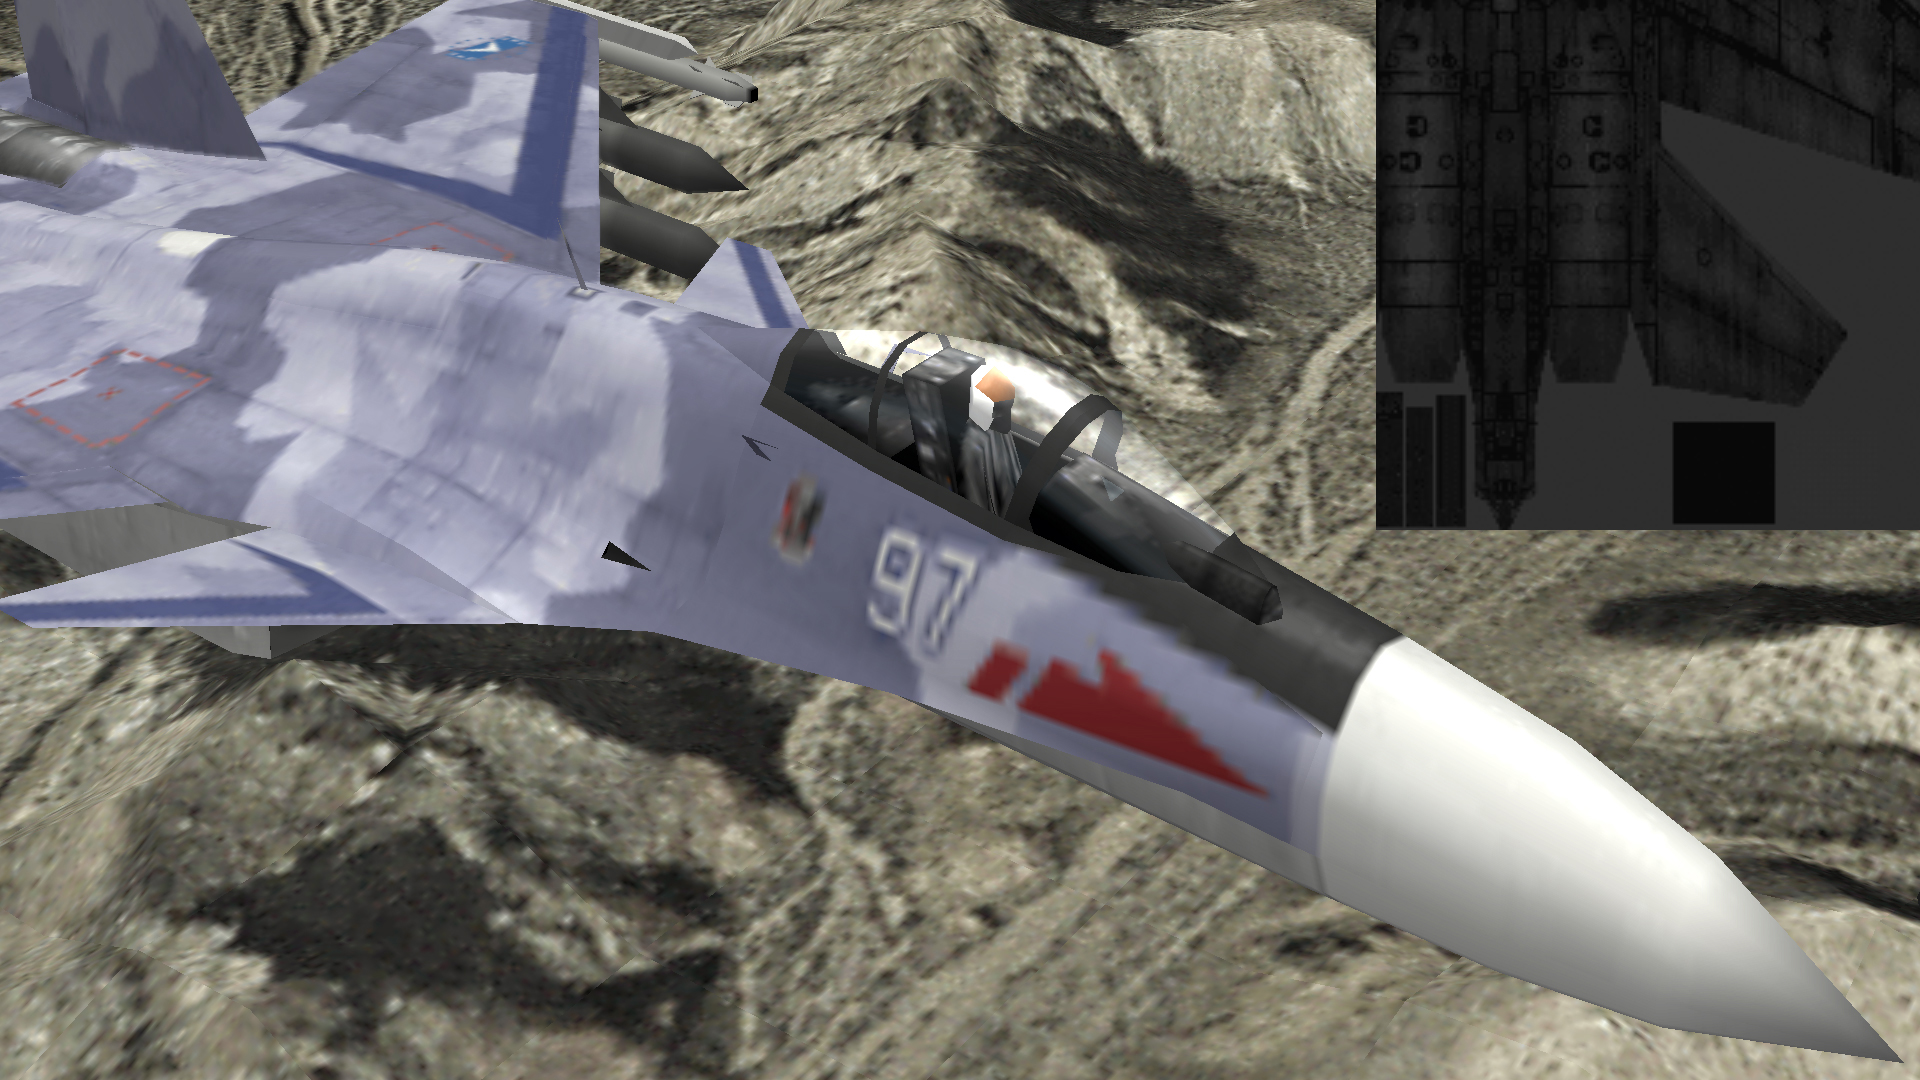
Let's look at an example.
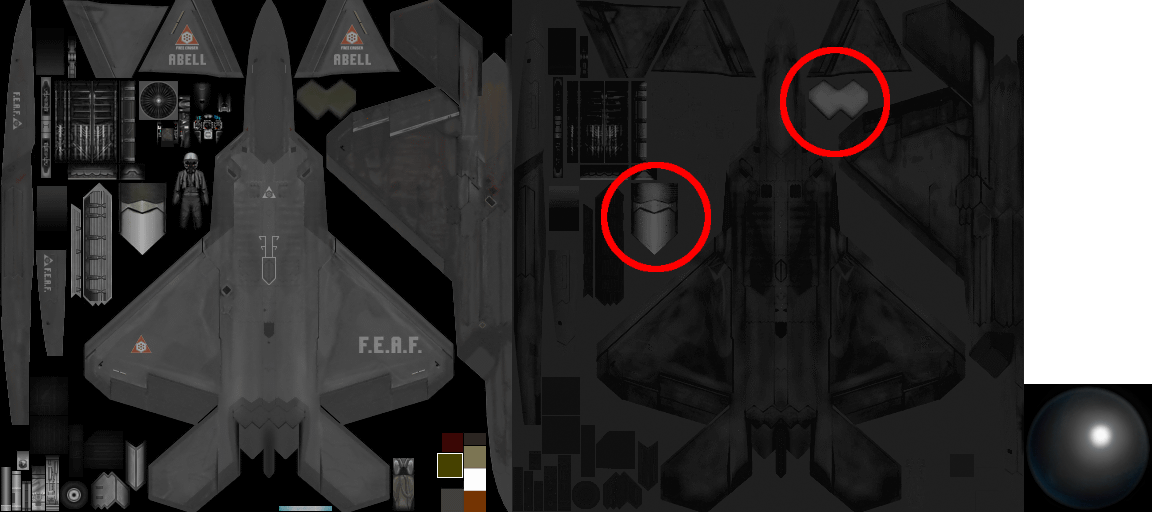
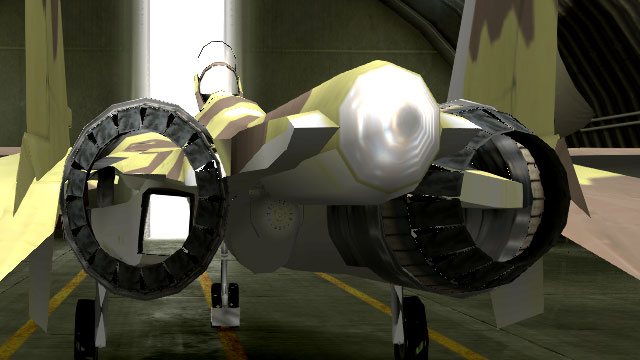
The image on the left is the Raptor's F.E.A.F livery texture and the center picture is its reflection map. The small square texture on the right is the environment map used in the Stonehenge stage. As you can see in the picture of the reflection map most of the aircraft fuselage is a bit obscured but the area of the nozzles (circled in red) is a bit brighter than the rest of the map. So when rendered, the brighter parts of the reflection map will reflect the stage's environment map and create the shine effect that is seen on the aircraft's fuselage and nozzle during gameplay.
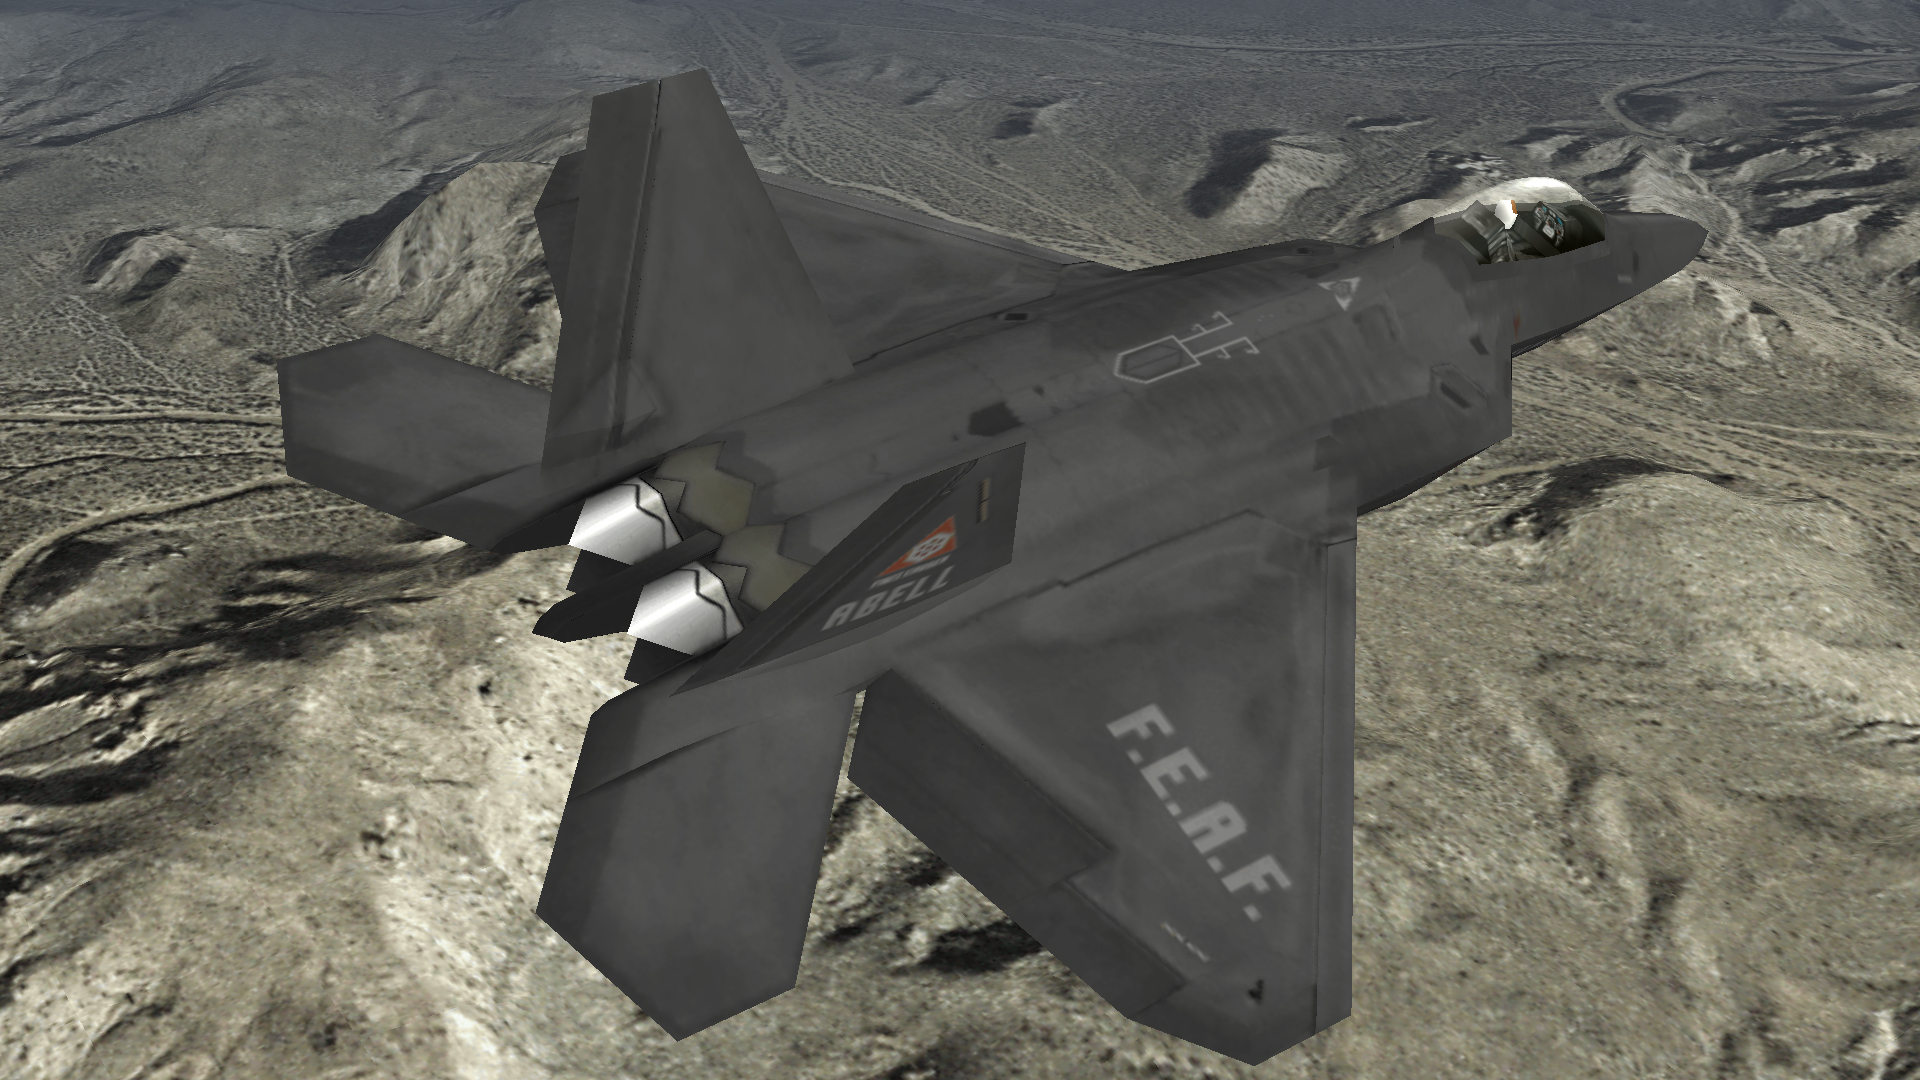
Notice how the nozzle area shines a lot more that the rest of the aircraft? Like I have pointed out, the reflection map of the erusean F-22 livery has parts that are brighter than the rest, causing said parts to reflect the stage's environment map a lot more than other sections of plane's surface.
If you are editing a livery you can edit this reflection map to define which sections of the livery/aircraft will reflect the environment map and how much of it will be reflected by painting the selected sections with a brighter shade of gray (if you want to increase the reflection) or a darker one (if you want to reduce it). Keep in mind that the issue with the reserved color values also apply here.

In the example shown above the F-22's reflection map had its levels greatly increased to demostrate that modifying an aircraft's reflection map is possible.
EDITING AN AIRCRAFT'S CANOPY GLASS AND TINT COLOR
Every aircraft texture has a small square with a solid color in it enclosed by white borders:

This small square defines the color tint of the aircraft's canopy. Just paint the area inside the white borders to change the canopy's tint color.
This small square is also found in the aircraft texture's alpha channel/reflection map and it defines the opacity of the canopy glass. Painting the small square area with a brighter shade of gray will increase the opacity of the canopy while painting with a darker one will reduce it.
Again, avoid using the reserved color values when painting these areas.
And this cocludes the Texture file creation and conversion tutorial. For any correction, question or feedback you might have feel free to contact me through my ModDB profile.
Special thanks to BelkanLoyalist for his -SCARFACE- livery for the Su-35.