Recently i have decided to put more perspective in prehistoric part of our game, since we received much better feedback from users on that particular area.
In middle of development i have almost dropped dinosaur production part, but i have discovered that players would be more interested in prehistoric than todays oceans.
With all said and done i will be expanding prehistoric part of game step by step. I am not yet sure how long will whole game development be extended and i will try not to extend it longer as it was predicted.
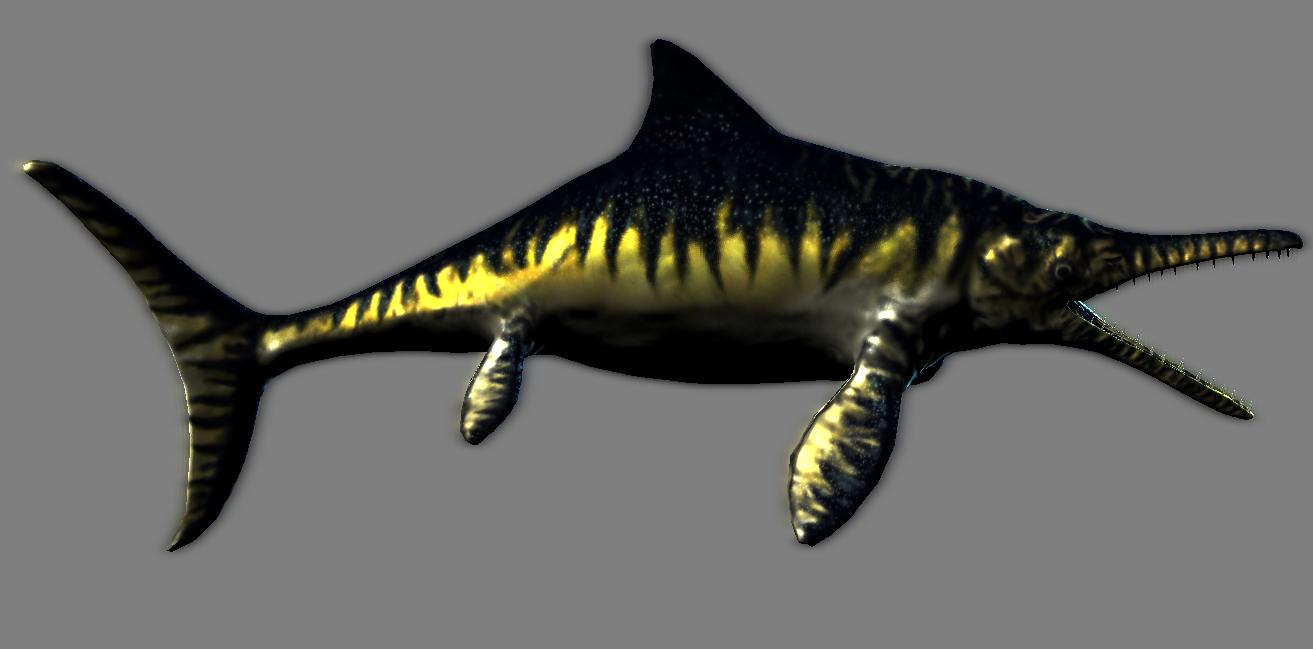
Here is render of second prehistoric creature that has been done for our game. This is still work in progress model, as it needs texture adjustments and color corrections.
This is my second Zbrush model with polypaint pipeline.

For those who are interested in pipeline here is my step by step described pipeline for asset creation with Zbrush:
#Pipeline#
Zbrush part:
1.First i start with creating basic model with Zspheres.
2. When basic Zsphere layout of model is done i press A and convert model to PolyMesh. With that step completed we can start sculpting model.
3. Sudbividing model few times and sculpting it until i am satisfied with results. I preffer to work with models arround 1 milion polygons, becouse i am working on laptop and due to texture requirements which do not exceed 1024x1024 pixels.
4. When sculpting is done i start with polypainting. To start polypainting i press Colorize under Polypaint menu in right toolbar. Material should be changed from MatCapRed to FastShader for cleaner paiting.
5. When polypainting is finished i am steping down to lowest subdivision. Then i create GUV tiles under UVmap menu. Then i bring model back to highest subdivision.
6. Under texture map menu i click on Texture from Polypaint. This puts polypaint color with GUV tiles on texture map. Then click on Clone texture under Texture map menu.
7. Under Texture menu on upper toolbar i click Flip Texture V. Now you are ready to export texture.
8. Next step is to export model with polypaint applied on. Simply export your sculpted and polypainted model under highest subdivision. After this is done i export model once more on subdivision with 100k polygons and without polypaint applied on.
3d coat part:
9.Import exported NON-polypainted model from Zbrush to begin with retopology part. To anyone new with topology procedures i would extremely suggest 3d coat, since i believe it has best retopology tools you can get.
10. When topology is complete i export retopologised model and unwrap it in software (in my case this is done in 3d coat too).
Xnormal part;
11. I set up high poly model with exported base texture from ZBrush and low poly model in Xnormal.
12. Bake all textures from Xnormal and if needed correct them in Photoshop.
This is my pipeline on organic asset creation for this game. If you have any questions feel free to ask them.


great Opthalmosaurus. :) very great tutorial on how you did it i hope all the designing is well and good luck :)
Cool!
Nice work! I just hope the prehistoric part doesn't overshadow the rest of the game. I'd like to swim in today's oceans, too!