Sundered Land: A Guide to the Reunited Kingdom
Playing the Reunited Kingdom is a game of long-term defense. At the beginning of the campaign, you struggle to defend your heartlands. After a little expansion, you must defend your new conquests. Unlike other factions that can - and should - keep up offensive pressure more or less constantly, the RK must do a lot with what feels like not enough, and conquer in a methodical fashion, with the aim of holding onto any new territory.
Fortunately, the RK can excel in its defensive endeavors. Its troops - especially its infantry - are among the best in the game at holding a line of battle. Its bowmen and powerful siege engines allow it to rain death upon approaching foes. And the terrain, especially in the southern theatre, works in the Kingdom's favor thanks to many river crossings, mountain passes, and other choke points.
Development of your settlements and deployment of your troops is also rather straightforward. Specialization Buildings range from the financial (Terracing, Royal Mint) to administrative (King's Court) to military (Guild of Venturers, Guild of Weaponsmiths, Ranger Holds, and Eorling Horse Traders). There are few surprises here; build where you can get the most advantage - though it may be some time before you feel secure enough to spend money on expensive, high-tier buildings rather than more troops.
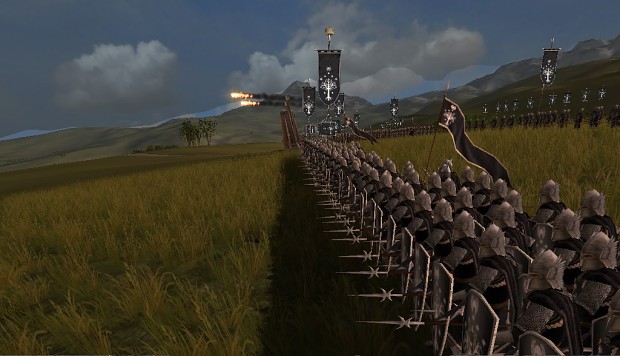
In battle, a standard 2- or 3-line formation is often sufficient. The game often deploys your archers behind your infantry, which is a good place for them if the enemy fields cavalry. But whittling down the enemy before they reach your lines is perhaps less important for the RK than for factions with more fragile infantry. Your foot soldiers are among the best in Middle-earth, so you needn't shy from a general melee clash.
In campaign, it's best to think of the RK as having four separate fronts. One is in the North, where the presence of the Cult is arguably the strongest. 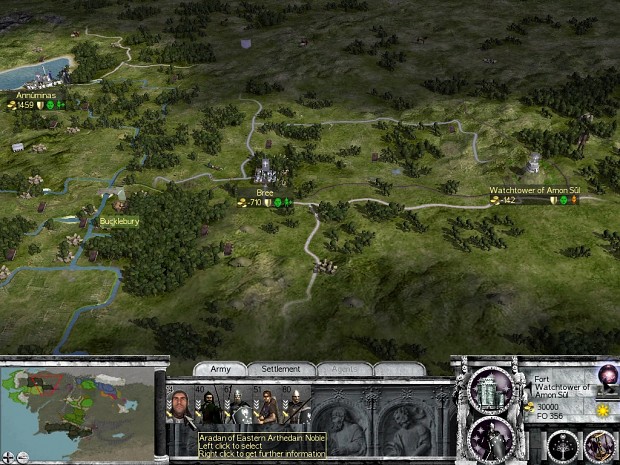
Your settlements here are strung out on a west-to-east line from Lake Evendim to the lonely sentinel of Amon Sul. At first, your only serious troop production is in Annuminas, though you must take care to avoid over-recruiting here and stripping the province of its population. Make each unit count, in other words: train smaller units with higher defense (e.g., Swordsmen over Militia), or units that are likely to cause the most damage while remaining relatively safe themselves (such as Bowmen). Bree can be tasked with providing Militia and eventually some higher-level troops, although Bree should be dedicated to a Financial Policy thanks to the high-value Pipe-weed resource found here. The other "settlement", at Weathertop, is a permanent fort, which provides no recruitment, although it can (and should) be used to retrain the local bowmen mercenaries you'll want to hire whenever they are available.
The good news about the northern front is that you have several allies and trade partners in the region. The Shire, the Elves, and the Dwarves will remain faithful friends throughout the campaign. The threat - Adunabar - will come mainly from the east. You have very little time, however, to gather forces and begin to challenge them.
Adunabar's forces in the North consist of many Orkish units, as well as strong Cultic troops - even several companies of Hill-trolls. Your own soldiers are a good match for these enemies, but over the course of many battles they will be gradually worn down, and Adunabar has lots of bodies to throw at you. So you must seize some initiative if you hope to outlast them.
My first move is usually to take the general (Aradan) out of Amon Sul, leaving a single unit of Militia in the fort. Aradan leads a unit of Grey Company - mounted rangers, who use bow and sword from horseback - and makes a fine field commander. I send him toward Bree and Annuminas with the goal of gathering a large army and hitting Adunabar wherever they are weak.
The first target for Adunabar will likely be Fornost, just east of Annuminas. Fornost is independent at the beginning of the campaign, and Adunabar will attempt to make it theirs. Let them. Train some soldiers with an eye to taking Fornost for yourself as soon as Adunabar ends its seige, whether as victor or defeated. The high stone walls of Fornost will allow you to hold off a few assaults, and free up some of the pressure on your other cities.
Bree will also come under siege soon enough. Because Adunabar initially holds Threeways, to the south of Bree, you may want to keep a reasonable garrison of 3-4 Militia along with your governor in order to support a relief force. But because of the relatively distant settlements in Arnor, much of the fighting here will consist of rushing your field army from one threat or opportunity to the next. Unlike the war in the South, you will often be unable to hold settlements you have taken from the enemy. You may strike at a crucial settlement like Lastbridge, only to be obliged to burn it down and withdraw back to Fornost to counter an approaching army. This type of grim warfare is a feature of the northern conflict, where you are constantly forced to hold out against much larger numbers. If you can manage it, the rewards are great, for in Arnor you may train some unique ranger units - but it will take many years of fighting before you will feel secure enough to do so.
Although the victory conditions for the RK only require you to take Fornost in the North, the reality is that you must push Adunabar back into the mountains if you want any respite. Their most important settlements are east of Amon Sul; taking these will be a severe blow. (Gifting some of these settlements - such as Rivendell and Lastbridge - to the Elves can also make a useful buffer against factions east of the Misty Mountains.) But it is likely you will have to push farther, into the old realm of Angmar, before the pressure is off. Note that Threeways borders Tharbad. Taking that settlement too soon may invite an attack from these rival Dunedain. Be sure that, when you take it, you are prepared for war with Tharbad itself.
Given the low population and scarcity of infrastructure in the North, you may want to reinforce your heroic captains with fresh troops from the much more populous southern realm. But here, geography conspires to thwart you: the only options for such reinforcement are via a long ship route, or an almost-as-long march overland, through territory held by Dunland and likely Tharbad. And often, your soldiers are needed in the South.
But if you can afford it, a ship passage is probably safer, provided you can avoid or defeat any Haradrian vessels lurking along the coasts of Gondor. You could land your troops southwest of Tharbad, with the intention of marching on Threeways, or at the Grey Havens, from which they can quickly reach Annuminas. On the other hand, a land route allows you to bring a more modest force with the aim of hiring mercenaries along the way. Gather a core of well-armored elites - lancer cavalry such as Dol Amroth Men-at-Arms, special infantry like Mariners, and solid archers like King's Longbowmen or Blackroot Vale Bowmen - and march them west toward Thoronburg Keep. From here, they will march northeast toward Orthanc, then north through Dunland to the Swanfleet crossing, which allows them to come upon Rivendell unexpectedly.
The South comprises 3 major areas of conflict. The quietest front is to the west.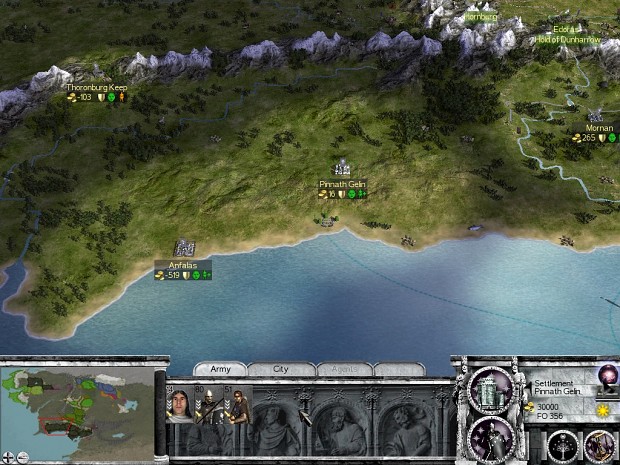
Here you will eventually face the Dunlendings. I like to gather a poor governor and some assorted troops, and leave them in Thoronburg Keep, which tends to be a target for Dunland after a few turns. You have some time, since Erindol to the north is initially independent, but it is likely to come under Dunland's sway fairly early. Fortunately, Dunland's warriors are poorly armed. Some archers atop the walls and your strong infantry will hold off a large host handily - especially if you have some riders to disrupt their approaching siege ladders.
Dunland is not a serious threat for some time, and their lands are not necessary for victory, so you may be tempted to ignore them. That, however, would be a mistake. If Dunland manages to expand into Rohan, they will simply overwhelm you with numbers. Note that your western provinces themselves are not very well developed - if Dunland takes Thoronburg (or passes around the mountains to the west) and breaks into these lands, you may well lose some territory. It is worth it, then, to periodically increase your garrison at Thoronburg with the intention of sending a punitive expedition against the Dunlendings. Smash Erindol, take Dunfreca (and gift it to Rohan), clear out the enemy armies and return home. The goal is for such expeditions to grant some initiative to your ally, so they will in turn keep the Dunlendings off your back.
Before you are free to deal with Dunland, however, you'll have to face more pressing problems. One of these is the Empire of Harad.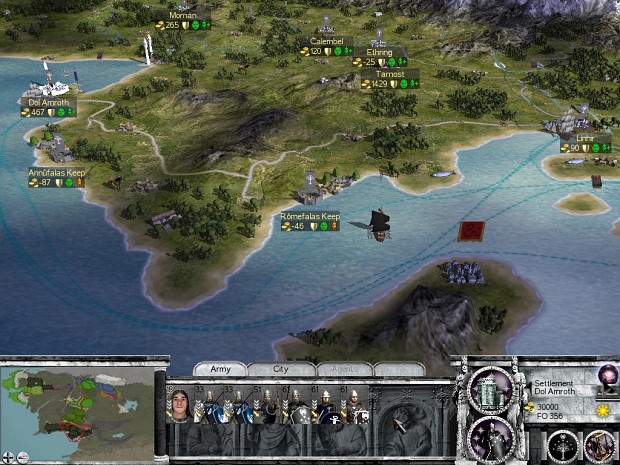
Your coastal fiefs will be pressured by Corsair fleets, which blockade your ports and disgorge crimson-garbed soldiers to besiege crucial settlements like Dol Amroth. While you can hold off these raids easily enough, over time they can become more than a nuisance. Examine the upkeep costs of those units that start in Dol Amroth and you'll see that it costs you thousands of mirian per turn to keep them there - yet you must maintain some force to push the Southrons off your shores. 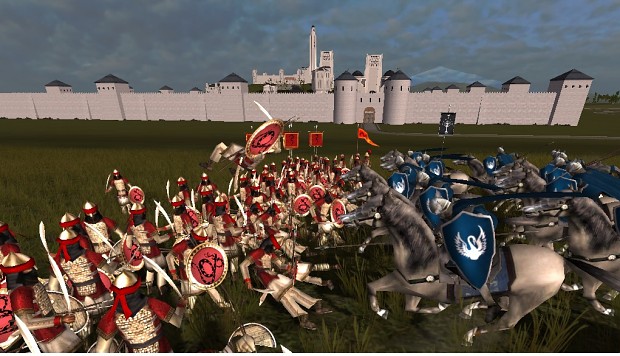
Above: Men at Arms of Dol Amroth crush a company of swordsmen before the city walls.
Or, you can let the diplomats do your fighting. The RK is in an excellent position to leverage diplomacy against its Haradrian rivals. Send a dedicated Emissary to both Harad and Harondor. Harad will often pay you handsomely for a ceasefire. This can come in the form of tribute (a few thousand mirian for several turns) or a single big payment. It's probably best to make such demands *after* you have driven any Haradrian armies off your shores, but negotiating a ceasefire will also end any sieges you may be suffering in Dol Amroth - and get you some much-needed coin in the bargain. Don't be too proud to trade with Harad during peacetime, either; your merchants will send trade routes to their coastal cities. Harad will break the truces you negotiate after a few turns, but that just allows you to wring more concessions from them later.
As for Harondor, you want at least trade rights with them. You will also use your Emissary to fan the flames of war between the Haradrian factions. Harad is likely to come into conflict with its neighbors very quickly, and you want to keep that conflict going as long as you can. If Harad conquers Harondor, it will gain tremendous wealth, and use its newfound riches to send stack after stack against you in Ithilien. So you must fund Harondor's war with the Empire. Demand that they attack Harad, and offer them 2-3,000 mirian in exchange. The AI seems to adhere to such agreements, even if it is as simple as blockading a port - but it's worth it to keep Harondor occupied with Harad, and vice versa.
Note here that the island of Tolfalas becomes a target for Harondor. If you take it, you'll soon find yourself at war with *both* factions, which will hurt your trade immensely. So stay off the island, or consider gifting it to Harondor. The same logic applies to Emyn Arnen. This settlement shares a border with Harondor, so taking it may incite them to attack. To that end, I let Adunabar hold Emyn Arnen for a few years, while I take back North Ithilien and Mordor.
Keep spies stationed in Harad and Harondor to monitor the war. If Harad begins to conquer north of the Harnen river, the time is right to intervene militarily. It may be time to acquire an alliance (and military access) with Harondor, and aid them in their defense. Or, you may simply sail a strong army to Umbar, and deny those rich and productive cities to Harad. Either way, ensuring that you are able to trade with the Harondor provinces is very useful for your precarious economic situation.
Because most of your funds will be spent on the eastern front - the main theatre of your war with Adunabar.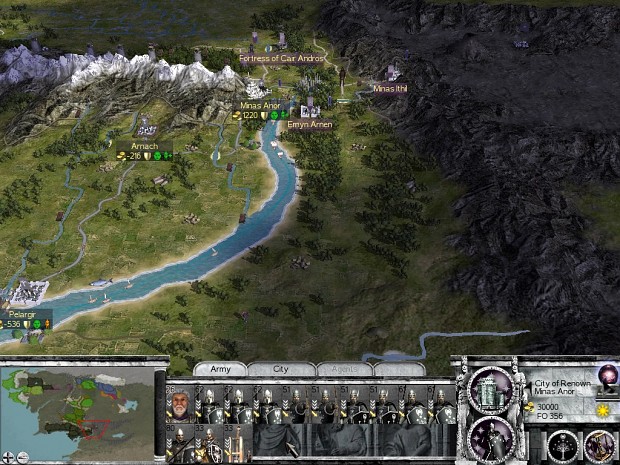
The forces both you and Adunabar can bring to bear around Ithilien are evenly matched at first, so you must take care not to take too many casualties in the initial battles. If you do, you will exhaust your momentum and discover that Adunabar's rich Nurn provinces in eastern Mordor are capable of producing lots of troops to overwhelm you.
In the first turn, assemble all troops that can reach Minas Anor under your king, and prepare to send them against Adunabar. You may leave a token unit of Militia as garrison in Minas Anor, but be sure to bring along the 3 Company of the Guard units. These are your best troops, and will see a great deal of fighting in these early years. While you cannot train them (ever) or retrain them to refresh their numbers (yet), don't be hesitant to use them as your front line. Their high defense allows them to take on more of the foe than your other soldiers, while at the same time preserving your army for later battles.
Another crucial unit is the Citadel Catapults you begin with. Turn them to fire at will and use flaming ammo in field battles - the range and devastation of these siege machines are incredible to watch, and allow you to decimate your Cultic foes as they approach your gleaming battle line.
Lossarnach Axemen (initially found in Arnach, and trainable there eventually) should also join your king's army. Armor piercing units are always welcome in the RK ranks, since your chief enemy is almost as well armored as you. Beware that these Axemen are relatively vulnerable; I like to keep them slightly behind the Catapults, initially, and send them around the flanks once battle has been joined.
This initial army will also consist of some Men at Arms, King's Spearmen, King's Longbowmen, and assorted lower-tier units. These troops will handle themselves well, though they may need the occasional trip back to Minas Anor for retraining.
Your king's first target will be either Calenhad (northwest of Minas Anor) or Minas Ithil. Whichever one you aim for first, you should secure both cities in the first few turns. Failure to take Calenhad will allow Adunabar to attack Rohan from the east (and pounce on Minas Anor from the north). Failure to take Minas Ithil ... well, let's just say that failure isn't an option.
From here, you will want to push on and secure any forts in the region - which, thanks to your Catapults, you can assault immediately. Cirith Duath, east of Minas Ithil, will block any incursions from Mordor, while Cair Andros will help shield your heartlands from the north.
The forts located along the mountains of Mordor provide Orkish troops for Adunabar. Taking these forts will mean never having to face such troops in the South. Arguably the greater threat, however, comes from the provinces farther east, especially Adunabar's initial capital, Lond Nurnen. These fertile lands support much of the manpower of the Cult; it is from here that Adunabar will send its Swords of the Shadow and other high-tier soldiers.
If you have been playing your battles carefully and minimizing casualties, you may have a strong enough army to push into Nurn. I, however, find that my troops need reinforcements before I am able to continue the eastward march. Take Seregon if you can, then consolidate, train, and reinforce. After taking just a few more settlements, you will have dealt a permanent blow to your rival's military.
Some final maneuvers may remain. If Adunabar managed to conquer northward, into the Brown Lands or the eastern flank of Rohan, your battle-weary hosts will have more fighting ahead of them. But by this point, you will face armies of mostly levies or lower-tier troops.
Utterly crushing Adunabar in Mordor often puts you cheek-by-jowl with the large Chiefdom of Rhun. Sometimes Rhun will want to ally with you; they may find themselves drawn into other wars along their borders, and pose little threat to your Nurn conquests. On the other hand, Rhun may be the largest, most powerful faction in the East, and looking to acquire the rich, formerly slave-worked fields of Nurn for itself. You will want to fortify your eastern borders for a potential invasion - but you will be able to make use of the several river crossings in the area to your advantage, shooting down Easterlings with your superior bowmen and cutting them to pieces with your smaller but more disciplined infantry units.
Fortunately, by the time you have taken all of Mordor back, you will be close to victory. All that remains is to continue holding your possessions, and take any remnants you may have passed over, such as Emyn Arnen or Lathron (in the Emyn Muil).
Though it begins in possession of a great number of settlements and wealthy provinces, playing as the Reunited Kingdom is anything but easy. But these descendants of Numenor are made of stern stuff. Thanks to a fantastic defensive roster, the heirs of Elendil can beat back any threat with a little caution and perseverance, and make their land whole once more.


Which difficulty setting do you recommend ?
Nice read and everything is mentioned that needs attention, liked the diplomacy and global strategy out of the box thinking.
The recommended settings for all factions in FATW is medium campaign difficulty and hard battle difficulty.
In game these are called 'Decidedly Tookish' and 'Bullroaring', respectively.