To create a transition, you need at least two textures. Textures of the same size work best.
Step 1 - Opening the two textures
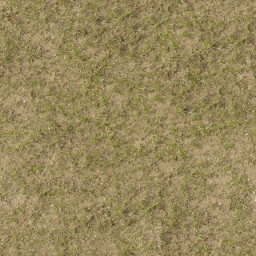
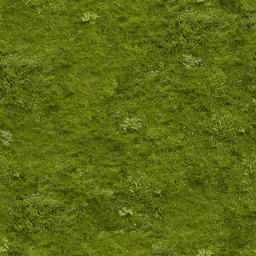
Here, we have two grass textures. Our goal is to have the dark green grass transition into the faded/dry grass. The faded grass will be our "base" image for this tutorial.
Step 2 - Cutting a region
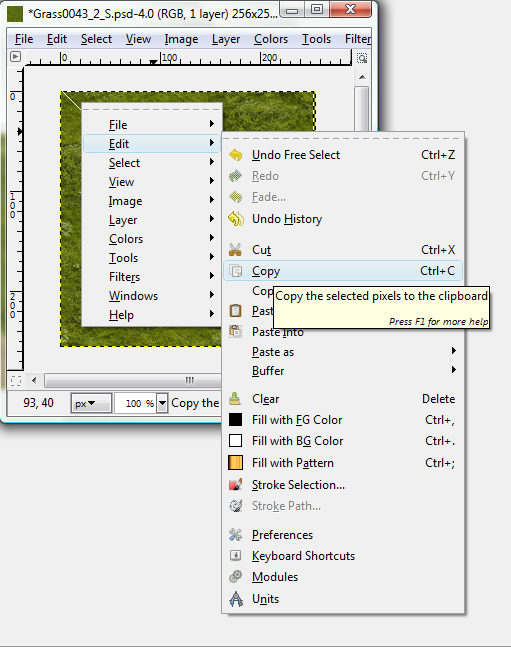
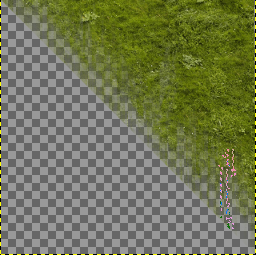
Next, we use the lasso tool. 
With this tool, we can select a triangular region from one of the textures, one in which we will then copy and paste onto the other texture.
Select a region as so: 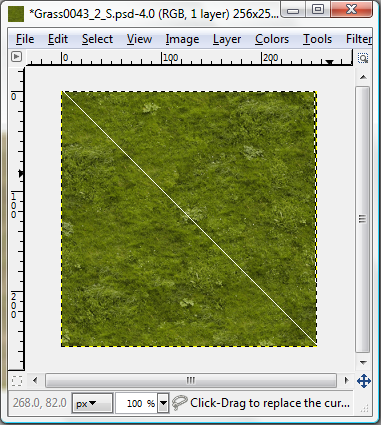
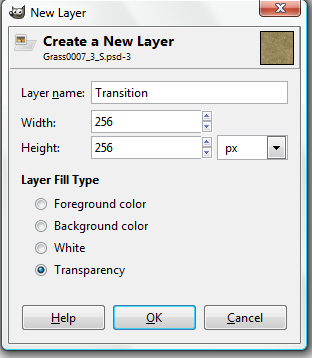
Step 3 - Creating a new layer on the base texture
Now that we have selected our region from the texture we will use as our transition; we create a new layer on the "base" image. This is so that we can edit the transition later on without messing up the base image.
Create a new layer on the base image, and name it "Transition" or whatever you want to call it.
Step 4 - Copy and pasting the transition onto the base image
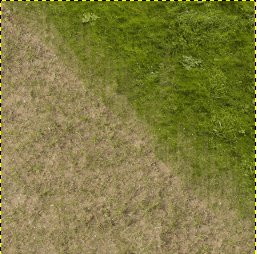
With the new layer; we can then copy and paste the selected transition region onto the base.
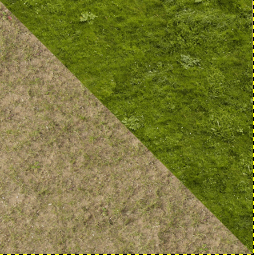
Now we have a slight look of a transition, but we are not quite done. As you can see; this looks rather sharp, and not blending into each other. It doesn't look realistic at all. Luckily, we can fix that by editing the transition.
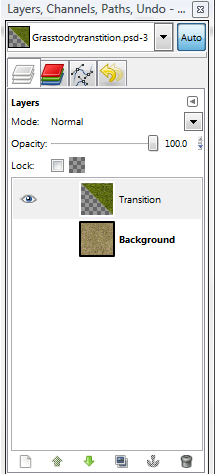
Step 5 - Opening the layer dialogue window (This is Optional)
For a better view of the transition layer you will be editing.
Go to the windows tab at top, dockable dialogues---> layers, and then open the layer window. Here we can temporarily hide the background layer to get a better view of what we are editing. by pressing the eye button next to the background layer. 
Step 6 - Setting up the eraser tool
Now that we have a good view of the transition. we can start editing. Select the eraser tool on the toolbar ( ) , and configure the properties so that they are similar to this.
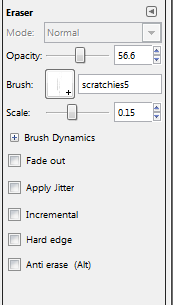
Opacity: 56.6
Scale: .15
(Or approximate values)
We do not want a too great opacity or it will erase too much of the transition. The scale must be small as well as we are dealing with a 256x256 image.
Notice the custom brushes used. These are not needed, but recommended for the purpose of this tutorial. The brushes can be downloaded here Deviantart.com (Created by: - Steve / lifebtb, original brushes by eggler)
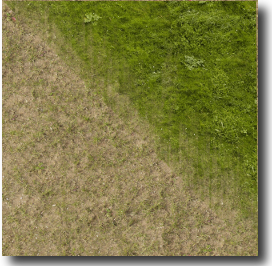
Step 7 - Applying the brush
After we have set up our eraser properties, and selected the brush; we can now apply it to the image. All we have to do is generously apply the brush to the edges of the image. We should have something like this after we're done.
Step 8 - Final Touches
We are just about done. Now all we have to do is open the layer dialogue, and click the eye icon next to the background layer. This will show you the background image, and your finished transition!
Well done.
If you want to go the extra mile; you could even blur some of the sides of the image, or add other effects if needed.
Thank you for reading, and I hope you found this tutorial useful. :)
A download link for setting up, and replicating the tutorial can be found here. Mediafire.com
There are other alternate methods you could do to obtain similar effects such as skipping steps 2 & 4, cutting a region to your own desire or just erasing from the whole image instead of a specific region. ;)

Not a bad tutorial you made here! Very simple and effective way to create textures.
Great work! :D