The source tutorial:
Msdn.microsoft.com
Tutorial steps were made quicker, so you can make this program a lot faster.
To make programs programmed in C#, first you'll need Micro$oft Visual C# 2010 Express:
Microsoft.com
Direct link:
Download.microsoft.com
After Installation
The difference between solution and project terms:
a solution can hold many projects
a project can hold many files
Projects can be compiled (made actual programs) separately.
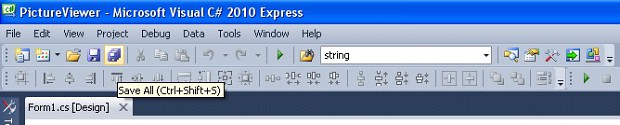
Also remember to use saving option often during this tutorial. (CTRL + S, or Save icon shown below in the picture.)
![]()
How to make a picture viewer?
1. Run Visual C# 2010
2. Select New Project, select Windows Forms Application

3. Name it PictureViewer
4. Click Save All icon to save the whole solution
5. Name and Solution Name should be e.g. PictureViewer
6. Press F5 on the keyboard to compile and run the program to see it
7. Close your program window
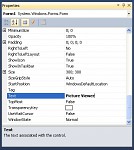
8. In C# Express, select your window/form so it's active and its properties are displayed
9. Set Text property to Picture Viewer (with a space between, it's allowed)
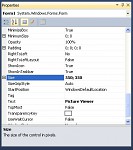
10. Set Size property to 550, 350
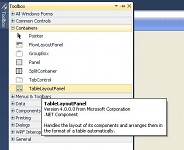
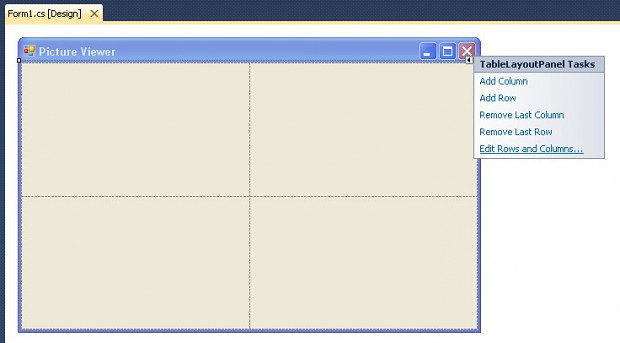
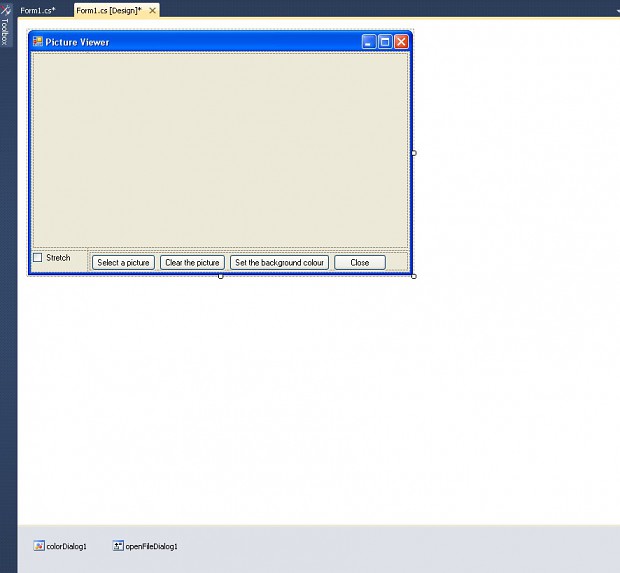
11. Choose from Toolbox a container called TableLayoutPanel, double click it.
12. Select this TableLayout Panel, so its properties (and not the main form) are displayed
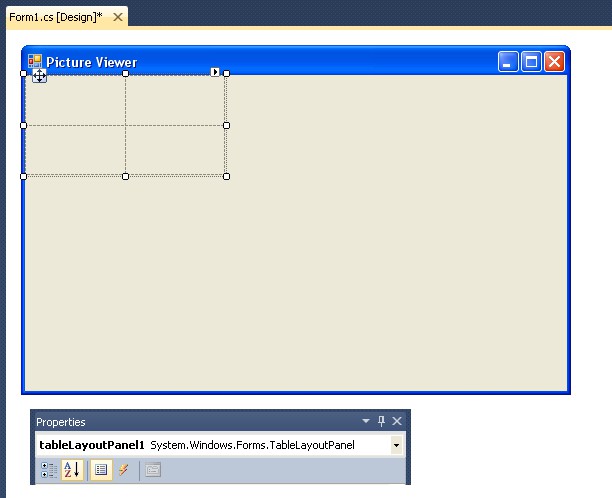
13. Select its Dock property and set it to the middle
14. Click the triangle/arrow of your TableLayoutPanel (in the upper right corner) to display TableLayoutPanel Tasks
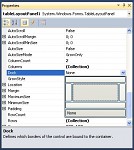
15. Select Edit Rows and Columns
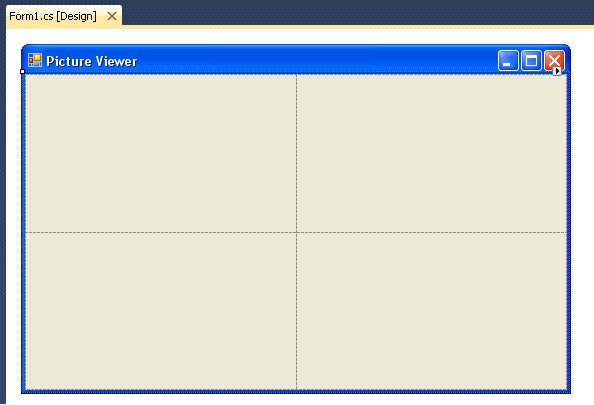
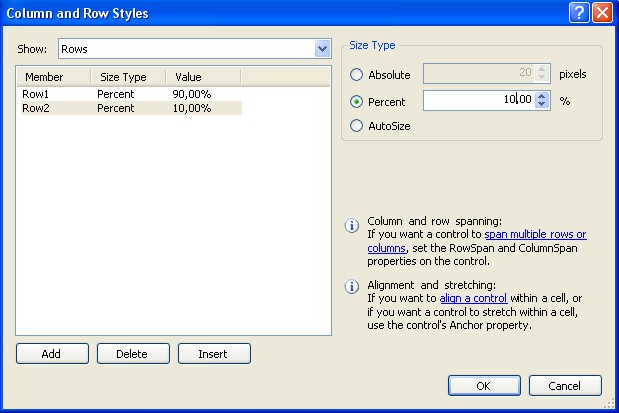
16. In Column and Row Styles set Column1 to 15%, and Column2 to 85%, then next to "Show:" choose Rows

17. Set Row1 to 90%, and Row2 to 10%, and click OK
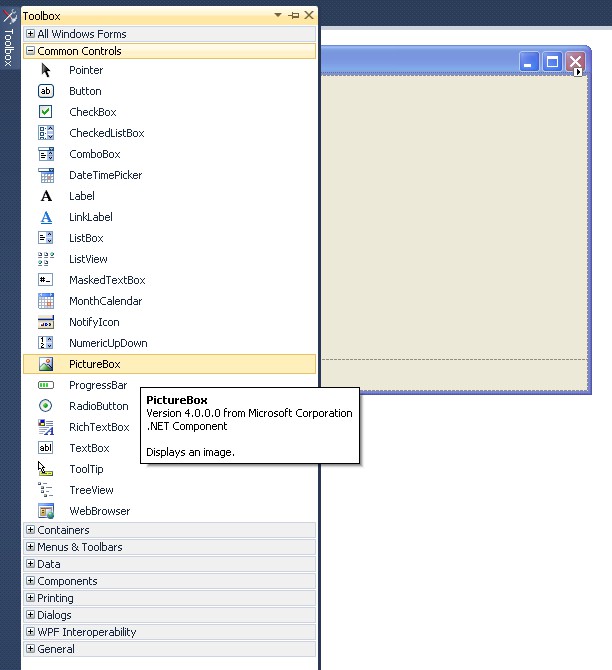
18. From Toolbox, category Common Controls, add PictureBox
19. Select PictureBox Tasks, click Dock in Parent Container
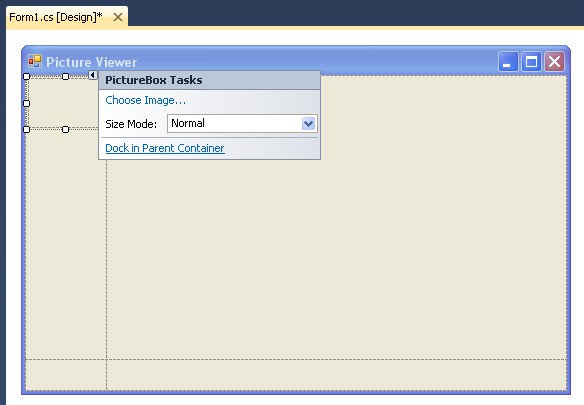
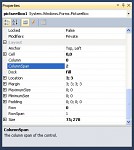
20. Change PictureBox ColumnSpan property to 2
21. Make sure TableLayoutPanel is selected, and not PictureBox in Properties
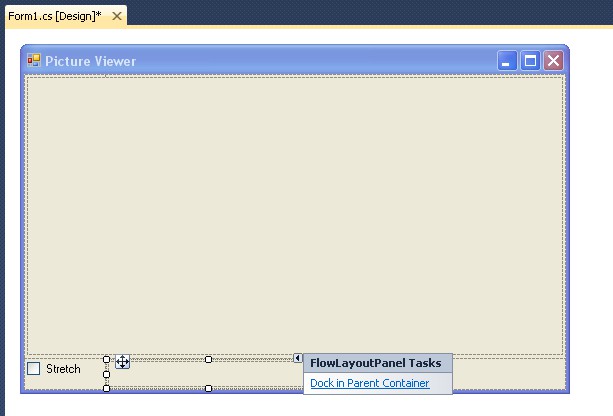
22. Add CheckBox from Common Controls/Toolbox
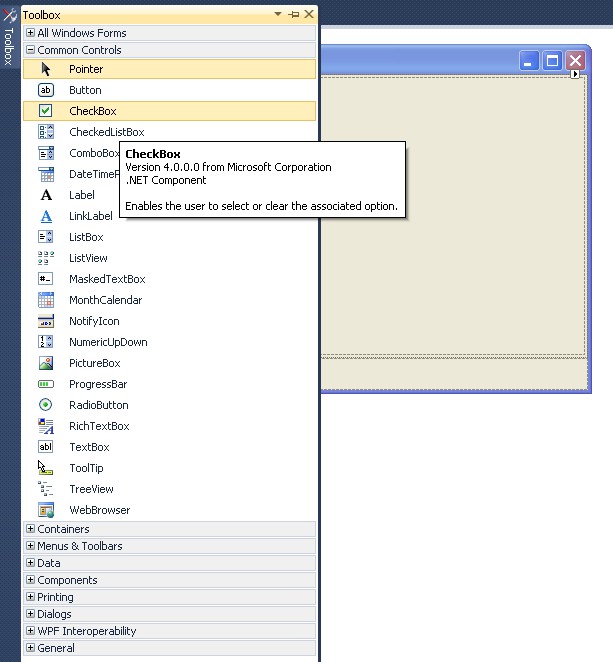
23. Change CheckBox's Text Property to Stretch
24. Add FlowLayoutPanel from Toolbox/Containers
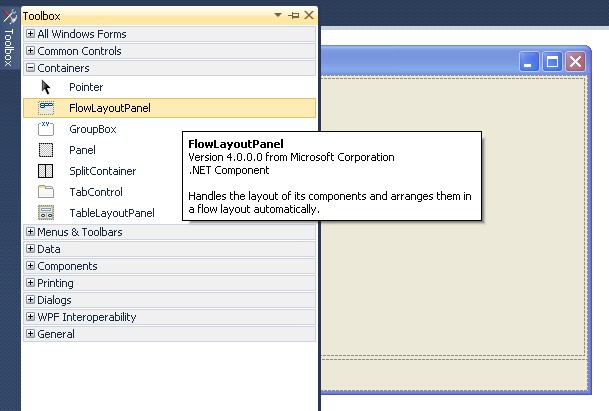
25. Dock it in Parent Container
26. Make sure FlowLayoutPanel is selected (see Properties section at the side)
27. Add four buttons from Toolbox/Common Controls/Button
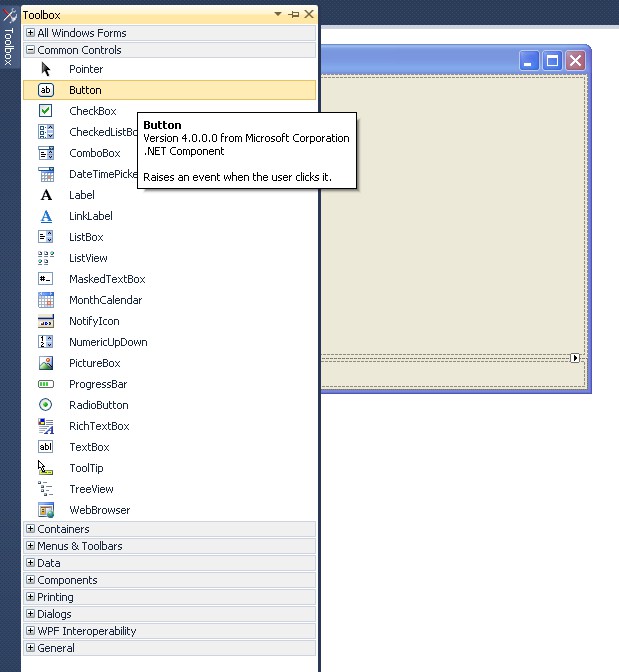
28. Select each button, and set their Text (TEXT, NOT NAME!) properties as follows:
button1 -> Select a picture
button2 -> Clear the picture
button3 -> Set the background colour
button4 -> Close
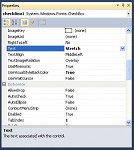
29. Hold CTRL key (on the keyboard), and select each button, go to Properties section, set AutoSize property to True
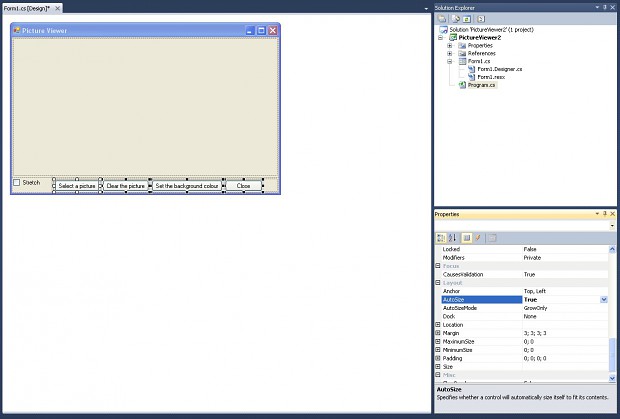
30. Deselect all buttons by clicking elsewhere, then click each button separately, and change their Name property (this time NAME property, not Text):
button1 -> selectButton
button2 -> clearButton
button3 -> backgroundButton
button4 -> closeButton
31. Double click each existing button in the form (not Toolbox), plus double-click the checkbox, to insert appropriate code to the editor
You should see following code:
using System;
using System.Collections.Generic;
using System.ComponentModel;
using System.Data;
using System.Drawing;
using System.Linq;
using System.Text;
using System.Windows.Forms;

namespace PictureViewer2
{
    public partial class Form1 : Form
    {
        public Form1()
        {
            InitializeComponent();
        }

        private void selectButton_Click(object sender, EventArgs e)
        {

        }

        private void clearButton_Click(object sender, EventArgs e)
        {

        }

        private void backgroundButton_Click(object sender, EventArgs e)
        {

        }

        private void closeButton_Click(object sender, EventArgs e)
        {

        }

        private void checkBox1_CheckedChanged(object sender, EventArgs e)
        {

        }
    }
}
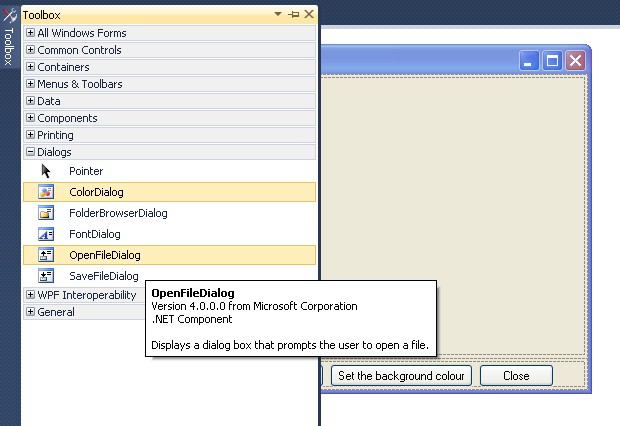
32. Go to Toolbox/Dialogs, choose ColorDialog and OpenFileDialog (double-click to add them)
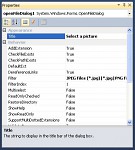
33. Change OpenFileDialog1's Filter property to:
JPEG Files (*.jpg)|*.jpg|PNG Files (*.png)|*.png|BMP Files (*.bmp)|*.bmp|All files (*.*)|*.*
(CTRL + C to copy this text, and then CTRL+V to insert it there in the Filter property box.)

34. Change Title property to Select a picture
35. Now you need to go to Form1.cs tab (not Form1.cs [Design]!), and write some new code:
private void selectButton_Click(object sender, EventArgs e)
{
    if (openFileDialog1.ShowDialog() == DialogResult.OK)
    {
        pictureBox1.Load(openFileDialog1.FileName);
    }
}

private void clearButton_Click(object sender, EventArgs e)
{
    pictureBox1.Image = null;
}

private void backgroundButton_Click(object sender, EventArgs e)
{
    if (colorDialog1.ShowDialog() == DialogResult.OK)
        pictureBox1.BackColor = colorDialog1.Color;
}

private void closeButton_Click(object sender, EventArgs e)
{
    this.Close();
}

private void checkBox1_CheckedChanged(object sender, EventArgs e)
{
    if (checkBox1.Checked)
        pictureBox1.SizeMode = PictureBoxSizeMode.StretchImage;
    else
        pictureBox1.SizeMode = PictureBoxSizeMode.Normal;
}
36. Press F5 to run your program, and test it all out!
That's all to make a simple picture viewer quickly. For more information and explanations you can go here:
Msdn.microsoft.com

This comment is currently awaiting admin approval, join now to view.