Tired of having to squint at tiny Menus or having to deal with old-school resolution changes when you are using a modern System? Need a more reliable way to Alt-Tab? Then this guide is for you!

Preface
For the sake of disclosure; this Tutorial is based off of "Xylr's" tutorial of the same nature, which can be found here: Steamcommunity.com
My guide here should hopefully simplify the configuration process; but it is otherwise identical. I have made some small changes to the config; and was hoping that adding in WineD3D could provide some other benefits; but alas, here we are.
Note:
To my best efforts; using alt.dll folder or any D3D8 to D3D9 tools to try and get reshade to work with this was unsuccessful. So if you are wanting to continue to use reshade; I'm afraid this won't be the guide for you until there is a better solution.
And now off to the guide!
Step 1.
To start off; we will be needing DXWnd. This can be downloaded Here.
Feel free to extract this where ever you may like. Be sure to make a shortcut to the EXE though, this will make your life a lot easier.
Step 2.
Next we will be downloading my DXWnd profile; you be able to find a link to this Over Here.
Step 3.
Now it's time to import the profile!
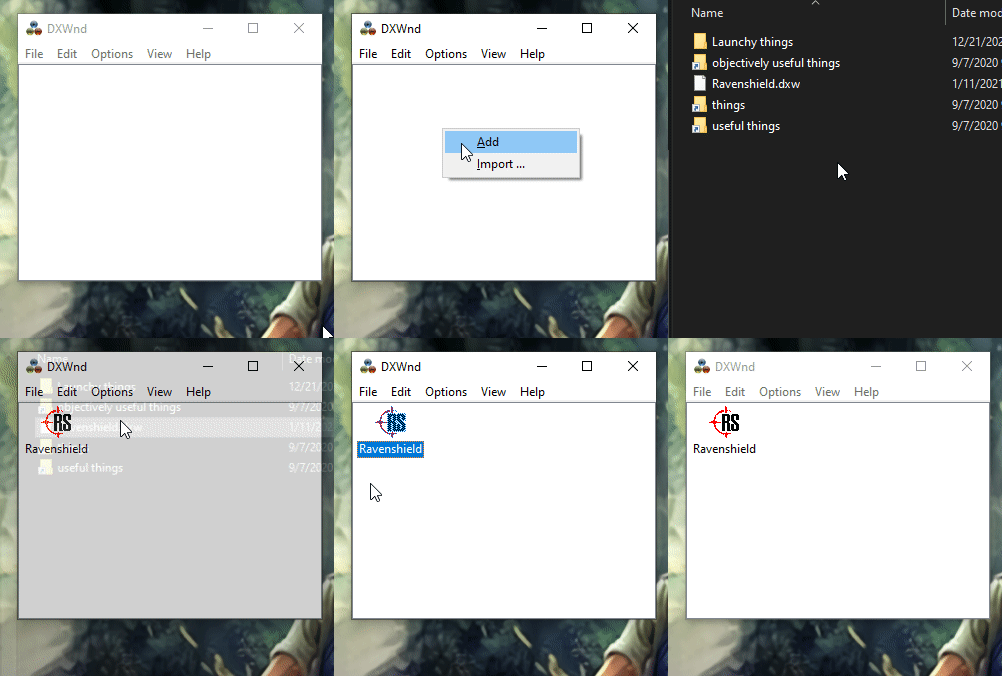
Start up DXWnd by selecting "dxwnd.exe". This will present you with a window with a blank area.
Right click this blank Area; and you will see an option for "Import"
Upon selecting this; you will get a file select window; select the preset you have downloaded (After extracting it from the .zip) and you should now see a "Ravenshield" shortcut added.

Step 4.
While you could click on it already; we aren't exactly ready to play yet. There are two more things we need to do.
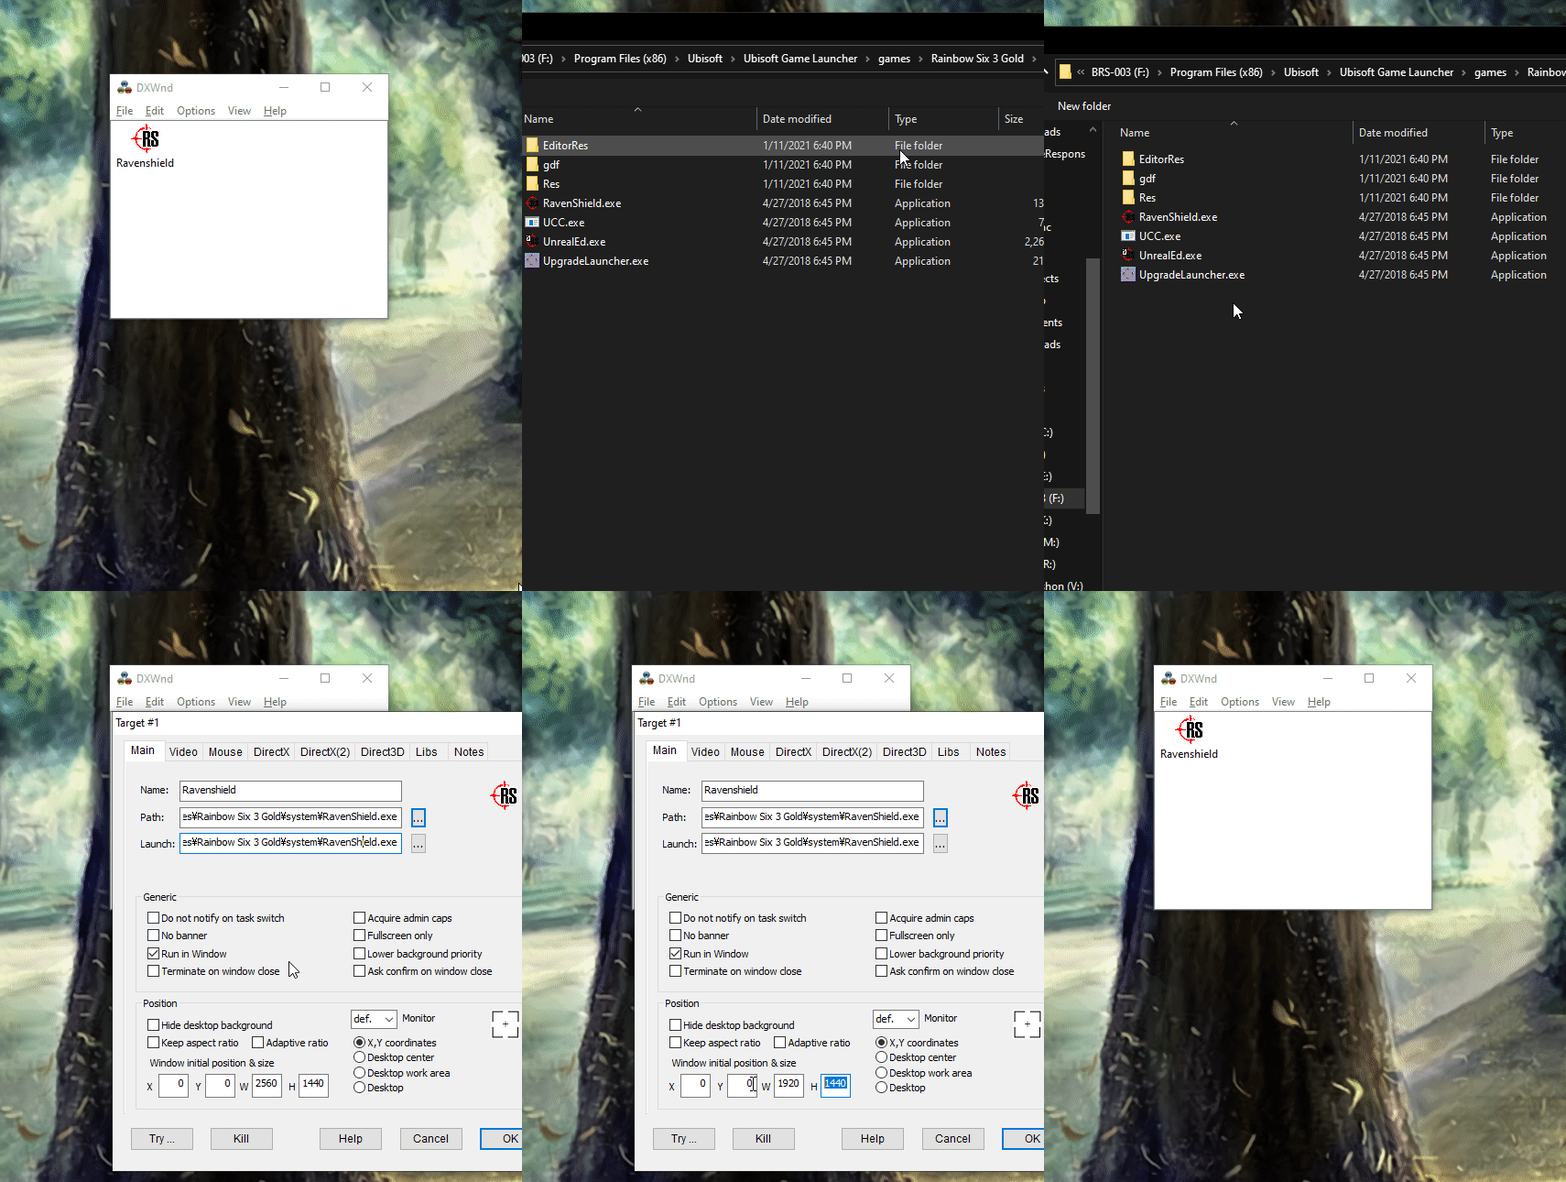
First, we need to Right Click the new "Ravenshield" icon and click "Modify".
This will bring up a menu with a few different options. What we will need to change is the Path, Launch, and Position fields.
Path and launch are pretty straight forward; simply select the location of your "Ravenshield.exe", you can find this in the "System" section of your install folder.
As for Position, the only thing you'll need to change is the "W" and "H" value. Simply change these to your desired resolution. (Width and Height accordingly)
*Please note that by default I have set this up for a 1440p monitor.

Step 5.
Launch and play!
*If the game is not covering your playspace; make sure to hit Alt+Enter! If you don't you will experience some issues with selecting menu elements!
Hopefully this guide has been at least somewhat helpful. This should result in a more modern feeling experience when playing Ravenshield; especially on a Multi-monitor setup.
Any updates I will post here; also feel free to ask any questions or post about any issues you are having below and I will try to get to you as soon as I'm available.
Cheers and happy gaming,
-Dewm


