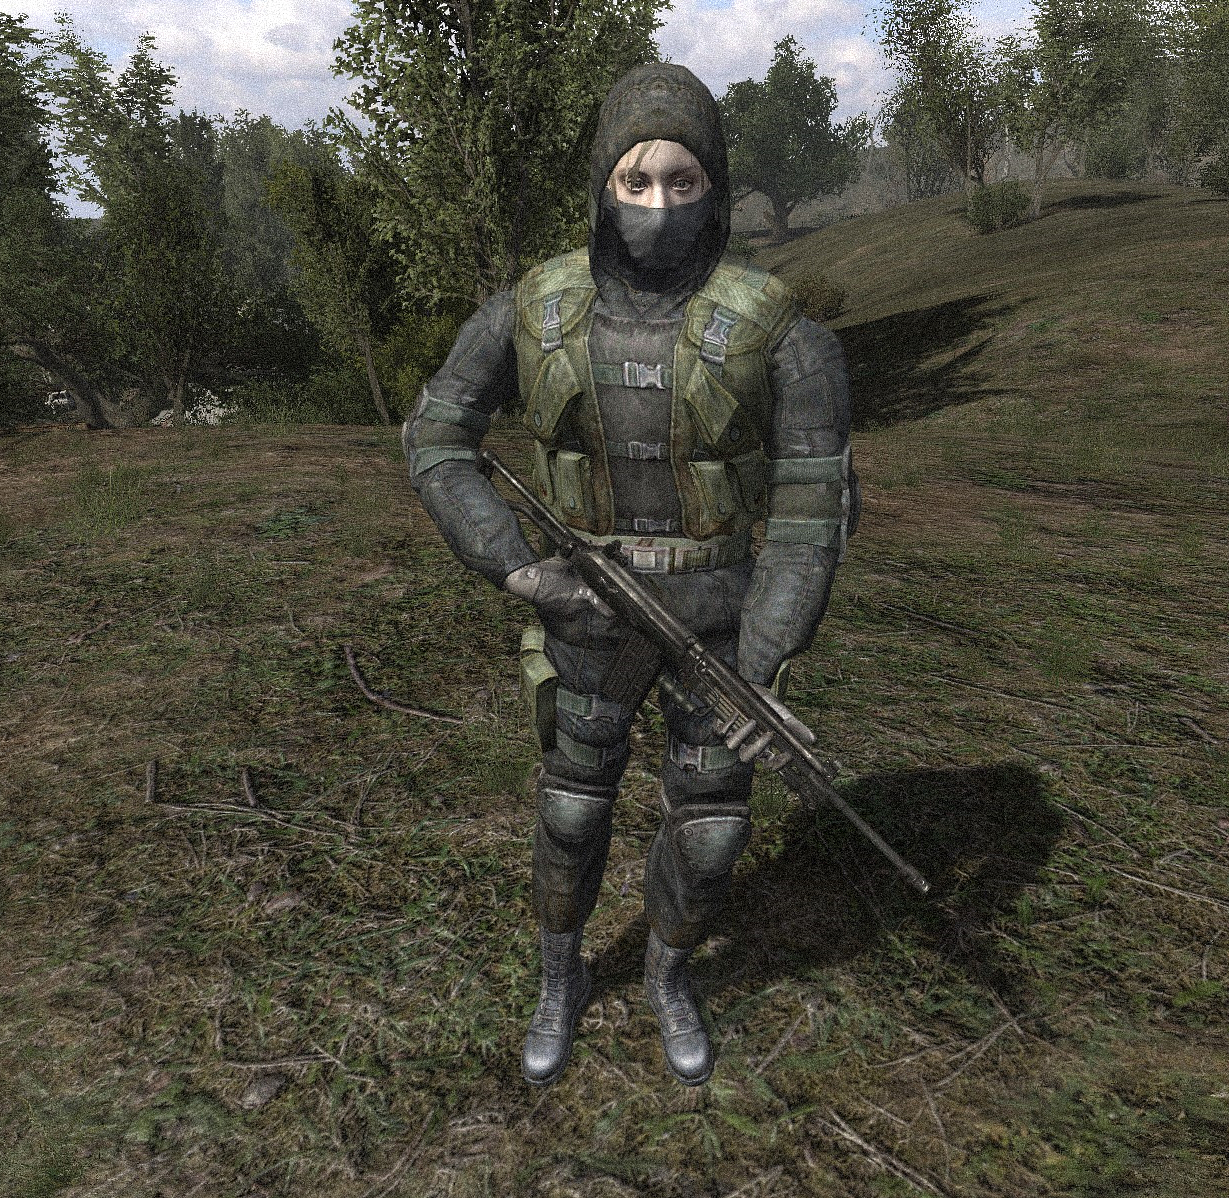
Description
This is a simple reskin of Hip's default outfit for vanilla Anomaly. It replaces the camouflage with green/grey fatigues and decreases the overall saturation.


Preview
Post a comment
Related Mods
Related Games
S.T.A.L.K.E.R.: Call of Pripyat
First Person Shooter
Related Groups
Anomaly Developers
Developer
Tags
Well, now she is from cheeki breeki
Hello, how do you reskin a model?
Hello! It is somewhat of a tedious process.
First open your Anomaly folder (wherever you have Anomaly installed) then open the tools folder.
Double click "db_unpacker_all.bat" and let it run. It will take a while as it is unpacking all of the game files (textures, meshes, configs, etc). It took my PC about 30 minutes I think, so be sure not to end the process prematurely or you may not unpack all of the files.
Your files should be now be unpacked and you can find them in the newly created "_unpacked" folder which is found in the tools folder.
Now the hard part... finding the file you want to edit. It can be easy, or like in Hip's case, take a lot of searching.
I'd start off by exploring the "textures" folder. Here you can find tons of sub-folders but for the sake of simplicity we'll use the "wpn" folder, which contains the majority of the textures for guns. Then you can select whatever gun folder you want, "wpn_9a91" for example. Now we select the actual texture file, in this case "wpn_9a91.dds". You'll need a program that can edit dds files. You can use something like paint.net or whatever you choose.
(Note: I tend to make backups before I edit any certain texture, don't want to have to unpack everything again for a single file)
Once you have edited the texture to your liking and have saved it now you need to create the folder path in your Anomaly "gamedata" folder. So lets say we edited the 9a91 (one of my favorite guns in-game). Now you open your gamedata folder, then "textures" (create this folder if you don't have it), then create a "wpn" folder, and inside that another folder named "wpn_9a91". Finally you can copy your edited dds to that folder, and now your texture should display after you restart your game. You are basically copying the edited item's file path and putting it into your gamedata folder rather than leaving it in the "_unpacked" folder. Anything left in the "_unpacked" folder rather than the gamedata folder will not effect the game. If you want to, you could just copy everything inside the "_unpacked" folder to your gamedata folder and edit it from there. Just remember to make a backup!
To edit outfits, you would go to the unpacked "textures" folder, then the "act" folder. Here you will find the majority of the textures for the in-game outfits. This takes a lot of tinkering and testing, so if you choose to edit outfits be sure to make backups. Sometimes you will edit an entire outfit and find out that only the pants changed and that the shirt is a whole other file in a different folder. Every outfit is different so you really have to know what you are looking for.
That's the basics! If you have any questions just ask. :)
Thank you for your help!
You're welcome! Have fun. :)
Could I request that you make another retexture, where the jacket is red to give of a Duty vibe?