Ace Combat Zero: The Belkan War:
Importing aircraft from Ace Combat 5: The Unsung War
///Description:
This tutorial will explain how to add/restore some of aircraft that was available in Ace Combat 5 (Such as the Su-35, S-32, Hawk, etc.) to the aircraft roster of Ace Combat Zero: The Belkan War.
///Required files/programs:
- Python 3.8.5 o higher installed in your computer
- CDVD_IML2ISO (by gnie) installed in your computer (available here)
- CDVDGEN 1.50 tool
- AceZero PAC extractor/rebuilder script + ACZ aircraft file ID text file (available here)
- Aircraft mod files to add (available in the Files section of ModDB). For this tutorial I will use the MiG-1.44 Flatpack (available here).
- The american release (NTSC-U) of Ace Combat Zero: The Belkan War
- PCSX2 emulator
More information about the required ISO file (taken from redump.org):
- Serial: SLUS-21346
- Region: USA
- Version: 1.00
- CRC32: F7E98EEB
- MD5: 61C016FAD9D992DEE8DCB0AEC2A6C31F
- SHA-1: E72C3D5FD27BCD6C71CDD1A5BEE26956BC625E43
///BEFORE WE START:
-This tutorial (and by extension the Python scripts) currently do not support the european/japanese/other regions releases of Ace Combat Zero. Compatibility for these versions will be added eventually.
-You will need to replace an existant aircraft if you want to use the ones that are in the FILES section.
-The aircraft mods will not work in Multiplayer/VS. stages
-Modified ISOs have been tested in a real Playstation 2 and some users have confirmed the game loads just fine. Still, if you experience any issue I won't be able to help you.
-The Custom texture injection tutorial is not compatible with the modified ISO file that will be created in this tutorial. If you want to add a custom livery make sure you do it BEFORE starting this tutorial.
-The CDVDGEN 1.50 tool is part of the official Playstation 2 SDK so for obvious reasons I will not link a direct download to it.
-It goes without saying, but always make a backup of your files.
///STEP 1
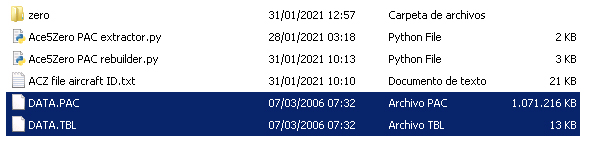
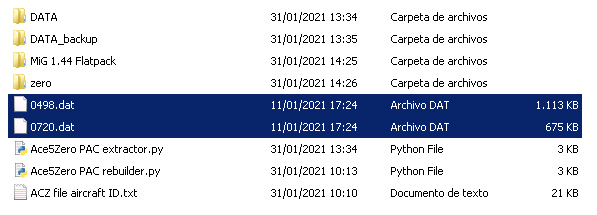
Create a folder and inside it place the following files: the Ace5Zero PAC extractor/rebuilder scripts, the ACZ AIRCRAFT FILE ID text file and your ISO of Ace Combat Zero: The Belkan War:

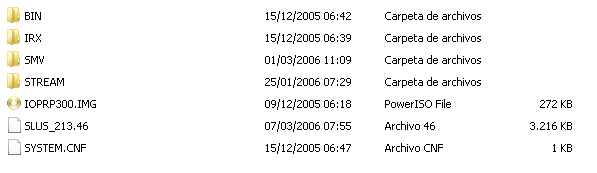
Extract the contents of the ISO file to a new folder (you can use either WinRAR, 7zip or any other ISO tool for this). Once the contents are extracted delete the ISO file. The folder where the ISO's contents were extracted will look like this:
///STEP 2
Navigate to the BIN folder and copy the following files: DATA.TBL and DATA.PAC. Go back to where the scripts are located then paste both files there:
Note: I extracted the contents of my ISO file to the "zero" folder as an example for this tutorial. You won't need to use the same folder name.
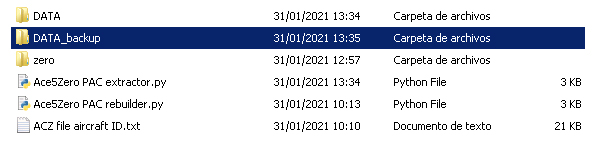
Run the Ace5Zero PAC extractor script and wait while the contents inside the DATA.PAC file are extracted. Once the extraction is complete the script will delete both TBL and PAC files and place the contents in a folder called DATA.
Copy this folder then paste in the same location again and rename it as DATA_backup. We'll use some of its files for later.
///STEP 3
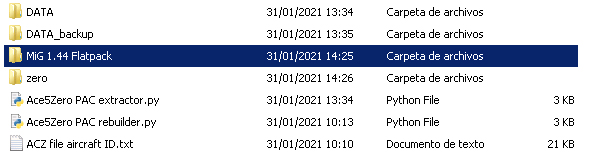
For this tutorial we will add the MiG-1.44 Flatpack to the aircraft roster of Zero. Download the file from ModDB's File section, place it along with the DATA folder and scripts then extract its contents in a new folder:
Delete the MiG-1.44 7z file if you want. Inside the aircraft mod folder you'll find the following content:

- MiG 1.44: contains the aircraft mod files and a small Python script which can be used to inject custom liveries into them.
- FLATPACK CUSTOM LIVERIES: Contains custom liveries for the aircraft mod in both GIM (the original format) and in PNG format. They were made by BelkanLoyalist and included in the mod release with his permission.
- FLATPACK AC5 LIVERIES: Contains the original liveries used by the aircraft in Ace Combat 5 in both GIM (the original format) and in PNG format.
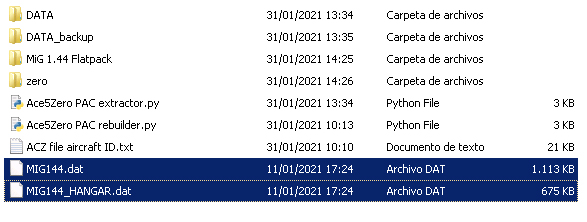
Navigate to the MiG 1.44 folder and copy both MIG144.DAT and MIG144_HANGAR.DAT, return to where the Ace5Zero PAC extractor/rebuilder scripts are located and paste them there:
///STEP 4
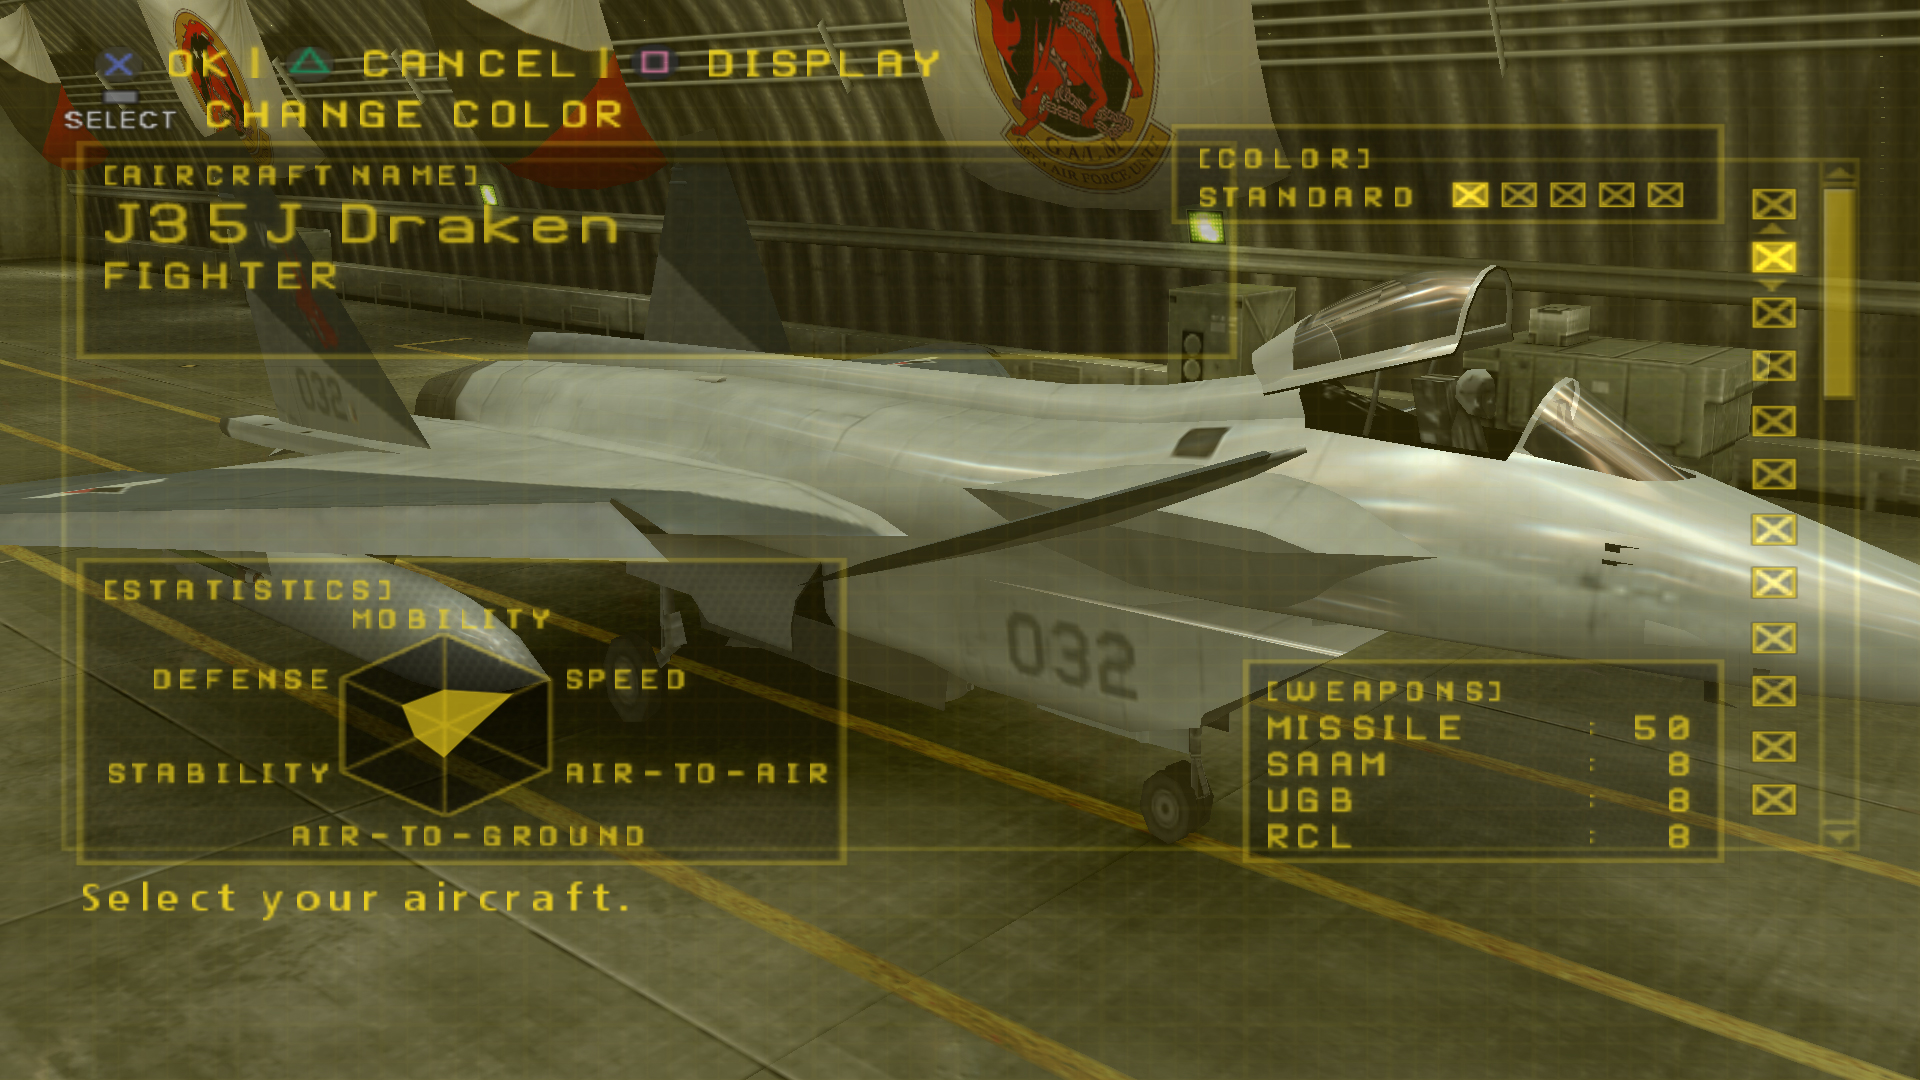
For this tutorial we'll place the Flatpack over the J35J Draken, which is one of the starter planes in the game. Open the ACZ file aircraft ID text file and scroll down through the text:
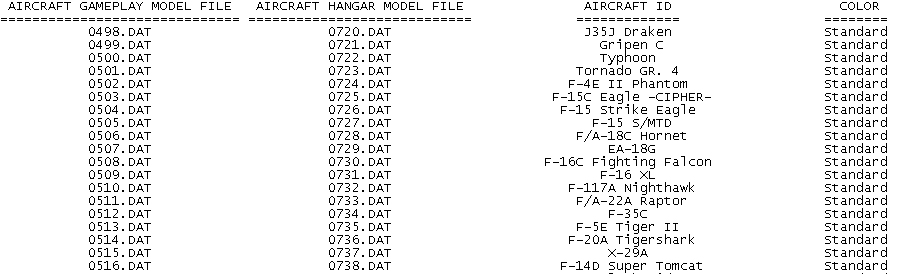
You'll see that there are five J35J Draken entries! Why is this you might ask? In Ace Combat Zero there is a total of 36 aircraft available for use to the player. As you progress with the game you can unlock up to five or six extra liveries (or COLOR as the game calls them) for each one of the available aircraft. Due to the way the game's data is organized, every aircraft is stored in two separate self-containing archives that have the necessary assets (such as models, textures, sound effects, aircraft parameters, etc) so the game can load them successfully. The first file is used for gameplay during missions and the second file is used for displaying the aircraft in the hangar during aircraft selection.
Each COLOR is a separate aircraft of its own, meaning that for example, the STANDARD COLOR of the J35J Draken has its own files (both for gameplay and for hangar), the MERCENARY J35J Draken COLOR also has its own, so does the SOLDIER J35J Draken COLOR, and so on. Basically, every COLOR available for an aircraft (STANDARD, MERCENARY, SOLDIER, KNIGHT, SPECIAL and PIXY/PJ) will have its own set of files. These files are almost the same, the only difference between them being the texture file used as the aircraft livery.
So to add our custom aircraft mod, you will need to give up a COLOR of the five that are available for the J35J Draken. We will place the MiG-1.44 over the Draken's STANDARD COLOR, so check the ACZ aircraft file ID text file and look for the J35J and STANDARD keywords under the AIRCRAFT and COLOR sections:

As you can see, the files that store (among other things) the Draken's STANDARD livery are named 0498.DAT (the aircraft used during gameplay) and 0720.DAT (the aircraft used for display in the hangar). With this information rename the files that we previously copied. Rename MIG144.DAT to 0498.DAT and MIG144_HANGAR.DAT to 0720.DAT:
Select both files then drop them in the DATA folder. You'll be asked if you want to replace the old files with the new ones, so select Yes to everything.
Now run the Ace5Zero PAC rebuilder script and wait while Python processes the files inside the DATA folder. Once complete, a new DATA.TBL/DATA.PAC files will be created.
Move these newly created files back to the BIN folder. You'll be asked if you want to replace the old files so select Yes to everything.
///STEP 5
Run the CDVDGEN 1.50 tool. You'll be asked if you want to create a new project or open an existing one. Select "Create a new one" and click OK. You'll be asked now what kind of project you will be creating so select "DVD-ROM Master Disc" and click OK again.
Open the folder where the contents of the ISO were dumped to then drag the files inside it on the CDVGEN windows in the following order shown below:

It's important that you respect the order of the files because otherwise PCSX2 won't read the ISO file.
Now click on the Volume button (the one next to the Directory one) and a form will appear. Configure yours in the same way as shown in the picture below:
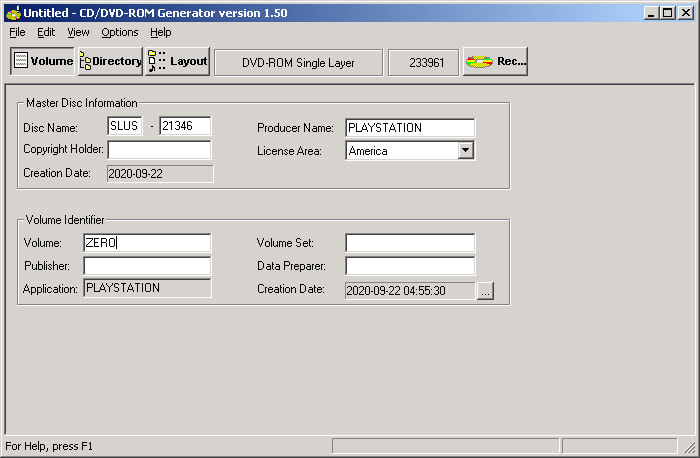
Once the form is filled, go to FILE > EXPORT IML FILE and give the IML file a name. I'll be using ACZ as the filename for this tutorial. The file saving location doesn't matter as long you remember it.
SAVING THIS TEMPLATE FOR FUTURE USES:
To avoid doing the process of adding the files from the folder where you extracted the contents of a ISO and filling the form every time we want to create a new one, go to FILE > SAVE, give the template a name and click OK. The tool will save it as a *.CCZ file.
The next time you have moved the newly created DATA.PAC and DATA.TBL files back to the BIN folder, for this step just open the program, click CANCEL when asked to create a new project then load the CCZ file. CDVDGEN will remember the location of the folder with the contents from the ISO and update the files to the most recent ones.
Remember that you can use this template as long the location of the folder with the extracted ISO contents remains the same. If you moved the folder location or renamed it then you will need to generate a new template with the updated folder path/name.
///STEP 6
Run cdvd_iml2iso, click on the folder icon with a green arrow on it and load the IML we previously saved:
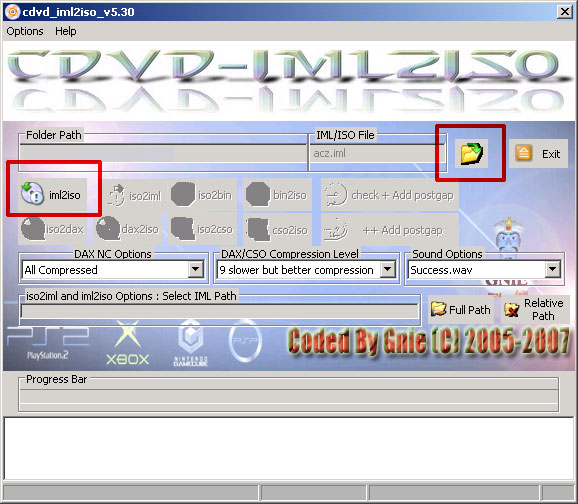
Click on the iml2iso button then select a save path. The program will then begin to create a new ISO. Once the process is complete a jingle will play, meaning that the program is done rebuilding the ISO file. It will saved using the same name as the IML file.
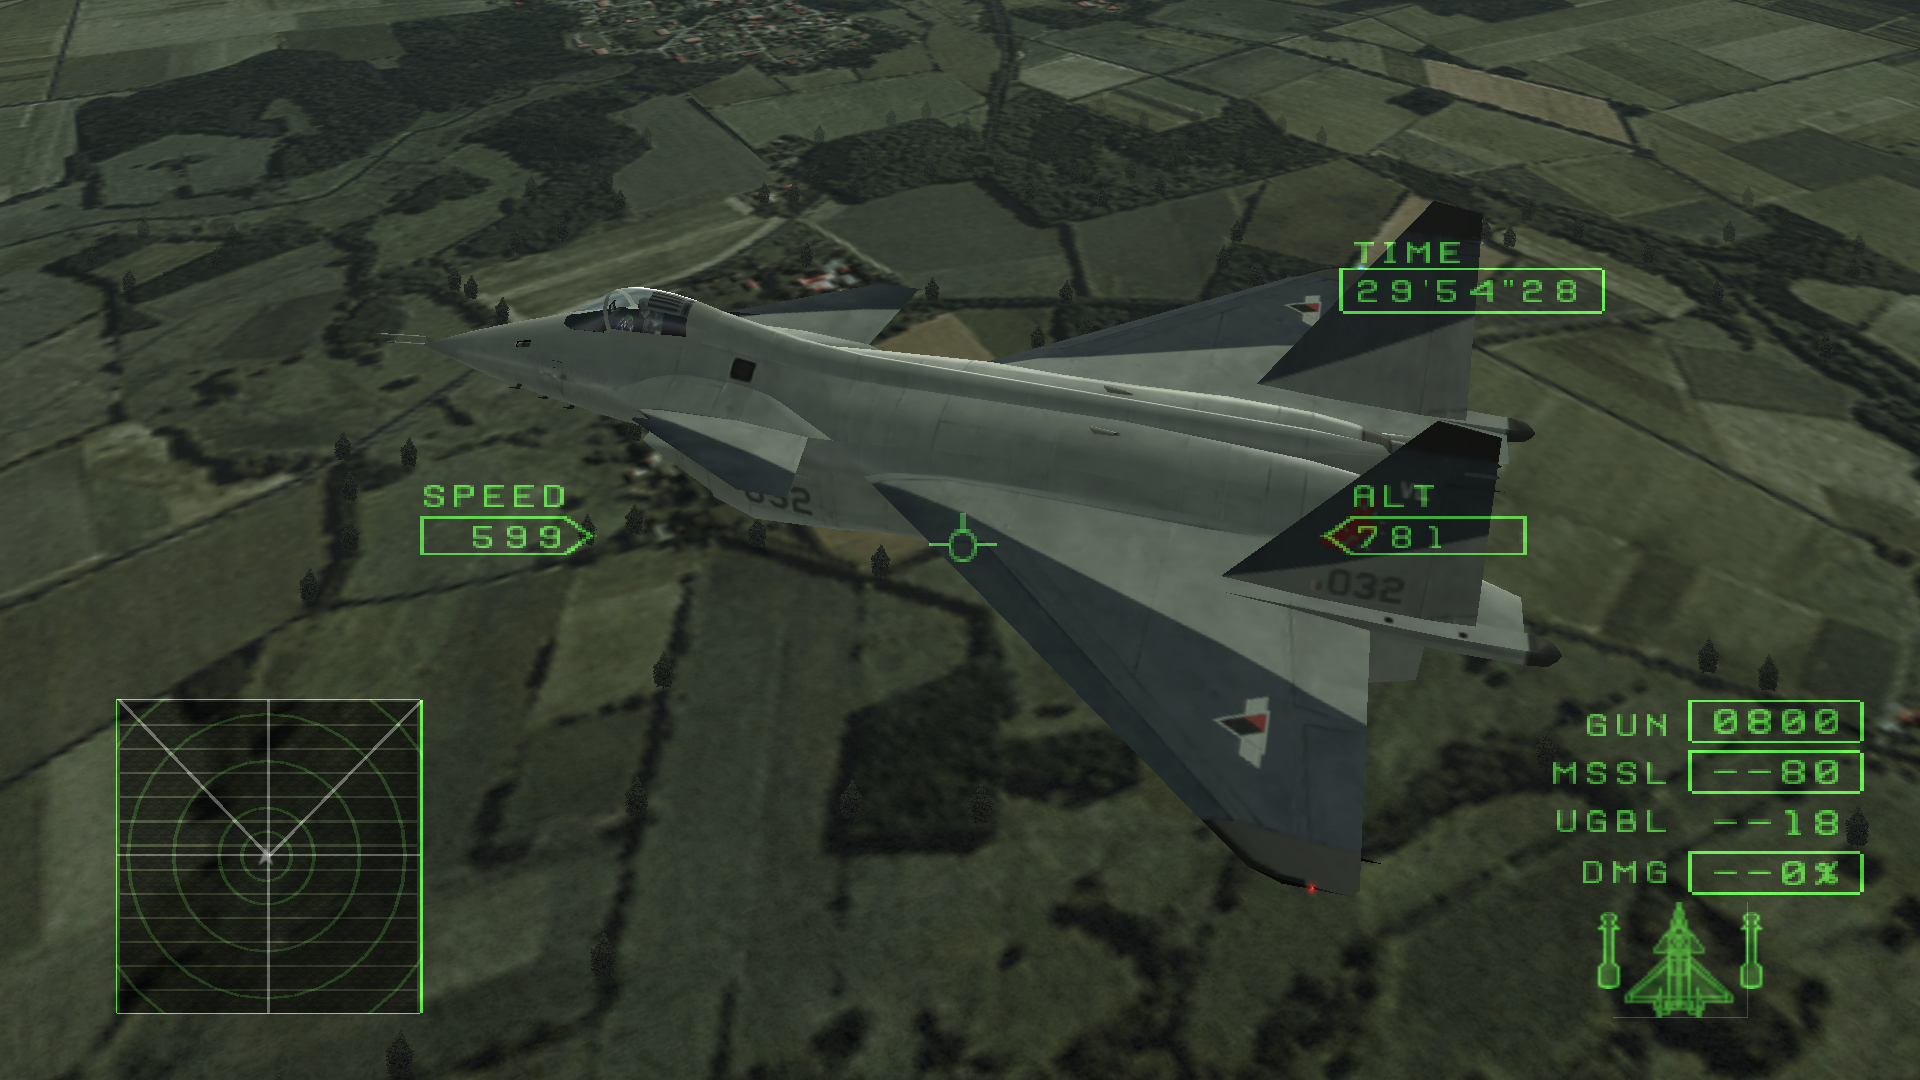
Load the ISO file with PCSX2. If you followed the steps correctly the MiG-1.44 will be available in the J35J Draken's STANDARD COLOR slot:
You can safely delete the IML and IMS files that were create with the ISO file.
///OPTIONAL STEP 1: RESTORING THE DEFAULT AIRCRAFT
In case you want to restore the default J35J Draken with the STANDARD livery (or any other aircraft that you have replaced), the process is quite simple:
If you remember early in the tutorial I told you to make a backup of the DATA folder that was created after executing the Ace5Zero PAC extractor script. So basically you will need to copy the Draken's STANDARD COLOR files (0498.dat and 0720.dat files) from this backup folder (DATA_backup) and paste them in the DATA folder.
Just click to Yes to the ovewrite confirmations and continue from STEP 4 (specifically from the part where you need to run the "Ace5Zero PAC rebuilder" script).
///OPTIONAL STEP 2: CHANGING THE DEFAULT LIVERY OF THE AIRCRAFT MOD
Every aircraft mod release comes with some custom liveries, courtesy of BelkanLoyalist. If you want to apply them to the aircraft mod, then follow these steps. Remember that you will need to do this BEFORE copying the files and renaming them.
Since we are using the MiG-1.44 Flatpack in this tutorial you will find the custom liveries in the "Flatpack custom liveries" folder, or in the "Flatpack AC5 liveries" for if you want to use the originals from AC5.
Navigate to any of these folders, click on one of the subfolders containing the livery you want to add, then copy the GIM file inside it. Go to the MiG 144 folder and paste the GIM file there. Run the GIM injector for the MiG 144 script file and you'll be asked to type the name of the GIM file to inject. Type the file name of the one that we copied and hit Enter. The script will copy the GIM file and paste in on both DAT files, where the aircraft livery texture is located. Now you can continue from STEP 3, in the part where you need to copy both MiG144 and MiG144_HANGAR files.
F.A.Q
1) - When replacing an aircraft with another, does this mean that the replaced aircraft will not longer available?
Yes and no. Like I explained earlier in the tutorial, every aircarft is stored in two self-contained files and every COLOR available for that aircraft are stored in separate files. You can think of every COLOR available for any aircraft as a "slot", so we placed the Flatpack on the STANDARD slot of the Draken. The Draken will be still available, just not the STANDARD livery variant of it.
The Draken will not be longer available if you replace all of its available COLORS with your aircraft of choice.
2) - Does placement matter when adding an aircraft mod (i.e placing the S-32 on the Su-47 because both planes are related)?
It doesn't, you can add your aircraft mod in any of available COLOR slots without problem. You can even replace the ADFX-01 "Morgan" with the Flatpack if you want for example.
3) - Can I add multiple aircraft?
Yes, you can. Just copy and rename the aircraft mod files with the filenames of the aircraft to replace in Zero then drop them in the DATA folder. Remember that every aircraft in Zero has up to five (six if replacing the F-15C/F-16C) "slots" available to mod your custom aircraft in.
4) - Is there any other way to add the custom aircraft without replacing the existant ones?
There might be one way, but sadly I haven't figured it out yet.
5) - I added a custom aircraft mod but when selecting it in the hangar the game still displays the name and description of the aircraft that was replaced!
Sadly I don't know how to manipulate the data related to the game's text or hangar yet.
6) - I selected the second/third Special Weapon option of the custom aircraft but when I start the mission that Special Weapon is disabled or its ammo amount is set to zero?
This is intentional. I will not bother going into the specifics of why does this happen but the gist of it is that the aircraft models from AC5 can carry only one Special Weapon (SpW). Leaving the second/third SpW options enabled will cause problems if they are selected, so for compatibility reasons they will remain disabled until a solution for these issues is found.
7) - During the Special Weapon selection the game will still display the ordnance of the aircraft that was replaced as well their HUD graphics!
See the answer to question #5.
And this concludes the Importing aircraft from Ace Combat 5: The Unsung War tutorial. The process is actually quite simple but I believe it can be difficult to follow due to grammatical errors (I'm not a native english speaker and I had a lot of difficulty writing this tutorial). If this is the case, feel free to post your questions.
Tutorial end.