*SPOILERS*
Chapter 2: DAYLIGHT
If you came here from the previous level, stay on the tram and the door will open automatically. If you aren't on the tram, the wheel can operate the door after the tram has passed. If you start in this chapter, you'll spawn at the rail entrance to the shark pool.
A shark in the water will knock you off of the tram while it is over the water. Swim to the shark cage and use the up/down button. Technically, the shark doesn't exist until you click the up/down button, or swim past the shark cage. There is a ladder around the far side of the building to climb out of the water, but the shark will attack there.
Press the button to move the cage towards the building. When the door opens, put the blue barrel in the shark cage for later. The building has a health charger on the outside at the bottom of the ramp. There is a suit charger and crossbow inside the building on the second floor.
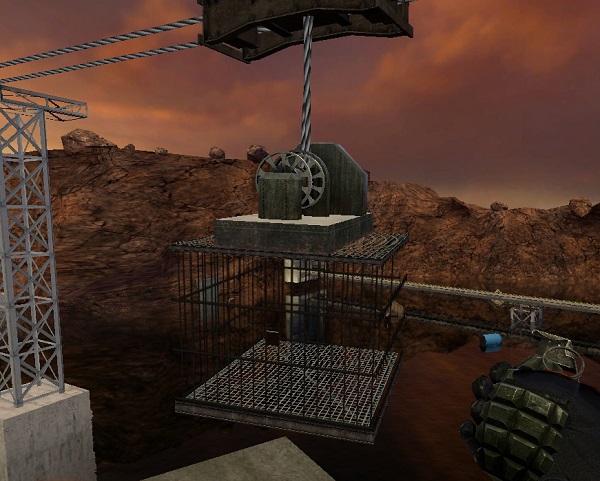
Press the shark cage button to move away from the building. The cage will stop in the middle one time so press the button again to keep moving away from the building. Part of the area has a fence to keep the shark out. Lower the shark cage into that section.
When the cage door opens, bring the blue barrel with you and bring it to the edge of the wall with a tram on the other side.

Swim/jump out of the water onto the barrel, and then jump onto the concrete wall. You can also put all the blue barrels in the cage and it will become unsinkable. Then you can jump on the roof the cage and more easily jump to the concrete wall.
Carefully jump down to the sand and then climb a ladder on one of the overhead track supports. Approach the end of the track with a fence that is jammed from fully closing. Drop down to the fence area and break the concrete debris with the crowbar or use grenades. When the fence can fully close, drop back down to the sand. Climb the emergency ladder into the tram car. There is a button in the middle of the tram for emergencies. This will reactivate the tram and approach the now functioning fence.
The next section features the G-Man letting you through the security checkpoint and then some vortigaunts surging the tram system with electricity.

The tram will take off with no control and a helicopter will chase you. Stay in the middle of the tram car for most of the chase to avoid damage. Towards the end of the chase, move to the door and crouch behind a small divider wall in the tram car. The tram car will derail and crash into the next security checkpoint. Grab the RPG launcher and kill the helicopter. There is a health charger behind the security door. Another health charger is on the side of a waste treatment building.
A security guard will wave at you when you approach a catwalk to cross the open pit. The cat walk will break before you can cross it and drop you all the way back down into some train tunnels.

Part of the tunnel has collapsed and fallen onto a radioactive transport.
Proceed in the opposite direction and shoot some hound eyes along the way. Watch your step around the elevator shaft and walk over to the blue pipe at the end of the tunnel. This is the same blue pipe that was visible at the tunnel collapse earlier. Turn the valve to return water to the pipe and flood the tunnel. Get some oxygen from the access shaft in the ceiling where you first fell in. Swim back to the ceiling collapse and swim over the radioactive debris. Use the red wheel to open the tunnel door and the water will flush you into a large junction area.

Gargantua is here, but is distracted by a loader machine. Don't shoot or draw attention to yourself. Stand near the big doors to the right when you came in and the HECU will begin welding their way in.
When the HECU breaches the door, Gargantua will be alerted and attack. The HECU will run away and you'll need to also run into this tunnel. Shoot the guards in the back with the crossbow. Gargantua will break the doors down and then knock the tram out of the way. The tram will derail and smash into the tunnel walls to the right. Stick to the left and avoid being crushed. At the other end of the tunnel are some shotgun ammo and health kits. The next room is a checkpoint with vortigaunts on the left and right. A military truck with a rocket launcher is coming down the elevator outside and will drive through the wall of boxes.
Eliminate the vortigaunts and close the side hallway doors to prevent more of them from attacking. The hall on the left contains a health charger and satchel charge. The hall on the right contains a suit charger and grenade. When you kill the HECU guard and take control of the rocket launcher, Gargantua will break the second door down. Shoot the rocket to kill Gargantua.
Proceed outside and use the terrain to climb the elevator to the top.

Follow the tracks to a guard sitting on the ground. He will warn you and a sniper will take some shots. Grab the grenades and then jump over the 3rd rail and hide behind it.
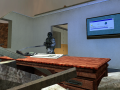
Enter the building, use the health charger and then take this elevator to the 3rd floor. Talk to the security guard and have him follow you to a central area in this office space.

Get trip mines from a supply closet on the far side of the office near the stair case. Use one of the trip mines to block either the hallway with the elevator, or the top of the staircase. Save the other trip mines for later. Enter the corner office and answer the ringing phone and then use the keyboard to start the file backup.
HECU guards will approach with two waves. They will attack from either the elevator or the stairs depending one where you are not watching.


After the two waves, air-strikes will begin. The first air-strike will destroy the ceiling near the elevator. The second air-strike will destroy the stairs. The third air-strike will come through the ceiling of the corner office. After the final air-strike, exit the office space through the corner office with the walls removed. Grab a health kit off the roof near the radio, and then drop down to the ground near the cliffs for a safe drop.
Enter the vehicle checkpoint from the the very beginning. Special Forces have taken over and will close the inner doors.

Place a trip mine at the door to enter the security area, then run back to the outside and place a trip mine at the outer doors of the vehicle checkpoint (in red). The assassins should both blow themselves up. The satchel charge can be used here to help kill them (in yellow).
Two batteries are in the lower floor of the security area near the fenced portion. Refill your rockets with a crate on the second floor of the security area.
Enter the vehicle tunnel to the side of the open area. A tank is waiting there and will begin following you. Retreat to the vehicle checkpoint. Shoot rockets at the top of the tank turret when the tank is stopped.

The tank will stop at the mouth of the tunnel, then run over a street lamp and back up to another stopping point. There is one more stop point before it will back over the cliff and get disabled. The three locations where the tank will stop are shown in red.
After the tank is disabled, exit this level via the tunnel and meet the G-man for a new job.