Refer to these links to get an idea of what to expect with the mod installed.
THE THREE WAYS TO CHANGE THE EXPERIENCE:
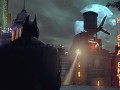
Reshade: A post-process injector. It allows you to inject different shaders, including an improved ambient occlusion method and reflections. Also perfect for colour grading.
Config Tweaks: I've experimented with different tweaks for a while. This allows for enhanced shadows, removal of depth of field, increased maximum texture size etc.
Texmod: This allows for texture changes. Whether you want blood impacts when you punch criminals, different sky textures, or just increased texture quality, the choice is yours.
Each of these options can make for significant changes. I'll start with tweaking the config files, then Texmod and finally Reshade.
CHOOSING YOUR GRAPHICS SETTINGS
Before you start tweaking config files, open your BMLauncher.exe and choose your preferred graphics settings but do meet the requirements.
Extreme texture settings is required. This is because the texture pack replaces the used textures in the extreme texture settings.
Dx11 (Directx 11) settings must be disabled. This is necessary if you want to add Reshade ambient occlusion and other depth-based effects, and if you want to utilize Texmod. The default HBAO (ambient occlusion method) used in the game is kind of old and cheap anyway, not as good as HBAO+ as found in Arkham Origins. As for MVSS (shadow enhancement), we will enhance the shadows through config editing anyway. Tesselation will be the one thing missed out on in this mod (and maybe physx?), but i personally don't care for it and never used it. Dx11 does introduce stutter anyway for many users including myself. I've played the game in Dx11 mode on an AMD 7850 and a GTX 970, stutter was consistent and annoying. This was an early Dx11 title and the developers weren't willing to fix the stuttering issues. Dx9 mode has no stuttering issues in my experience and it runs much faster. MSAA must also be disabled or Reshade won't work properly, i wouldn't recommend the default FXAA but that's optional. My Reshade presets will inject a high quality anti-aliasing method (SMAA) that isn't expensive and looks better than FXAA because of sharper results. Also, disable ambient occlusion as the in-game method is pretty cheap and will be replaced. I'll need to do testing on Physx, but i think medium/normal Physx works fine with the mod while the high setting won't work with the mod properly. Save the graphics settings you choose to go with before tweaking the config files.
CONFIG/INI TWEAKING
Reach your config files - C:\Users\(You)\Documents\WB Games\Batman Arkham City GOTY\BmGame\Config\
Make a back-up copy of any config files you edit. In the event that your game crashes and you have no back-up, just delete any edited files and use the 'verify integrity of game cache' option on Steam.
Open BmEngine.ini
Press Ctrl+F and search for SystemSettings
Under [SystemSettings], look for 'DepthOfField' and set it to False. Now look for 'MaxShadowResolution', the default value should be 256 or 512 (don't even remember). Change it to 1024 or above (i use 4096). Double the value for 'MinShadowResolution' and 'MinPreShadowResolution'. Now search for 'ShadowFilterQualityBias' and change it's value to 5. Remember to use Ctrl+F for searching convenience. Now search for 'ShadowFilterRadius' and set it to 9. Search for 'MaxAnisotropy' and set the value to 16. Find 'AllowSubsurfaceScattering' and set it to True. All these settings should be found under the [SytemSettings] column. If some lines are absent, write them in.
To allow for higher resolution textures:
Press Ctrl+F and search for 'MaxProcBuildingLODColorTextureSize'
Change value to 4096. Change line underneath 'MaxProcBuildingLODLightingTextureSize' value to 1024.
Save the file and set it to 'read-only' properties. This is necessary if you want to use the texture pack.
To disable fps cap:
Press Ctrl+F and search for 'MaxSmoothedFrameRate' and change 62 to whatever you want. Recommended you base the value around your refresh rate +2 if you use v sync.
After editing, save the file and set it to read-only properties so the game doesn't change or overwrite the settings.
What changes did we make?
Setting DepthOfField to false has removed any depth of field effects. I did this to remove the blur found on background city elements. Now the cities outside of the game world look sharp. This also changes the games colour grading for some reason. Everything will appear more saturated. My Reshade presets are built around this change in colour.
All shadow value changes do their job in adjusting the quality of shadows. Performance at 1080p has been fine for me on a GTX 970, though i may change the shadow resolution to 2048 as i don't think the difference will be noticeable at 1080p. Increasing the 'ShadowFilterRadius' value adds a bit of a blur to the shadows which is useful in blending the shadows properly. The smaller shadows cast on batman tend to be a bit noisy despite any shadow resolution increases. Adjusting the filter values helps tackle this.
MaxAnisotropy basically increases the anisotropic filtering. In other words, textures at steep angles remain sharp instead of being oddly blurred out. Research anisotropic filtering for a better idea on what increasing the value does if you don't quite understand. Maximum value is 16, you can't go further than that.
Enabling SubsurfaceScattering is a config option found in all the 4 major Arkham games. I can't be too sure that it helps the games visuals, but i leave it on as it doesn't hurt performance in my testing. The reason its hard to acknowledge is because subsurface scattering is basically light penetrating the skin. Not exactly easy to spot in a game like this.
The texture size changes are required to avoid texture glitches when using the texture pack or any other high-res texture mods.
The game's capped to 60/62 by default. Not something that annoyed me as my monitor is 60hz anyway, but i've stopped using in-game v sync and almost always use 'fast sync' available in the nvidia control panel. I prefer to increase the cap to reduce input lag with this v sync solution. If you're on a controller though, a locked frame rate is ideal or camera movement will be a little jarring.
Remember, you will not be able to change graphics settings from the game's launcher after this change. If you want to, then un-check the read only option in any files you've edited, though all your config changes will be gone.
TEXMOD
Downloading Texmod is required. It doesn't support Dx11 applications (yet), so the game obviously has to run in Dx9 mode to work with Texmod. Open Texmod and choose package mode. Select target application which is 'BatmanAC.exe'. You can find it in the installation directory of your game: SteamLibrary\steamapps\common\Batman Arkham City\Binaries\Win32
Once you've found it, you can use the small folder icon to select any textures (tpf files) made for the game. Download any of my textures (or the community's textures) and use whichever you want. Keep all textures in one folder for easy access. Don't be silly and choose textures that will conflict with each other, for example two different bat-suit textures.
Unfortunately with Texmod, it can take a while to load the game depending on the storage size of textures you select. Run the game off an SSD if you can. It would be great if someone finds a work around, looking for a way to install textures to the game itself so Texmod isn't required everytime.
If you want to load Texmod everytime you launch the game, rename your BMLauncher.exe which is find in the Win32 folder. Rename it to something like BMLauncherOLD. Next, paste Texmod to the same folder and rename it to BMLauncher. Now, everytime you launch the game from steam, it should open texmod first.
RESHADE
Ah yes, my favorite part of changing the look of any game. Reshade allows for high quality shader injections. It can prove phenomenal in games where it can access the depth buffer / read the game in a 3D space. The game does require running in Dx9, or the game will be read by Reshade in a 2D format which means less enhancements which is the unfortunate case for Arkham Asylum. I've utilized the LUT shader, which you can research for more information. To keep it short, the shader references a texture to understand how to grade an image in a quick manner. Doing this has made for a fast performing color grading method.
My Reshade presets are built around the DepthOfField option being disabled. I point this out because the color grading isn't designed around DepthOfField being enabled where the game's default colours are slightly different. In other words, if you use my presets in the vanilla game you will get a slightly different look from what i showcase. Feel free to experiment with this. It is also important to set the right brightness values, change the brightness using the settings option in-game.
Unfortunately, while accessing the depth buffer makes for great enhancements, it can also have bleeding issues. Ambient occlusion bleeding is noticeable through smoke and through cutscenes. I've set a 'page-up' option to toggle bleeding effects for during cutscenes. This isn't Reshade's fault though, it applies its changes on top of the game, so HUD (heads up display) elements can be effected by Reshade's depth of field effects for example. I'm using Reshade 3 for these presets, which does mean unfortunate loading times to load all shaders everytime you launch the game or alt-tab into the game. Previous versions of Reshade didn't have this problem but that was because they didn't allow you to edit your reshade settings in-game. You can delete unused shaders to speed up the loading process.
To use Reshade, first you have to download it from this site (at the bottom of the page): Reshade.me. Open the application and select BatmanAC.exe, which is found in SteamLibrary\steamapps\common\Batman Arkham City\Binaries\Win32 - After you've selected it, select the D3D9 mode and install all shaders when requested. Everytime you now open Arkham City, Reshade will load automatically. To delete it, just remove the d3d9 files found in the Win32 folder, as well as the Reshade-Shaders folder.
You have to place any presets you've downloaded in the Win32 folder so that Reshade can find it, as Reshade automatically searches for presets placed in the same folder of the .exe file you've injected. Launch the game, press shift+f2 to open Reshade in game. Go through the tutorial if you want to understand how to utilize Reshade's functions properly. You can skip if you want though, but keep in mind the tutorial can be replayed in the settings tab. After that, use the drop-down menu to select any presets you've placed in the Win32 folder. Your selected preset should be applied. Go to the settings tab and choose an effects toggle key. I recommend 'insert' as the toggle key. Now you can use your selected key to toggle all of Reshade's effects and see the differences for yourself. The page-up option as stated earlier lets you toggle depth-based effects. These are performance heavy, so if you don't want to use them you can keep them disabled, then in that case use the game's default ambient occlusion. I've also set a page-down key option, which selects filmic mode. I highly recommend disabling the in-game HUD if you use filmic mode, as DOF effects and Borders hurt the HUD. I've posted a link that guides you on how to do that near the end of this post.
Reshade.me - Refer to this site for a more in-depth guide on using Reshade 3. Useful if you want to make your own presets.
If you want to keep Reshade loading more optimized, or want to remove certain effects like CA (Chromatic Abberation) which is only used in filmic mode, then the next steps are for you. Open Reshade by pressing shift+f2, in the home tab press expand all if the option is visible. You can choose which effects to toggle on or off with the checking option. Effects toggled by the page-down or page-up key have prompts on the right-hand side of the menu. Just select the toggle key bar and change it how you want, backspace should remove the key. Keep note of all shaders that go unused, for example FXAA is something i never use, so the FXAA shader can be deleted. In your Win32 folder, find the 'reshade-shaders' folder and select 'shaders' folder. Delete any shaders that go unused, or just move them to another folder to keep them saved as back-up. This will shorten down the loading time required for Reshade, you'll notice the number of shaders Reshade states is being loaded reduced. In the settings tab or Reshade, change 'configuration mode' to 'performance mode'. Will require reloading, but you'll get faster performance.
The next step to utilizing Reshade even better, is by using the LUT shader and PirateKitty's Pirate Shaders Pack. The reason for this shader pack is to allow for better bloom effects, and LUT was explained earlier. If you are using an LUT based preset, you are required to place the downloaded LUT image in the 'Textures' folder found in the 'Reshade-Shaders' folder. You have to replace the default LUT image. This is the page of the Pirate Shaders i've used: Reshade.me
To download the Pirate Shaders: Github.com
Use the 'clone or download' option and download .zip - Extract the file and copy the 'reshade-shaders' contents found in the extracted file and merge it with the one found in the Win32 folder. This has allowed for excellent bloom effects that look similar to the bloom found in the 'Return To Arkham' remaster. Again, delete any shaders you won't be using, such as the FXAA shader this package adds (my gosh i really hate FXAA don't i?). Huge credits to PirateKitty for letting me use his/her shaders.
ANOTHER WAY TO MODIFY THE GAME!?
Well, yeah, pretty much. This is by console commands. I recommend using it to toggle in-game HUD and especially for its GTA-styled camera mode.
The link's here: Youtube.com
This belongs to the uploader of course. Once installed, just double tap f10 in-game and type 'showhud' to toggle HUD on or off. There's no way to finish the game without the HUD, as detective mode requires HUD in some analysis tasks, so keep the toggle code in mind. Alternatively you can just set the binding to a key if you prefer: Nohud.wikia.com
FOV adjustments are definitely also an option but they can cause cutscene issues. The list of console commands linked in the video includes a GTA-styled camera mode code which you can apply in-game. Remember to restart from last checkpoint once applied. This camera mode hasn't had any issues/graphical glitches in my testing. I think it simply applies the camera values during combat to regular play.
SKIP INTRO VIDEOS
This will assist in faster loading times. If you decide not to use Texmod and Reshade, the game should jump straight to the menu upon start-up.
Find the movies folder \SteamLibrary\steamapps\common\Batman Arkham City\BmGame\Movies - Now you can delete or rename any intro videos, these are: Bac_logo.usm, Startup.swf and StartupNV.swf.
IS YOUR BUILD STRONG ENOUGH?
I'd recommend atleast a 7850 2gb or GTX 660, though i'm sure a 260x/750 ti can manage 1080p30fps just fine. Video memory requirements do increase based on the textures you choose. If you have only 2gb vram, might need to stick to just suit texture changes or just the texture pack. Might be fine with both though, but i've not at all reached vram limitations on my 4gb 970. I use MSI Afterburner to monitor my GPU usage, and a little over 2gb of vram does get eaten with both the texture pack and suit mod. Texture pack may increase in size over time, so 3gb vram is ideal at 1080p. Performance feedback would be useful though in letting me know how this mod performs for everyone on based on different setups.
So, just remember my guide isn't to force you to use everything. Maybe you prefer the games default colours and only want to utilize the texture changes. Maybe you just care for the improved ambient occlusion method, or want a decent global illumination approach. Despite a lot of graphical changes, i've had no issues keeping my GTX 970 at 1080p 60fps. It is a bios flashed and overclocked card to be clear (1531mhz core, 2020mhz memory).
NEED TO FINALLY POINT OUT
Batman: Arkham City remains one of my favorite games of all time. The lack of a major graphics mod felt very lacking. I've attempted to fill that void for myself and other fans of the game. Played it since launch day and don't think i will let go of it. Your experience and support truly matters in making this graphics mod as good as it can be. Whether you like something about this mod or not, or want to request specific texture changes or are suffering from installation issues etc - anything really, then feel free to ask questions and leave feedback.
Feel free to add your own files. If you want to post your own texture mod, make sure it's a quality enhancement mod. Don't add any random suit mods that don't relate to the game e.g. spiderman suit. If you want to post a batman suit texture enhancement, please seperate the cape texture and body texture. The 'choose your combination' option is something i want to keep intact, to allow players with more suit options.
paypal.me/GPUnity - Please consider donating if you appreciate this mod and want to see it evolve.

I plan to test this tomorrow on a 4.0 ghz i5 processor/gtx 1070. In excited, I'll let you know how it runs. Looks goods so far.
Thanks hope you enjoy the mod.
This comment is currently awaiting admin approval, join now to view.