[page=Introduction]
About 120,234,853,584,123 texturing tutorials are available all over the internet covering pretty much any possible aspect of modern texturing. So why post another one? Well, why not. It won't do any harm :)
This tutorial shall show you one of many techneques of creating basic ship hull textures for Star Wars: X-Wing Alliance. This techneque is suitable for starfighters and smaller transports.
[page=Requirements]
Alright, what do you need...
- A modellign tool to model and render any object that you desire.
(I'm using Rhino 3D)
- A Photo Editing software, e.g. Adobe PhotoShop or Corel PhotoPaint.
- An OPTing Program like Ace_DXF or OPTech to assemble the model in an XWA-compatible format. Both are available on Darksaber's X-Wing Station.
So let's get started!
[page=Getting Started]
Although X-Wing Alliance supports UV-mapped models and 3DS format I'll be going the traditional way of applying stitching the textures in an OPTing program. As an example I'll take a fighter model called XT-100 Viper.
[page=Take a picture]
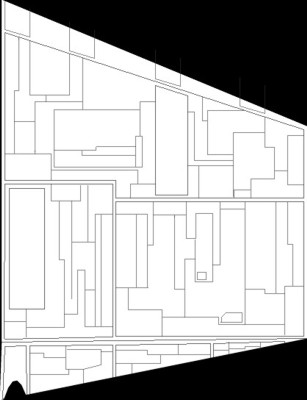
The very first step is - of course - to select the part of the ship you want to texture, and the way the texture should be applied lateron. The way you want to apply and stitch a texture is important for its layout. OPTech and Ace_DXF both feature 3 types of stitching, i. e. the direction in which the texture is strapped over your mesh:
- Top/Bottom
- Front/Rear
- Sides
- 16
- 32
- 64
- 128
- 256
-
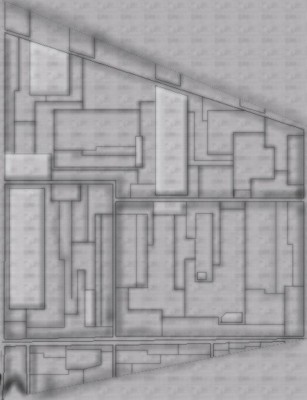
In our case we choose to texture one of the wings. in your modelling Program, hide all other meshes except for the wing.
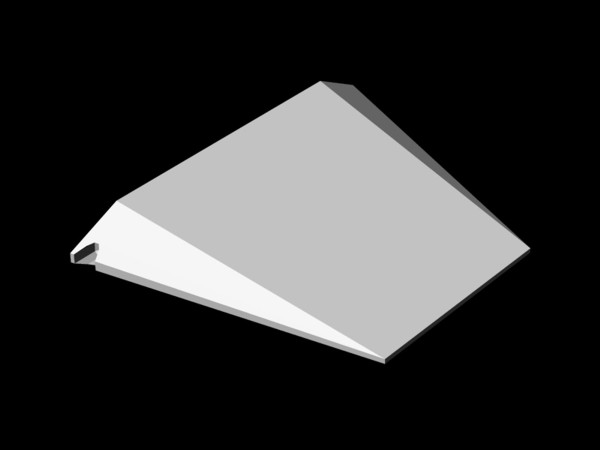
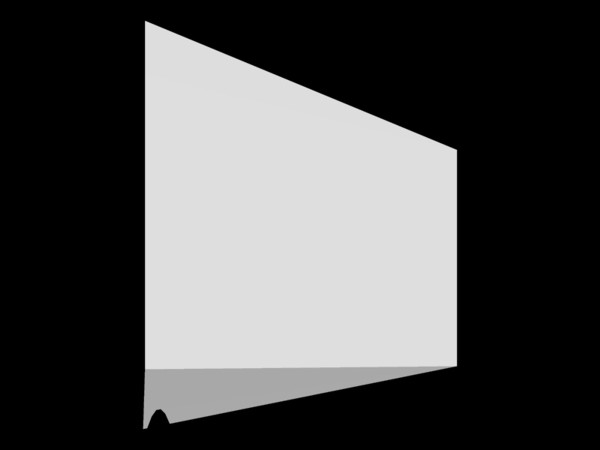
From the shape of the mesh you can tell that the Top/Bottom method is recommendable. So, in your modelling program make a clean top-view-rendering of the mesh.
[page=Some more preparations]
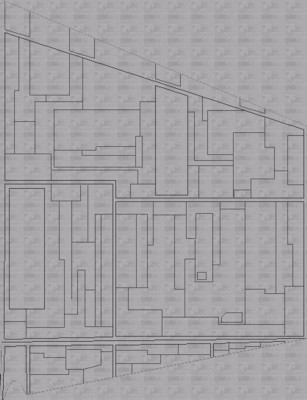
Load up the texture in your painting program and cut of all superfluous areas so the picture dimensions measure the rendered mesh's extents.

Now, (optionally) use a brightness/contrast filter or white filling to get rid of the various grey tones. Or use strong lighting, when rendering the mesh - either method works.

Now, that you have a nice white pattern, let's get really started!
[page=Lines!]
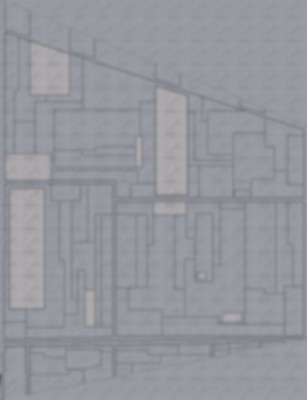
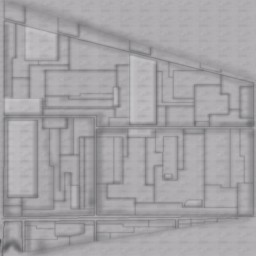
To get some basic structure into your texture, draw some basic lines! Those will be the wings main hull plates.
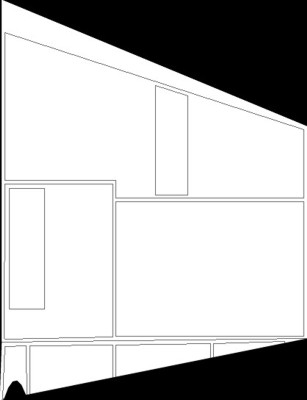
Now add some detail - lines, squares, polygons - anything goes, just don't cross the base lines.
[page=background filling]
These are auxillary textures, which I have created in the process of making earlier textures. They're very basic and only 32x32 in size.


Now use the first texture as flood filling. Us a 'subtraction' or 'multiplication' filter and the pattern will only cover the white parts(I've filled the black edges manually, but that's optional).
The second filling can be added manually or by working with masks, so you can leave a few areas untouched. I have also worked with a transparency filter of about 40-60% so the contrast isn't too strong.

[page=blurrrrr!]
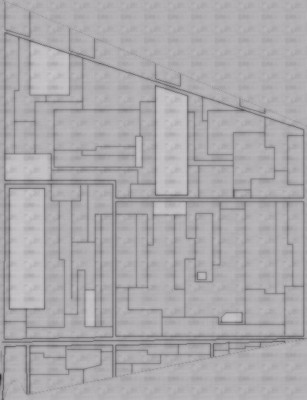
Next, create a copy of the texture as a new object(layer) and use a blurr filter on it.
Use a 50% transparency filter on this object to blend it with the background.
[page=Shadows!]
Create another layer and - with a smooth brush draw along the edges of the base plates. Try not to paint between the plates! Also you can add shadows to the brighter plates making them extrude from the surface. When doing so, only paint two sides of it to get a nice 3D effect.

Now you can go on with the rest of the texture. Always draw along the lines, but not too strong. Also, now you can add dirt, burn marks and such things. Note that I've blackened the edges of the torpedo slots.
[page=limitations]
The bad thing about XWA is that its tolerance towards texture format and dimensions is very limited. So the last thing to do is to scale the texture. XWA only accepts a maximal image resolution of of 256x256 pixels.
The generally accepted values are
Of course, any combination of those is possible.
Once you've scaled the texture, convert it to 8bit(256 colors) palette format and save it as .BMP!
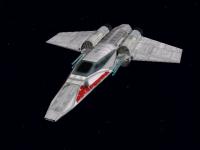
[page=Voillà!]
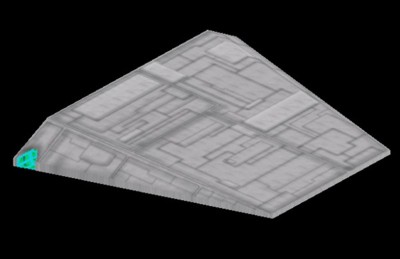
Once you have imported the model into your OPTing program and applied the texture, it should look somewhat like This:
Now, that you know the basics, try your luck! Go out there and have fun!


Good to see a tut for this game :D
Nice tutorial! :)