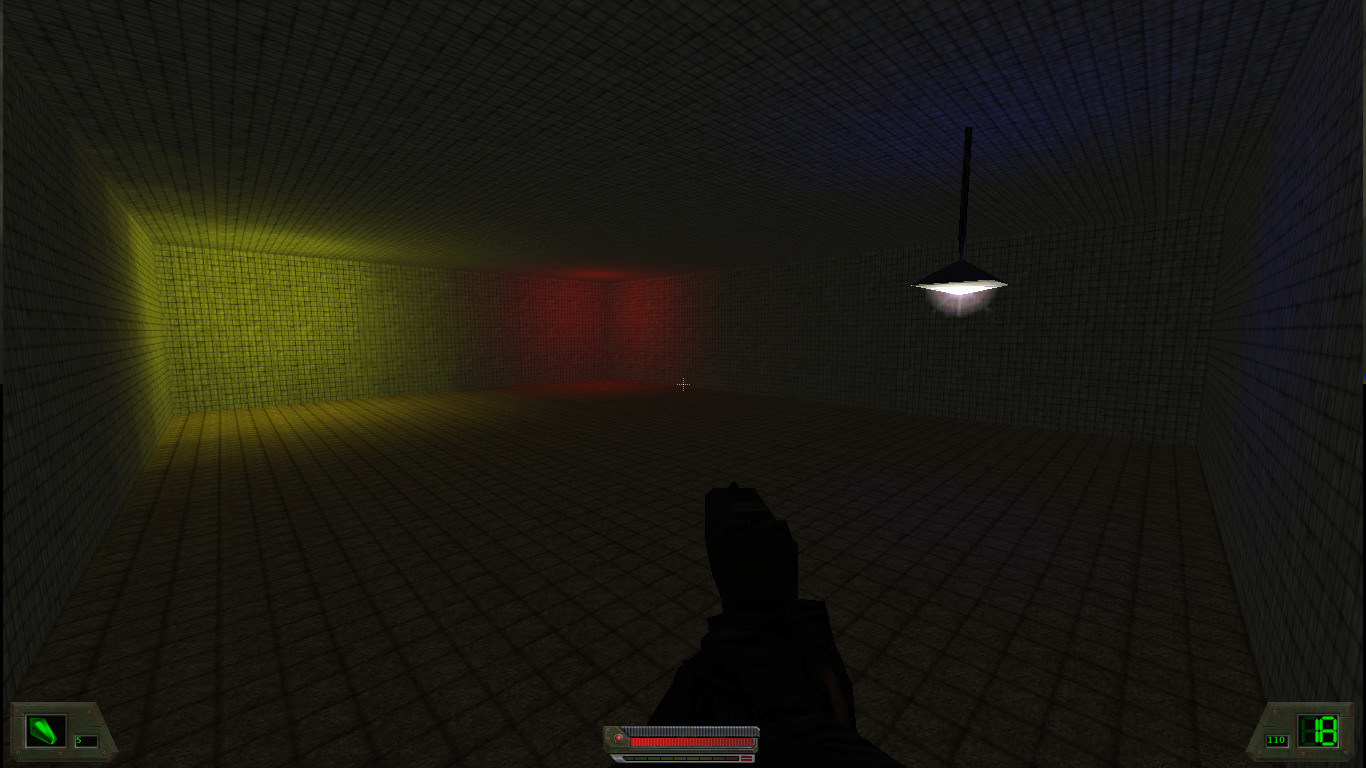
This is an example map showing how to properly add lighting to your map. Created by INTRUDER.
Lighting is a big probelm to some, but actually its very simple and easy to use. First when in sofradiant, right click anywhere on your maps grid and then select light from the menu that pops up and then place the light where ever you want it, but usually place it 9 grid blocks from the floor of your map and don't let it touch anything like walls or entities, now that its placed hit the k key and the color menu pops up and there you select the color of your light, click on the color you want and then click ok and then hit the n key and the lights properties menu will come up and there at the key line type in "light" (no quotes) and at the value line type in a value from 10 to 1000, if you don't set the value of the light it will default to 300, now at this menu you can also set the style of light used, by typing "style" at the key line and then a number 1 thru 9 at the value line, the styles are all listed in the scroll box of the light properties menu and now you can also set the cone size of the light too, it defaults to 10 and to change it type "default_cone"(no quotes) at the key line and at the value line type in a value from 1 to 1000, this is good for making spotlights or spredding the light out over a large area. Now when selecting the second light menu when right clicking you can select generic_lights and these you can set the lights value(brightness) also, but changing the color of the light only changes the projected light and not the actual color of the bulb or light source. Experiment, now that you know the basics anything is possible. Check out my lights map and you will see exactly how lights are setup, Load it up into the sofradiant editor and look at it and then bsp it quad extra and then load it up within SOF and you'll just how the lights look within a map
INTRUDER