A tutorial for porting weapons and animations from SoC to CS/CoP/CoC (and mods based on all of these).
=== TOOLS REQUIRED: ===
AXRToolset: Github.com
[1.4.12, patched to 1.4.22] S.T.A.L.K.E.R.: Call of Chernobyl (for the requirement below): Moddb.com
S.T.A.L.K.E.R.: Transparent Texture (found via gamedata/textures/act/act_stalker_body_invisible.dds via your install of S.T.A.L.K.E.R.: Call of Chernobyl). Can be extracted via the DB Tool in the AXRToolset.
TeXworks (optional): Tug.org
**Notepad++ and Notepad are suitable alternatives to TeXworks. These are useful for opening .ltx and .xml files.
***As shown in the screenshots on step 6, please double-check that your .ltx file that you're editing does not reference any non-existent bones. Bones such as those named as "wpn_body" are in most (if not all) weapon .ogf models, so renaming them to this should be fine. Bones are just sections of a model that allow it to work properly, especially when it's animated (i.e. moving parts).
=== BACKGROUND INFO ===
Before we proceed, there's something that I need to clarify to help you understand how weapon models (specifically their hud/first-person models) are rendered in-game.
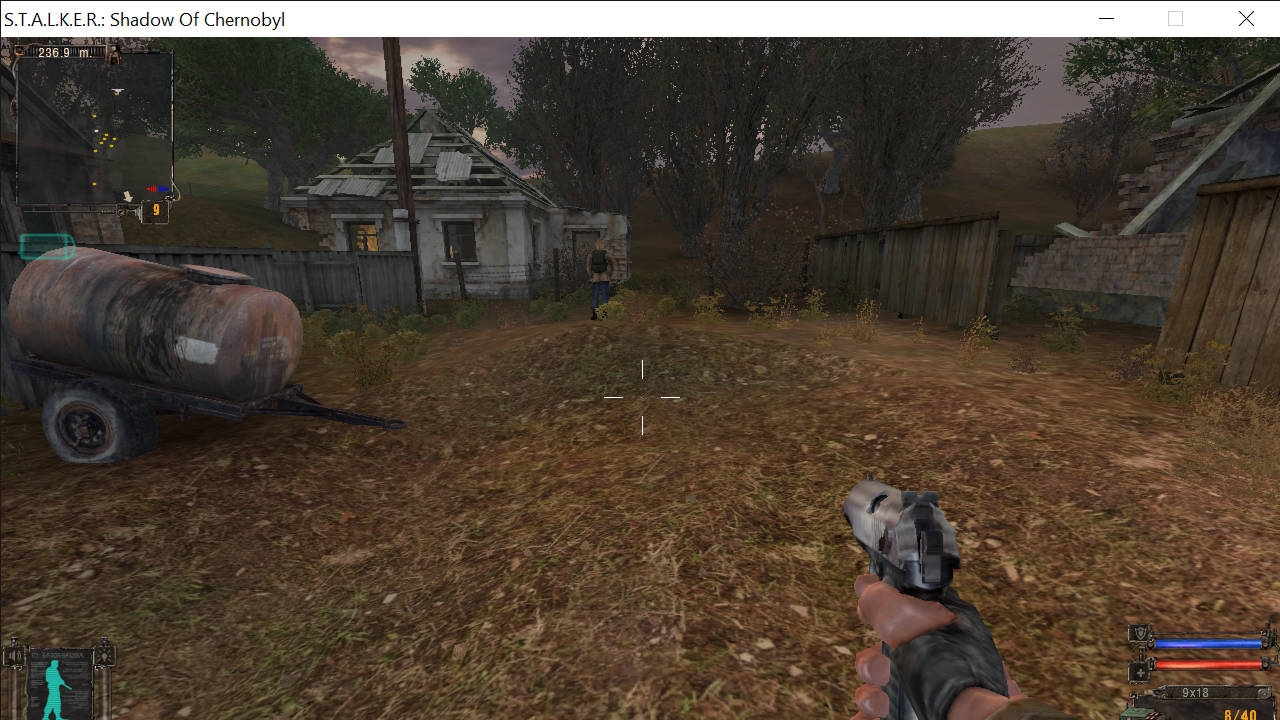
In the screenshot below, we have a PMm from S.T.A.L.K.E.R.: Shadow of Chernobyl. In this game (and mods based on SoC), the weapon that your character is holding and their hands are both all in one model. We will touch on this again shortly.
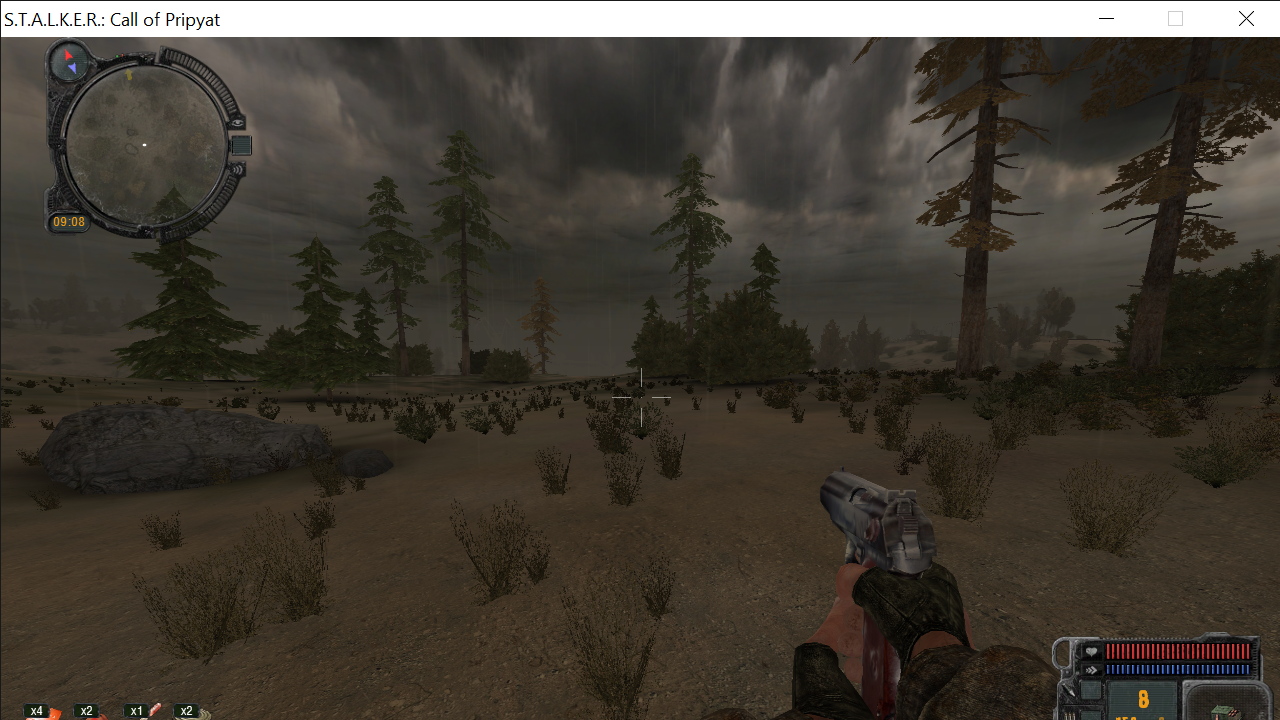
In this next screenshot, we have another PMm from S.T.A.L.K.E.R.: Call of Pripyat. In this game (and also on mods based on these, including CS), the weapon that your character is holding and their hands are both seperate models. This is especially evident when changing outfits as the player's hands can change upon doing this, leaving the weapon that you're holding in the same way it already is.
Also, this method does not require any experience with editing 3D models, so applications like Blender and Milkshape 3D are not required for this tutorial.
I would also like to clarify that getting the exact results of porting the weapon(s) you want may take a lot of trail and error with this method, and some animations may not fit together with certain models. Also, some models may not work with this method and may crash your game upon being loaded, though this is very rare. Please take this into account before you proceed.
Now that this has been explained, let's get into porting your first SoC weapon to S.T.A.L.K.E.R.: Call of Chernobyl (this also works for CS and CoP and, of course, mods based on these). For this tutorial, we'll be porting the Walther P38 pistol from the L.U.R.K. 1.1 mod for SoC.
=== PORTING WEAPONS GUIDE: ===
1) First off, you need to open the .ltx file of the weapon you want to change (this can be a brand new one of an existing weapon).
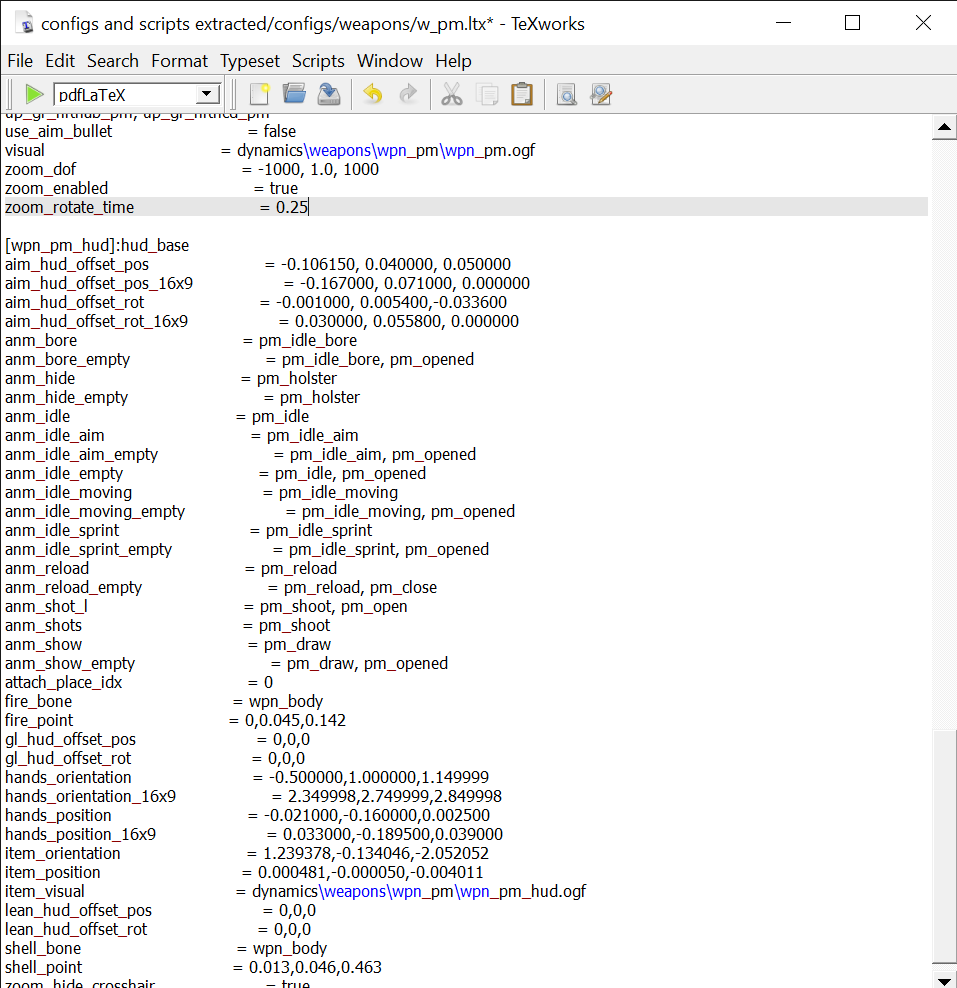
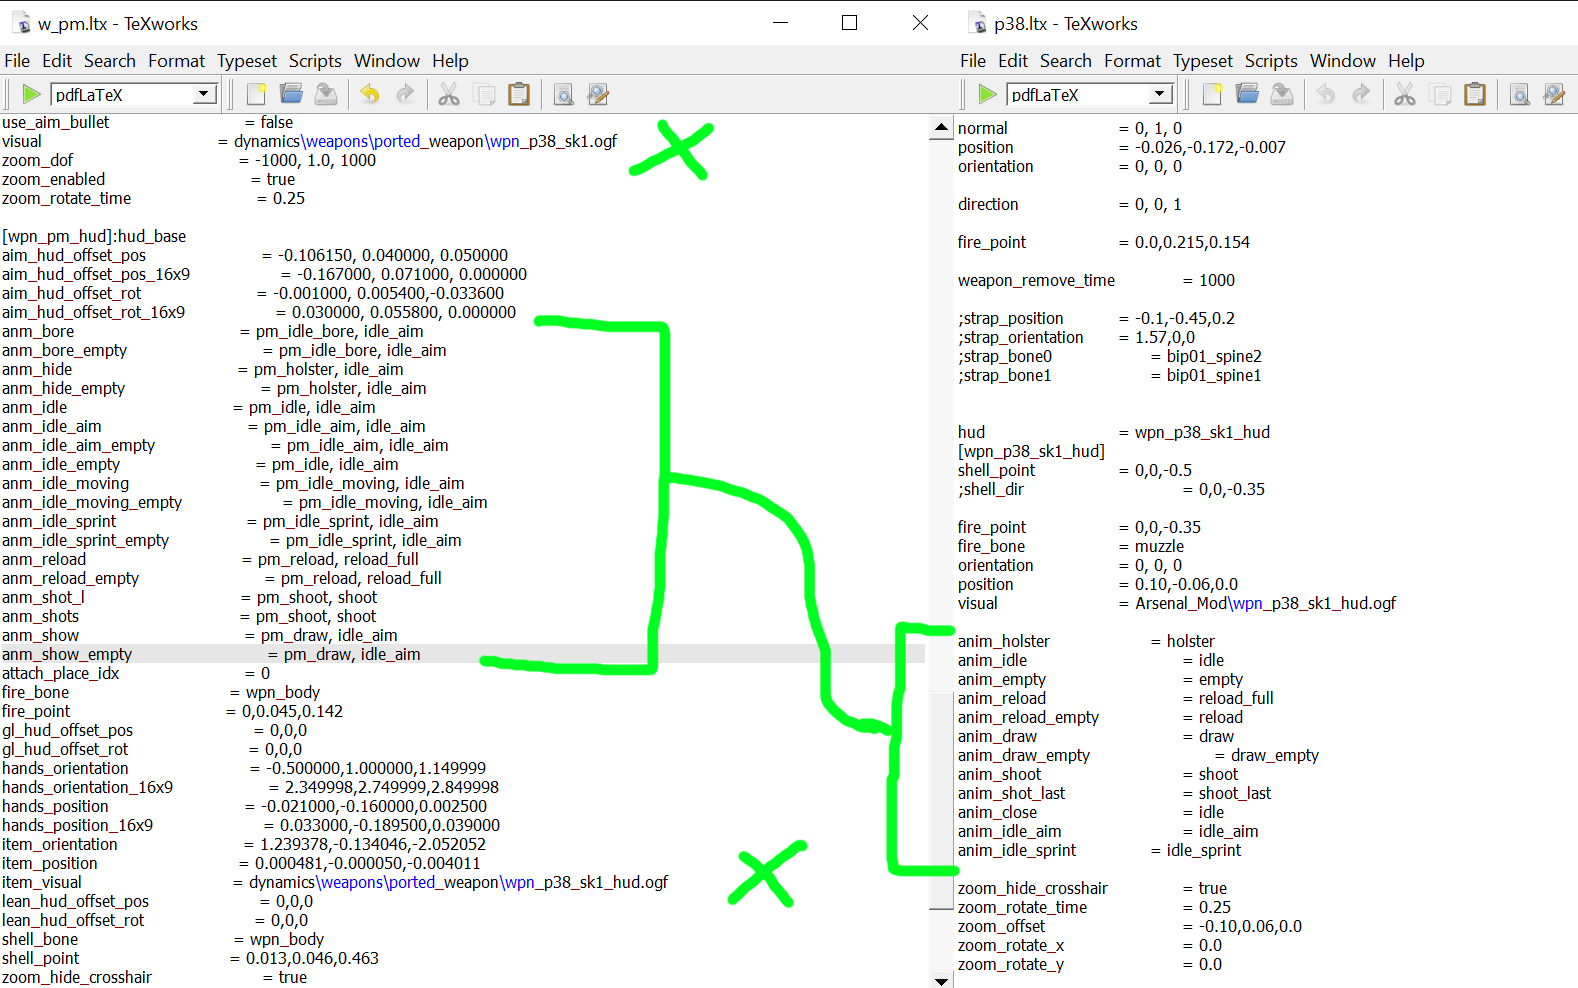
2) From here, you need to open the .ltx file of the weapon that you're porting over. For instance, the Walther P38. This step is not mandatory, but it will help you a lot. Scroll down to where the weapon's animations are found. You'll need these for later.
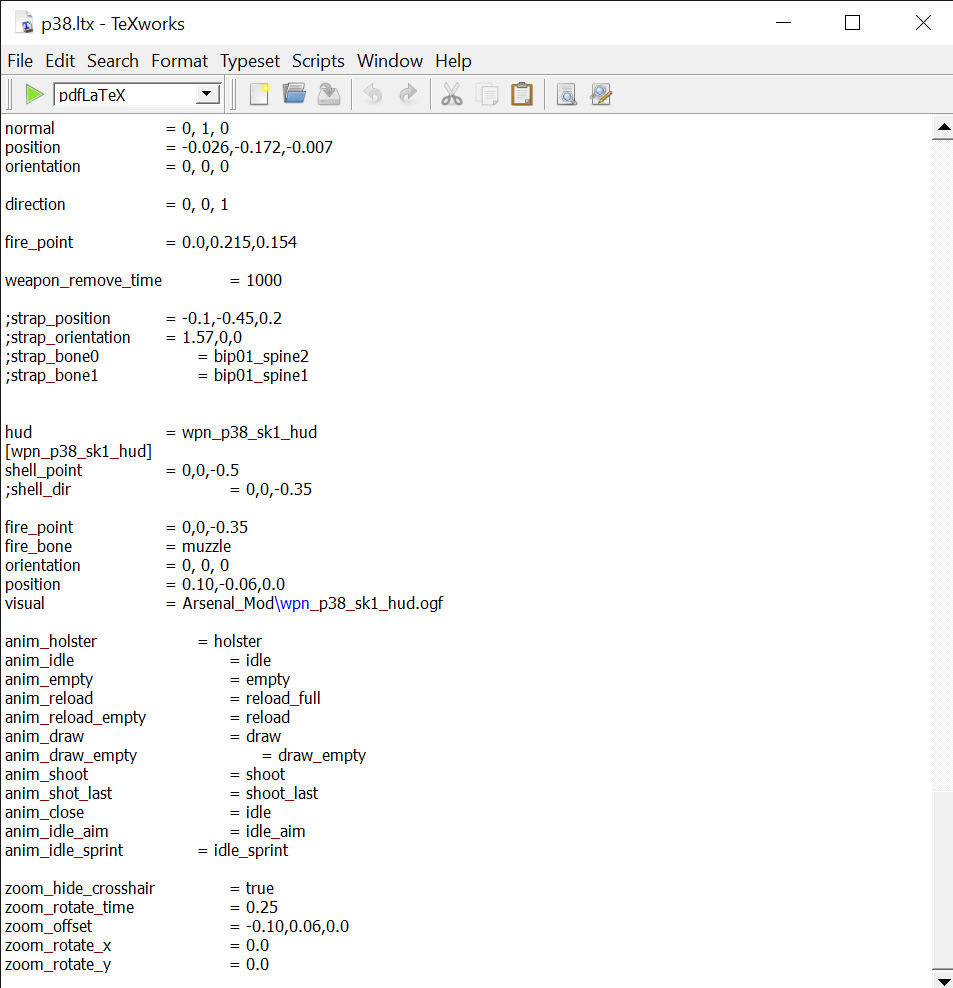
3) Copy the animations from the Walther P38 to the weapon's .ltx file that you first opened (the one in your destination folder) and list them as secondary animations. Also, make sure you reference the hud and world models of the weapon you're porting in the .ltx file you're editing. See the two screenshot below on how to do this.
4) Copy and paste both the first-person and third-person models (the hud and world models) of the weapon that you're porting into (for quickness) gamedata/meshes/dynamics/weapons/WEAPON_NAME (make sure to substitute the final folder with the name of your ported weapon).
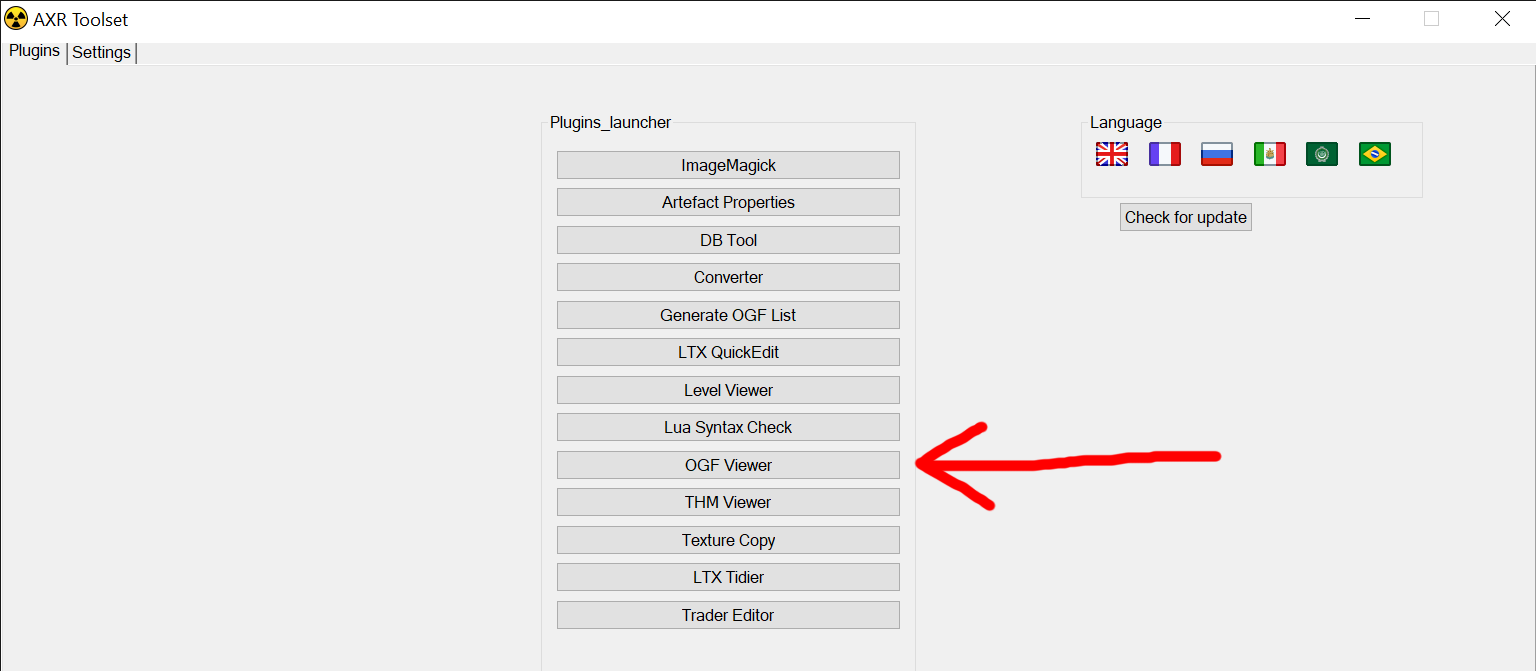
5) Open the AXRToolset and go to the OGF Viewer. From here, copy and paste the file path of the weapon models that you've copied from the previous step. From here, click the drop-down tab at the top of the window to reveal the contents of this folder. The files that show up will be the models that you copied and pasted over previously.
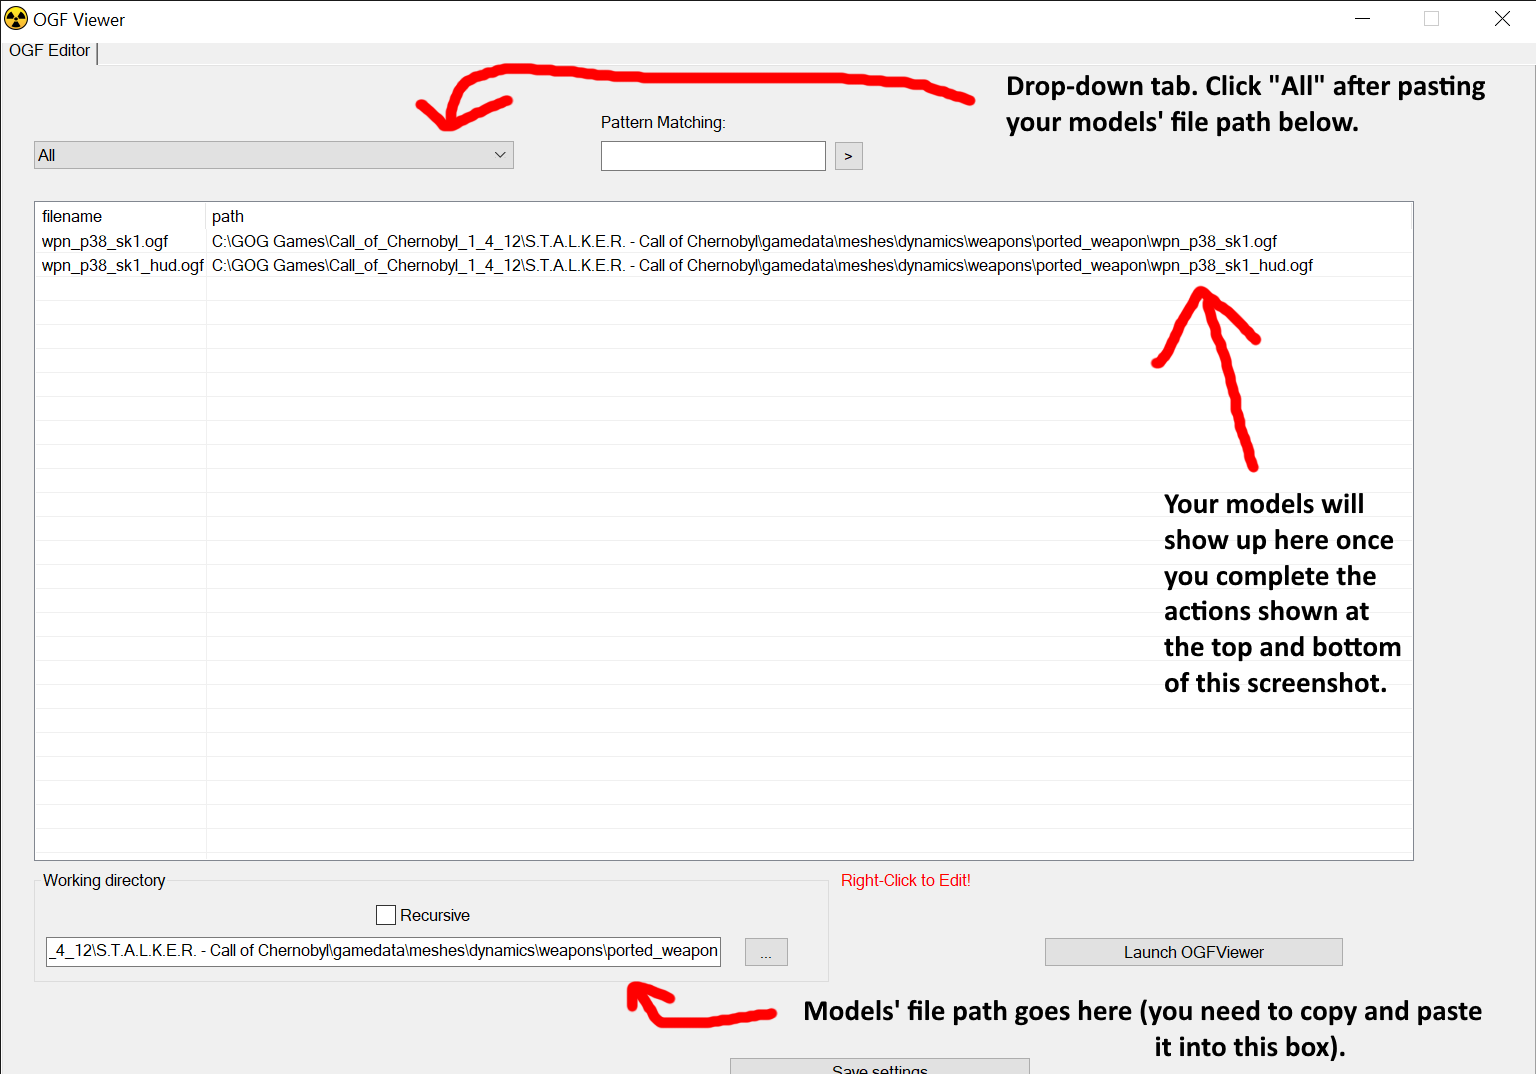
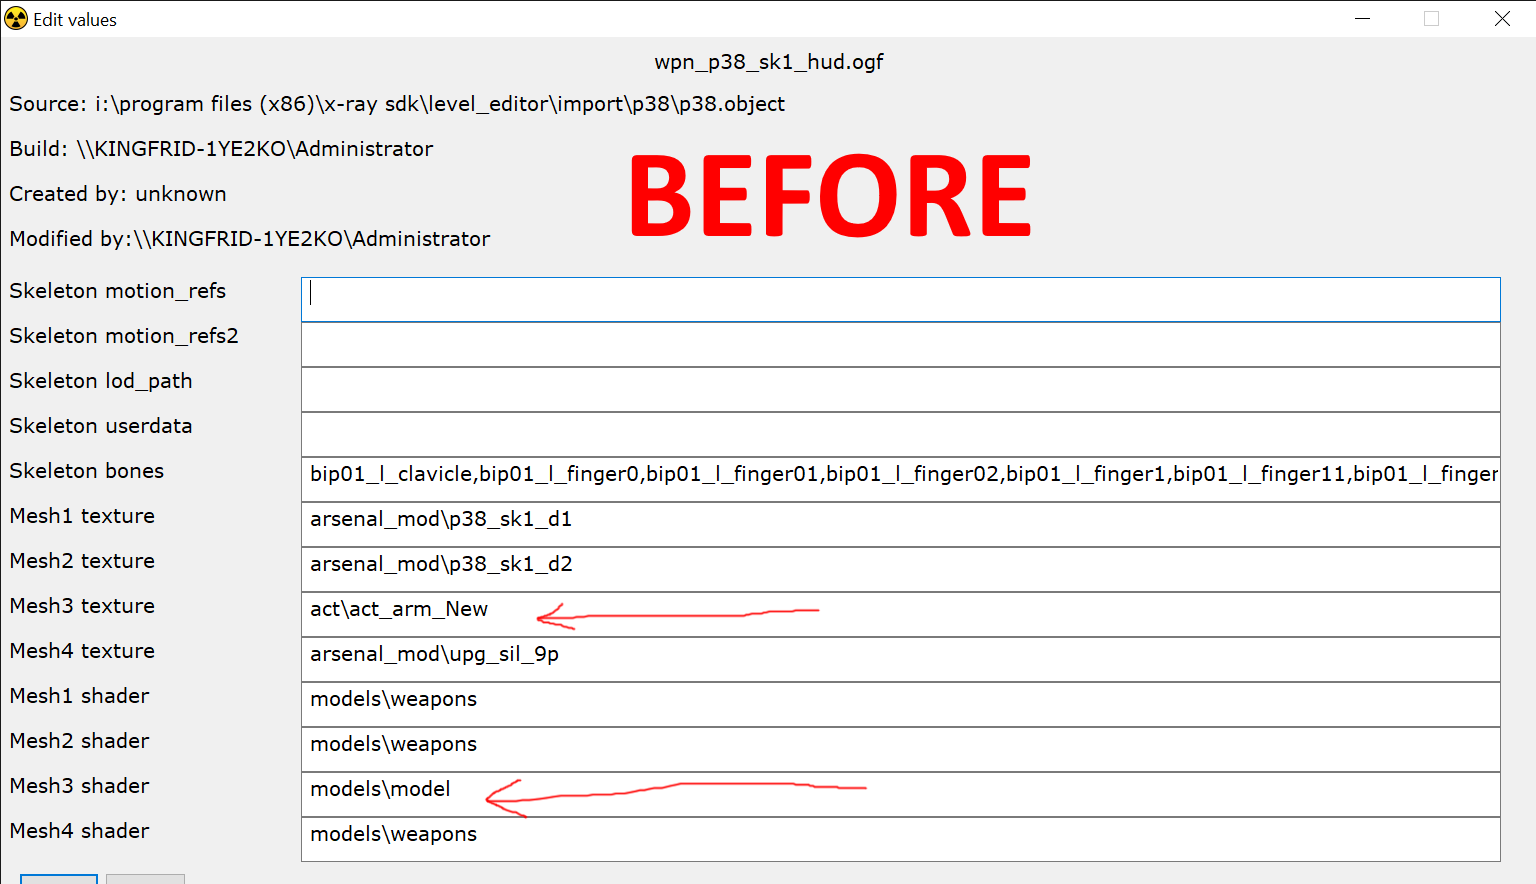
6) Right-click the hud model of the weapon that you're porting (as shown in the screenshot above). This step is very important as it prevents the player's hands from SoC (as shown in the background info towards the top of this tutorial) from showing up in-game when the ported weapon is equipped.
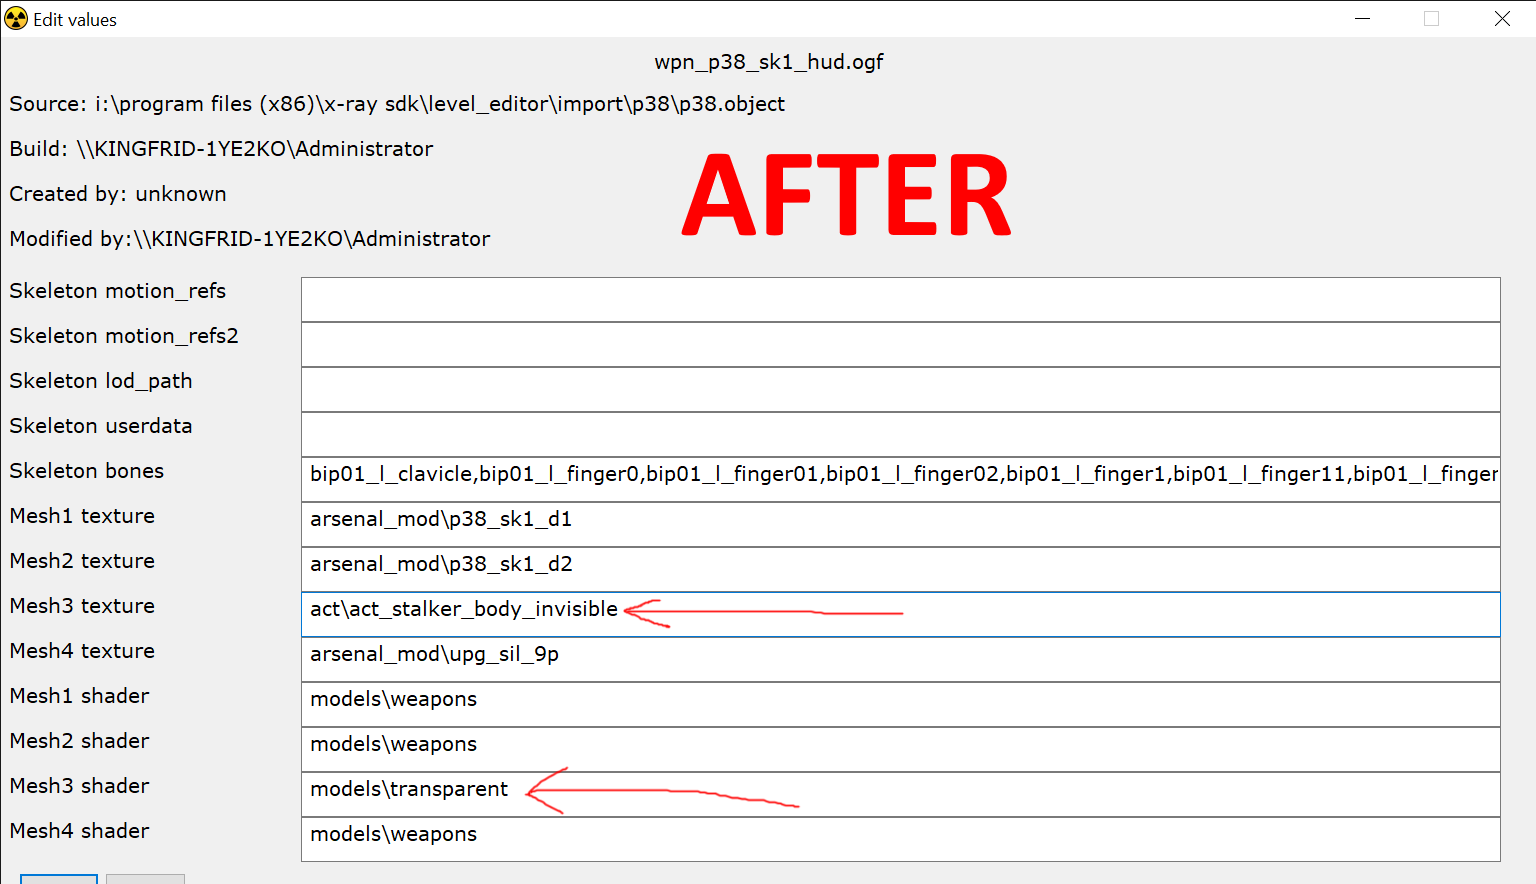
7) Make sure you've copied the transparent texture from earlier in this tutorial into the textures folder of your destination folder (i.e. gamedata/textures/wpn), or see the "S.T.A.L.K.E.R.: Transparent Texture" heading in the tools required section at the top of this tutorial.
8) Copy and paste the file path for this transparent texture into this section of the window. You should replicate the results below from "before" and make them the same as what's shown in "after".
9) Click "Accept" and close the AXRToolset.
10) Start your game to view the results of your new ported weapon in-game.
Any textures can be referenced through the OGF Viewer, as shown in the AXRToolset from steps 5, 6, 7 and 8. Adjusting the position of your weapon would be required (the same goes for its position while being aimed). I've left a couple of references below to help you with this (this will involve loading and closing your game a lot, along with making edits between doing these things, to get your weapon to show up properly).
Hand/item position values: +left/-right, +up/-down, +forwards/-backwards
*you will be able to familiarise yourself with these, along with tweaking rotation values, over time. It takes a lot of trial and error, as well as patience.
Rotational/hud values:

End of tutorial.

Thanks for the tutorial bro