1. Important Information:
1.1 What you cannot do:
- Add vertex animations. (So no facial animations, which is why we can't make custom NPCs).
- Add cloth physics.
- Edit the skeleton.
- Edit the animations.
1.2 What you can do:
- Replace the player with a completely custom model, as long as they are humanoid.
1.3 What you need:
- A copy of VTMB installed.
- The Unofficial SDK for VTMB. The SDK is included under "Patch Extras" with the Unofficial Patch, and there's also a standalone installer on MODDB. (Moddb.com)
- 3d modeling software (I use Blender) with a plug-in for the Source Engine. You need something that can import/export models in *.smd format.
- Knowledge of how to use this software, as teaching you would be an entire course, way beyond this guide).
- Some knowledge of how materials in Source works, as explaining all that is beyond the scope of this guide.
1.4 Setting things up:
The first time you launch the SDK, it will prompt you to extract the game data from VTMB. Let it do that. (If you're on a modern OS and VTMB is installed in "Program Files (x86)", you'll have to run the SDK as Admin.) The tools included in the SDK that you'll need are Crowbar, and the Texture Converter for converting your textures to Troika's *.tth/*.ttz format.
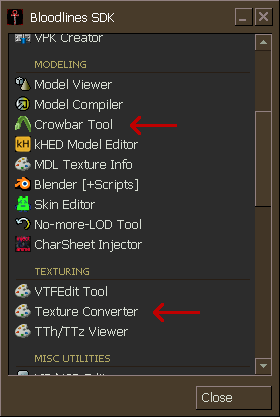
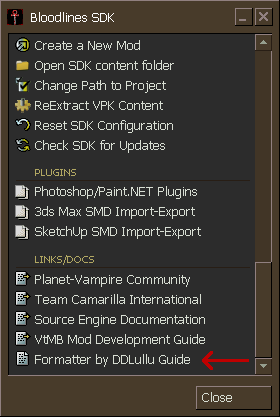
If you scroll down the SDK's launcher, you'll also find the readme for the Formatter at the very bottom.
"[...]Bloodlines SDK\SDKContent\ModelSrc\PoisonIvy_example\" contains and example where DDLullu ported Poison Ivy's model (from Arkham Asylum) to VTMB.
2. Choose your skeleton:
The very first (and very important) thing you have to do is decide which skeleton you want to use. You can't alter the skeleton, but any procedural- and jigglebones it contains will be used. Any animations included in the model will also be copied over. The Formatter will work on any character model, but I've not tested it on an NPC model. I recommend sticking to the existing player models.
As an example for this guide, I'm going make a PC model from Damsel. Damsel has long, loose hair, so I need to use the female Tremere's skeleton. The player models are under "[...]models\character\pc\".
- Launch Crowbar through the SDK.
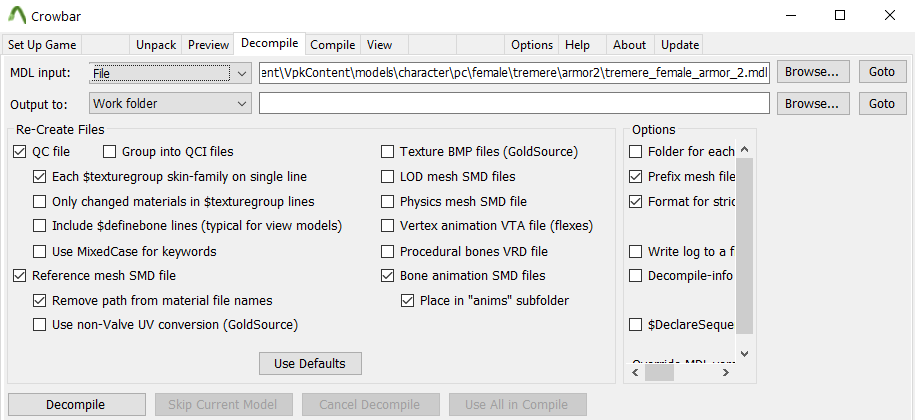
- Switch to the Decompile tab.
- Click "Browse..." at the top, next to "MDL Input:" and navigate to the model who's skeleton you want.("[...]Bloodlines SDK\SDKContent\VpkContent\models\character\pc\female\tremere\armor2\tremere_female_armor_2.mdl" in this example). I'm using armor_2 (her third outfit) because armor_0 doesn't have working jigglebones in her chest and the jigglebones in her hair on armor_1 are messed up.
- Create a folder somewhere you want to work from.
- Click "Browse..." next to "Output to:" and navigate to the folder you made.
- Under "Re-Create Files": Check "QC file"; "Each $textgroup skin-family on single line"; "Reference mesh SMD file"; "Remove path from material file names"; "Bone animation SMD files"; "Place in "anims" subfolder". Uncheck everything else. (You can check "Use MixedCase for keywords" if you want).
- Under "Options": Check "Prefix mesh file names with model name" and "Format for stricter importers". Uncheck everything else. Leave "Override MDL version" on "Do not override".
- Click Decompile.
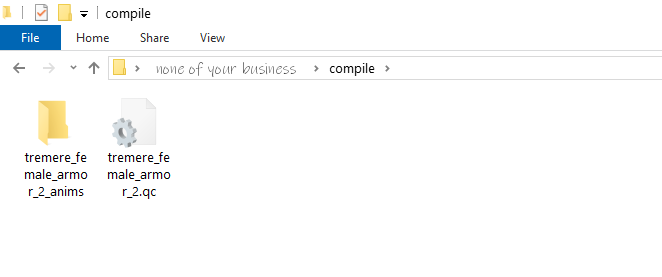
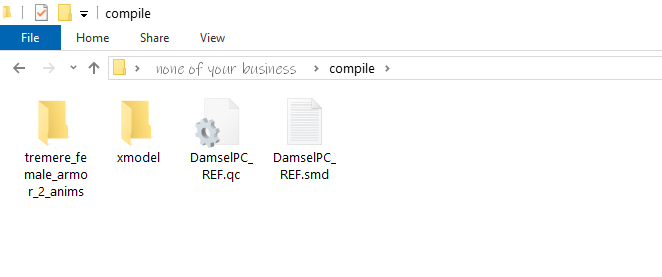
Inside the work folder you created, create a folder called "compile", and move the anims folder and *.qc file into that folder.
Inside the "compile" folder, create a folder called "xmodel".
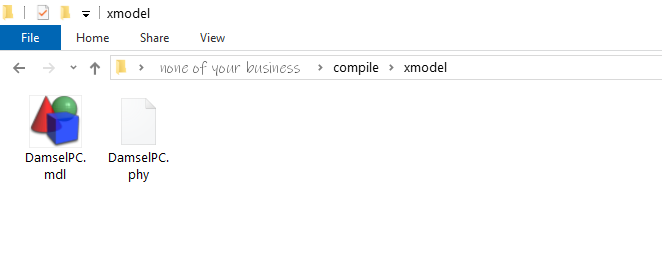
Navigate to where the SDK extracted the VTMB files, going to the folder containing the model you decompiled. "[...]Bloodlines SDK\SDKContent\VpkContent\models\character\pc\female\tremere\armor2\" in this example. Copy the *.mdl and *.phy files to the "xmodel" folder. The Formatter will use these files to copy over the skeleton and other data.
For the Formatter to work, you need to rename the files. The names of the files in "xmodel" needs to match everything before an underscore in the name of your reference mesh. I'm going to name my reference mesh "DamselPC_REF", so I rename "tremere_female_armor_2.mdl" to "DamselPC.mdl" and rename "tremere_female_armor_2.phy" to "DamselPC.phy".
Note: If your skeleton model doesn't have a *.phy file (as is the case with viewmodels (first-person-view models)), you simply omit that part. Place only the *.mdl in "xmodel" and everything else is the same. (It's thanks to the Formatter that I was able to clean up the first-person hands for the Unofficial Patch).
3. Make your model:
- Load the *.smd you got with Crowbar into your 3d software.
- Create or port your custom model. You can go bananas with it, as long as you rig it onto the skeleton from the *.smd you loaded in first.
Some notes:
The Source Engine has a bone weight limit of three bones. The minimum weight you can assign is 5%. Both 4+ assigned bones and weights below 5% will get culled at compile time, damaging your rigging. You should stay within these limits when rigging. (Yes, I learned this the hard way.)
While you can't alter the skeleton, you can avoid using a bone by just not assigning weight to it.
Jigglebones aren't always descriptively named. If a bone is called "Bone05" for example, it's probably a jigglebone. For women - even if bones in the chest are not set up as jigglebones, you'll have to assign weights to those bones if you want your model to be affected by the "money" console command. ("money" scales those bones by the number you put into the console).
Bones with Hip, Femoris, Quadricep, Knee, Shin, Ankle, Shoulder, Bicep, Elbow, Ulna or Wrist in the name are procedural bones. (Bones that the engine will animate for you). Most models don't have all of these bones.
Hip is attached to the wrong spine bone and will probably look bad, I strongly recommend ignoring the Hip bones.
I've not figured out how all these bones work. Most of them twist like you'd expect (Knee/Elbow twists -45 degrees around local Z when Calf/Forearm twists -90 around local Z, twisting Hand/Foot +90/-90 around local X twists Wrist/Ankle +90/-90 around local X and twists Ulna/Shin +45/-45 around local X), but the ones in the upper arms and upper legs twist in odd manners. I actually avoid using the upper ones entirely because of that.
Regarding the poly count of your model - here's information on the Source Engine's limits.
To give you a sense of what VTMB's models are like:
Female Citizen: 3166 verts; 9239 edges; 6080 faces.
Beckett: 3815 verts; 11093 edges; 7204 faces.
Yukie: 5063 verts; 14619 edges; 9562 faces.
4. Set up your model for compiling:
Once you're done in your 3d software, export your reference mesh as *.smd and place it in the "compile" folder you made before. Make sure the name (everything before an underscore) matches what you named the files in "xmodel".
Rename the *.qc file to the same name you're going to give your custom model.
4.1 Set up your materials:
- Use the Texture Converter from the SDK to convert your model's textures to *.tth/*.ttz. That's two files per texture. Optionally, you can use VTFEdit (the SDK contains a copy of VTFEdit) to convert the textures to *.vtf first, then convert the *.vtf to *.tth/*.ttz. Doing so results in larger textures, so if your textures are 2k or larger, that may cause performance issues.
- Set up the *.vmt files for your textures.
- Place your textures/*.vmt files in a folder somewhere in "[...]Vampire\materials\models\".
4.2 Set up your *.qc file:
The *.qc file is a plain text file that you can open with any text editor. (I recommend Notepad++).
"[...]Bloodlines SDK\SDKContent\ModelSrc\PoisonIvy_example\poison_vtmb\new_poisonivy_a3.qc" is the *.qc file for the Poison Ivy port I mentioned earlier. You can look at that to see how the *.qc should look for the Formatter.
Let's walk through how to edit the *.qc file we got from Crowbar.
"$modelname" gives the file path (relative to Vampire\models\) and filename for your model. This is where the final model will be placed. I'm going to place my Damsel PC straight into the Brujah folder, so I change that line to
$modelname "character/pc/female/brujah/armor0/DamselPC.mdl"Note: I assume for this guide that you're setting up your model with Valve-type eyes. You don't have to, but the eyes are weighted onto the head and they'll be frozen in place if they don't use the "Eyes" shader. Speaking of, you have to use "Eyes". "EyeRefract" didn't exist yet in 2004. Yes, the PC has no facial animation, but they do have working eye tracking. That's why you'll see them looking to the side in some cutscenes.
We have to use "$model" instead of "$bodygroup" because we're adding data for the eyes. Replace the "$bodygroup" block with a "$model" block that looks like this:
$model "girl" "DamselPC_REF" {

	eyeball "eye_right" "Bip01 Head" -1.20 -2.96 64.75 "eyeball_r" 1 4 "iris_unused" 0.63
	eyeball "eye_left" "Bip01 Head" 1.20 -2.96 64.75 "eyeball_l" 1 -4 "iris_unused" 0.63
}
Let me run through what this all does real quick.
"girl" is what the model is called inside the *.mdl. It isn't used anywhere else. You can leave that alone.
"DamselPC_REF" is the name of your reference mesh. Change that to what you called the *.smd you exported from your 3d software.
The "eyeball" command is explained here.
"eye_right" and "eye_left" are the names of the eyeballs.
"Bip01 Head" is the name of your character's head bone. I believe all the models in VTMB have this name for the head bone.
These next three numbers - this is the important part. These numbers are an XYZ co-ordinate that tells the engine where the center of your character's eyeball is. I use Blender, and fortunately Damsel's eyes are half-spheres, so I can easily find the center. I select the loop at the back of her eyes, snap the cursor there, and check what the cursor's location is.
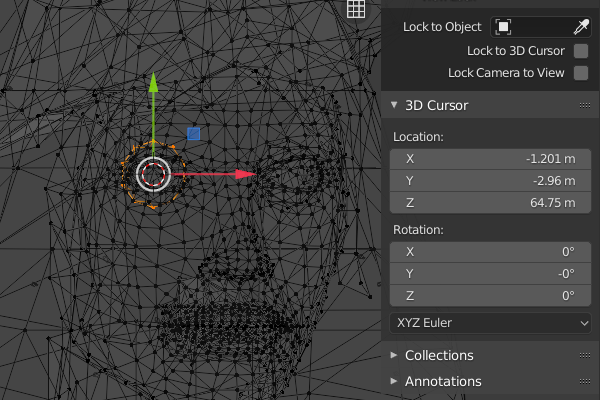
I do the same for the left eye.
If your model's eyes are not spheres, it can be hard to find the center (I've never had to deal with that). These are DDLullu's instructions from the Formatter readme:
You must put the eyes data into the QC. The data is taken from Blender, you put the cursor on the center (or where you want the iris) of each eye and read the coordinates (X,Y,Z) of the cursor with +0.5 added to the Y coordinates.
"eyeball_r" and "eyeball_l" are the names of the materials for your eyes. They should match what the material slots on the model are called.
The rest you can leave as-is. "1" is the width of the eyeball (which the engine apparently doesn't even use), "4" and "-4" is by how many degrees they eyes are turned outward from the center (your eyes don't point straight ahead, they're turned slightly). "iris_unused" is the name of the iris material and "0.63" is the scale of the the iris. The iris material doesn't actually exist. That and the scale is unused, but you have to put that in the eyeball command for it to work. (Something-something load-bearing coconut).
Moving on with the rest of the *.qc:
Leave "$illumposition" as-is.
I can't find documentation on how "$eyeposition" is calculated. Valve always used 0 0 70. Anyway, change that to
$eyeposition 0 0 65like DDLullu did.
Leave "$surfaceprop" as-is.
"$cdmaterials" - these are all the folder(s) that contain your *.vmt files, relative to "Vampire\materials\". Your textures don't need to be in the same folder, and the *.qc doesn't need to know where the textures are. The *.vmt files point at the textures. So you point this at the folder(s) where you placed your materials.
Note: "materials\models\character\eyes\" and "materials\models\character\teeth\" contain the shared eyes/teeth textures VTMB has, if you want to use any of them.
For our example, I'm going to re-use Damsel's textures, so I point at Damsel's folder. I also need to point at the "teeth" folder, but not the "eyes" folder, because the *.vmt files for Damsel's eyes are in her unique folder. So I change this block to
$cdmaterials "models\character\npc\unique\downtown\damsel\"
$cdmaterials "models\character\teeth\"
Delete the "$texturegroup" block.
Leave "$attachment "mouth"" as-is.
Change "$attachment "eyes"" to
$attachment "eyes" "Bip01 Head" 0 -2.96 64.75 absolute"Bip01 Head" is the name of your character's head bone.
You need to change the numbers to match your model. The numbers are an XYZ co-ordinate, the point between the center of the eyeballs. You calculate that by taking the X-co-ordinates from the "eyeball" lines, adding them together, and dividing the result by 2. Do the same for Y and Z.
Leave "$attachment "0"" as-is.
Delete the "$cbox" line.
Delete the "$bbox" line.
Delete the "$hboxset" line.
Delete all the "$hbox" lines.
Leave the "$sequence" lines as-is. These are the bone animations.
Leave the "$includemodel" lines as-is.
Delete the entire "$collisionjoints" block.
5. Compile your model:
With your *.qc done, you can compile your model.
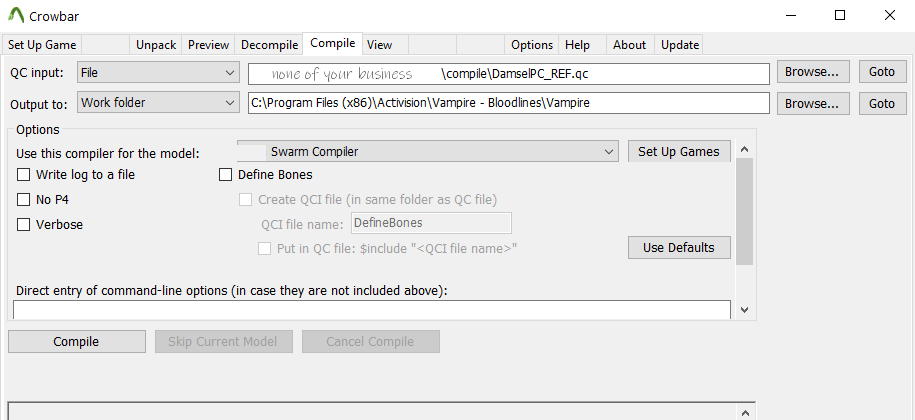
- Launch Crowbar through the SDK.
- Switch to the Compile tab.
- Click "Browse..." next to "QC input:" and navigate to the *.qc you edited.
- "Output to:" Should already be pointing at "C:\Program Files (x86)\Activision\Vampire - Bloodlines\Vampire" or where your copy of VTMB is installed.
- Under "Options": next to "Use this compiler for the model" select "Alien Swarm Compiler" from the drop-down list.
- Uncheck everything else.
- Click "Compile".
Crowbar automatically calls the MDL Formatter, so your model should now be compiled, converted and placed in the folder you pointed at in the *.qc.
6. Test your model:
Navigate to where your model was placed. For me, that's "[...]Vampire\models\character\pc\female\brujah\armor0\".
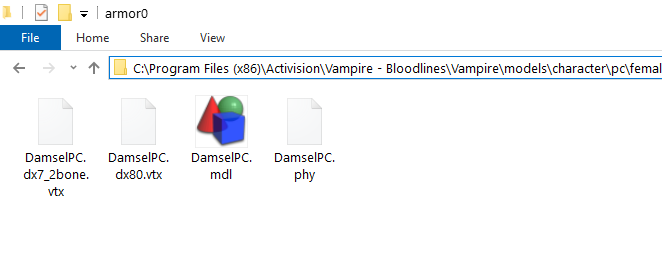
All 4 files are needed for a model, and you should move them to the folder of the PC model you want to replace. Just the model, don't touch the materials. The model has the file path(s) to the materials stored internally. Even if you move/rename the model, it still knows where it's materials are. I don't need to move my model because I compiled it into the right folder already.
You also need to rename your model. I'm replacing the female Brujah's first outfit, so I need to know what that model is called. I navigate to "[...]Bloodlines SDK\SDKContent\VpkContent\models\character\pc\female\brujah\armor0" and rename my "DamselPC" files to match what those files are called.
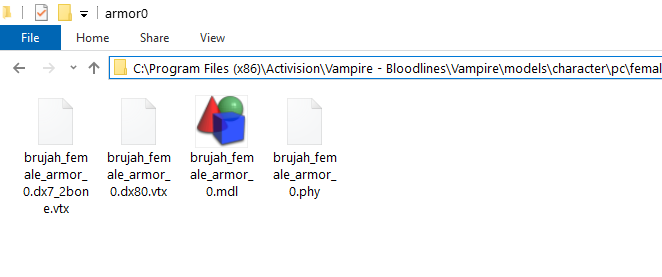
Now we can check our model in-game.
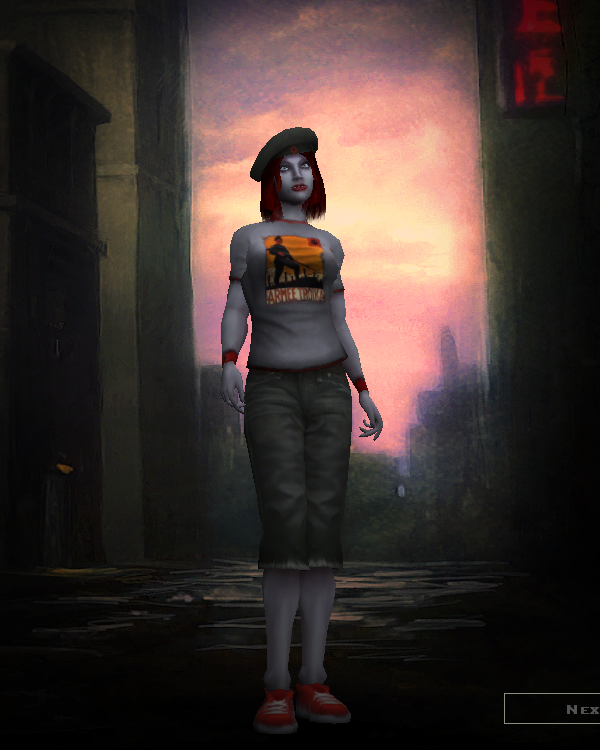
You'll notice she's using the female Tremere animation on the character sheet, because that's the skeleton we put her on. That's only on the character sheet. If you're using the Unofficial Patch Plus, she'll use the correct clan-specific animations in-game. The UP+ fixes that via a script.
Note: Loose files on disk are used instead of files inside the *.vpk archives. If the same file is present in both the "Vampire" and "Unofficial Patch" folders, the one from "Unofficial Patch" will be used. So, if your model doesn't show up in-game, check if that model is already being replaced by the UP. If it is, you'll have to place your mod in the "Unofficial Patch" folder, overwriting the files from the UP. The same is true for any of the other big mods that have their own folder.
One last note: If you want to replace the inventory images, they're in "[...]materials\hud\inventory_images\armors\". A folder for each character, and the directory also includes a clean copy of the vest overlay you'll need for the Body Armor's image.
That wraps up how to make a custom PC model.
If you have any questions, leave a comment below, or find me in the Planet Vampire Discord.


Great info ,thanks for sharing !
Thank you King for this.
Adding custom model looks hard and time consuming so bad. I respect modders for this.
Just building on the work of those who came before me. :)
I'm not sure the Formatter is actually running. When I load into the map, my model only shows up as a 3d model of green text saying "Wrong Version" with a debug log showing the model path that's supposed to be there.
Is there a method for manually running the Formatter after compiling?
I've heard someone say the Formatter has string length limitations and sometimes won't run if those are hit so they had to move it somewhere else.
Have you run into any of this IlexManor?
This comment is currently awaiting admin approval, join now to view.
I've not been able to reproduce this issue, despite trying to break things on purpose. Someone else on the the forums ran into the "Wrong Version" error too, and with his testing he learned it's that specific PC that has an issue. Everything works if he copies the project to another PC. Last we spoke, he said he's still trying to isolate the problem, but he thinks it's with Crowbar.
So... I have no clue what causes this. The only thing I can suggest right now is doing a clean re-install of the SDK.
Thanks for this I've been having trouble finding info on almost everything. Can this method be used for weapons as well?
Yes. I've used it on first-person models, and it should work on the third-person ones as well.
Cool looks like I'll finally get to rock a LMG!