Today I will tell you about the process that I am planning to use for level creation.
Until now, all the levels were created directly in the level editor. This process was satisfying enough in order to test gameplay ideas, debug the 2D engine... Concerning the final levels, it will be more efficient to have a global idea of the level before starting to use the editor.
The plan is to create a digital drawing document in which I can draw the levels, as if I am drawing on paper and to iterate until the level is satisfying enough to be implemented.
Getting some measurements
Drawing the level can only be considered a viable solution if there is a way to check that it produces playable levels. For instance, when positioning platforms, we need to ensure that the player will be able to jump from one platform to another. Papy Stampy can also use a parachute and reachable places need to be known.
I decided to extract a piece of measurements that could help creating the levels:
- jump length
- jump height
- run speed
- parachute falling curve
- ...
This was achieved by creating a test level that allows all the actions that should be measured and by capturing a set of player measurements at each frame in a CSV file (player position, key pressed, ...).
The following screenshot shows the position of the captured player position:
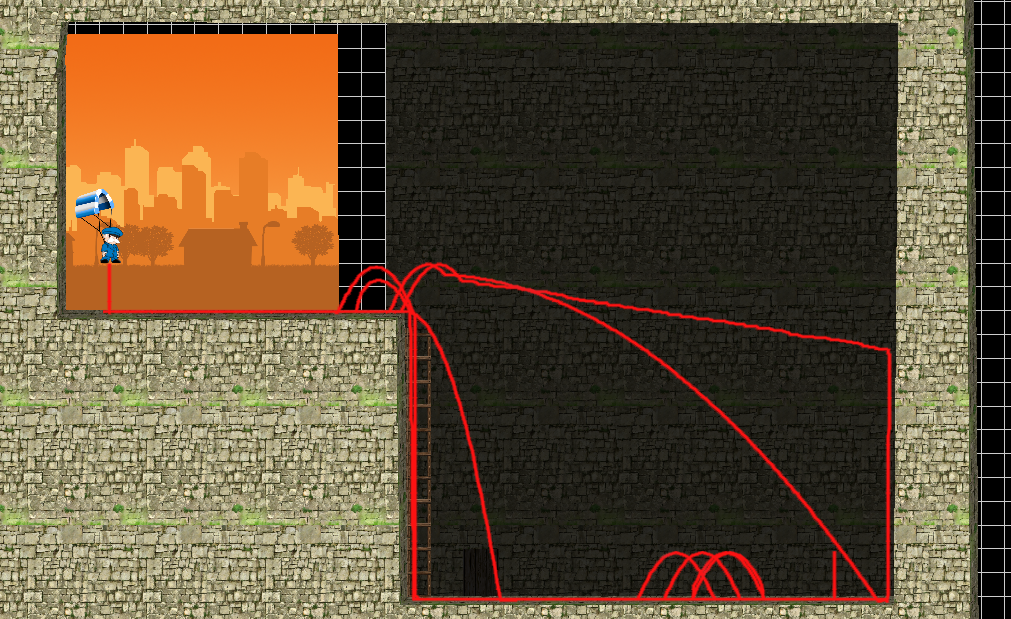
All the data was analyzed in order to extract the required measurements.
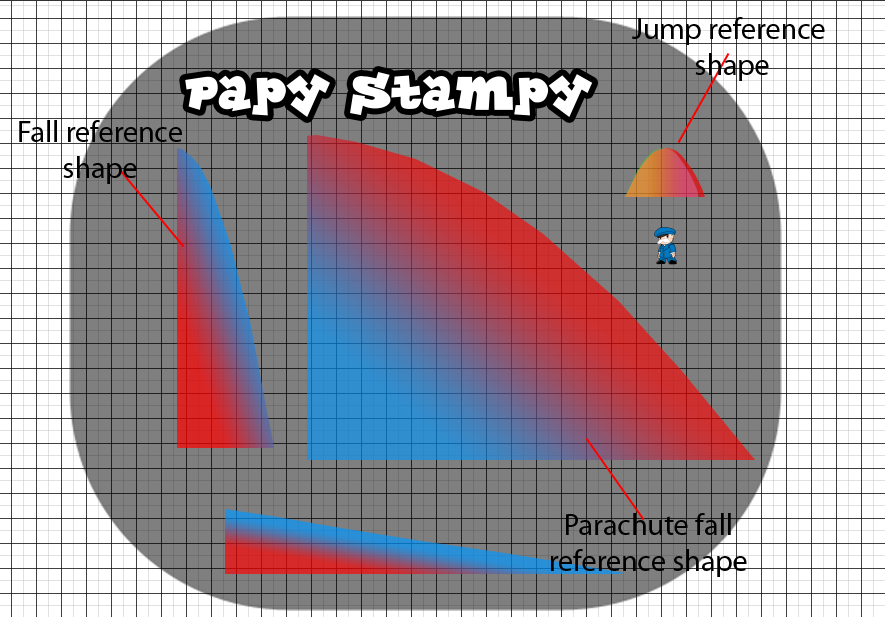
Creating the level design blueprint
The next step was to create the template document for level creation,named blueprint. the blueprint needed to contain grids and some size references in order to facilitate level creation.
This was achieved by using reference shapes representing the jump and fall curves of the character.
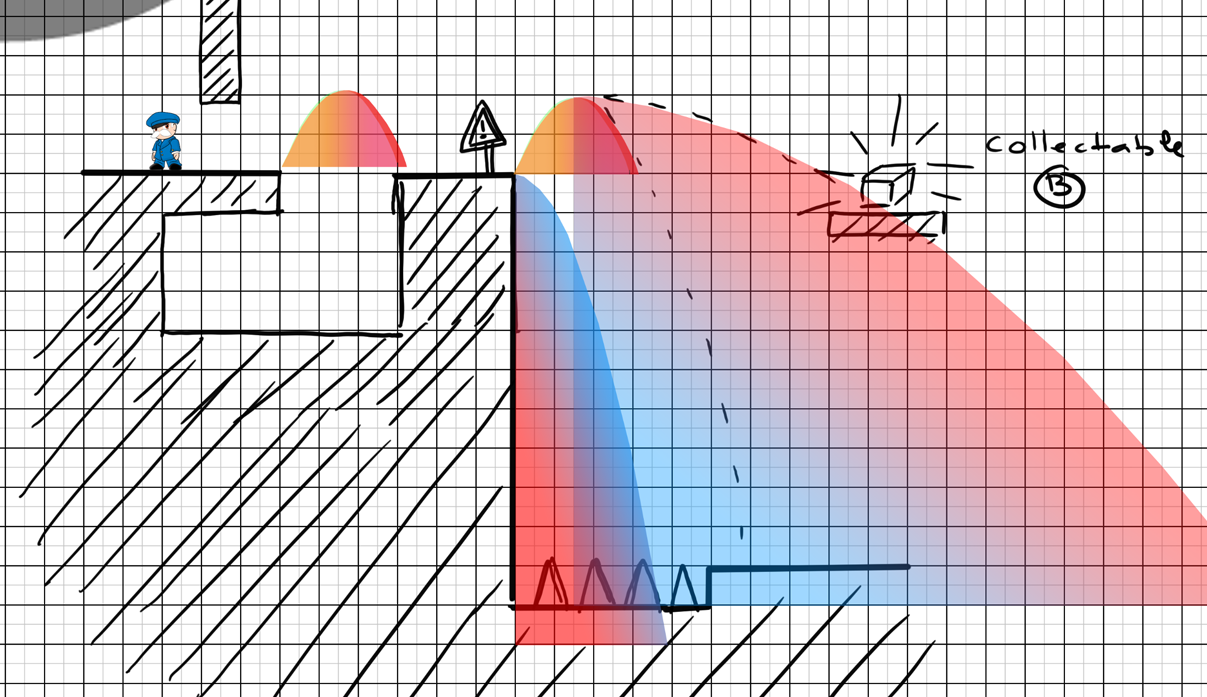
The following screenshot shows a level created with the blueprint. the jump and fall curves are used
- to calibrates the jumps
- to position the traps
- ...
Creating levels
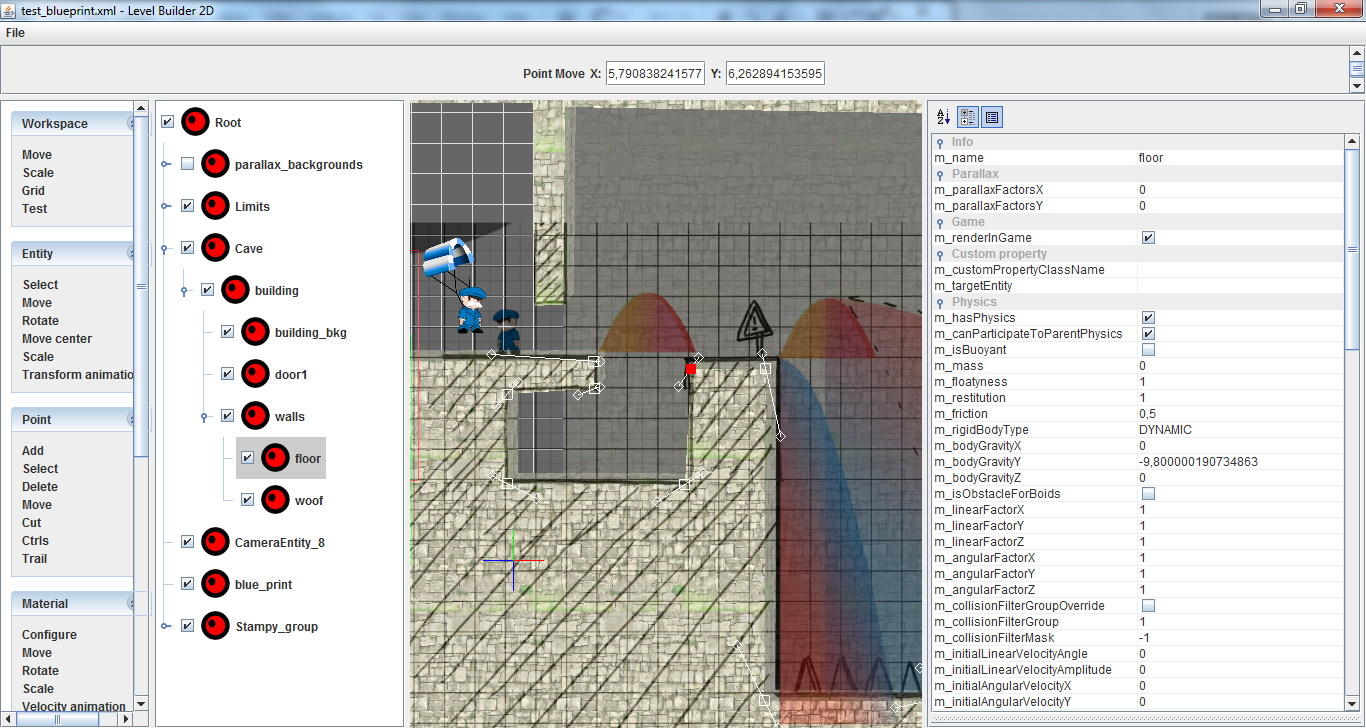
When the blueprint is ready to be implemented, it can be exported into an image and imported as a background image in the level editor
That's it for today!
Stay tunned,
Noxis