Location
AddonsFilename
leomh2ob.1.2.zipCategory
Player ModelLicence
ProprietaryUploader
fotmCredits
Rockstar GamesAdded
Updated
Size
129.9kb (133,021 bytes)Downloads
307 (1 today)MD5 Hash
53c83c79a1b83ee956edc0001e3df274Embed Button
Embed Widget
Description
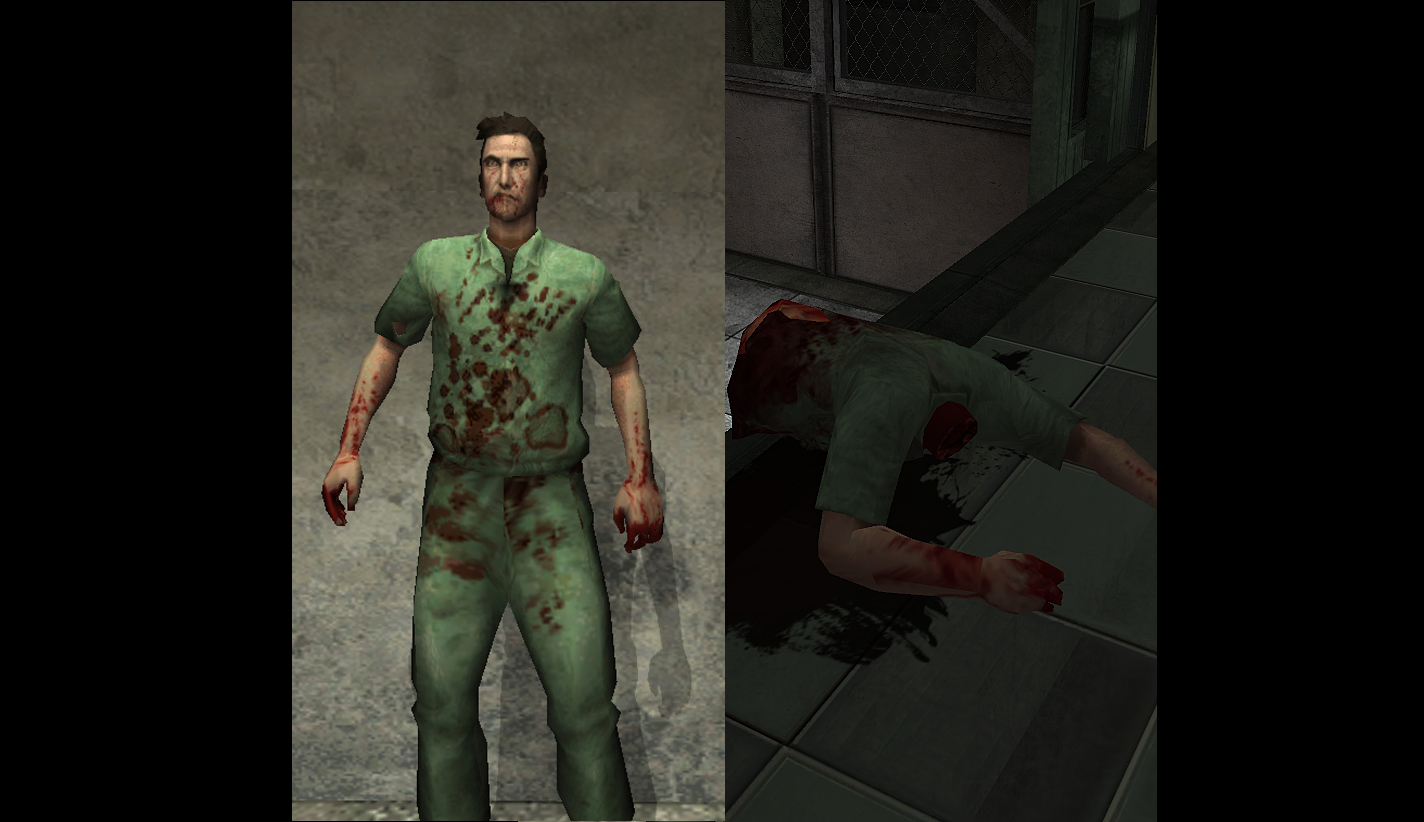
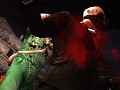
This mod changes Daniel Lamb's main player ("asylum") model with Leo Kasper's original beta model. It also includes the "A01_dead_elevator" character model, with the head removed so it appears to be decapitated.
Before modifying files concerning any game, remember that it's advised to backup it or them, in case you want in the future to recover anything, another option of course being to manually modify the name of the file/s you don't want to be replaced before adding mods.
To use, locate Manhunt's 2 installation folder (or the folder from which Manhunt 2 is launched).
1. For A01_dead_elevator model: You need Manhunt2 MDL Editor. Launch the program and locate the "levels\A01_Escape_Asylum\modelspc.mdl" file selecting "File\open". Once inside this file, choose and replace the file named "A01_dead_elevator" with the one included in this download, and click "File\save". That's it, Enjoy.
1. For Leo beta model: Open the "global" folder and place the file "danny_ingame-dasy_pc.mdl" included in this mod inside it (replace if necessary). Now extract the files "wacko_bod.tga" and "wacko_hed.tga" to a familiar location in your pc.
2. Then, you need to download Manhunt 2 TEX/TXD Editor. Launch it, open with it the file "danny_ingame-dasy_pc.tex" found in the same location as file "danny_ingame-dasy_pc.mdl", and clicking the button "add" on two separate occassions, select "wacko_hed.tga" and "wacko_bod.tga" to include them in the file (you can delete the default textures if you want to). Save it. That's all, Enjoy.
P.S.: This model doesn't have the bones needed to attach weapons and lures as player (these will float in the air where you decide to holster them and won't stick with you until you unholster them) and honestly i didn't do it mainly because i haven't been successful at rigging skins.
In this case a workaround i consider sufficient though somewhat tedious [the result will be that weapons don't float but are "concealed" in your body like in most games, so among other things that's why i consider this enough of a solution, also wanting to mention that they are actually not concealed in you, but in this case in the lurebag with can model (you can use other models that are included in the level you're playing or models available inside gmodelspc.mdl in the "global" folder, just so you know) which you may "luckily" find on some gameplay somewhere in a level laying on the ground or even floating if i remember correctly], that consists in editing resource3.glg inside the level folder you want this to have effect (which you can learn to do by following the instructions about resource1.glg below on section 3.).
Then add to every weapon (that you want to "not float") entry, the string "HOLSTER_MODEL LurebagCan_(CT)" (it can also be "LurebagBrick_(CT)" or "LurebagEmpty_(CT)" of course). One more thing about this is that as tedious as this may seem, basically everything can be simplified by using the "replace all" option found next to the text search tab you may open with the aid of the shortcut ctrl+f in the software Notepad++ (even WordPad has this "replace all" option). Sorry if you consider this postscript a let down.
P.S.2.: To insert the model as another main "character" or model, you need Manhunt2 MDL Editor.
For example, if you want to change Leo Kasper's main player ("asylum") model and texture for the model in this mod, the easiest thing to do is renaming the "danny_ingame-dasy_pc.tex" file you modified in section 1. to "leo_ingame-lasy_pc.tex" and for the model rename the "danny_ingame-dasy_pc.mdl" file (from this mod) to "leo_ingame-lasy_pc.mdl", but in this case, there is another important task which is to modify this model's root bone name using the mentioned Manhunt2 MDL Editor.
Launch it, open the "leo_ingame-lasy_pc.mdl" file (the one just edited) with it and select the "root bone" or the name that appears in the wide or big section. In the text box write the name of the file you are replacing this one for (leo_ingame-lasy, notice that this time "_pc" is not included) click the "rename" button, and the name should change. Save the file and Leo's main player ("asylum") model and texture should have changed ingame for those of Leo Kasper beta (once again as long as the mentioned files are inside the "global" folder located inside Manhunt 2's launcher folder).
That's it, Enjoy (enjoy again haha).
P.S.3.: Another if, is adding a player model and texture, without replacing one of the existing "character" file names. To achieve for example, adding this mod's files not named as "danny_ingame-dasy" but as "insane_Awhed" (Leo Kasper's beta file name), follow section 2. except this time using as pointed out the names "insane_Awhed_pc.mdl", "insane_Awhed_pc.tex" and "insane_Awhed" respectively.
Then you'll need to edit resource1.glg contained in every level folder inside the "levels" path found inside the Manhunt 2's launcher folder or main installation folder. You need to decompress the one you want your "character" or model in. For this, you can either use the decompress/compress functions included in Manhunt2 MDL Editor by clicking the "edit" tab (to decompress the file just select decompress and when you've finished compress it selecting "compress\Z2HM" or if you are editing some file from the Wii version, of course choose "compress\MH2Z"), or you can download "The extended beta executions mod" found on this site on the Manhunt 2's page, in the sections "files" or "mods". Inside the .zip go to #tools, then glg tools and extract or just launch "mh2pcglg-unpacker" and clicking open locate resource1.glg on the level's folder you want to insert your model in.
Press the unpack button and a resource1.glg.unpk will appear inside the level's folder. Open this file with a text editor (Notepad++ is recommended), replace the name of the default "character's" file name (e.g. danny_ingame-dasy) with "insane_Awhed" and save the file. Now launch "mh2pcglg-packer", then with open, select that resource1.glg.unpk and press the pack button to compress the file (if you don't move or copy the original resource1.glg from the unpk's path to somewhere else, resource1.glg will be replaced).
That's it. Launch that level and the playable character should be "insane_Awhed" or whatever name you had decided. Enjoy (oh, enjoy a 3rd time? I hadn't noticed, go to hell).
P.S.4.: This postscript is about placing a model in a level as a different character or object than the playable or player's one. For this, additionally from Manhunt2 MDL Editor and the glg's packer as well as the unpacker, you need to download Manhunt 2 TEX/TXD Editor.
To add for example, once again Leo's beta model, to the first level of the game, "Awakening", placing the character in the beta location (or as the guy in the ending who bashes his head on the glass), continue by locating the level's folder inside Manhunt 2's launcher folder then opening "levels" and "A01_Escape_Asylum". Now identify this level's files: entity_pc.inst, resource3.glg, modelspc.mdl and modelspc.tex.
After this, launch Manhunt2 MDL Editor, open the file "danny_ingame-dasy_pc.mdl" from this mod with it, select the model's root/name, then preferably rename it to "insane_Awhed" as in section 3. and extract it to a familiar location by pressing the export button. Luckily or maybe not for you this time, the beta Leo's textures are already included in the PC version of the game in this level (at least they are in mine, you could confirm this in yours), so depending if its your case or not, you can skip any following step about extracting/exporting or adding textures, but i'm gonna explain it anyway.
Do the same with the .tex file by launching Manhunt 2 TEX/TXD Editor, opening "danny_ingame-dasy_pc.tex" from this mod with it, selecting each texture and pressing the export button to extract them to a familiar place (for this case, choosing bmp at the bottom of the windows explorer exporter's dialog as the image's format is the best in general, i think).
Next is to insert them in the model's and texture's files of the A01_Escape_Asylum's folder/level, which is done by again using Manhunt2 MDL Editor to open the file modelspc.mdl and pressing the add button to look for the preferably renamed "insane_Awhed.mdl" file, selecting and opening it. Save the modelspc.mdl file.
Then using again Manhunt 2 TEX/TXD Editor open the file modelspc.tex and basically do the same to add the textures but looking in this case for the bmp files called "wacko_hed.bmp" and "wacko_bod.bmp", don't rename them or the model won't identify the textures. Save the modelspc.tex file.
Hang in there buddy! Just two steps more on this.
Unpack/decompress the file resource3.glg in A01_Escape_Asylum, as in section 3.. Open the file resource3.glg.unpk and one option in this step would be replacing a game's default character (in this case, the game release version's default character that bangs his head on the glass, also known as "Mendez" haha, or that's what i'd been thinking for some time) for beta Leo's character, which evidently means that the default character would disappear from the level, and personally i don't like that possibility, even though choosing it we would skip last step.
So for this, what you'll do next is adding an "entry" for the new model/character/entity which is easiest done by searching (using your text editor of preference, again preferably Notepad++ among others, usually pressing ctrl+f as shortcut) for "insane_Bwhed" and one of the results should read "insane_BwhedH". Select and copy this character's (Mendeez, Mendeeeez!) "entry" (from RECORD insane_BwhedH to END), and paste it after END, being important that you respect the format of the text in this file (e.g. after any END there should be at least 2 paragraph or text "jumps" which consequently cause the same situation before RECORD, i hope i make myself clear with this).
After doing this there will be two "entries" with the same name which is a problem so rename one of the "RECORD insane_BwhedH" entries/strings/text to "RECORD insane_A" as well as renaming the string "MODEL insane_Bwhed" (below the previously modified text) as "MODEL insane_Awhed" (if you didn't follow the preferences over this that i mentioned almost at the start of this section, then whatever you have named beta Leo's .mdl from its root). Save the file and pack/compress it as in section 3..
Finally, to change Mendez' model/character location you have to edit the entity_pc.inst file. You need to download a hex editor, i recommend HxD.
Install it, launch it and open the mentioned .inst file with it. Again helping yourself with the shortcut ctrl+f search for "fighter02" and when you find it in "insane_B.pppfighter02(hunter).pp" replace the "insane_B" text (when you write in this file make sure you don't erase/add any letter or just any value, by default HxD asks you if you are sure about anything like that if it happens for any reason) with "insane_A" in order for the string to be "insane_A.pppfighter02(hunter).pp". Save the file.
That's it. And for the last time, Enjoy!
Any questions, ask.
Tools used and special thanks: TEX/TXD Editor, Manhunt2 MDL IO/Manhunt2 MDL Editor, 3ds Max 2011, Megahoff and anyone related to this mod one way or the other.
Preview
Post a comment
RTX Remix
RTX Remix is a modding platform by NVIDIA, which allows modders to create stunning HD remasters of classic games (see all supported), with ray tracing and DLSS.
This player model is NOT RTX Remix compatible. Learn more about ModDB's collaboration with the Remix community to organize all compatible games,. Hide this dialog.
Community Rating
Average
-0 votes submitted.
Related Games
Manhunt 2
Stealth
Related Groups

Rockstar
Developer & Publisher

Take-Two Interactive Software
Developer & Publisher
Tags