From a few sketches drawn on a piece of paper, to a fully animated weapon in a digital world… Here’s the making of process of my Ion Shotgun that will not only give an insight into how it came to be, but also hopefully an inspiration for others to make some cool stuff for games, and/or help overcome various obstacles.
Note: To see larger images, right click them and click on "view image"/"open image in new tab."
Prototype
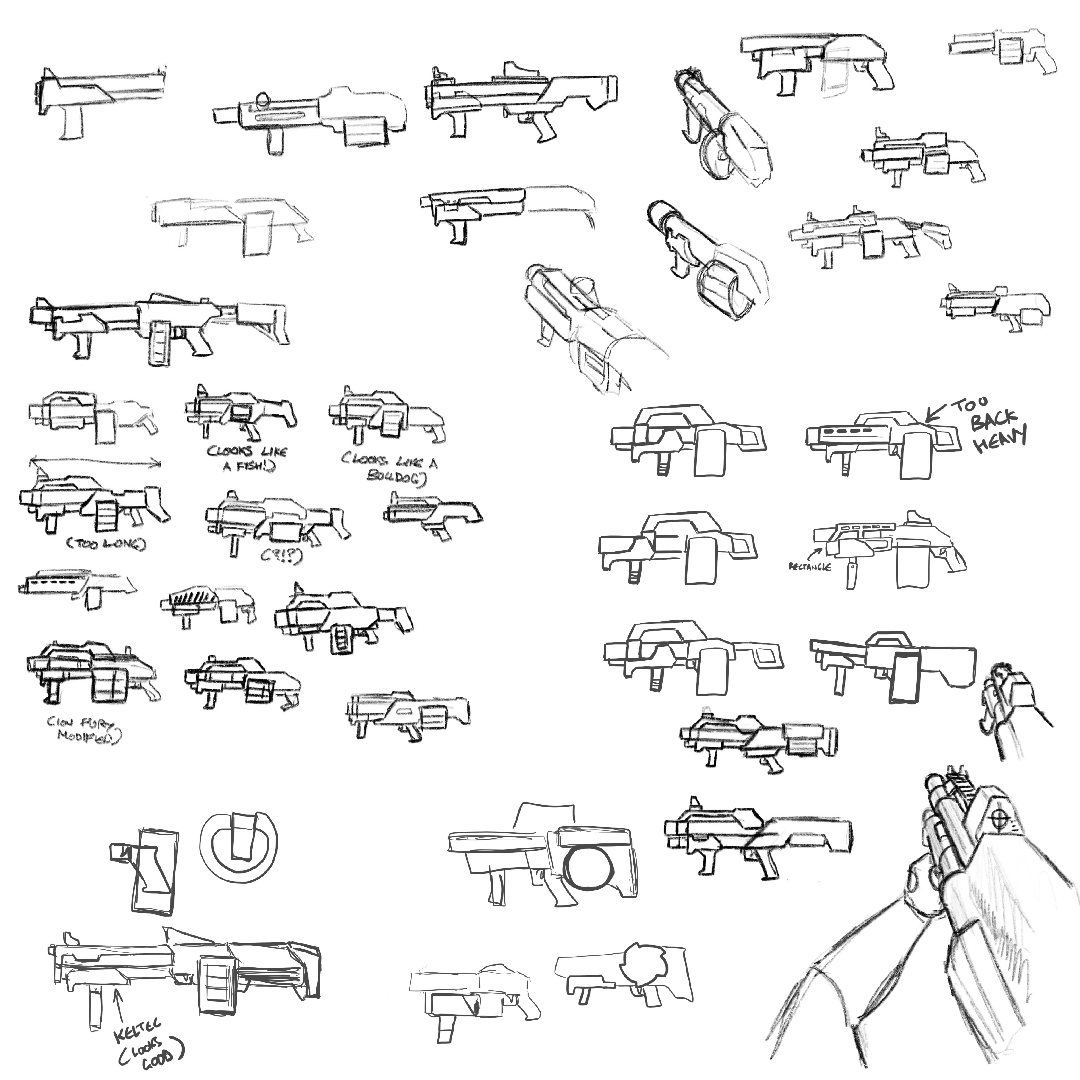
Like my Ion Uzi, I can’t just chuck out a weapon: I need to give it life, complete with it’s own believable working mechanics and lore. It was a huge challenge to come up with a design that can be associated with both a shotgun and a grenade launcher, so took me months of brainstorming. I’ve been doing it as far back as April (maybe even before) leading up to the final product in August.
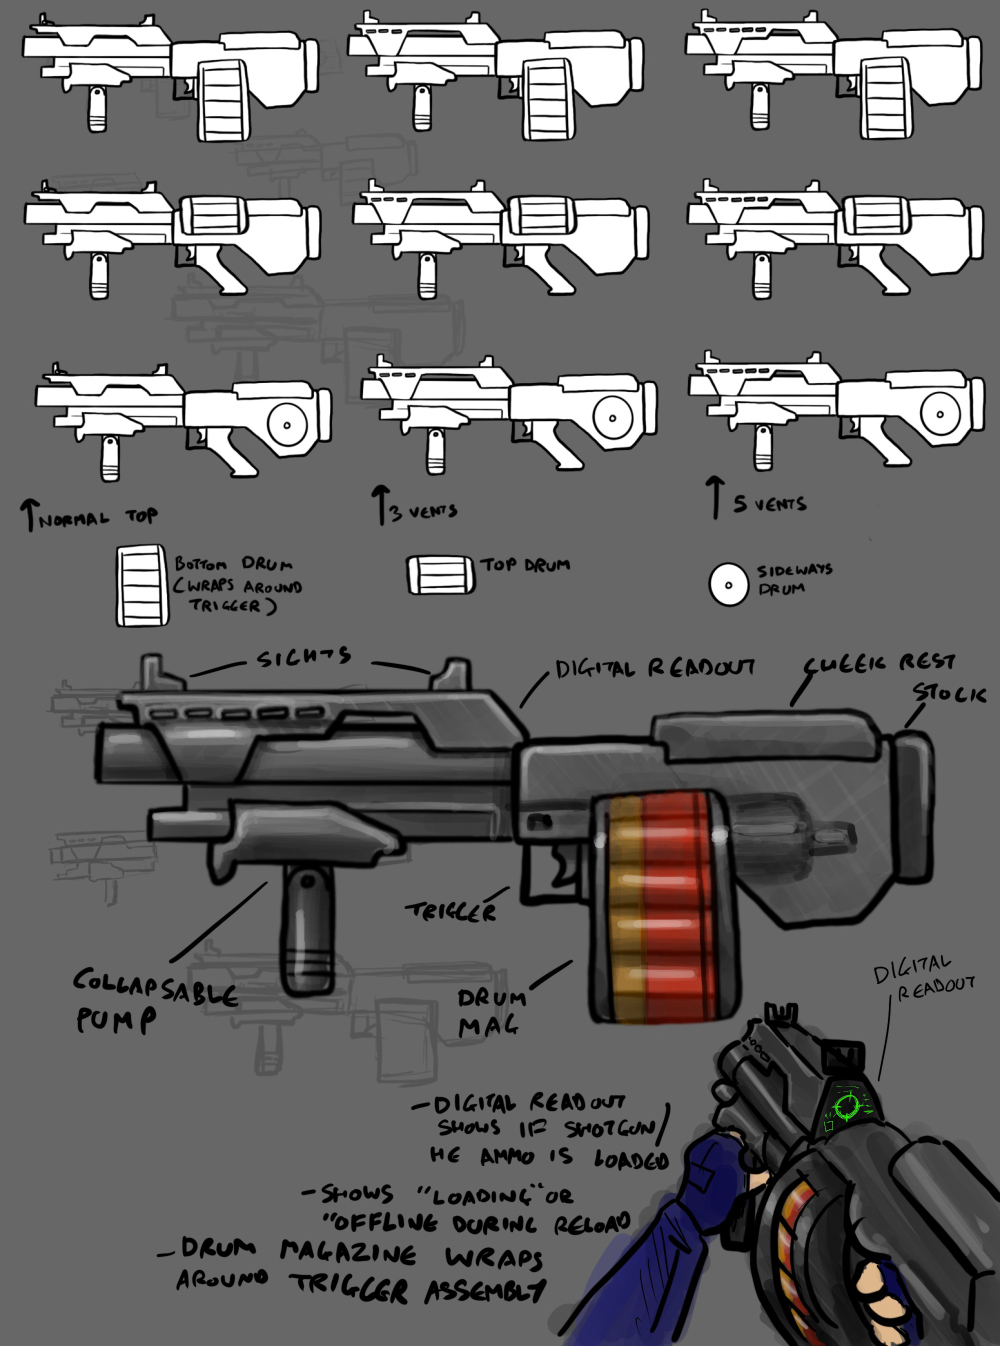 After looking for inspiration, I was suddenly reminded of the shotgun from Deus Ex and The Matrix, and I knew I wanted that drum magazine wrapped around the trigger. I also based the front end from the KelTec shotgun. After fusing elements of them altogether, I came up with something that my instincts told me “this is the one.” This image was used as a reference in Blender, where I would build it from the ground up in a 3D digital space.
Modelling
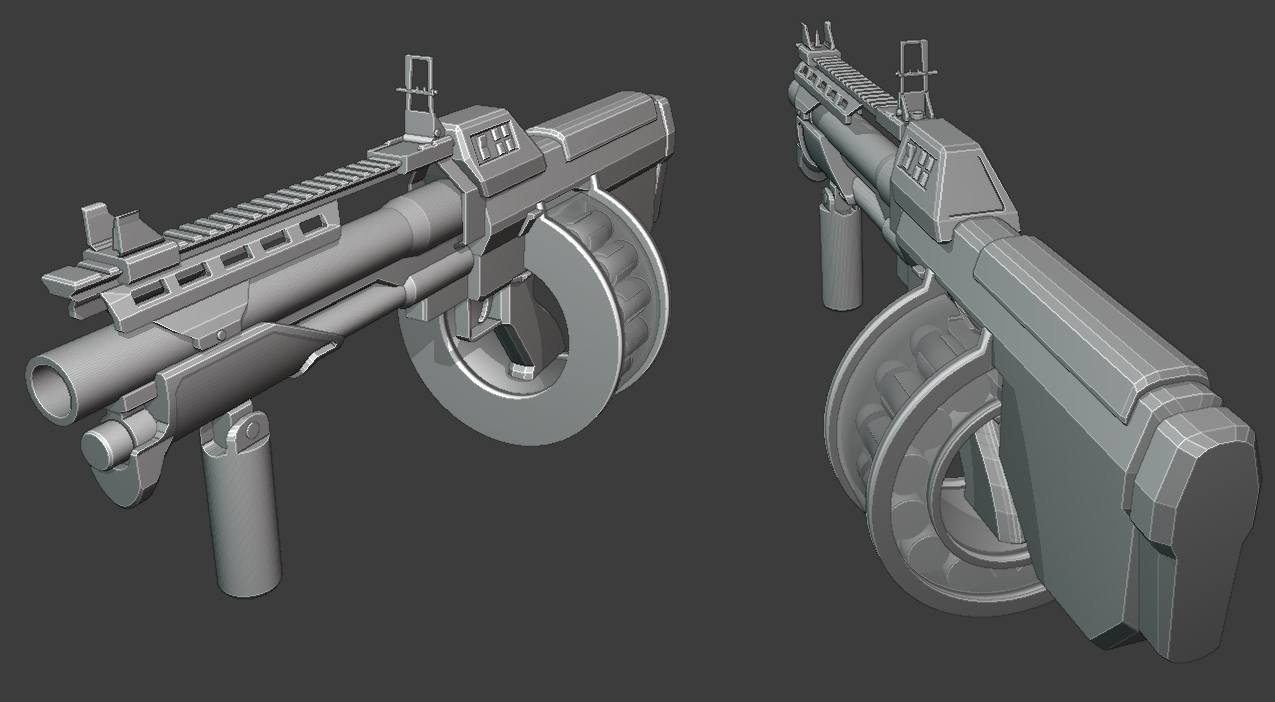 First iteration. I strayed too far from the original design: it was more long, sleek and shotgun like, rather than something shorter and chunkier like a grenade launcher.
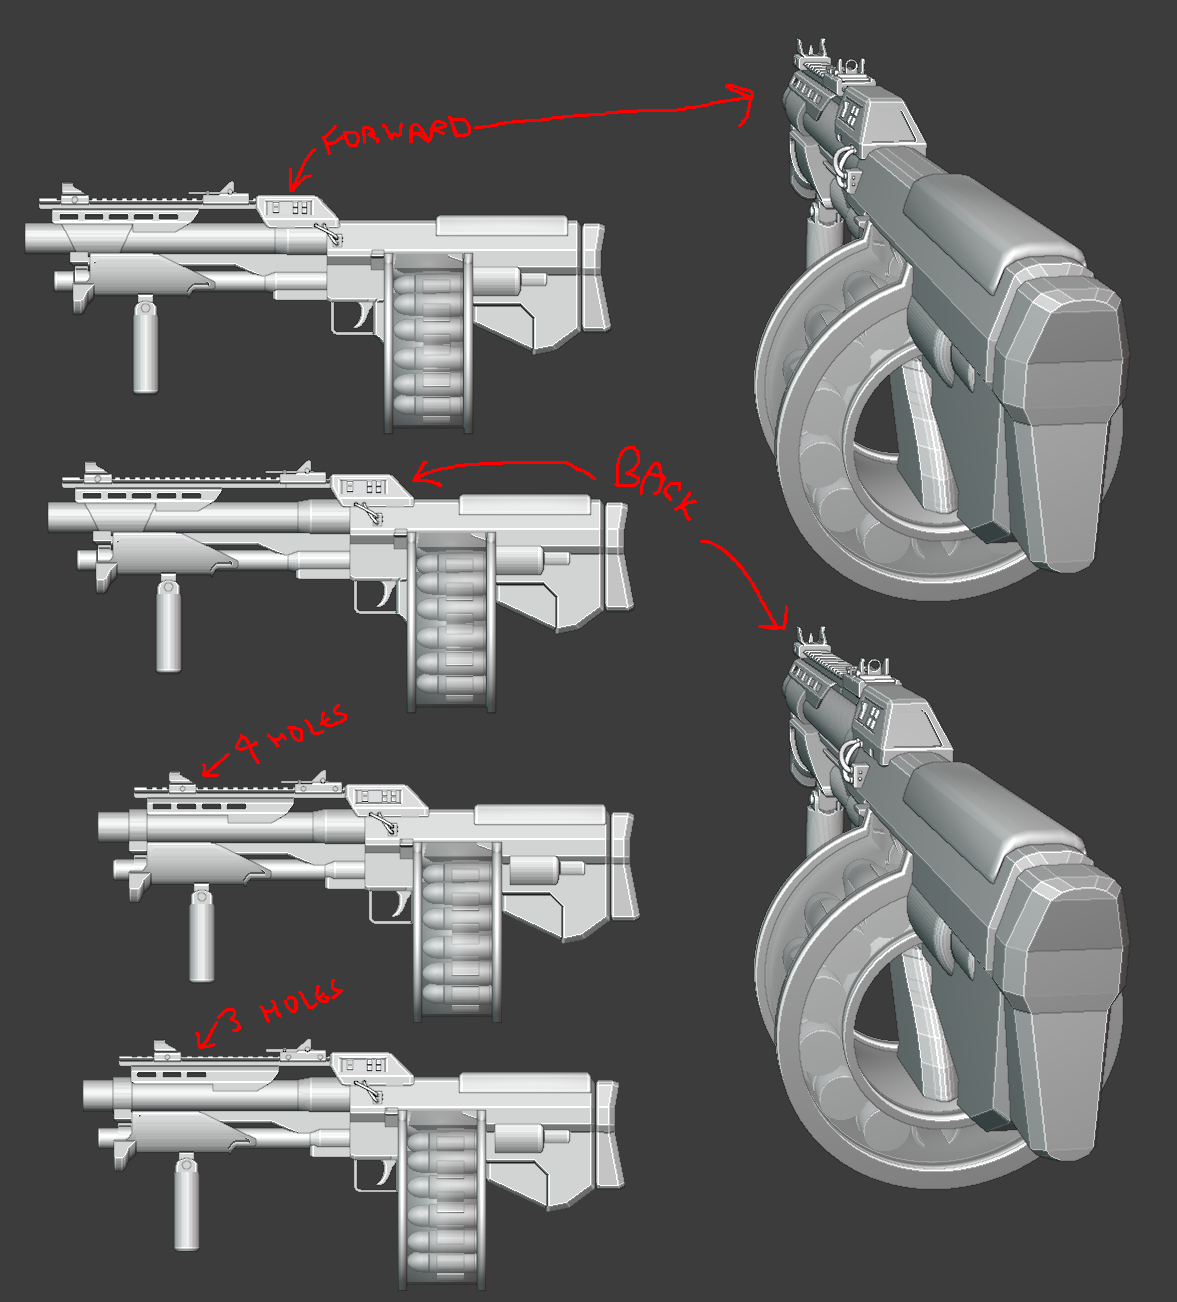 A few variants I pondered over. I stressed out a lot over the front end, but figured it out in the end.
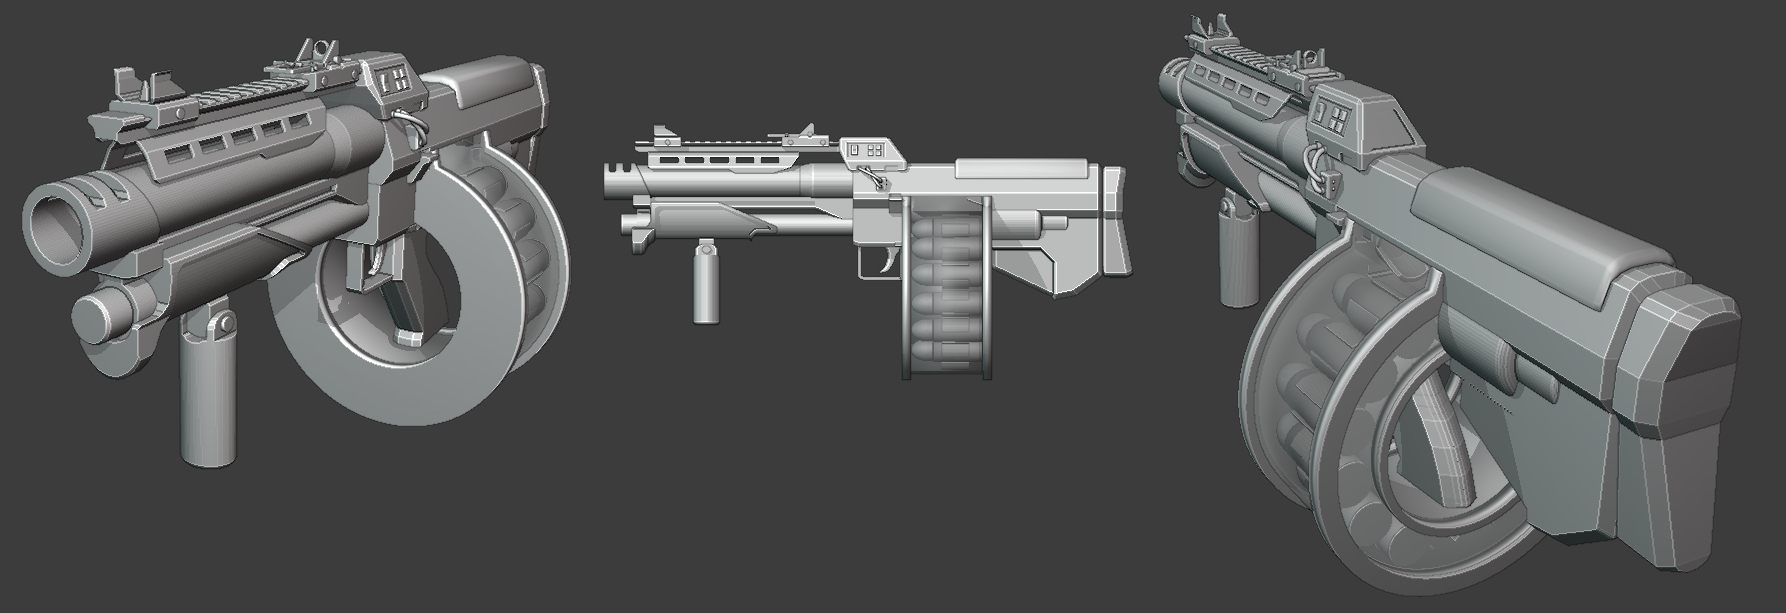 The entire front part was shortened, barrel widened, the height of the pump was reduced and a muzzle brake was added.
Texturing
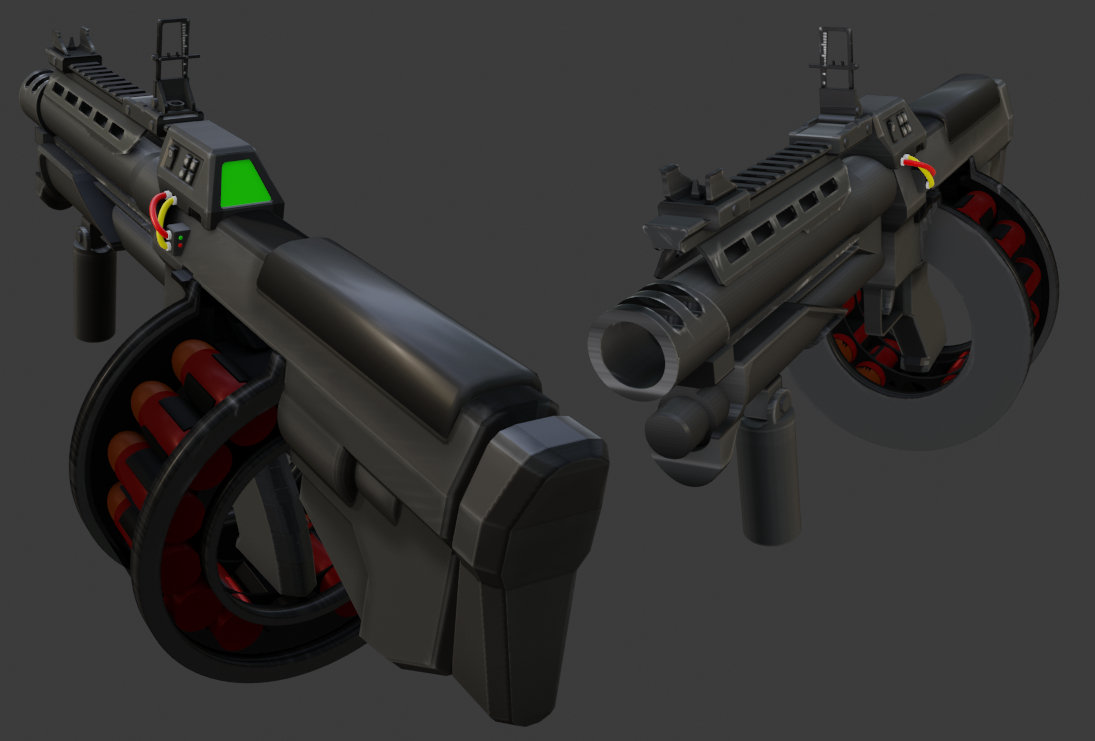 First basic texture pass. Couldn’t help but add a few scratches and wear marks.
 First test in-game when you first begin to see the fruits of your labour and the REAL hard work has just begun, haha.
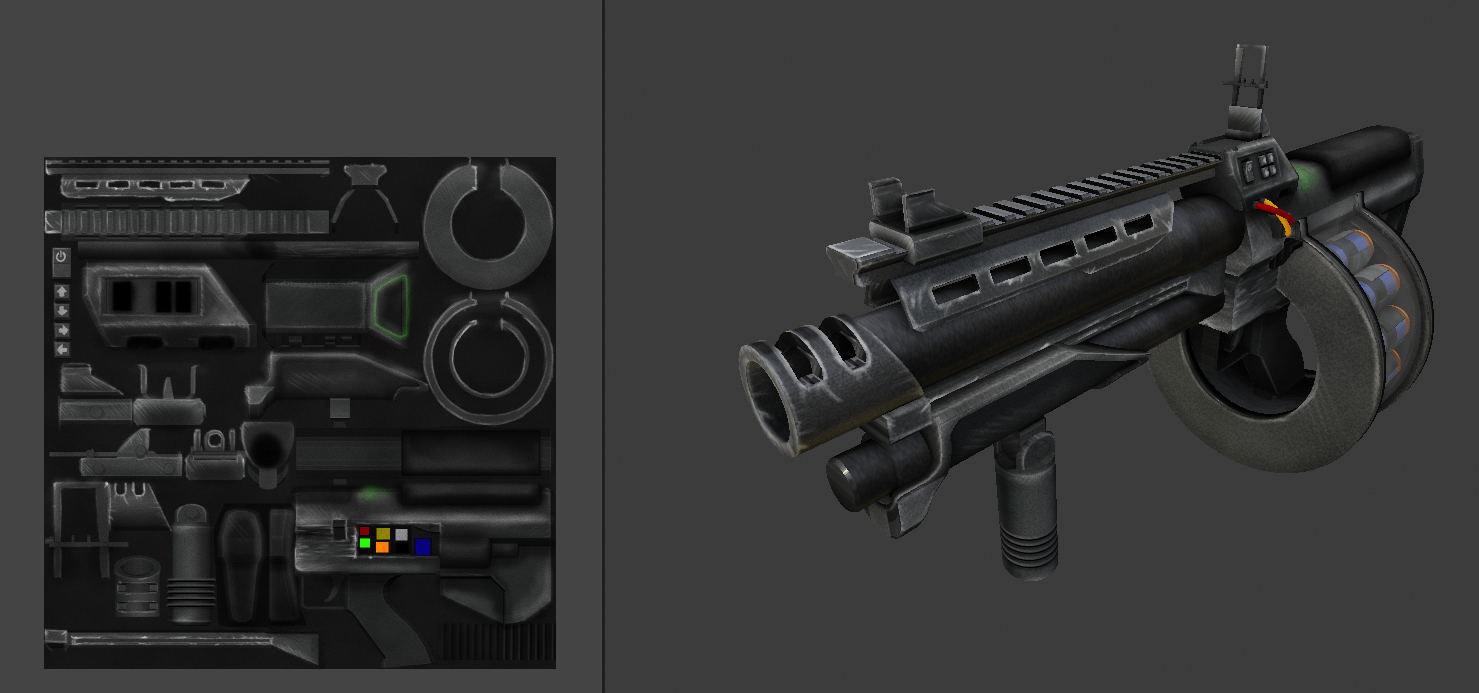 The textures: everything was done by hand. Fine detail isn't so important as they will get lost in the Ioning process. The entire PNG is no larger than 1024x1024, plus no fancy bump-maps nor 4K nonsense. Also it's a fun challenge to try to fit as much as possible with the limited amount of space you have. Just like the good old days of modding where you couldn't afford to go too high with resources. Besides, we're not making a gun for 2020's Unreal Engine 4: we're making it for the 1995's Build engine.
Plot twist: I don’t actually know what I’m doing in Blender and for the first time while looking on tutorials on how to make transparent textures, I figured out how to make reflective surfaces. Absolute game changer!
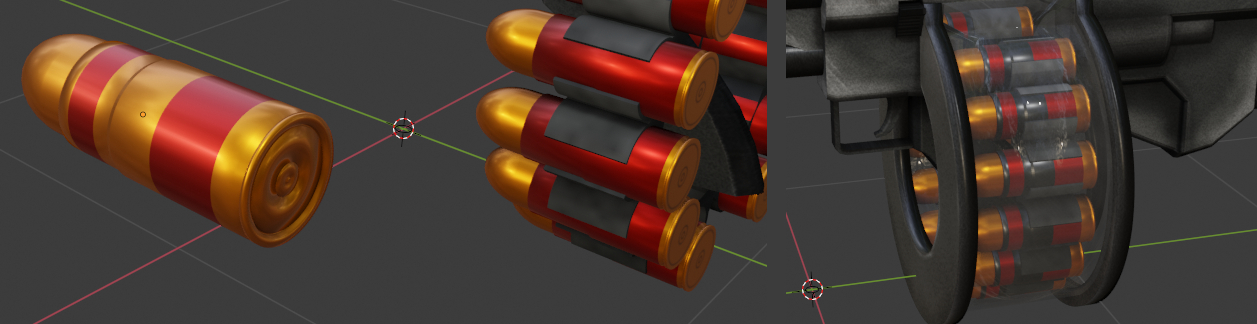
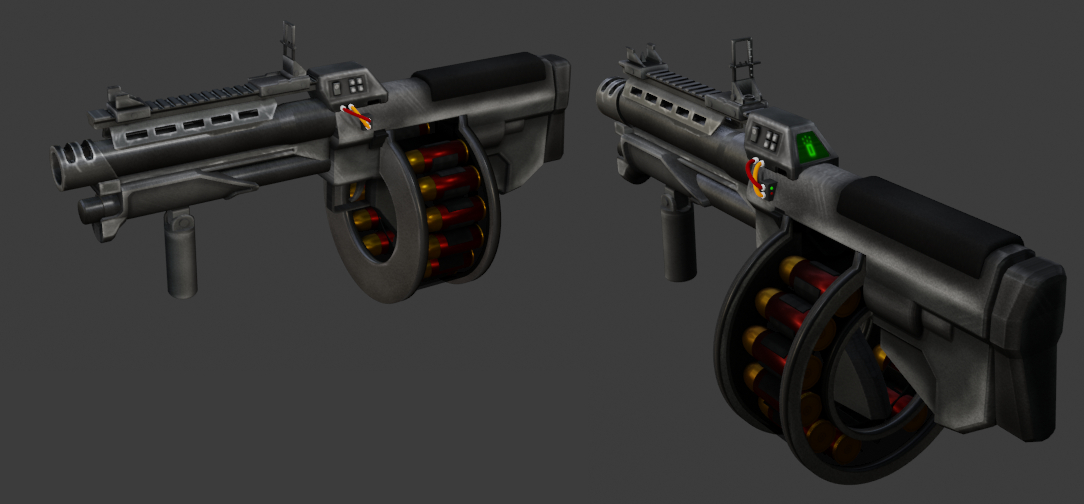
Having made the revelation of reflective surfaces, I thought instead of using extremely primitive textures to handle the rear of the shells, why not model it myself and let Blender handle the rest? Blender did not disappoint. Just look at that. Sexy.
Fun facts: the drum magazine was quite a challenge to develop. For starters, how does this thing attach and detach from the gun without clipping into it? How does the gun cycle the next round if there’s a huge gap through the middle of the magazine? Yea I gave myself a headache thinking about that one.
Also note that in-game, the shotgun/GL holds 6 rounds maximum, yet since the drum on my gun is so large, having 6 rounds in it would just produce so much empty space, which is silly. In the end, I settled for having 12 rounds and making up some lore that the gun fires 2 rounds in quick succession. The drum itself can hold 13 rounds in total, but you will notice 1 is missing: this is to keep with the lore that the gun fires 2 rounds at once, plus Shelly is superstitious so dislikes the number 13. Think I dodged a bullet with that one, haha.
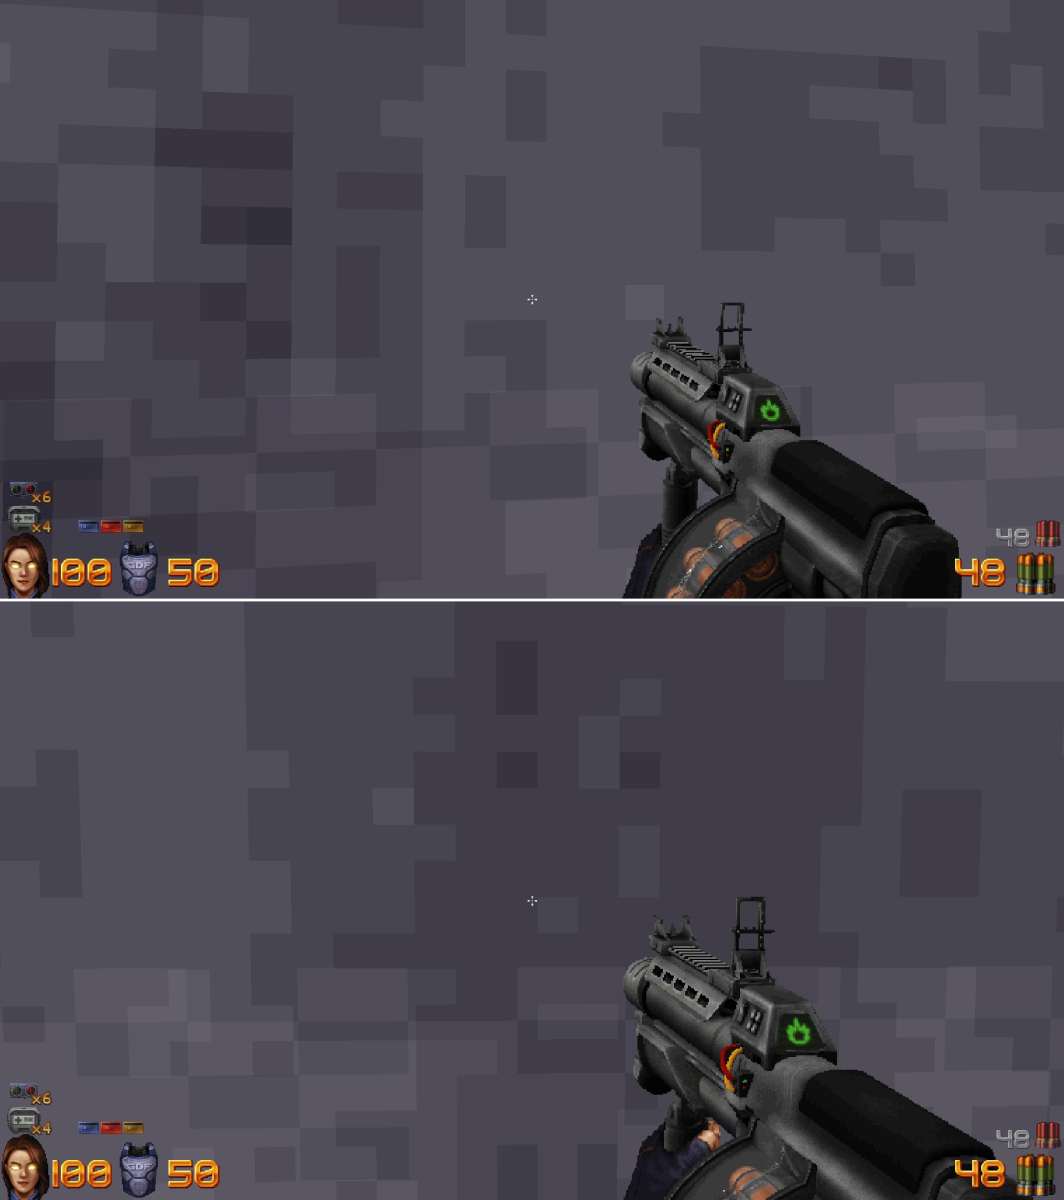
Altering the sizes to appear convincing in-game. I specifically wanted it so you can see the shells in action. I also wanted to have the trigger hand appear in frame, unfortunately it conflicted with how I wanted the overall appearance of the shotgun. Maybe in Ion Shotgun V2, eh?
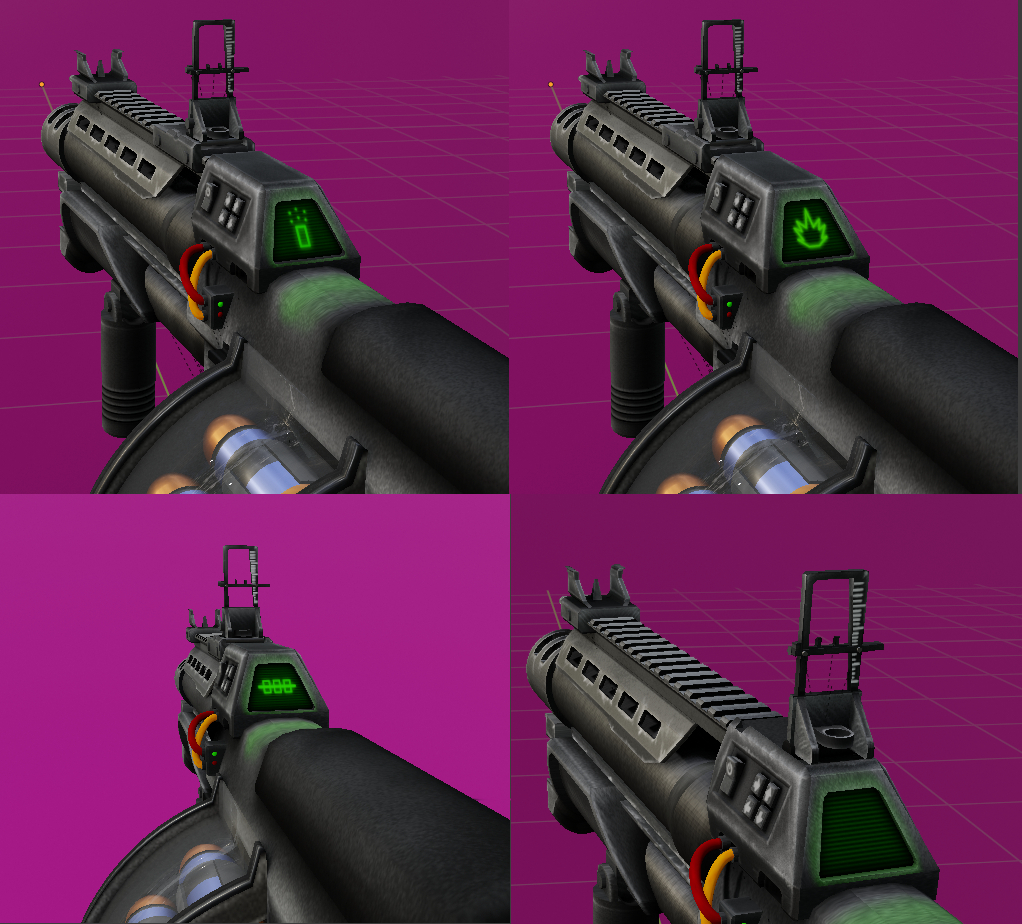 The sighting system details. At the last minute, I moved the rear sight to the back, because it would make sense for the digital sight to flip it up and down via computer controlled, rather than it happening by itself. Also note the reflections on the plastic: I removed this in the end because it kind of looks like… something else.
Animating
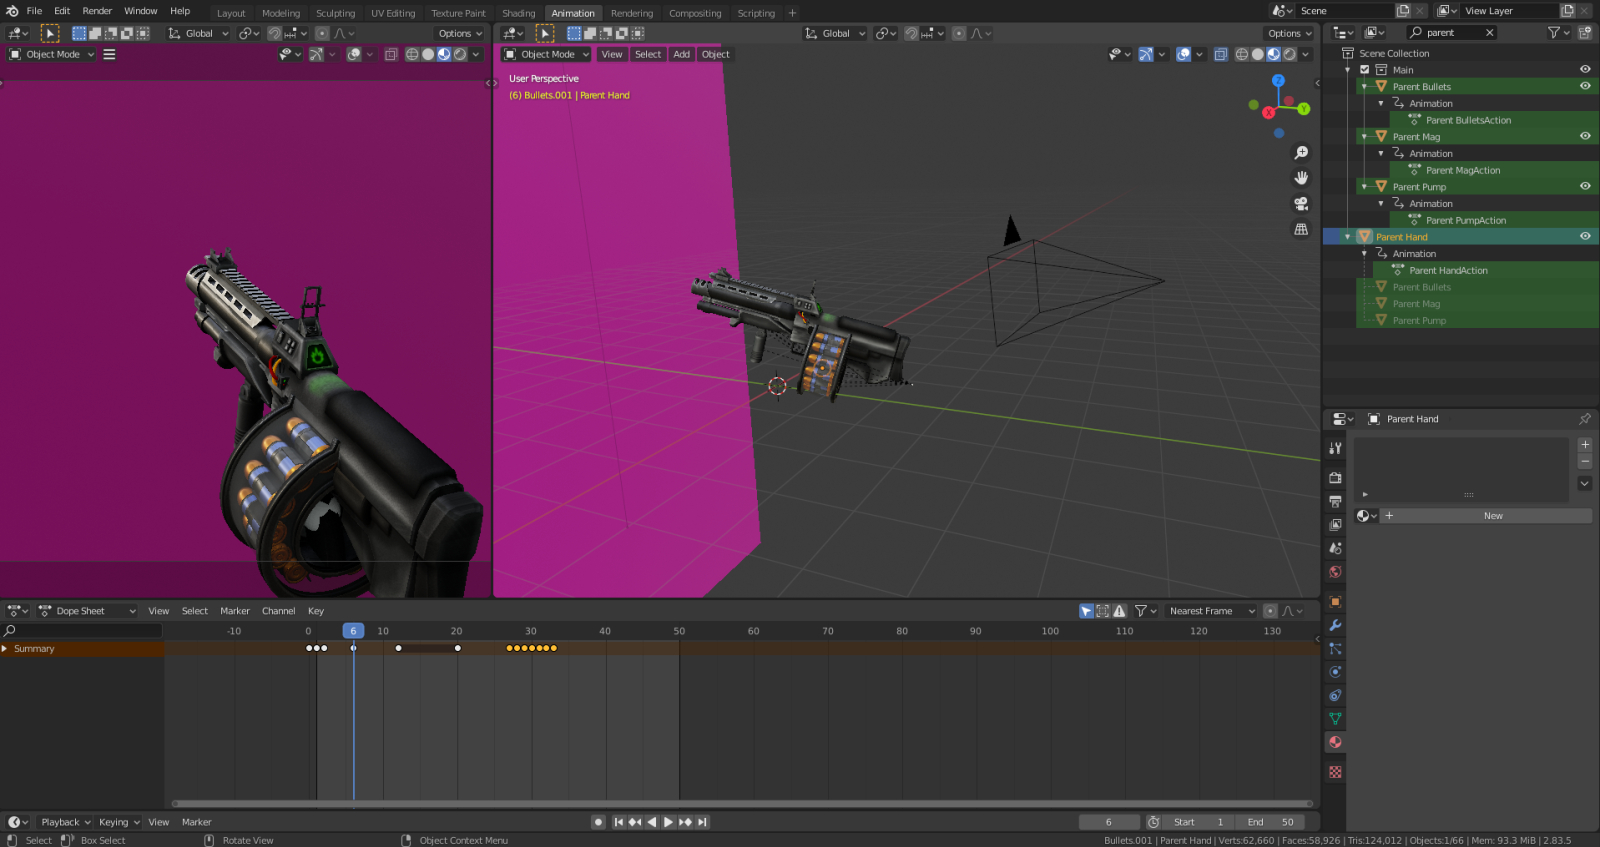
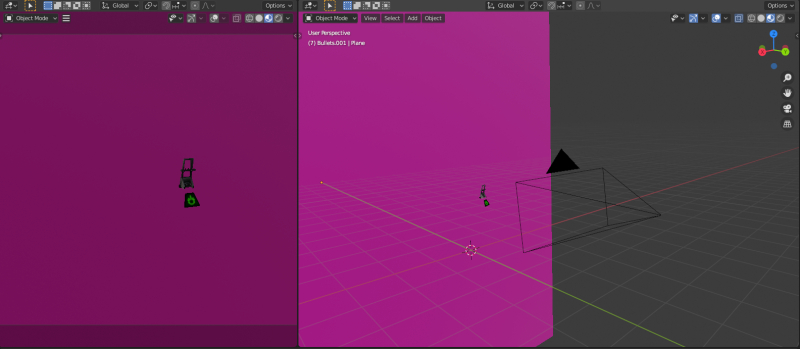
A little inside look as to how I set up the animation. Used a pink plane as a basic green-screen, a fixed camera viewpoint (very important to get consistent images) and 4 basic spheres acting as parents:
1. The entire weapon
2. The magazine
3. The rotating shells
4.The pump
As ever, I don’t need to do all those fancy long renders when I can just hit printscreen every frame and pretty much get all the screenshots I need before a single render would even finish.
My number 1 goal was to have the shells visibly rotate. There were around 5 different reload variations, and it turns out the more the entire weapon is in motion, the more difficult it is to see specific movements (especially in a sprite based game like the Build engine). I am a firm believer in the Less is More approach is valid, and I settled for a more simple and subdued reload sequence, so everything mechanical can be seen clearly. I'd post a gif of the unused animations: unfortunatley it seems like I already deleted them.
 You may notice some of the images have the rear sight omitted: this is because they're separate sprites as the game calls up the main gun sprite with a palette swap for each, plus an additional sprite (the original has the grenade sight up or down respectively). I simply hid the other objects while keeping the same animations.
Sprite Refinement
 The most important part that gives life to the sprites, which I call the “Ioning” process, hehe (also note the lower part that unfortunately isn't visible in-game) . A fantastic mapper + modder by the name of Mamijomale gave me some extremely helpful advice when I was making my first guns for Ion Fury: painting highlights over the gun sprite would help it come to life. It really made a night and day difference for me as it gives the weapons so much depth and avoids that “stolen from Counter-Strike” look we see so much in Doom mods. You know what I'm talking about.
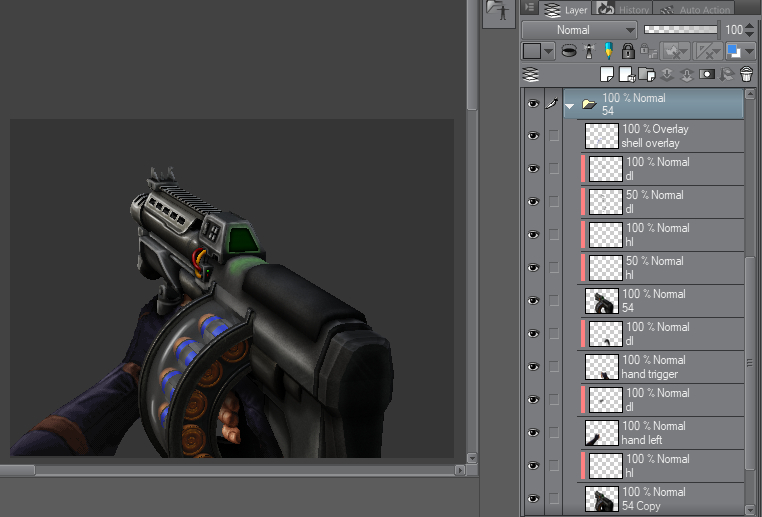 Overall, there’s 23 different sprites for the idle, firing and reload sequences. Each single sprite was meticulously painted over with no less than 5 different layers of shades and highlights. As for the hands, I simply used sprites already existing in the base game: it was just a case of finding out which looks suitable for each sprite in motion and modifying it. With 23 individual sprites taking at least an hour to perfect, this process was extremely lengthy, so breaks or varying the process was extremely important to avoid burn-out (and insanity).
Like I said, this stage is pretty essential as unlike a modern 3D engine which tackles all the reflections, light and shadows itself, I have nearly complete control on how I want everything to look and even add highlights and shadows that aren't neccesarily realistic, but really make everything stand out. End of the day, it's artistic value over realism, especially when dealing with 2D stuff.
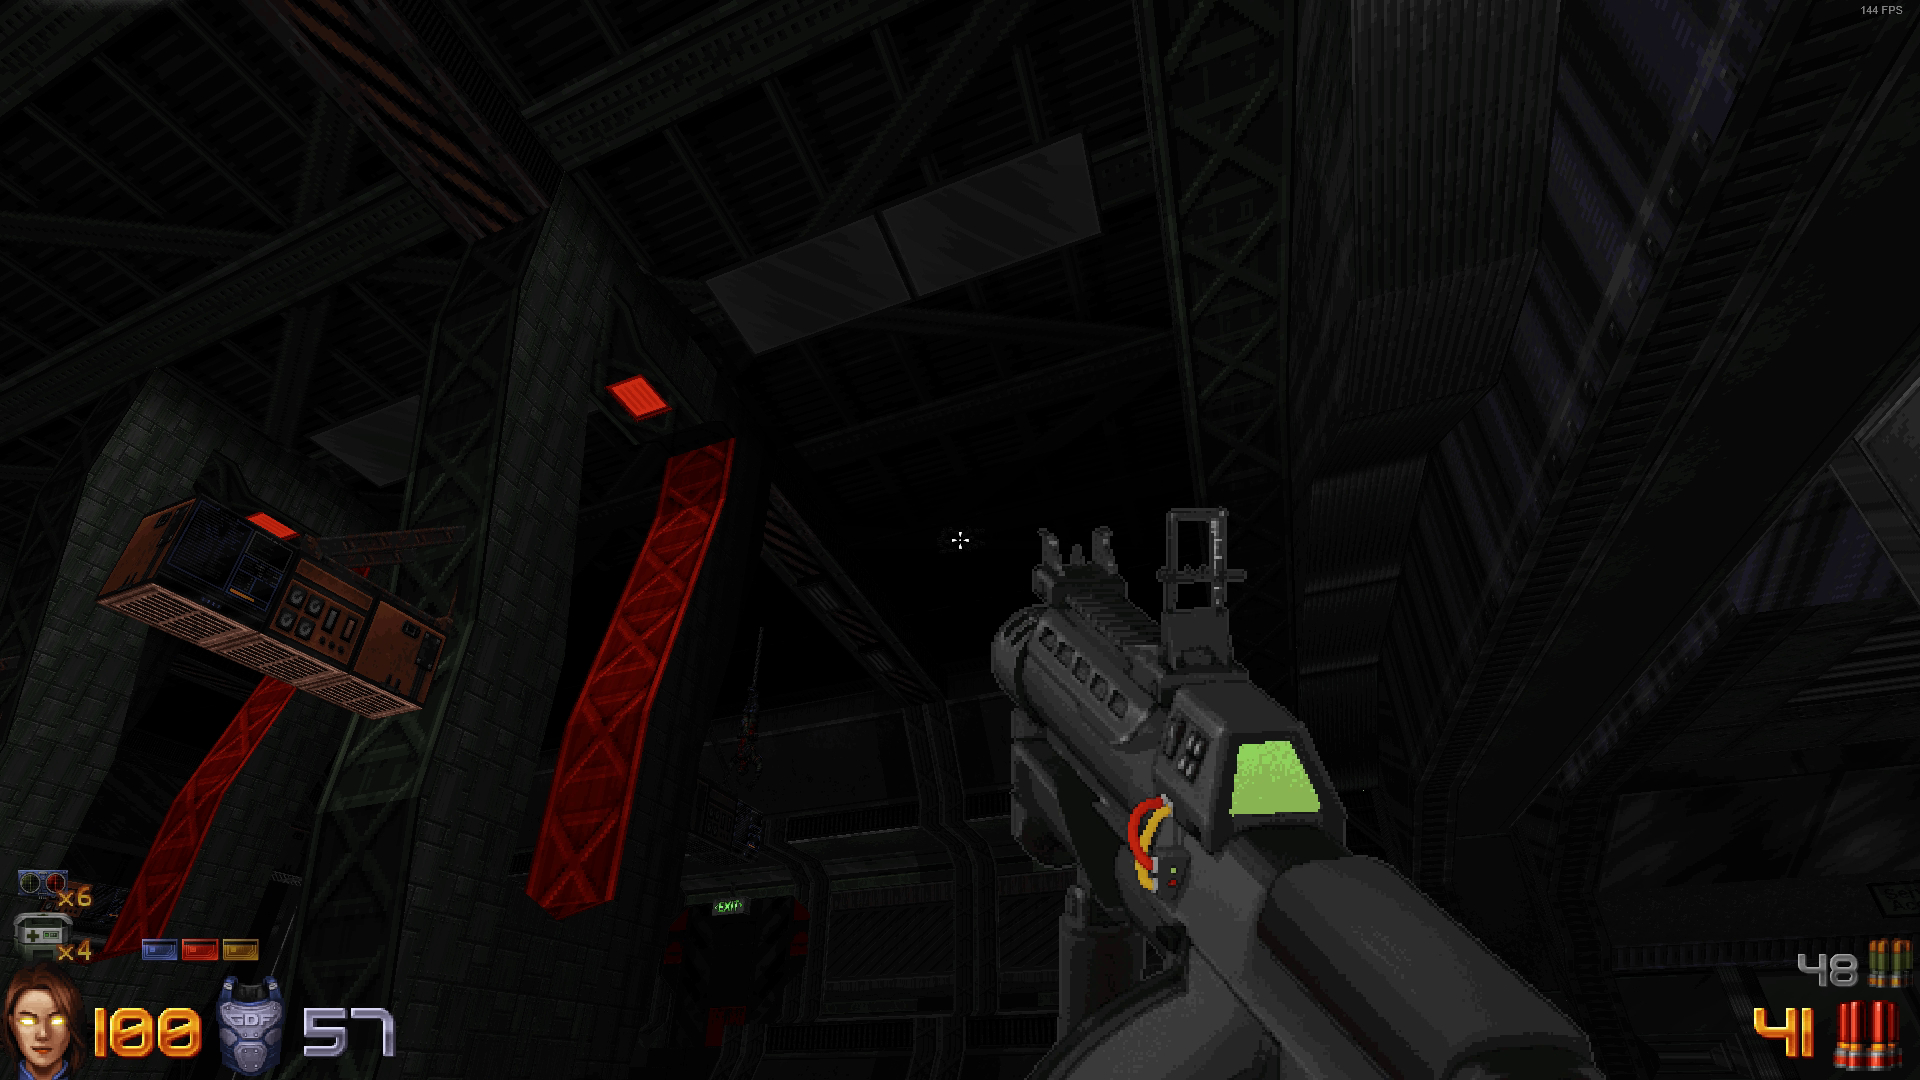
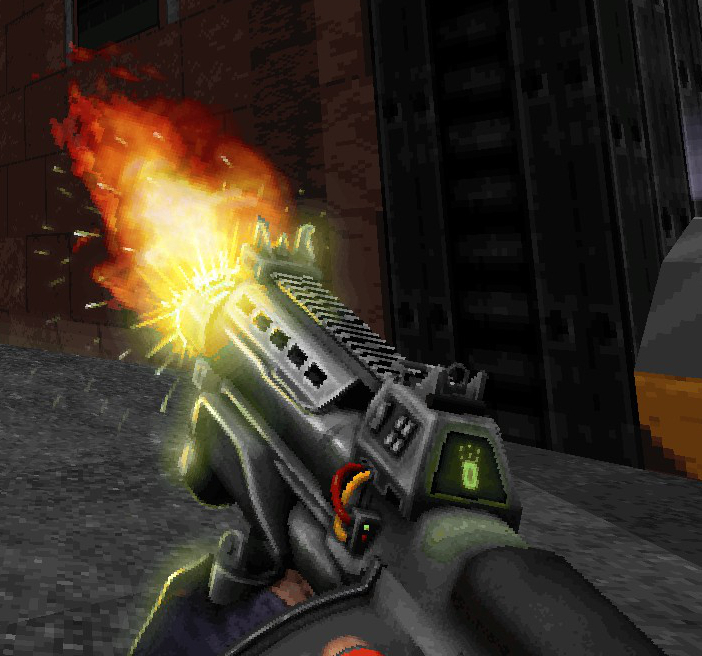 In-game muzzle flash test. Boom!
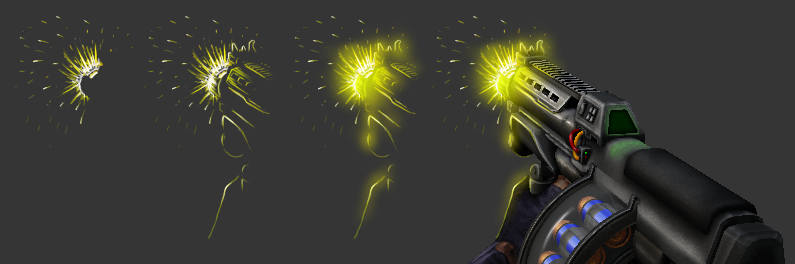 I got better at doing muzzle flashes since my Ion Uzi, and it really is a really simple process! Just add some white and yellow lines for the initial blast. Then, add some white and yellow highlights along the edges of the weapon where you think the muzzle light will hit it. Finally, add some yellow glow to the areas where you feel the emitted light is the strongest. Once again, the Less is More factor applies here, so I’m careful to keep it fairly restrained and not too distracting.
 The Voxel model was created in MagikaVoxel, first by importing an image of the side view of the weapon, and building it up from there. I used to hate Voxel modelling (would take me days due to in-experience plus the program is fairly fiddly) but having done it 3 times already, I was experienced enough to finish the process in a few hours. Not quite as perfect as I'd like, but I'm not fond of Voxel modelling so wanted to get that out the way ASAP.
Final product